Intro
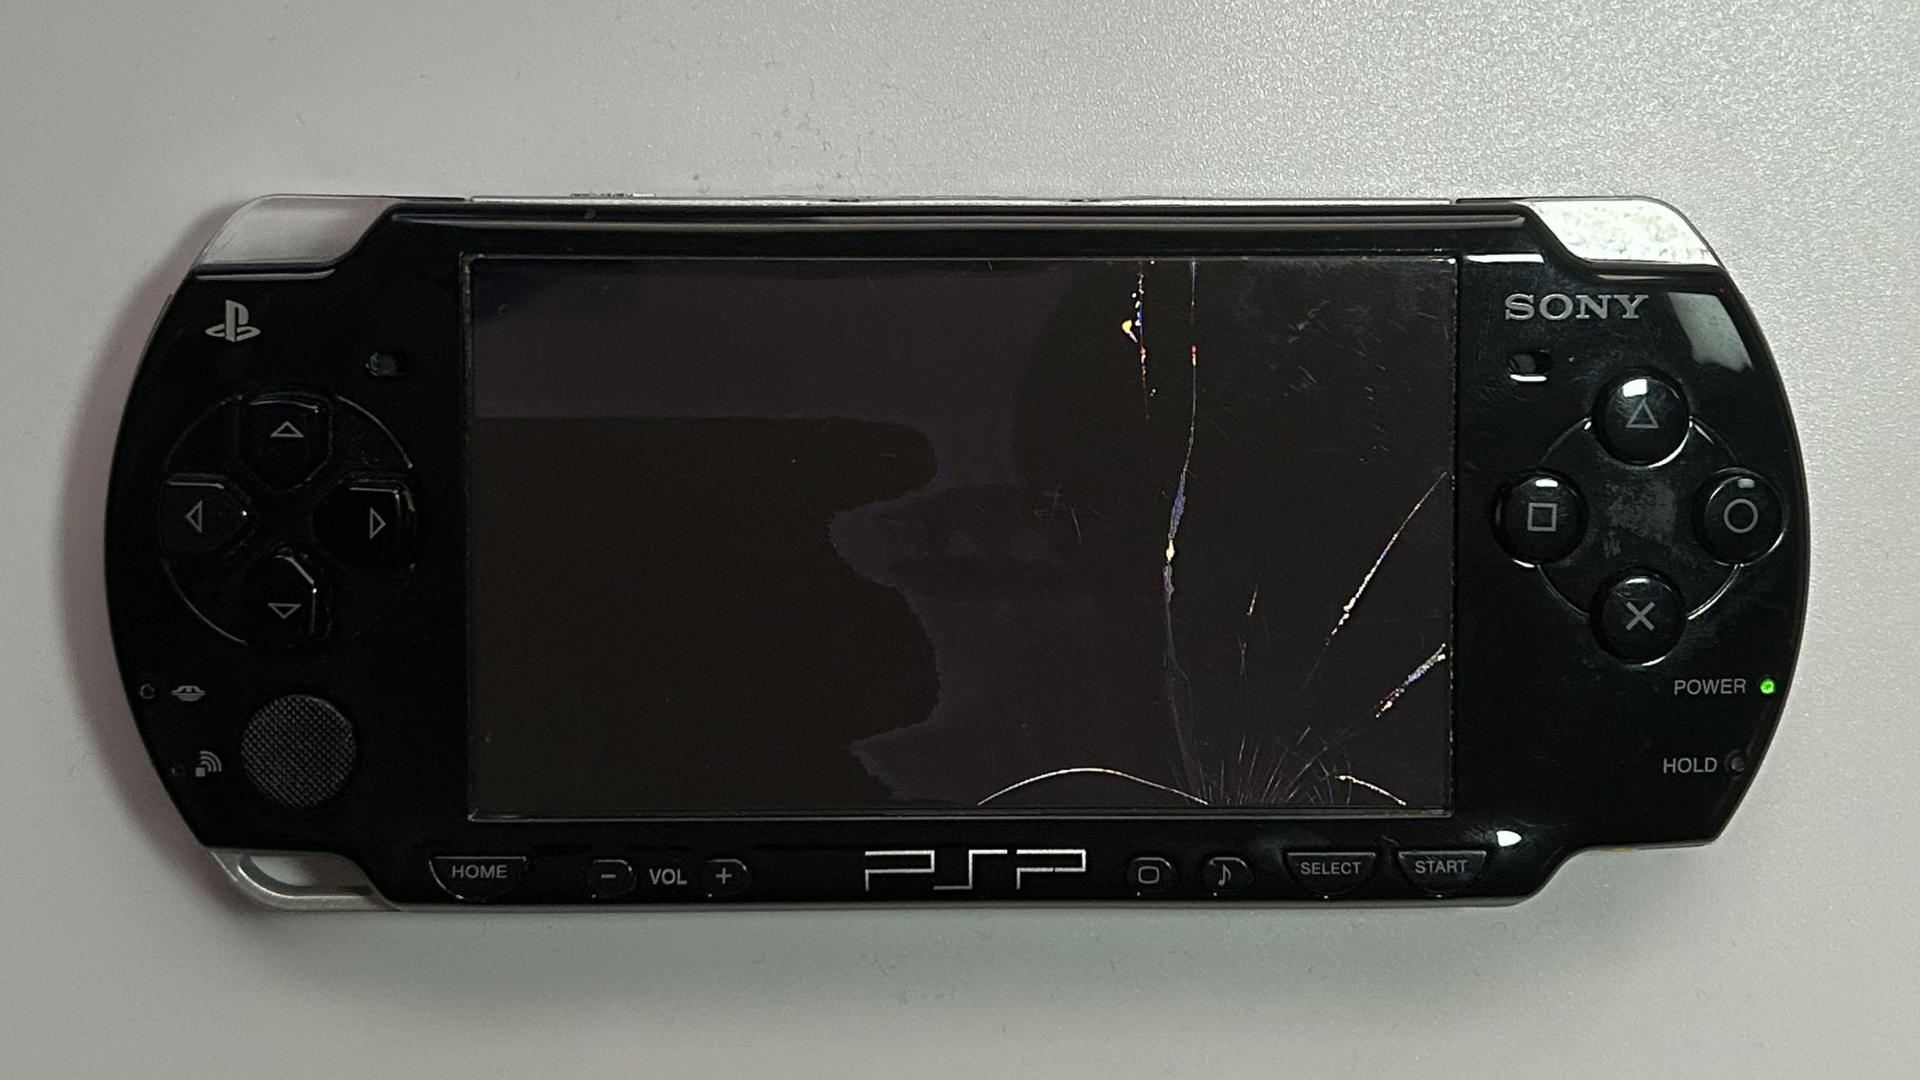
In this guide, I’ll show you how to replace the LCD screen on a Sony PSP 2000 model.
What you'll need
- Phillips Head Screwdriver
- Plastic Spudger Pry Tool
- Hand Squeeze Air Blower (optional, for removing dust and debris)
- Copper Tape (if new screen does not have it already)
Important: Power off the console completely and remove any UMD and memory card before starting. Work on a clean, static-free surface.
Step 1 – Remove the battery and outer screws
1. Turn the PSP over and remove the battery cover.
2. Take the battery out of the console.
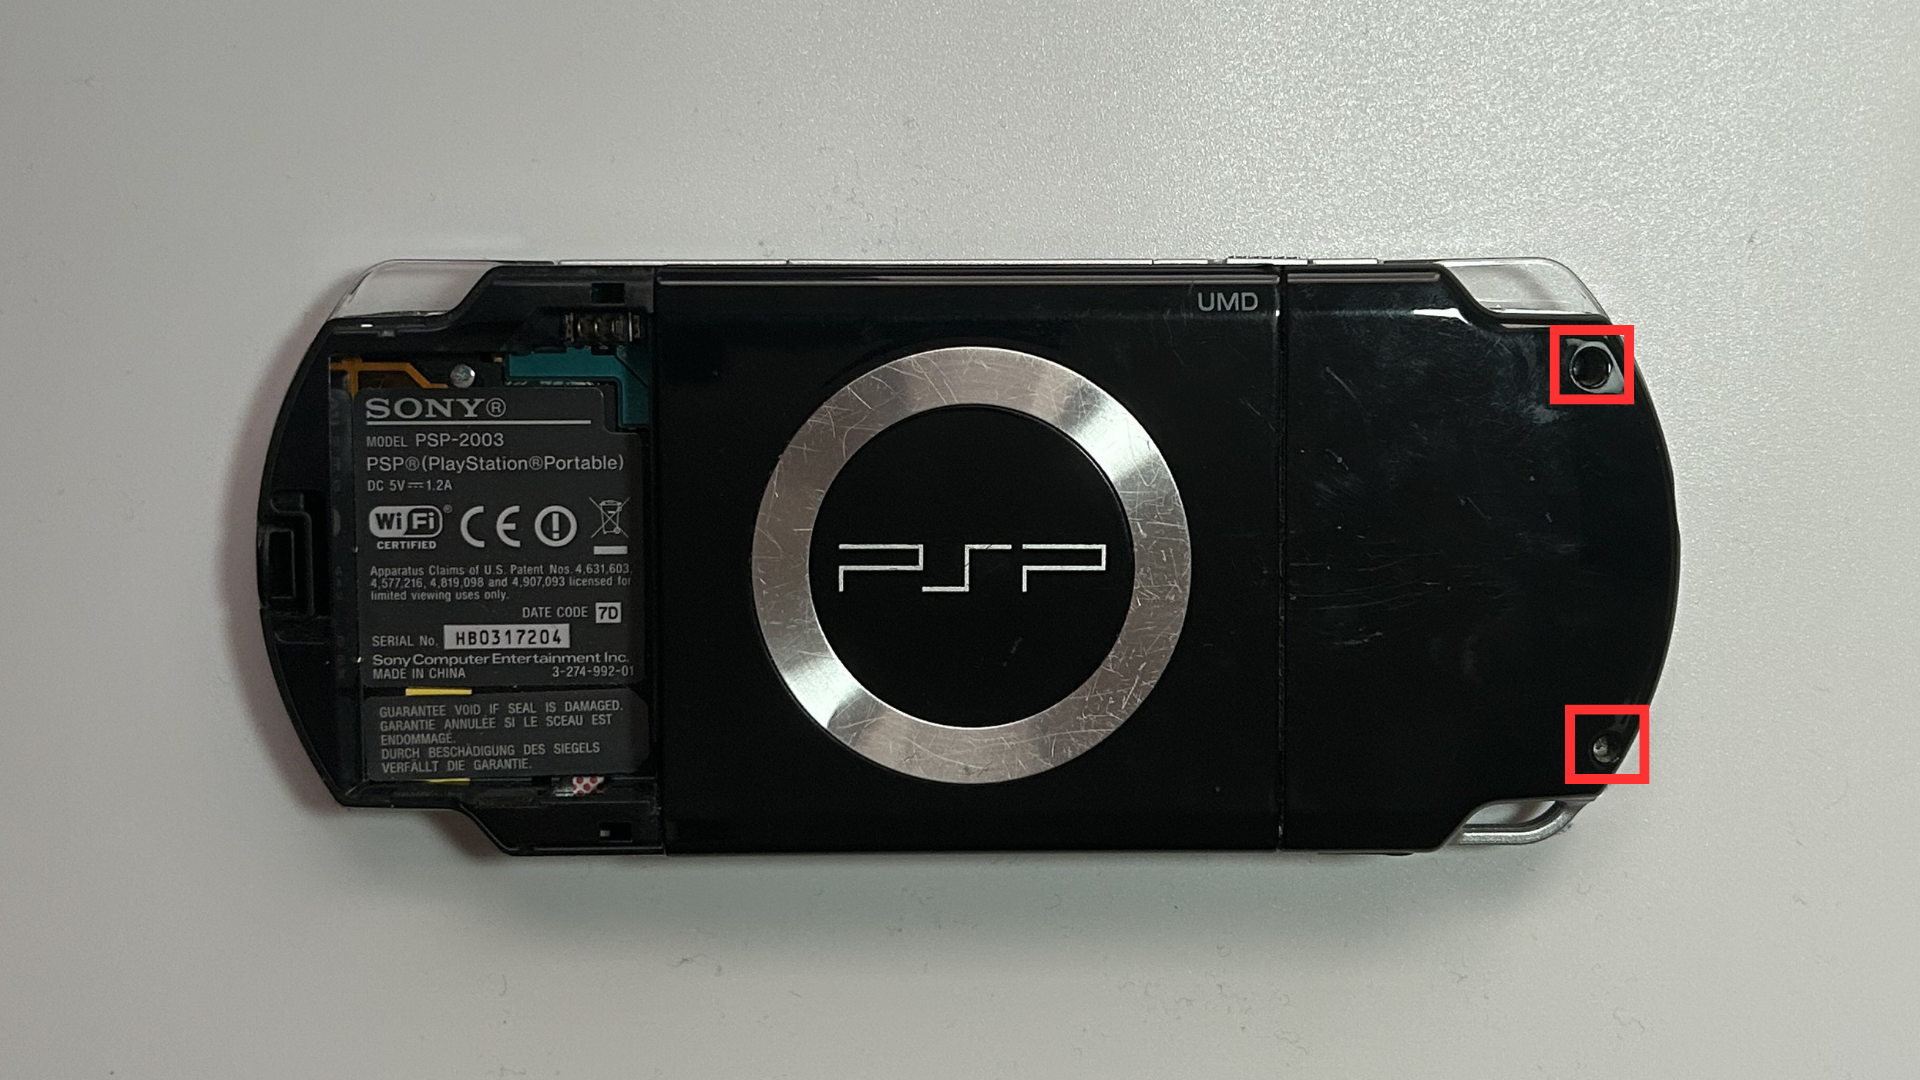
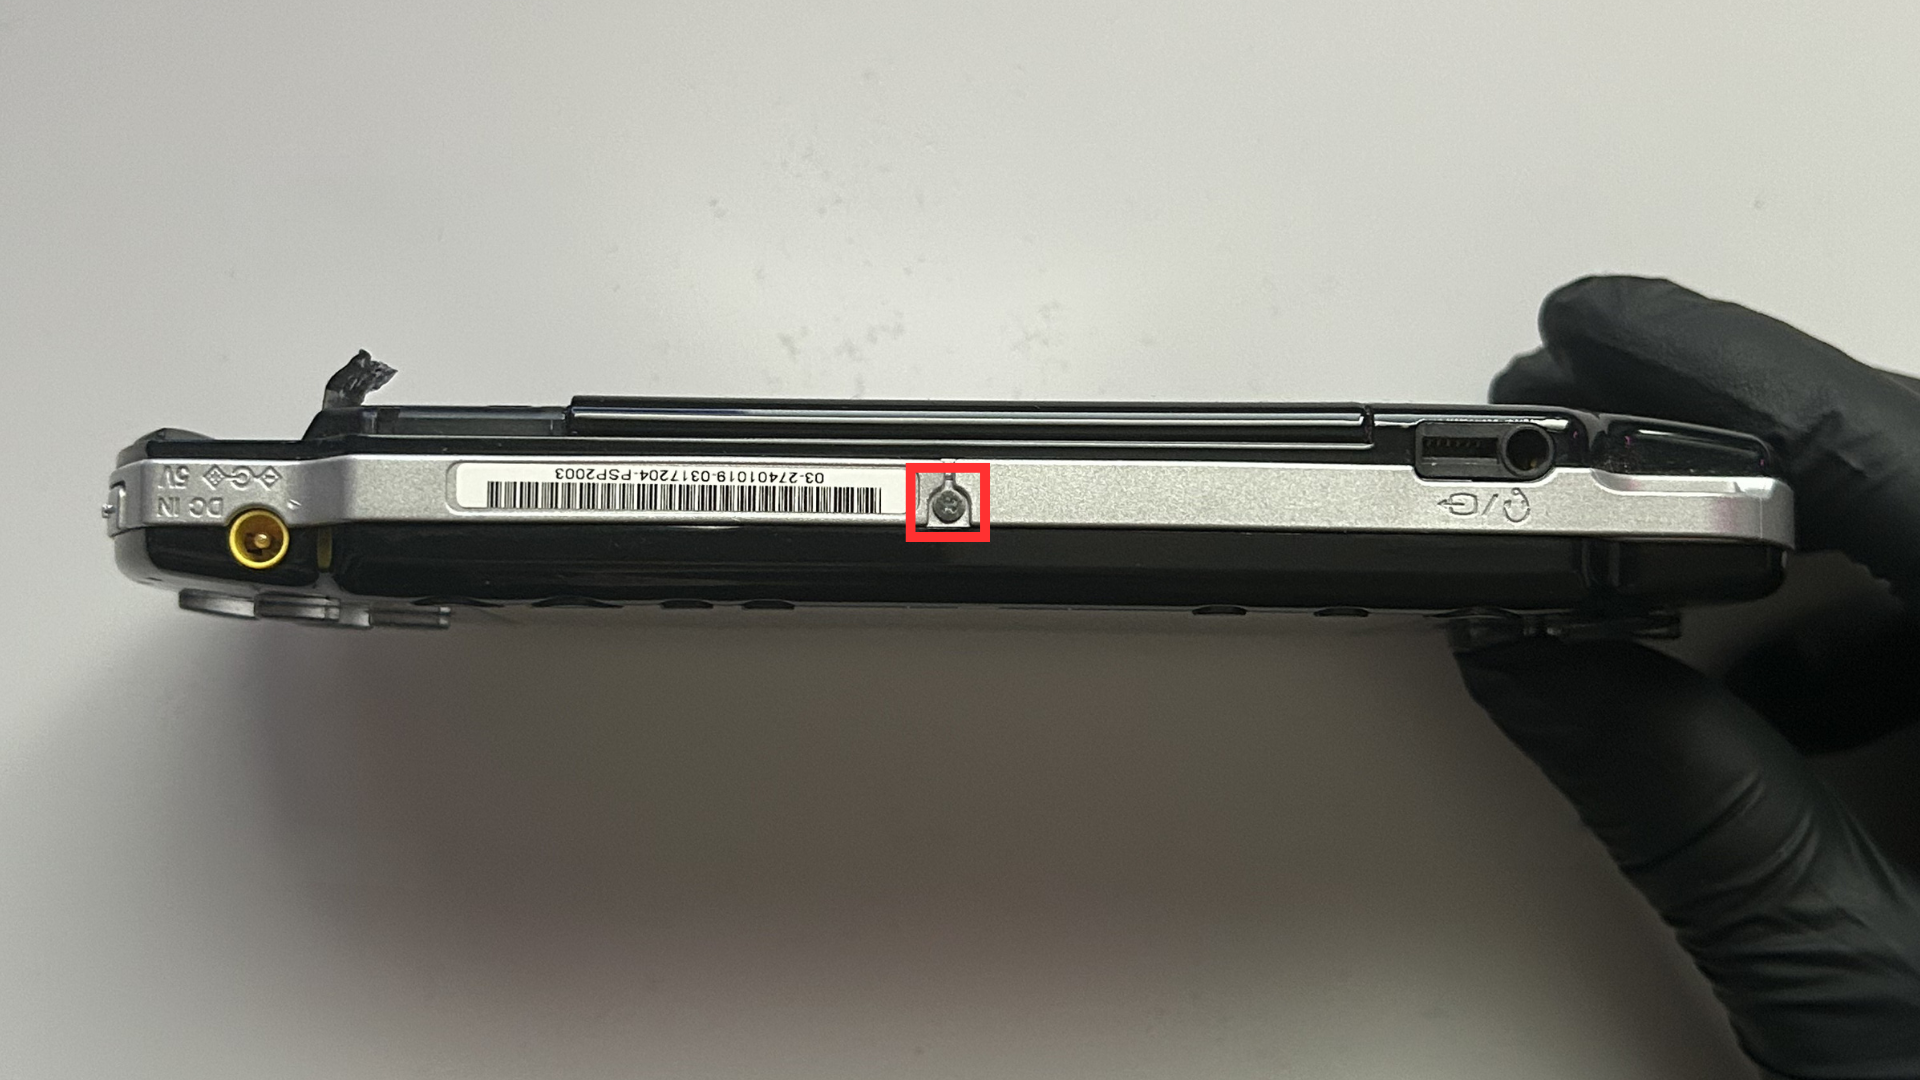
3. Remove the screws located on both sides of the PSP.
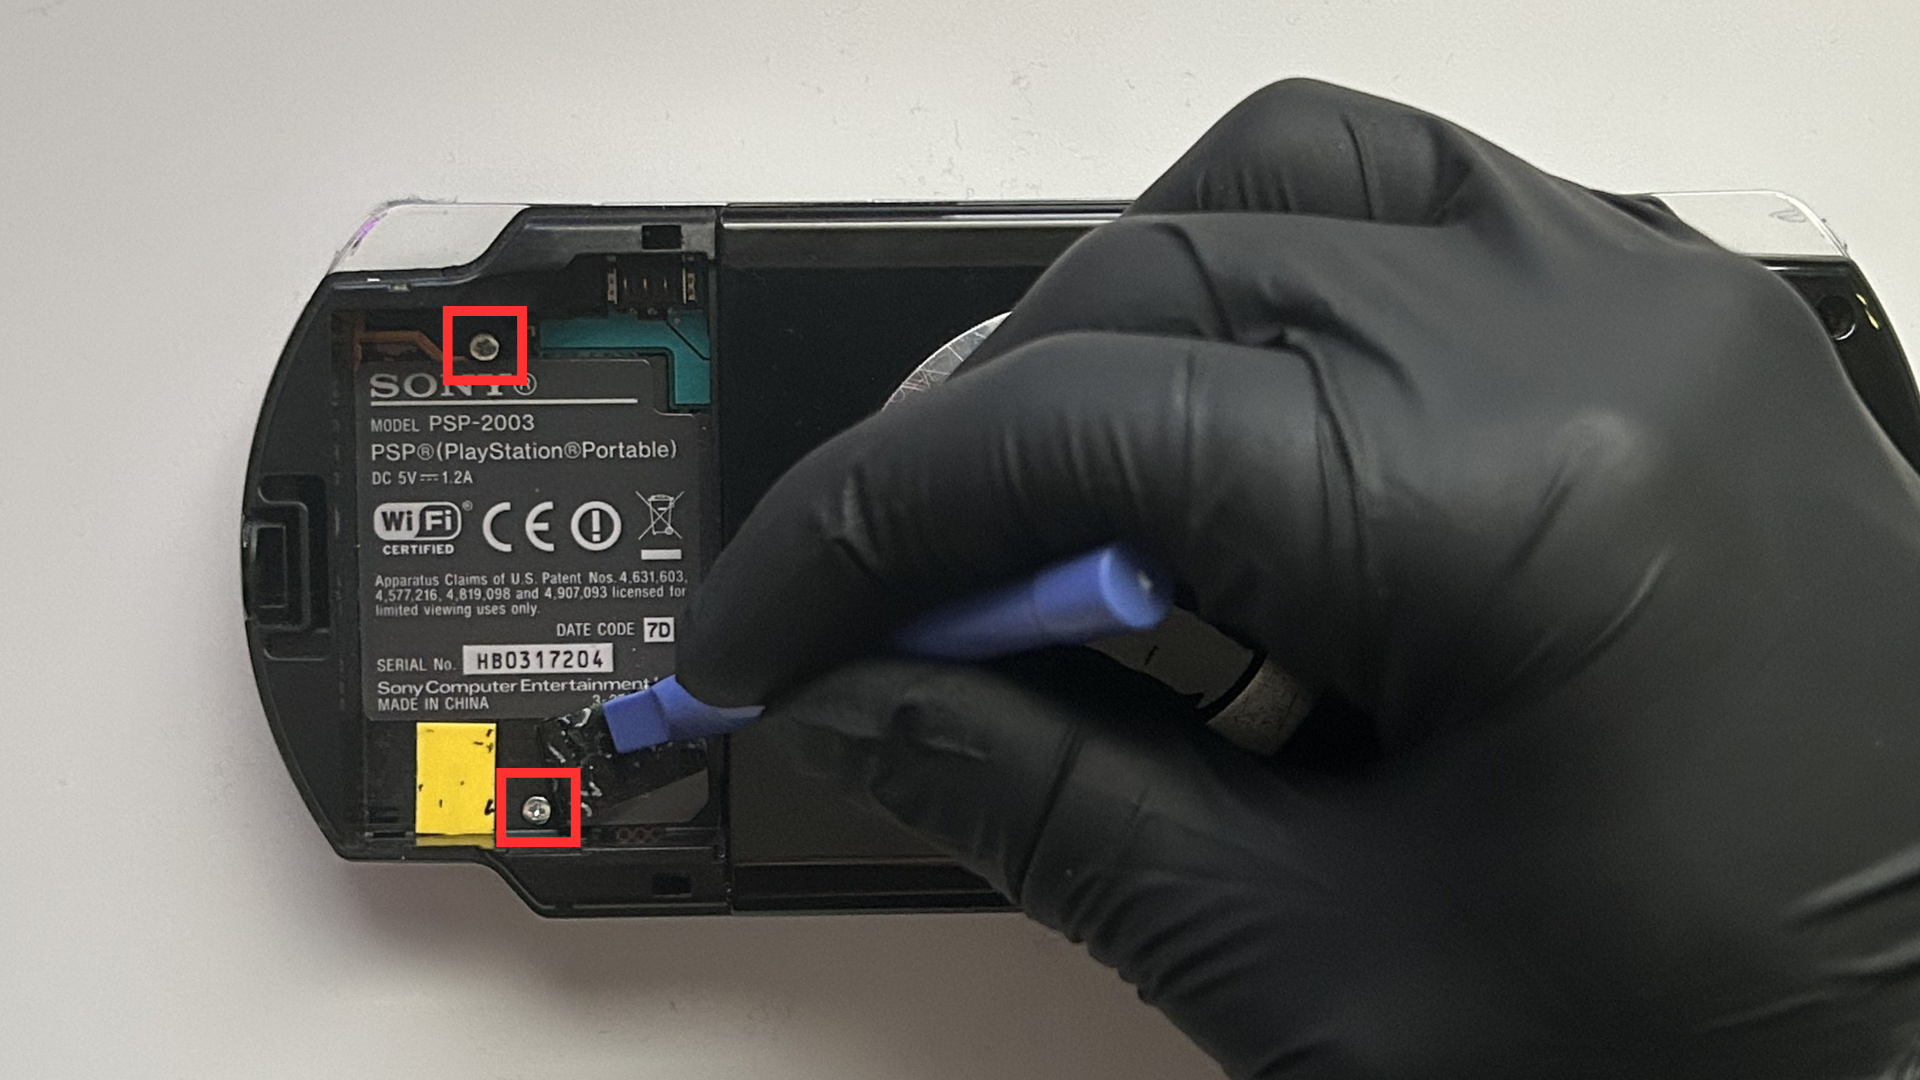
4. Inside the battery compartment, carefully peel back the lower sticker to reveal a hidden
screw. Remove this screw, as well as the visible screw at the top of the compartment.
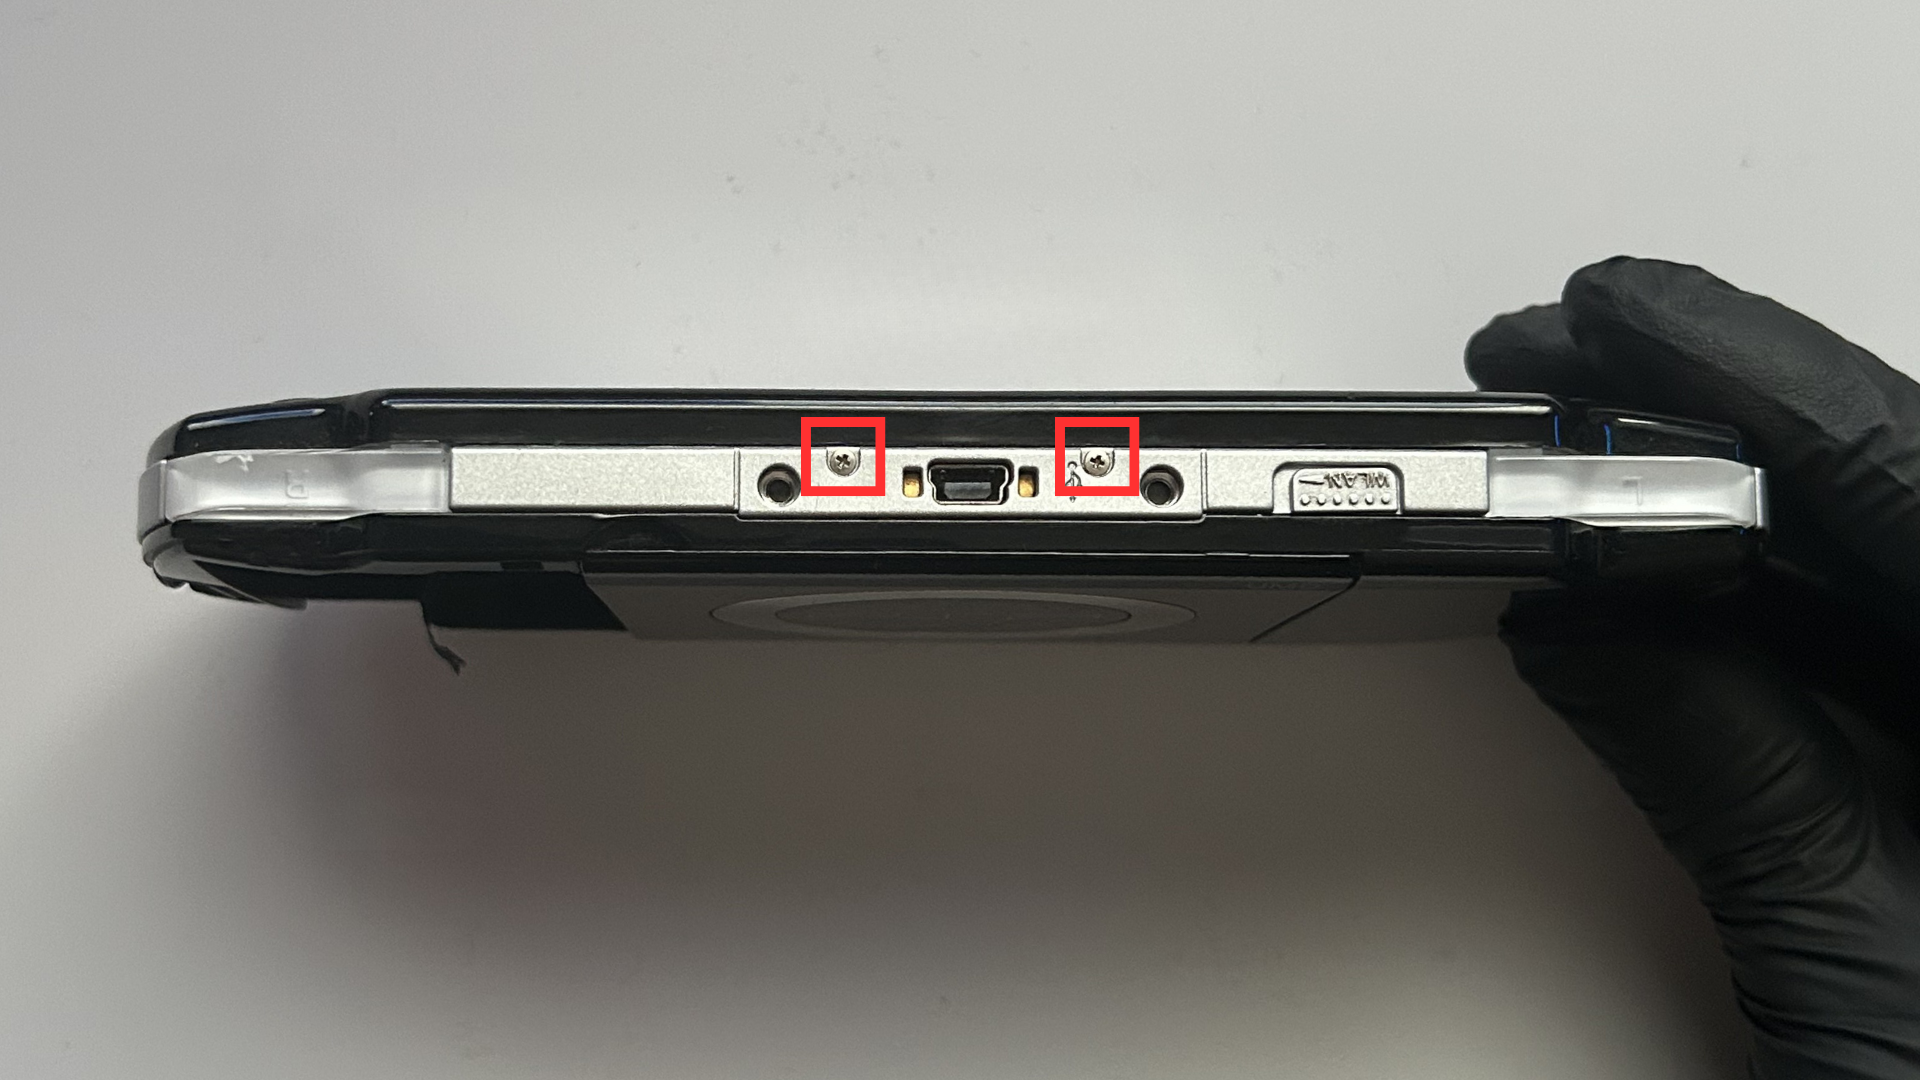
5. Finally, remove the two screws at the top edge of the PSP and the single screw at the
bottom edge.
Step 2 – Remove the faceplate and loosen the control buttons flex
1. Turn the PSP back over so the screen is facing up.
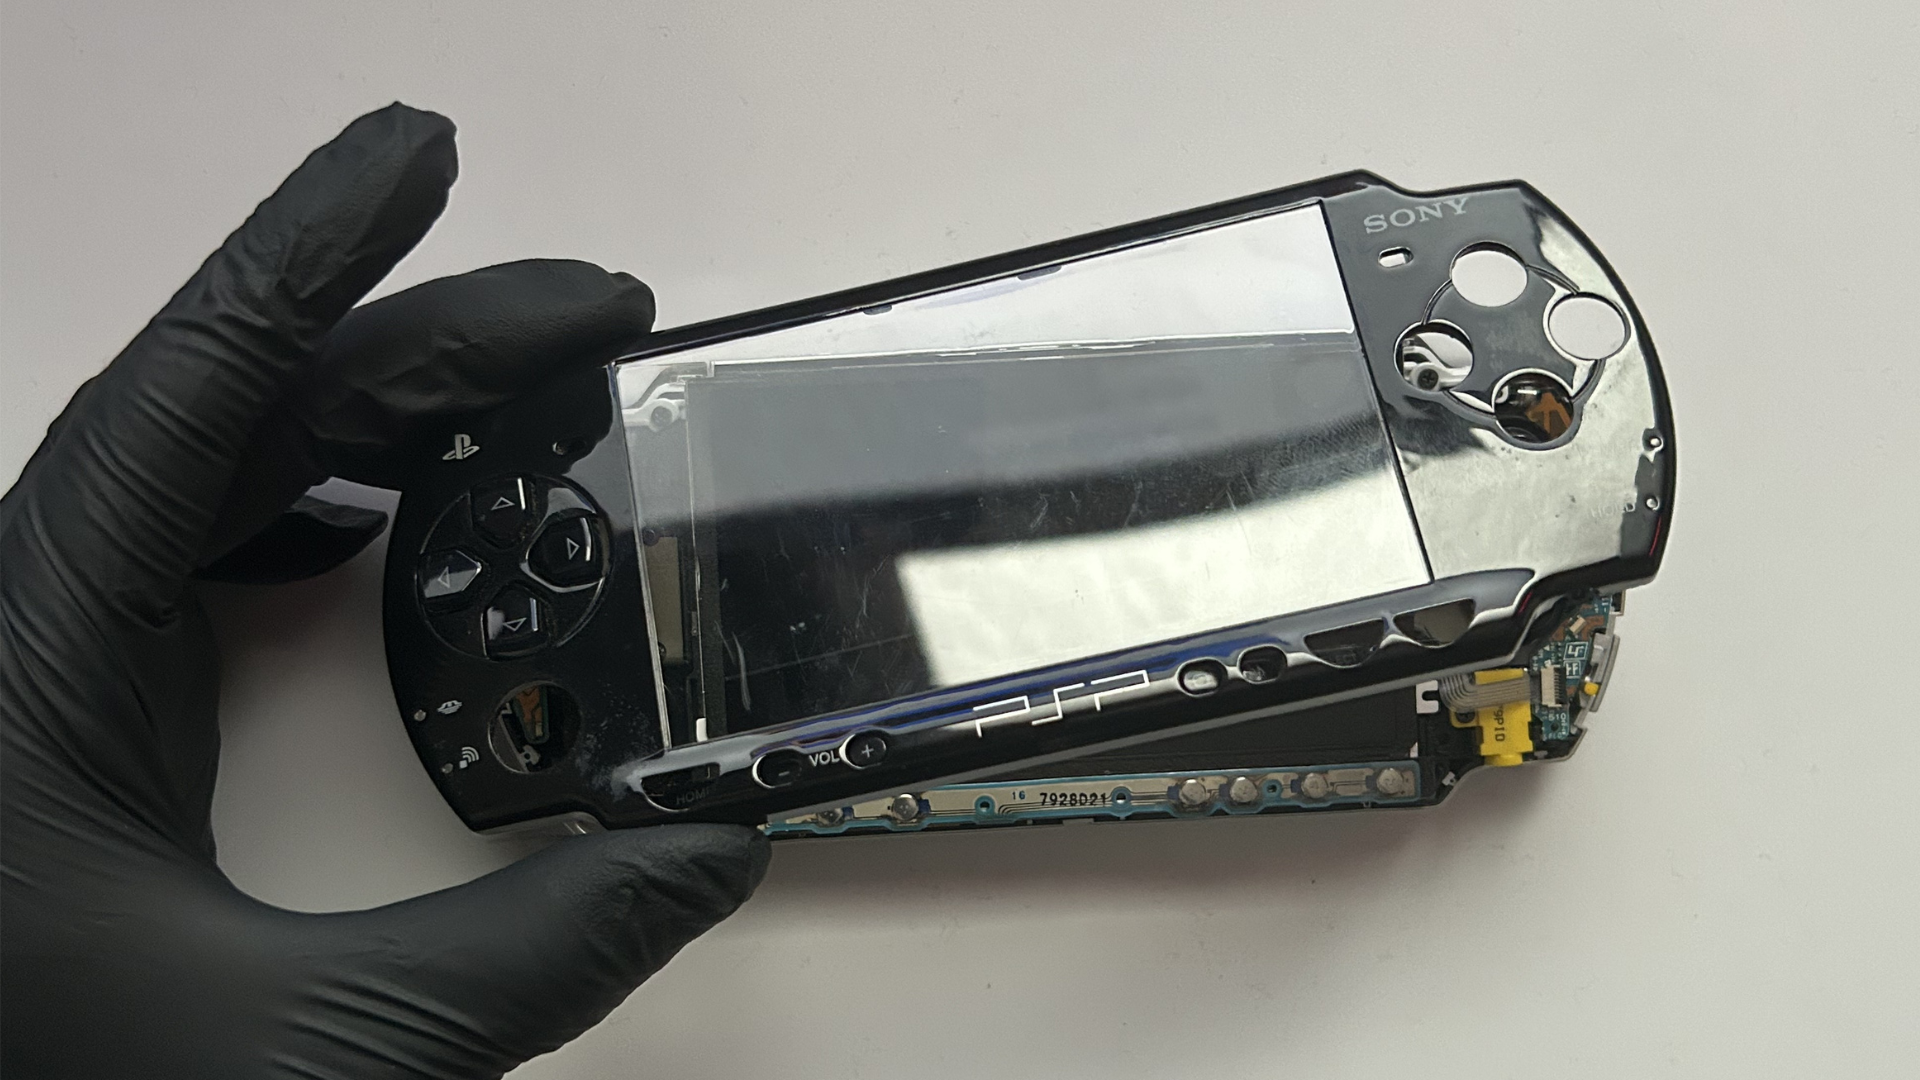
2. Gently lift and remove the front faceplate (front shell) using a plastic pry tool. Work
slowly around the edges to avoid cracking the plastic.
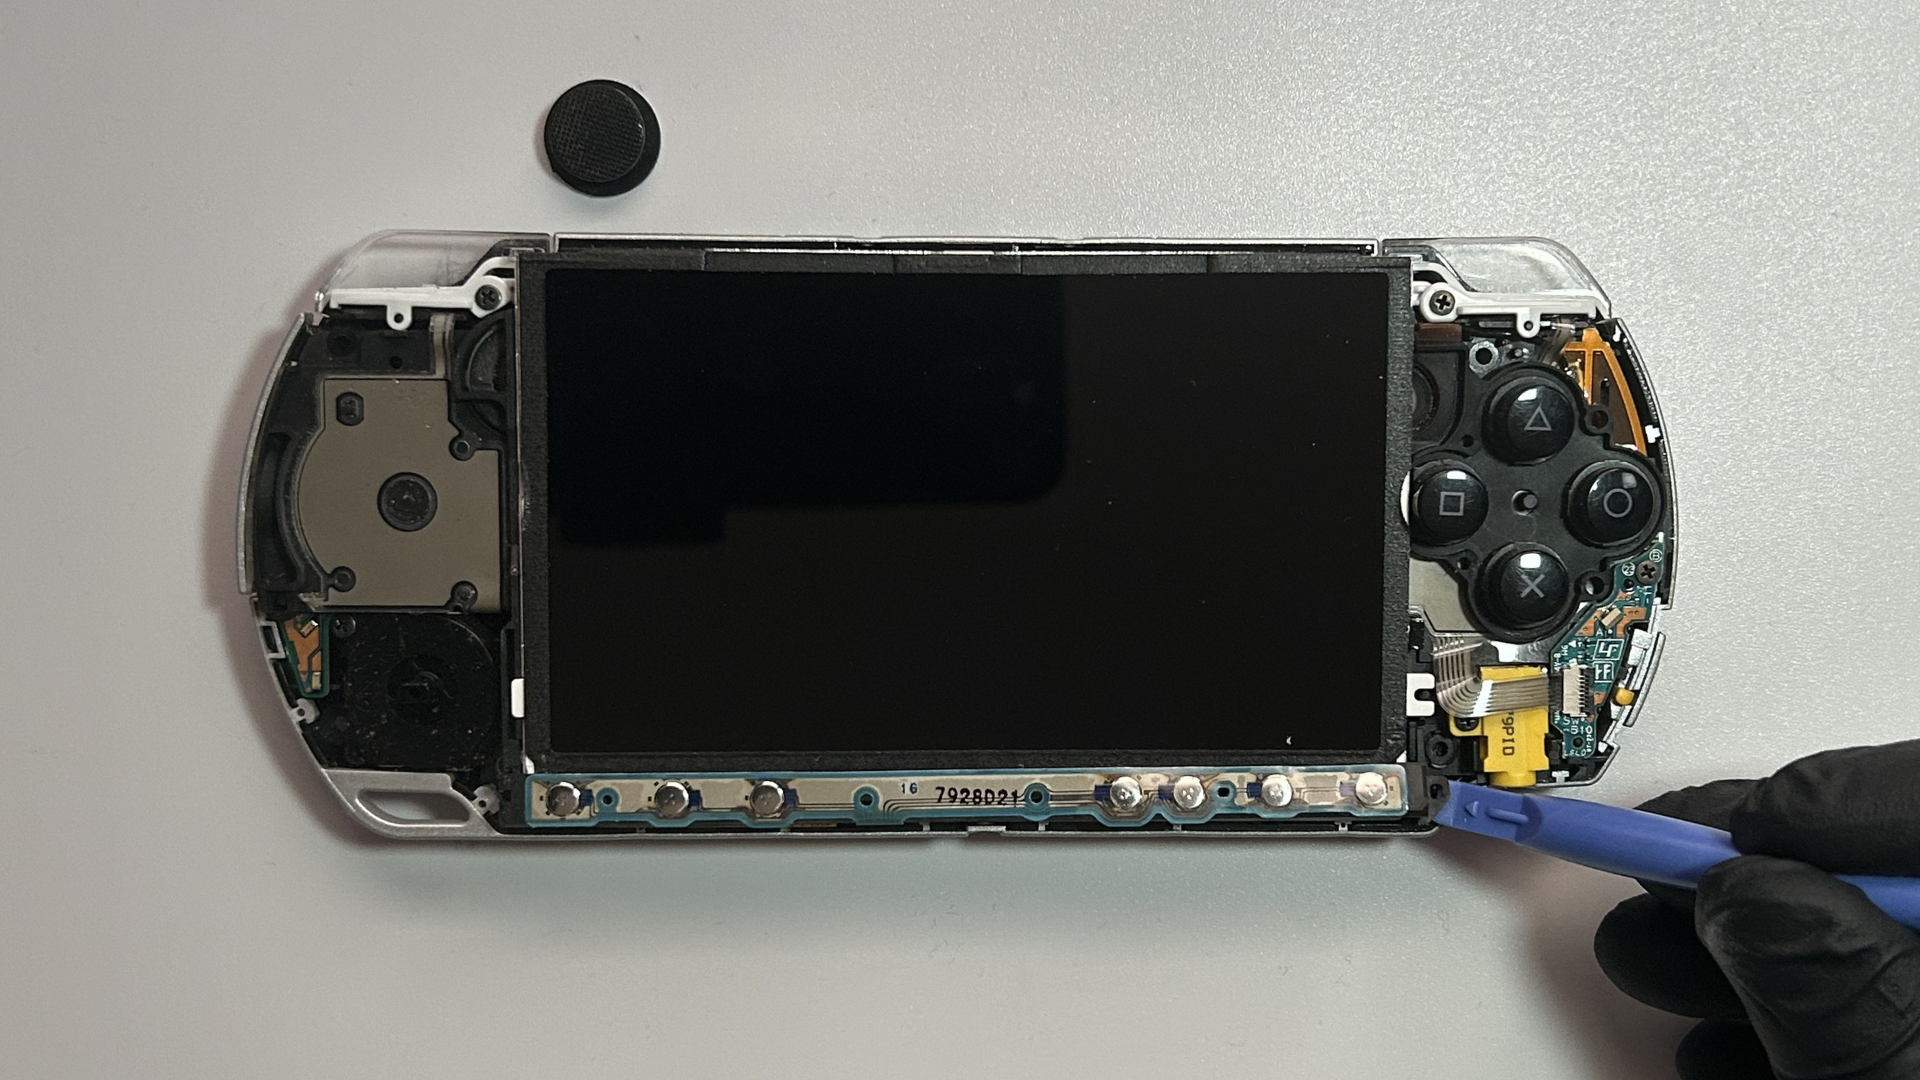
3. If the analog joystick is in your way, you can gently pull it up and remove it. This is
also a good time to clean dust or debris from around the joystick area if needed.
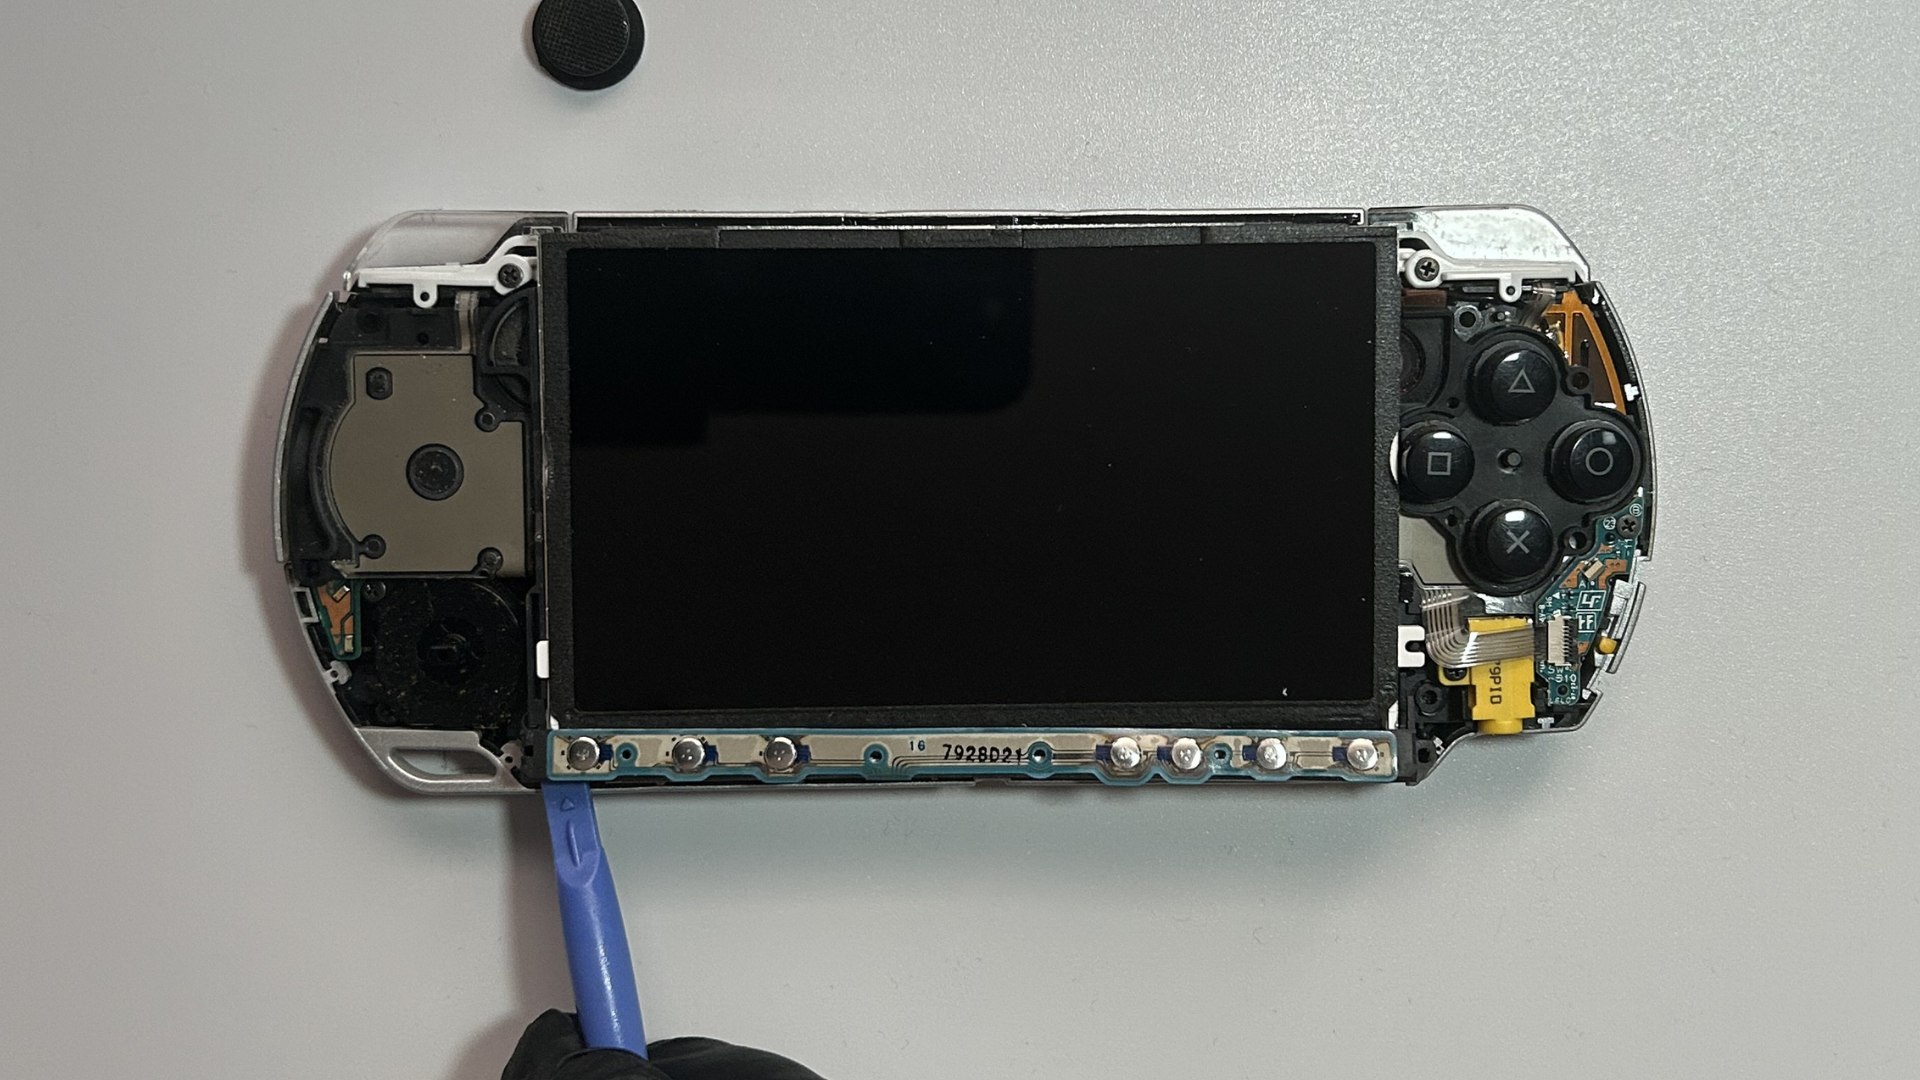
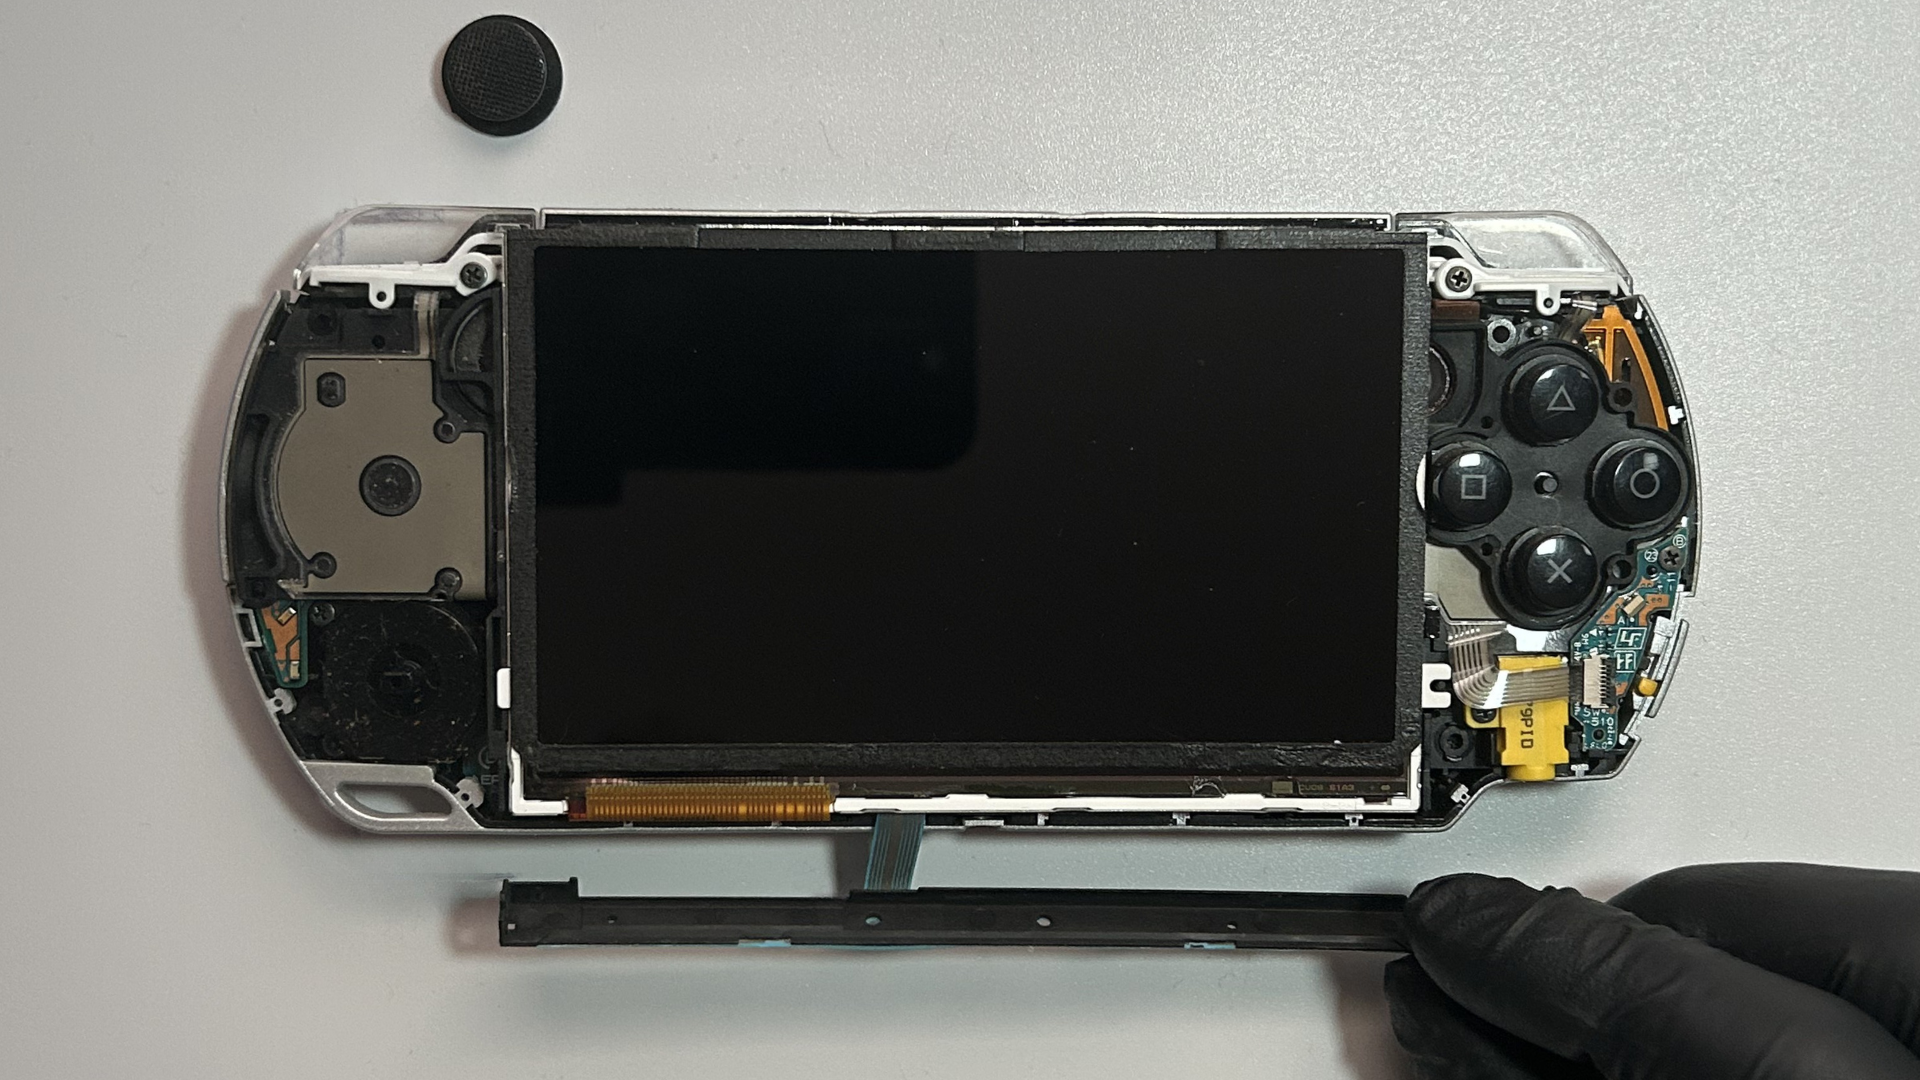
4. Carefully lift both ends of the plastic that holds the front control buttons (Home, Volume,
Brightness etc) so that it is loose from the LCD.
Step 3 – Lift the LCD & undo the screen flex cables
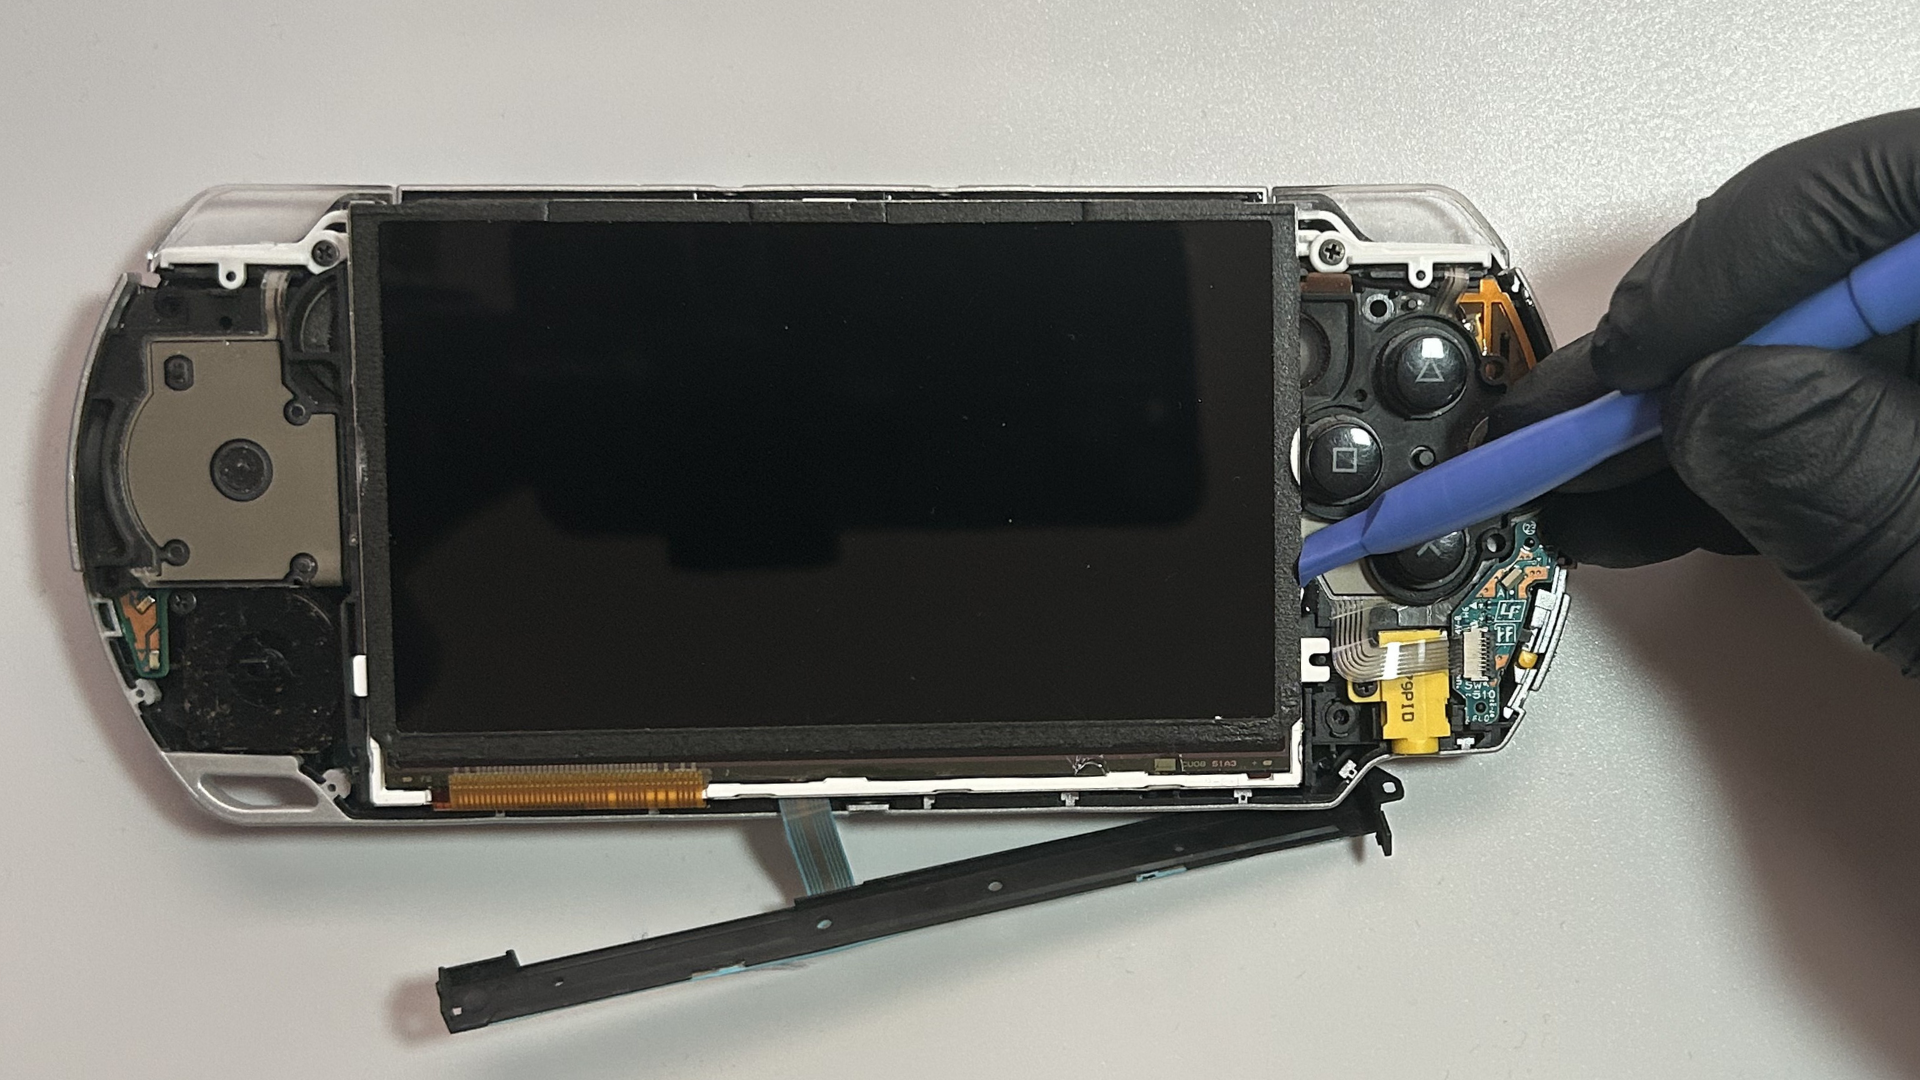
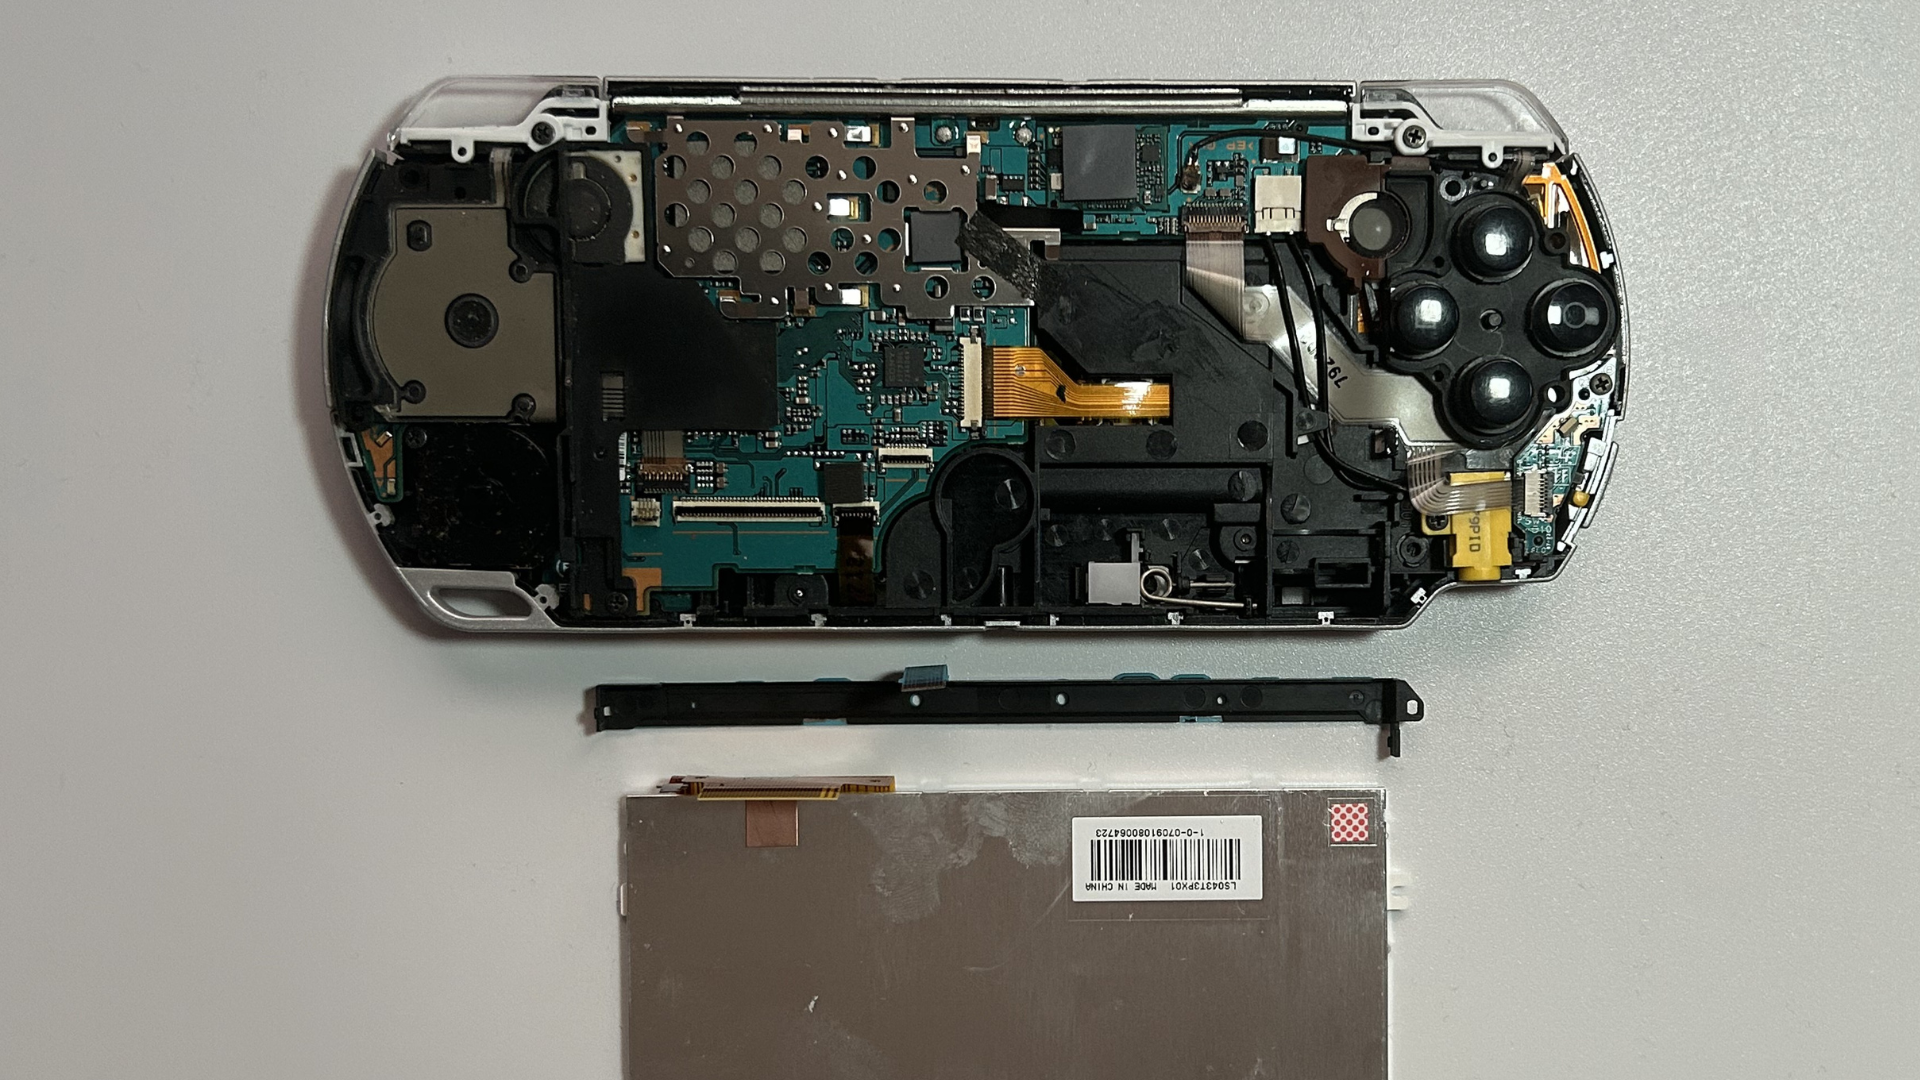
1. Use the pry tool on the small plastic notch on the right side of the LCD whilst carefully
lifting the LCD from the top edge. The small notch holds the LCD down so lifting it outwards
with a pry tool will make lifting the LCD a very easy process.
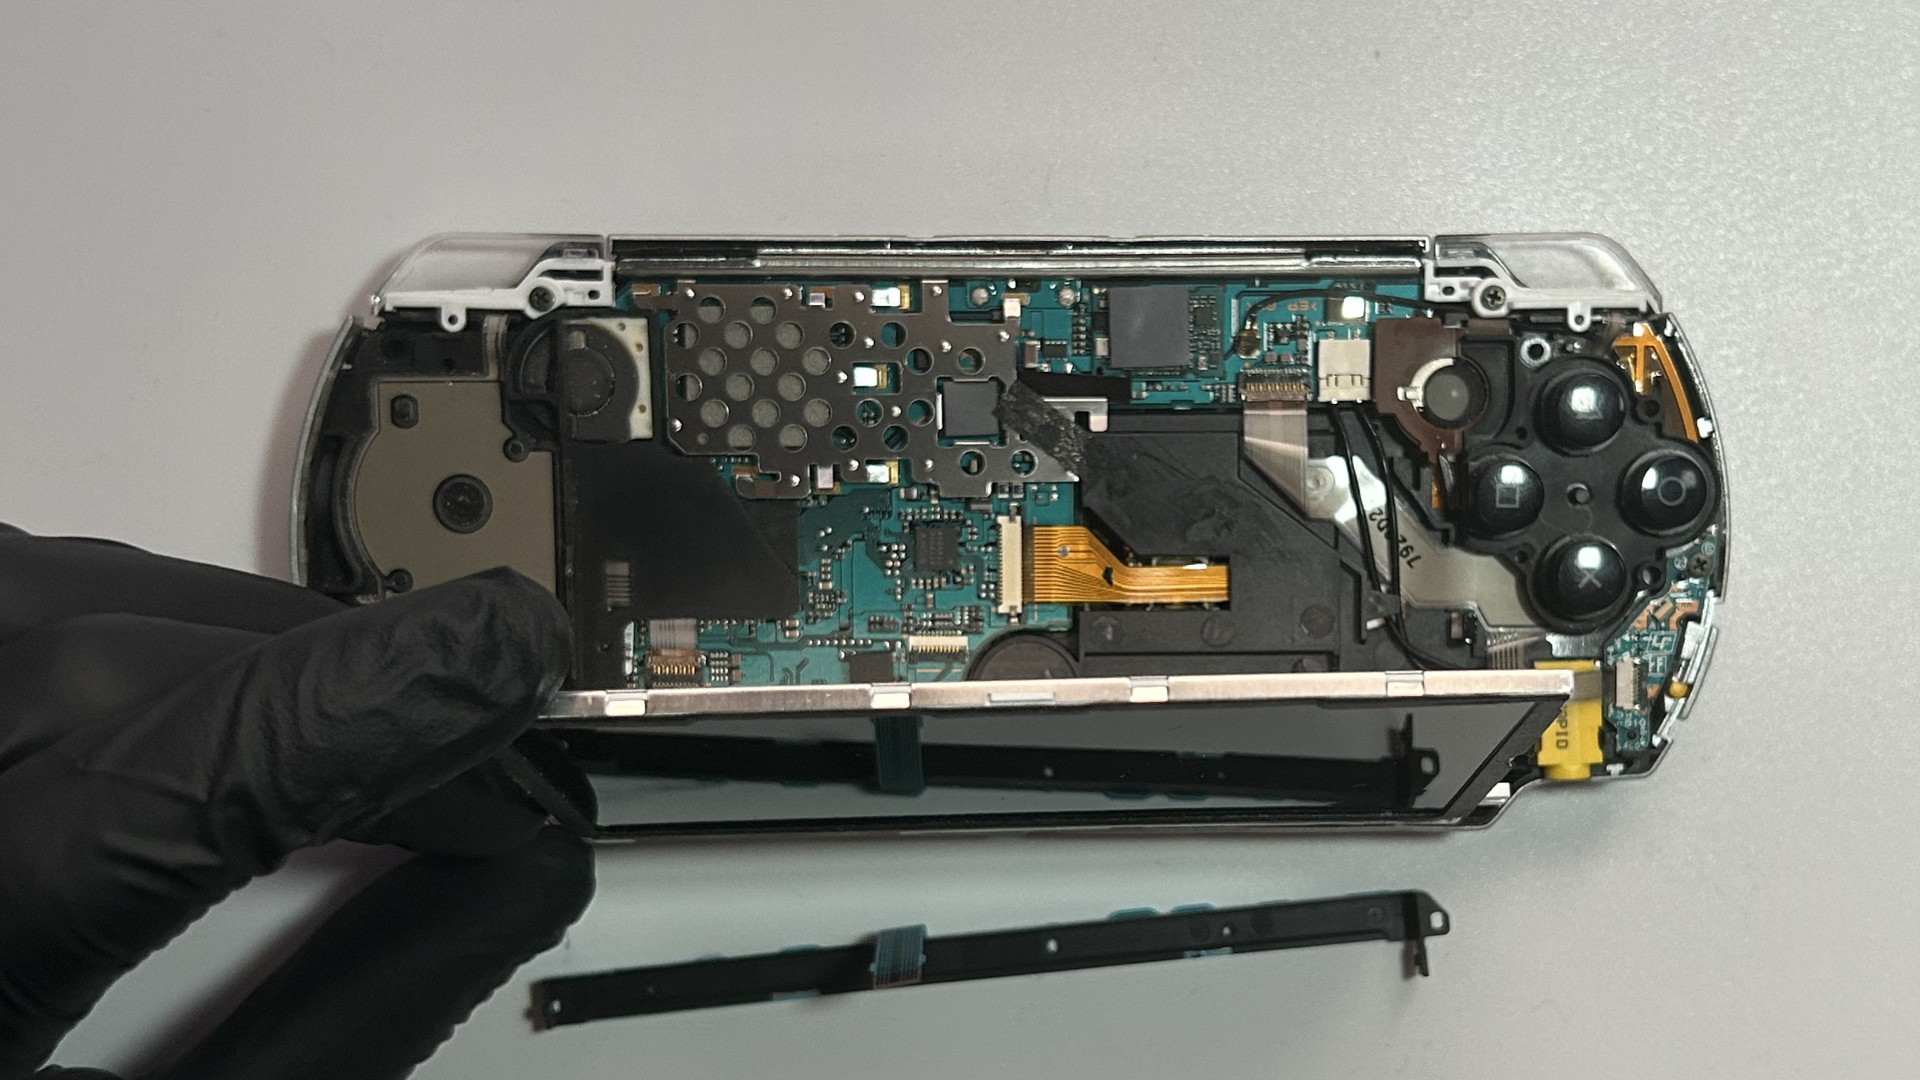
2. Take care not to damage any ribbon cables while lifting the LCD. They are delicate and
easily torn if pulled too hard or at an angle.
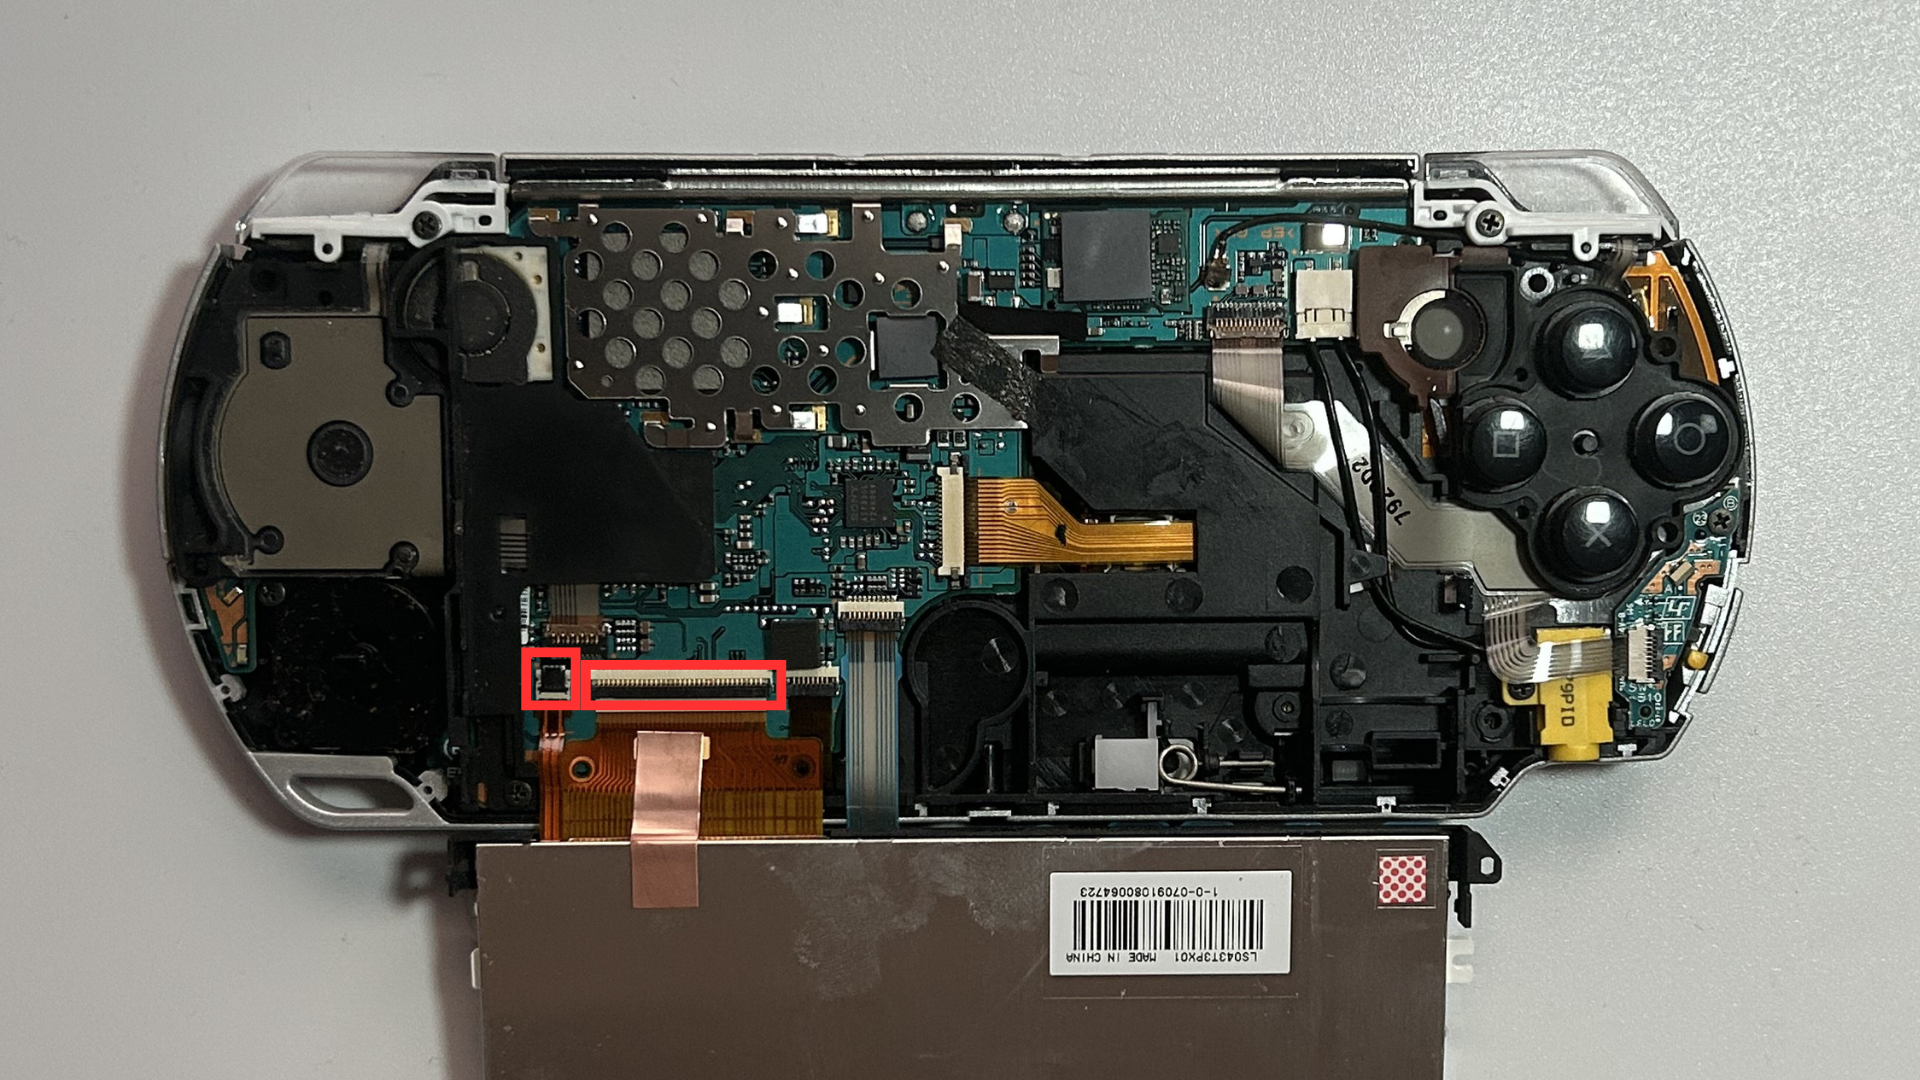
3. Now use your pry tool to lift the tabs of the flex cable connectors. The tiny far-left tab
opens downwards, the large tab beside it opens upwards.
Step 4 – Transfer or replace the copper grounding / EMI tape
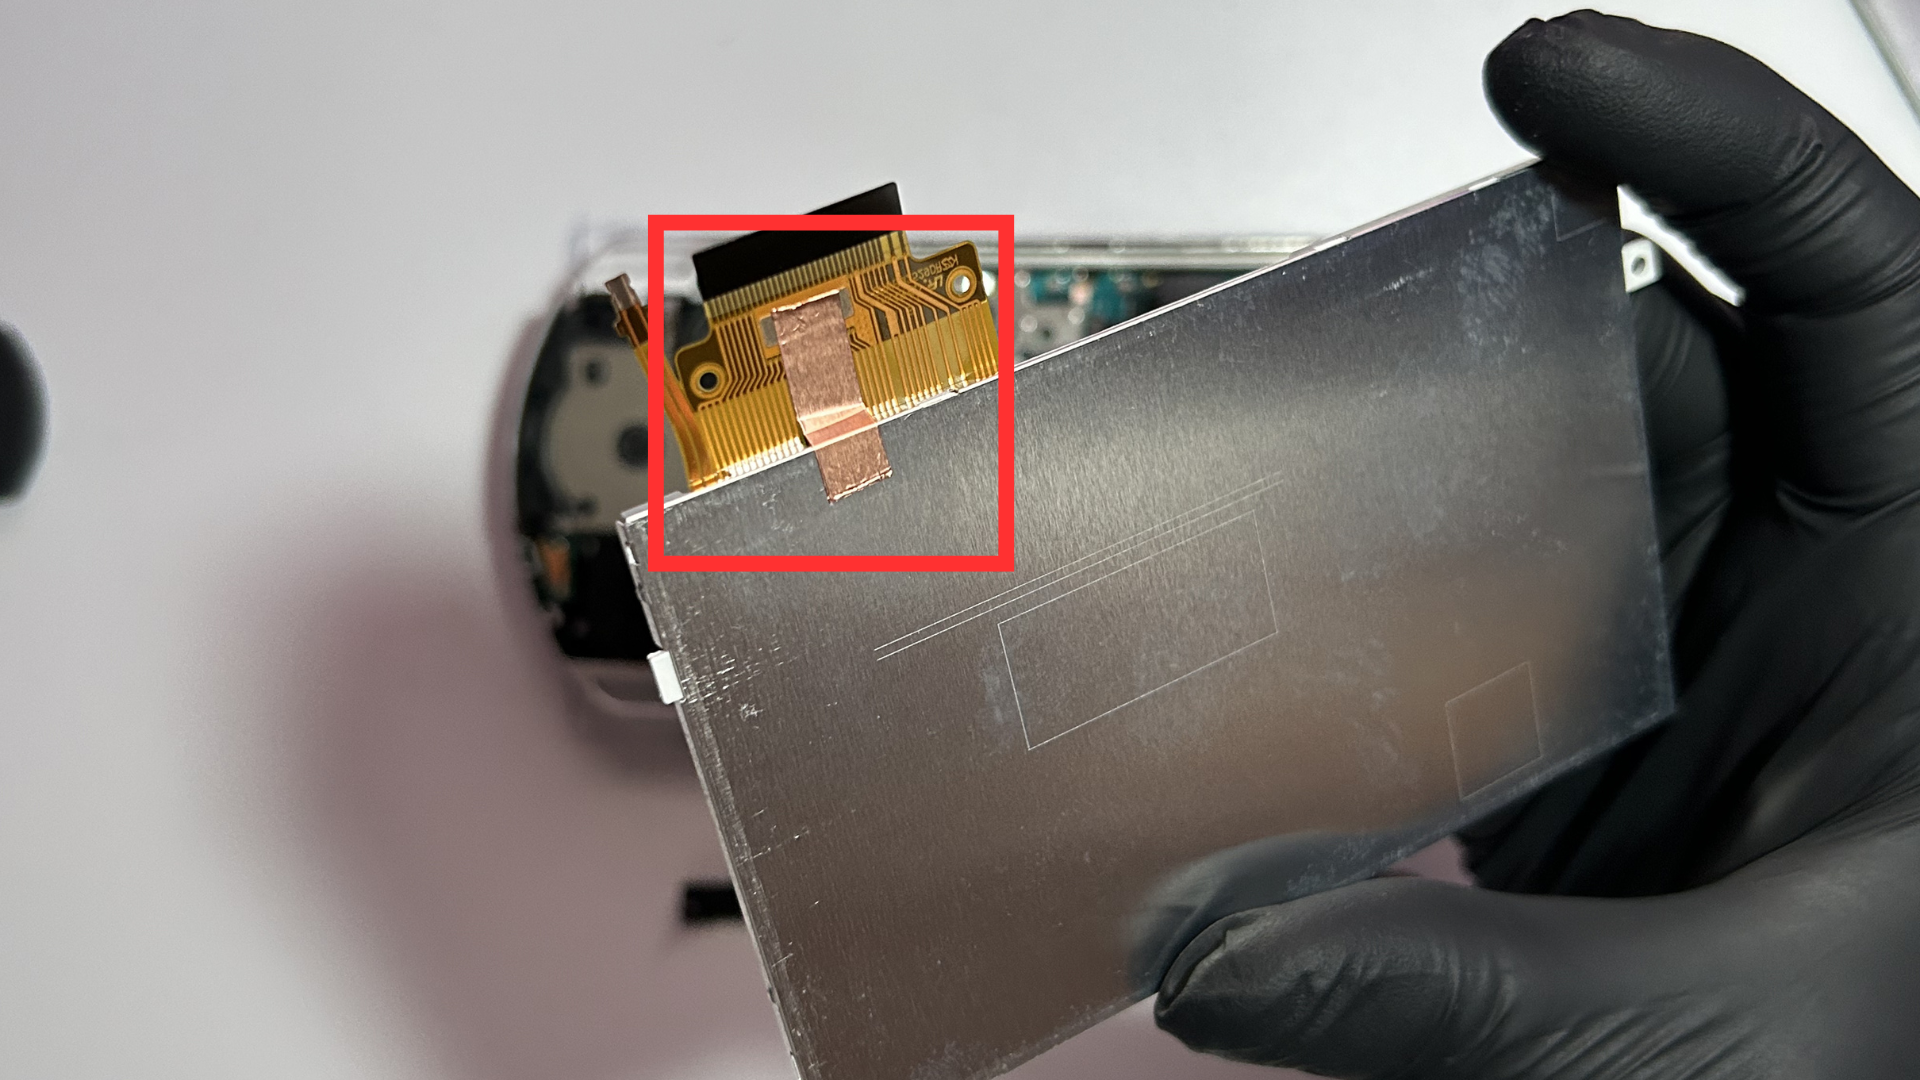
You may notice your new screen doesn't have the copper grounding / EMI tape going from the LCD flex to the metal backplate of the LCD. If this is the case, you will need to replace it to help prevent flickering or other display issues.
Once the new LCD is in place and everything is reconnected, reassemble the PSP in the reverse order:
- Lower the LCD and ensure it sits flat.
- Reconnect and position the front buttons flex cable.
- Reinstall the joystick (if removed).
- Refit the front faceplate and all outer screws.
- Reinsert the battery and battery cover.
Power the PSP back on and test the new screen to confirm everything is working correctly.
Conclusion
Replacing a PSP 2000 LCD screen is a relatively straightforward repair once the front shell is removed and the LCD connectors are exposed. Take your time when handling the ribbon cables and ensure any grounding / EMI tape is transferred correctly if your replacement screen does not include it.
If you're repairing a PSP 2000 for the first time, allow around 30–60 minutes to complete the repair.