Introduction
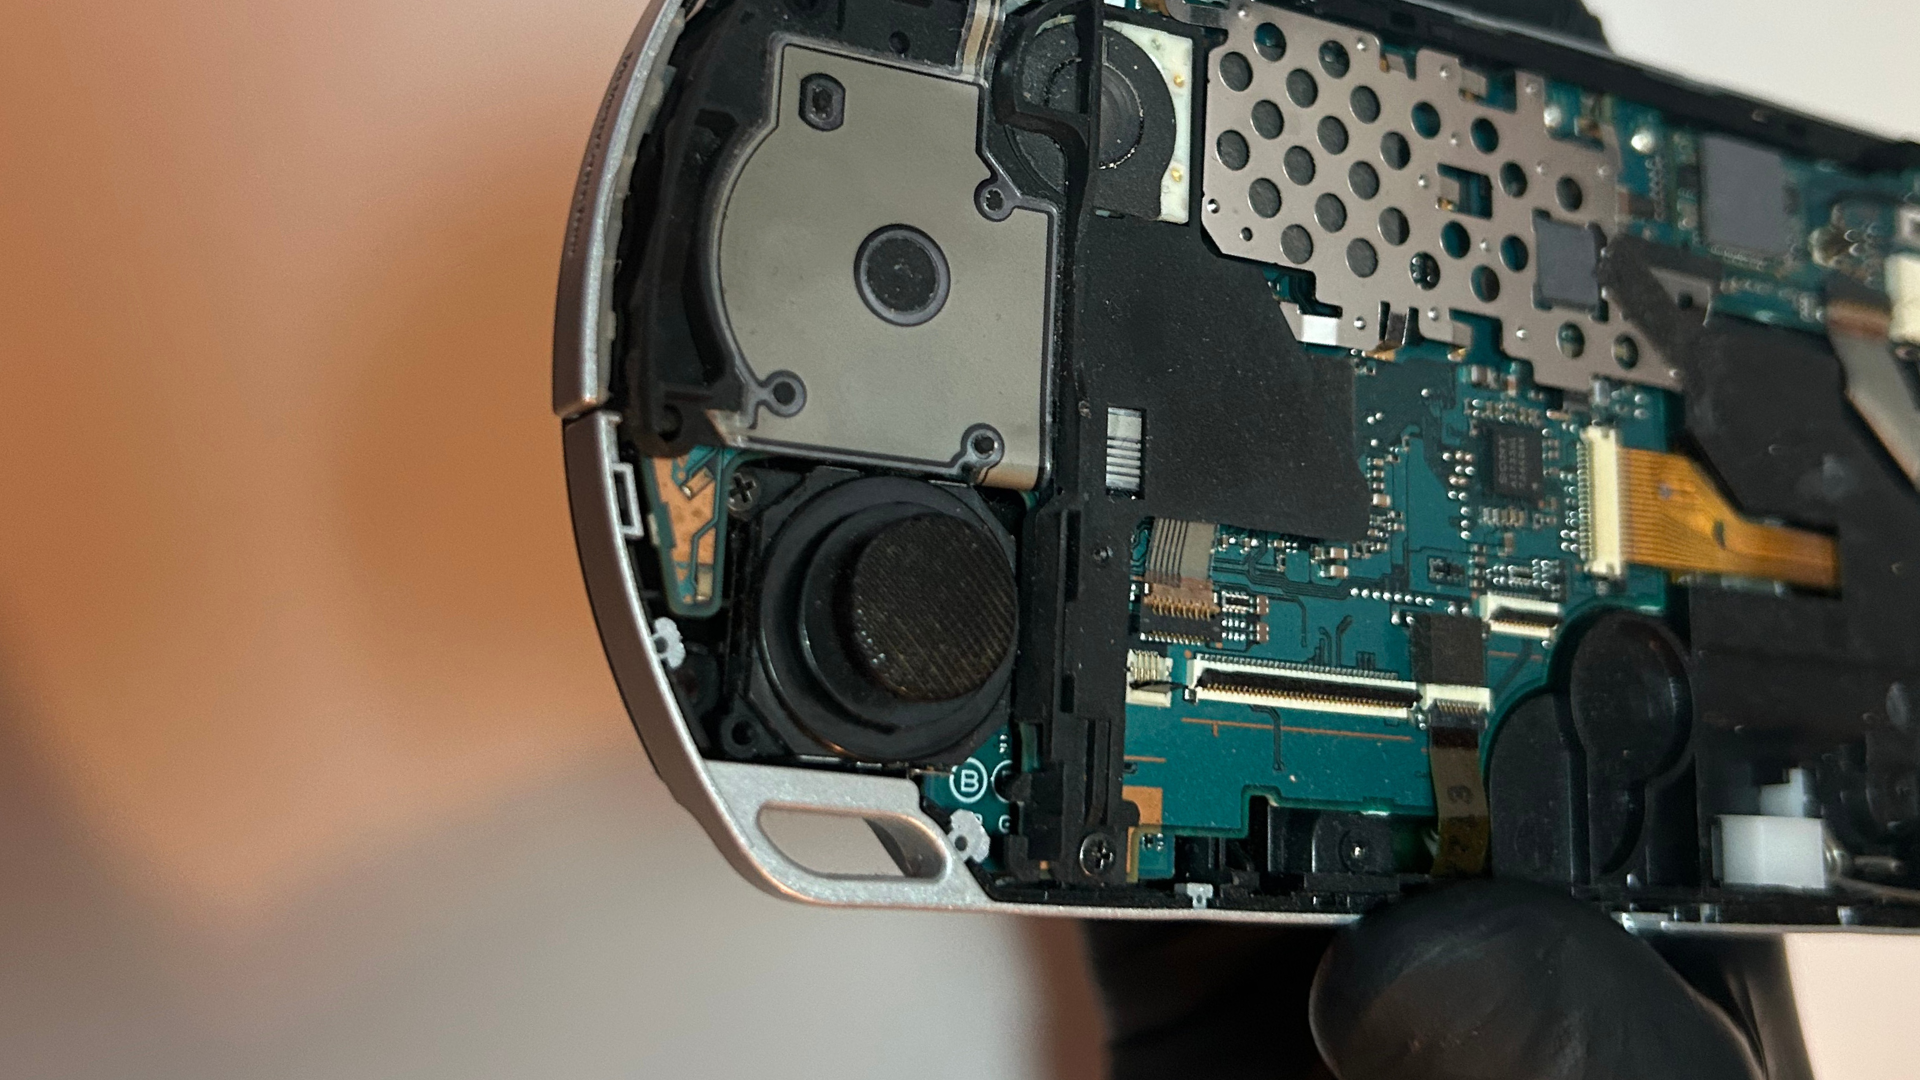
In this guide, I'll show you how to replace the analog thumbstick on a Sony PSP 2000.
Replacing the analog thumbstick may help if your PSP has problems such as stick drift, inconsistent movement, physical damage or a thumbstick that no longer responds correctly.
What you'll need
- Phillips head screwdriver
- Plastic spudger or pry tool
- Replacement analog thumbstick for the PSP 2000
Step 1 – Remove the battery and outer screws
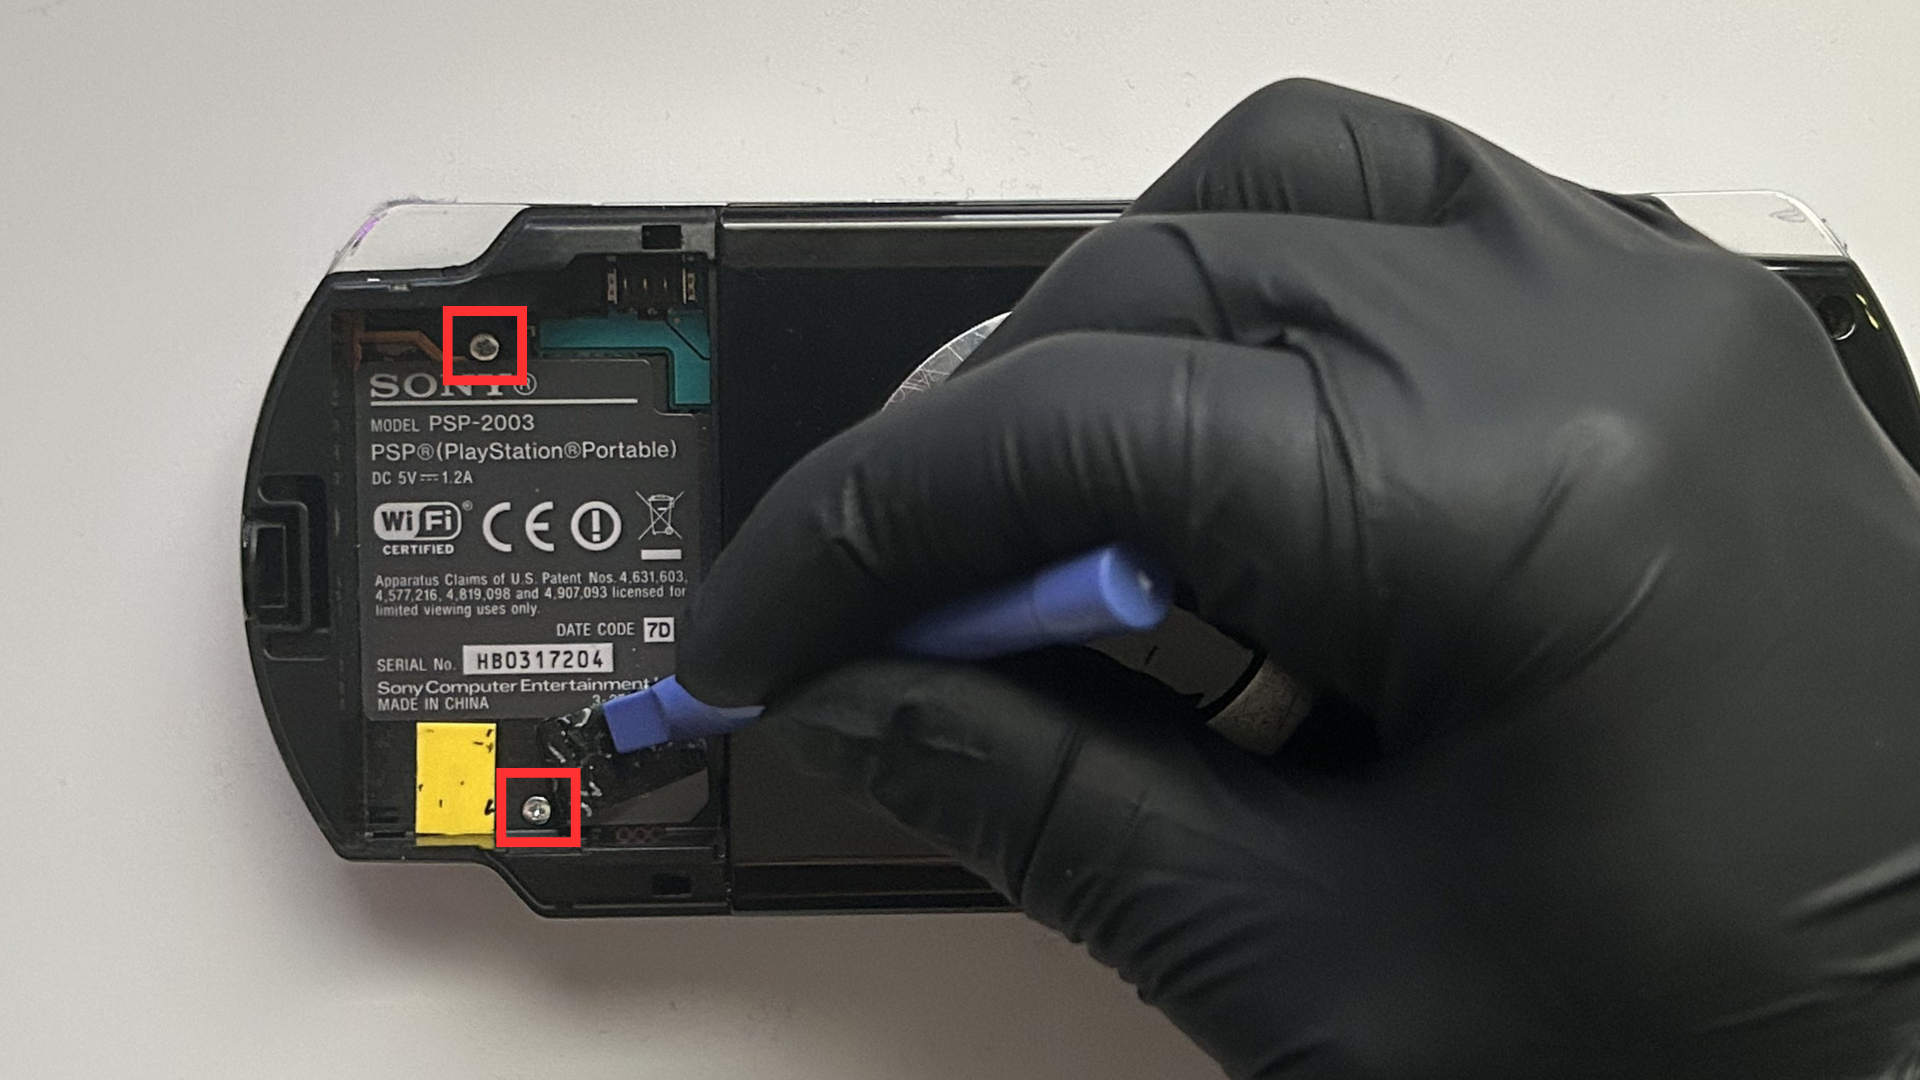
- Turn the PSP over and remove the battery cover.
- Remove the battery from the console.
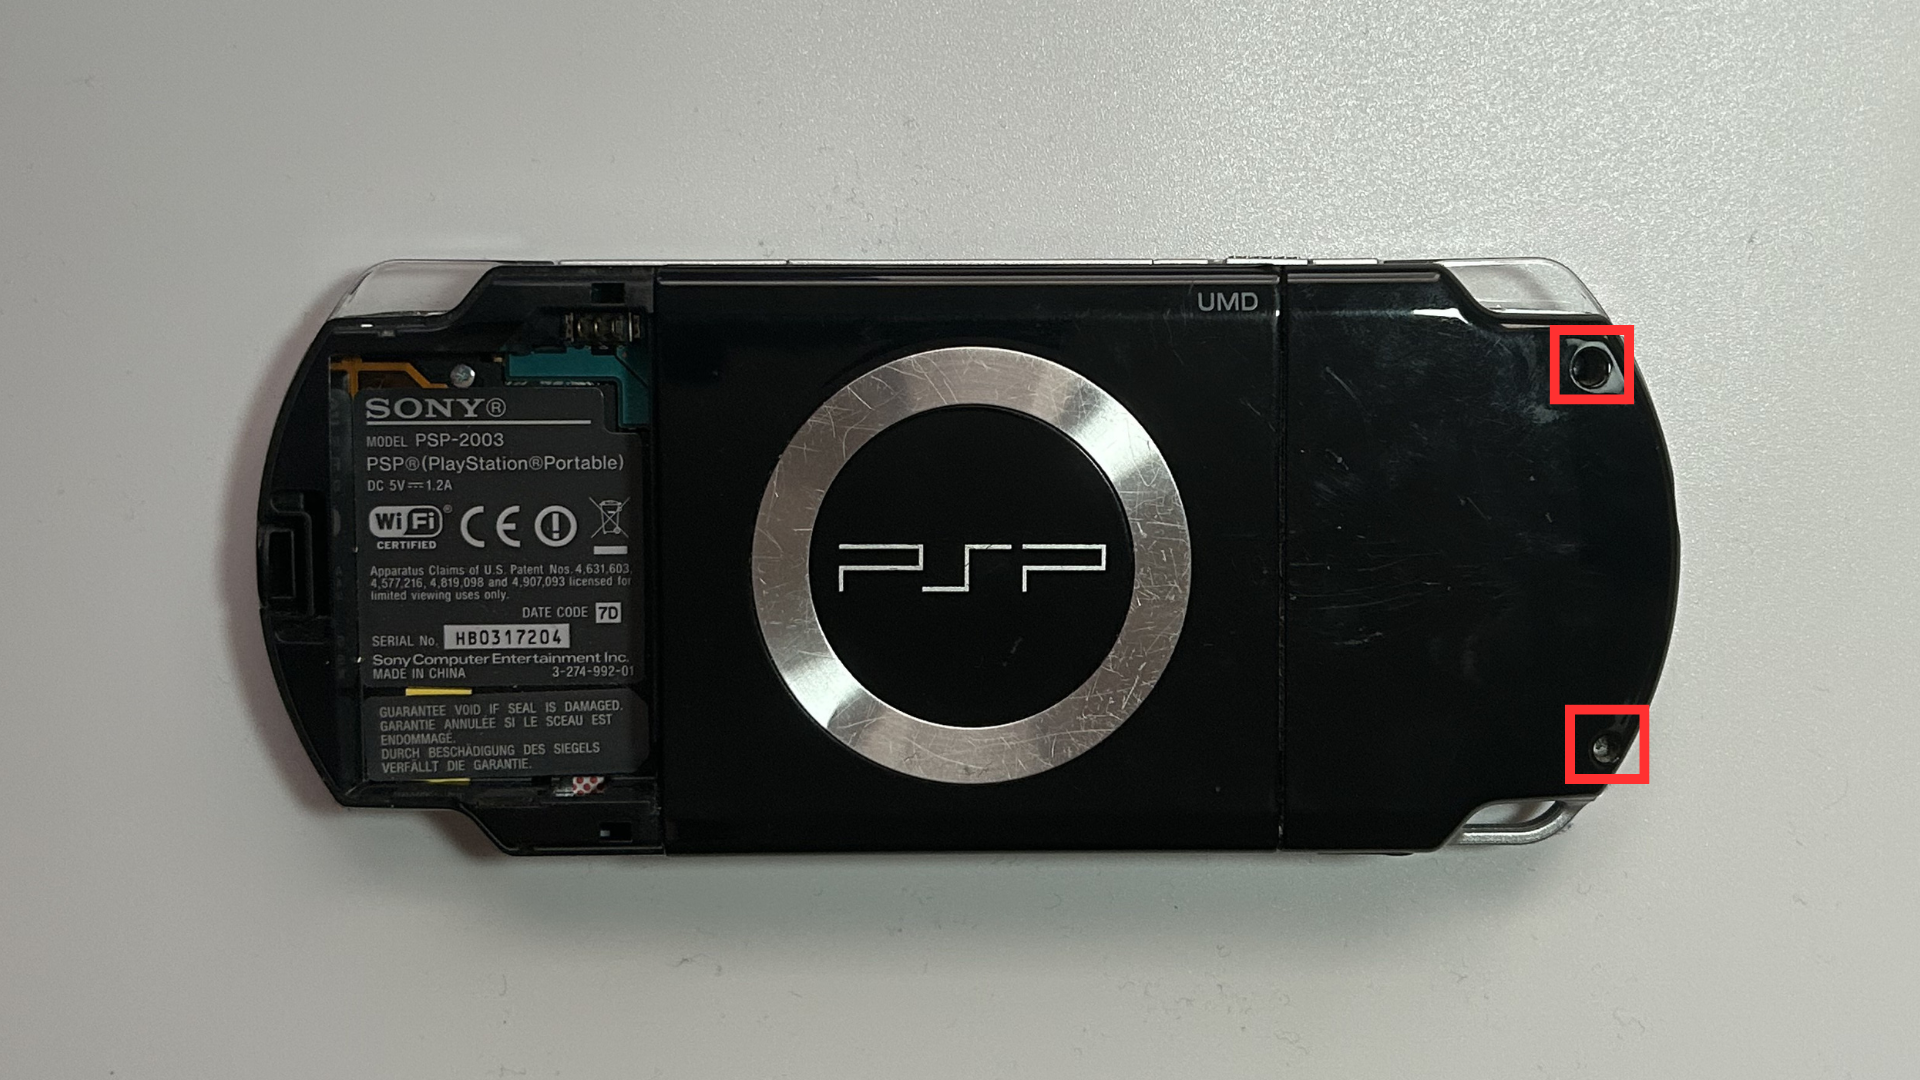
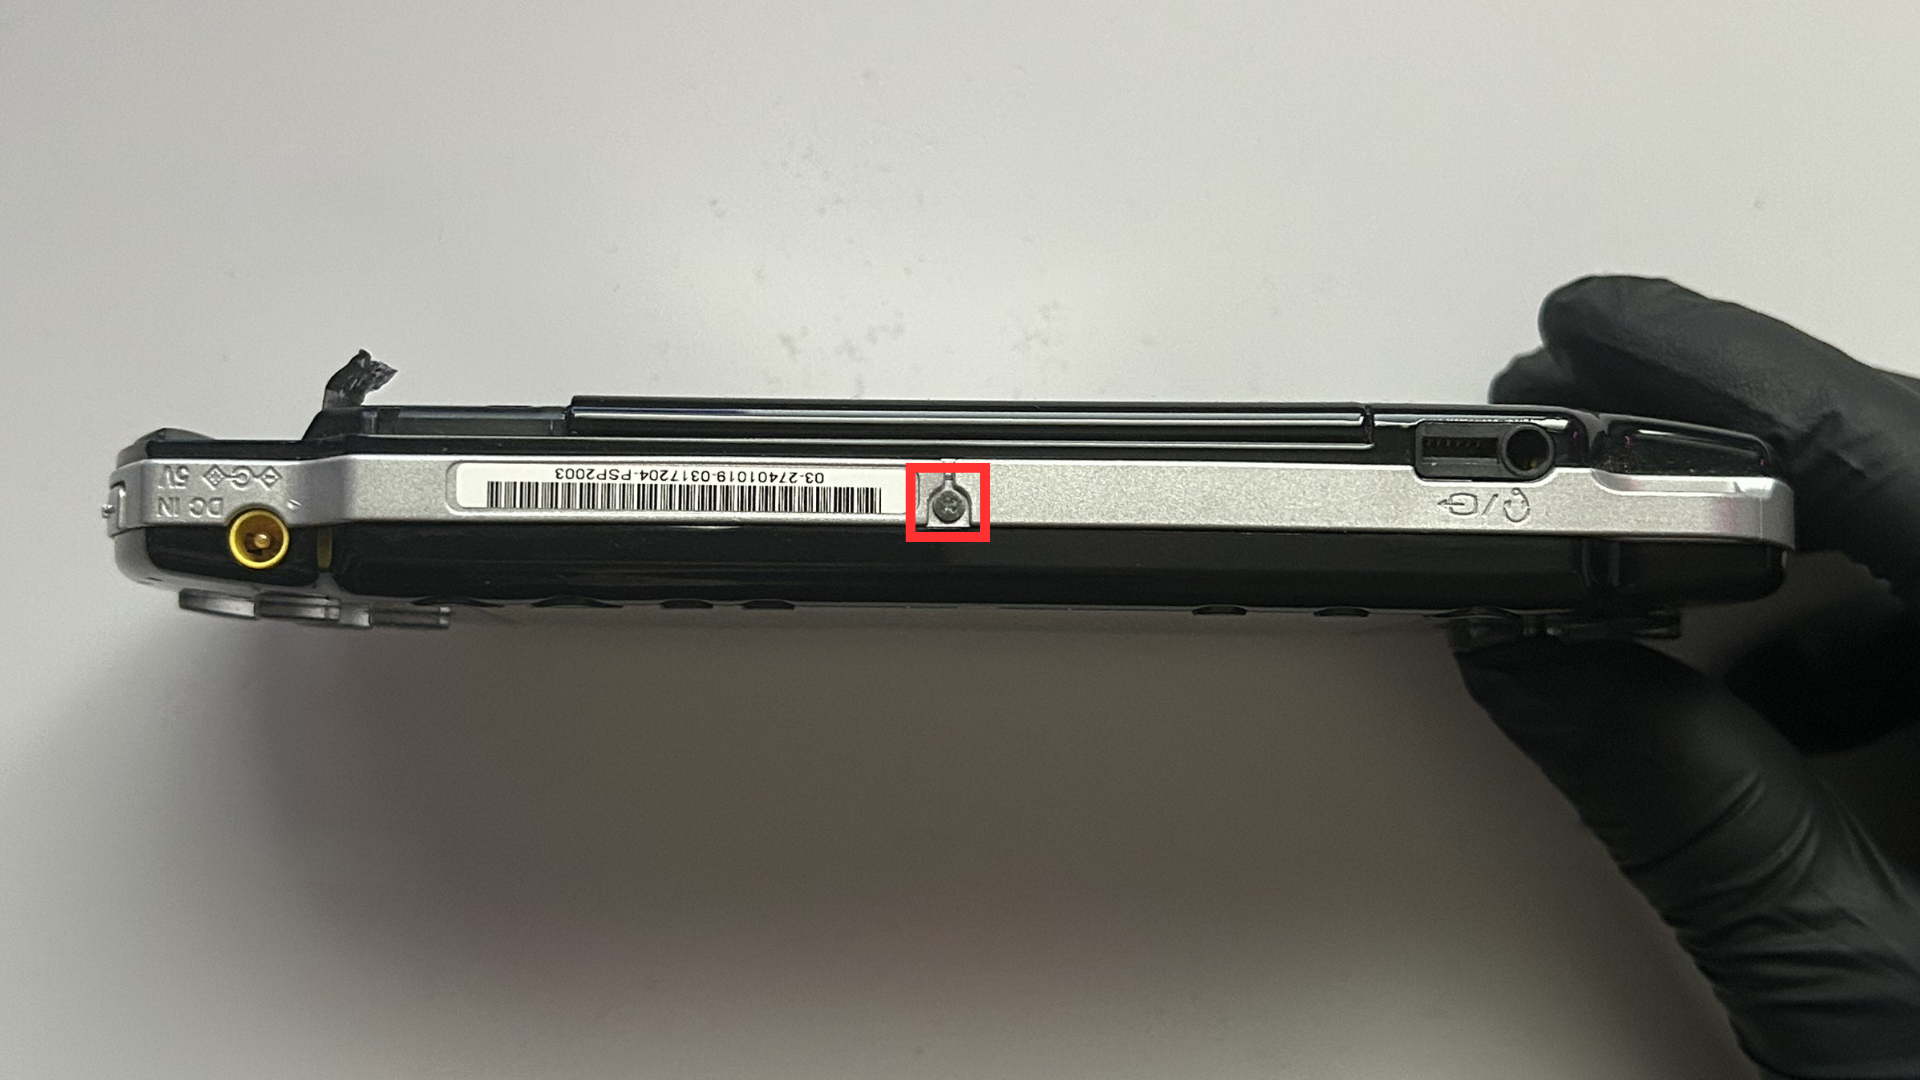
- Remove the screws located on both sides of the PSP.
- Inside the battery compartment, carefully peel back the lower sticker to reveal the hidden screw. Remove this screw along with the visible screw at the top of the compartment.
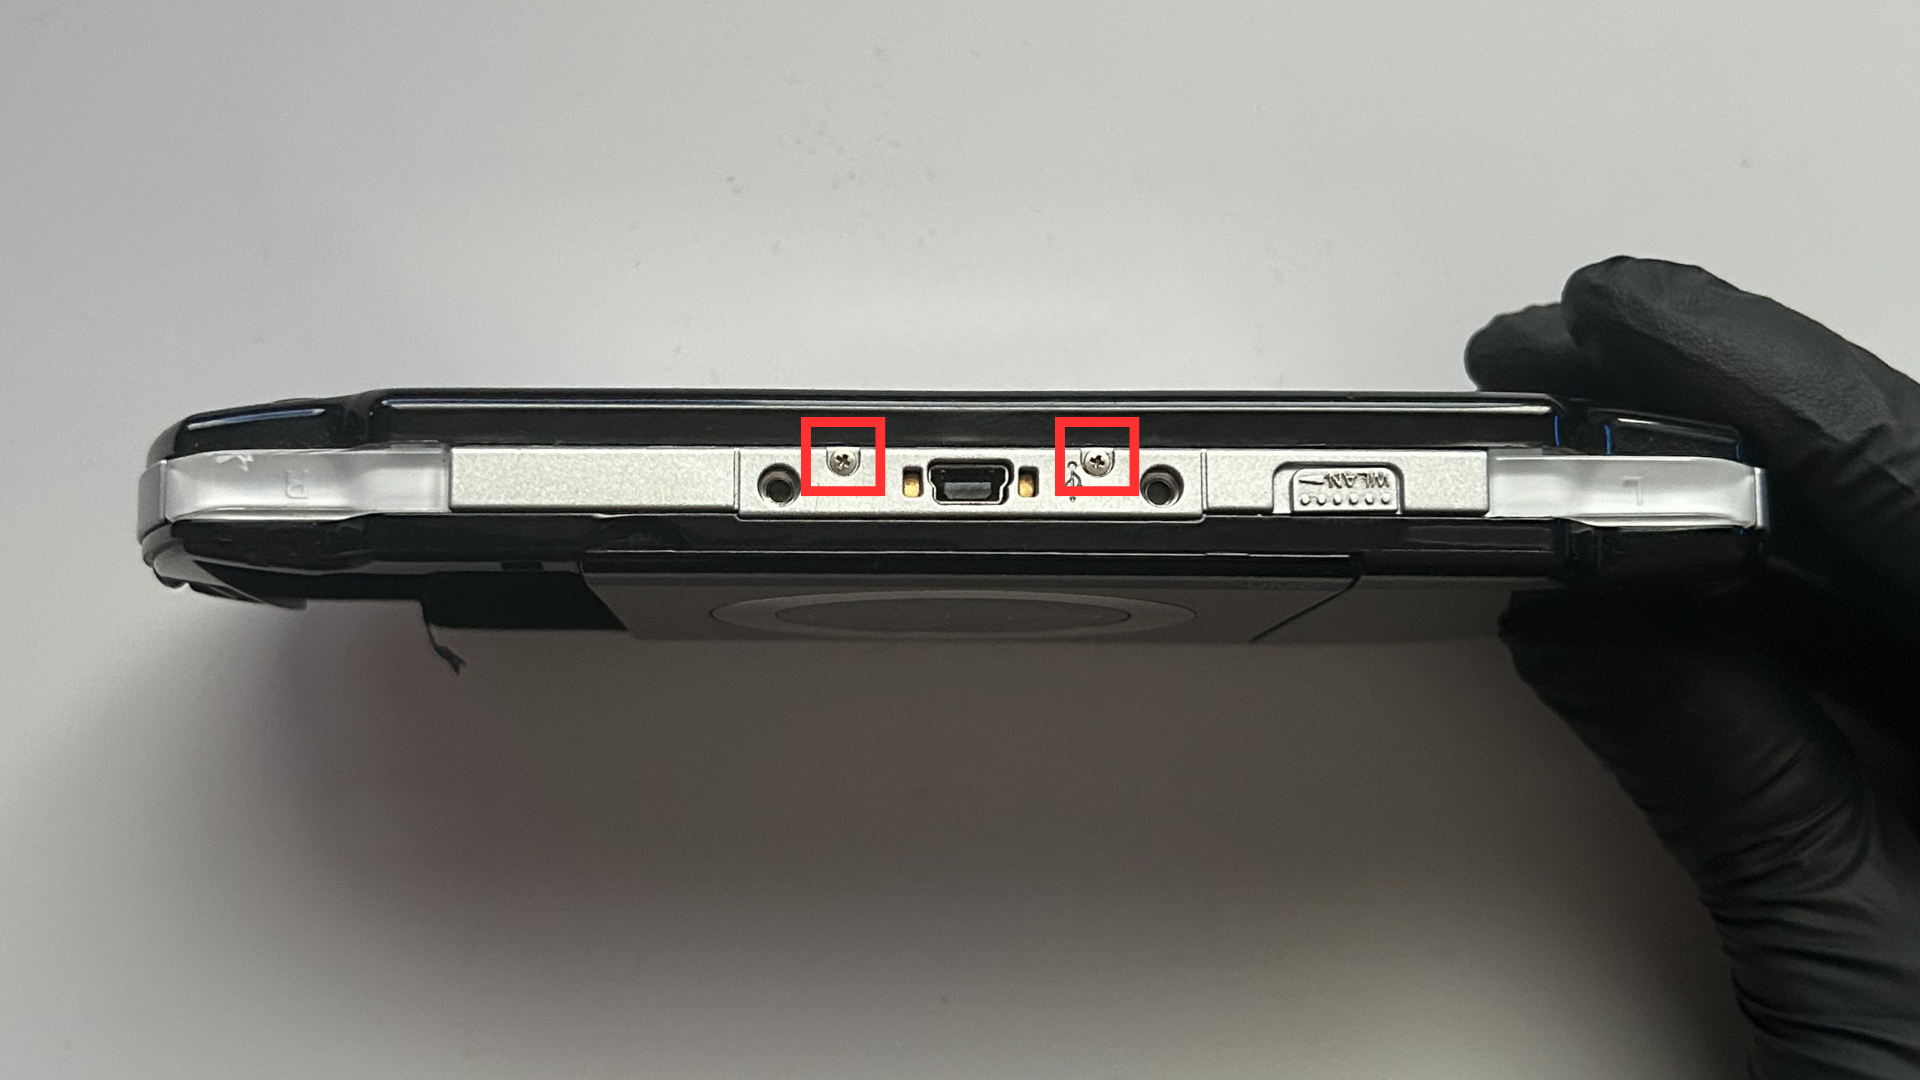
- Remove the two screws along the top edge of the PSP and the single screw along the bottom edge.
Step 2 – Remove the front faceplate
- Turn the PSP back over so the screen is facing upwards.
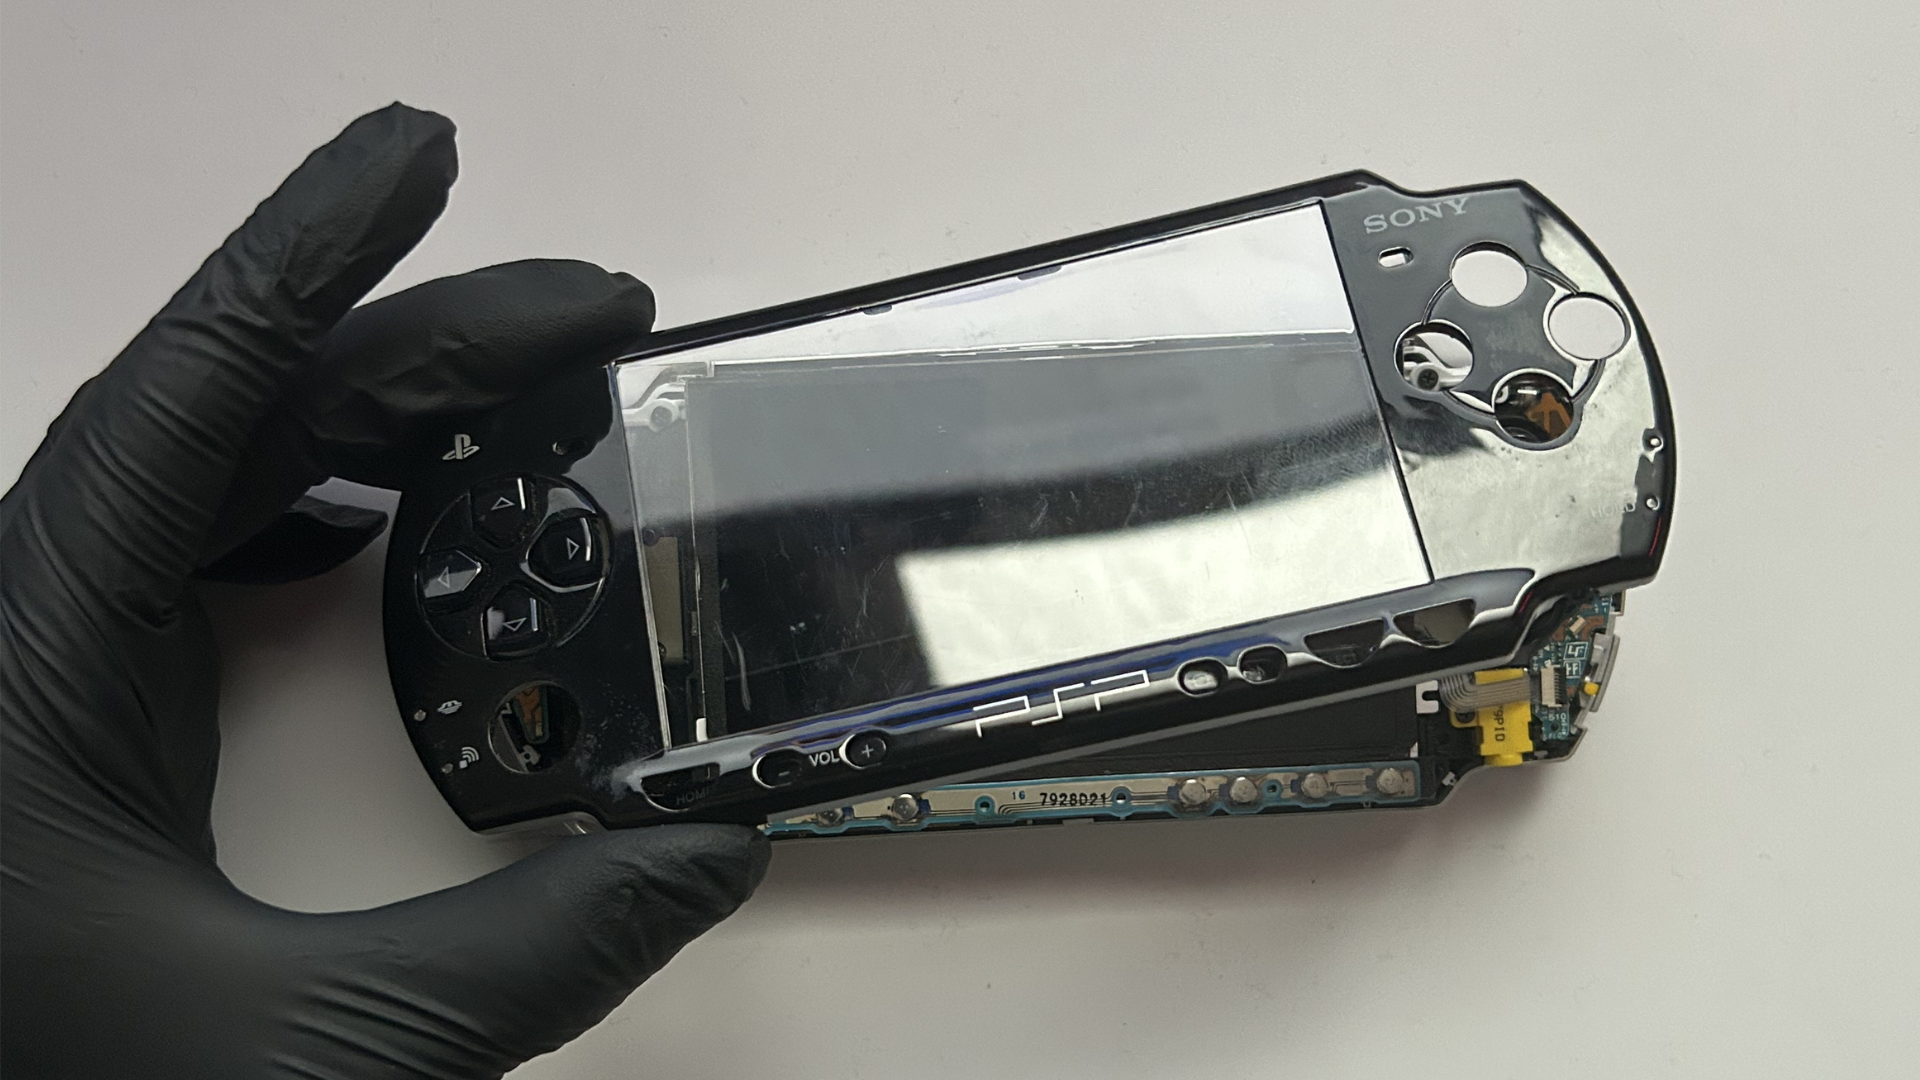
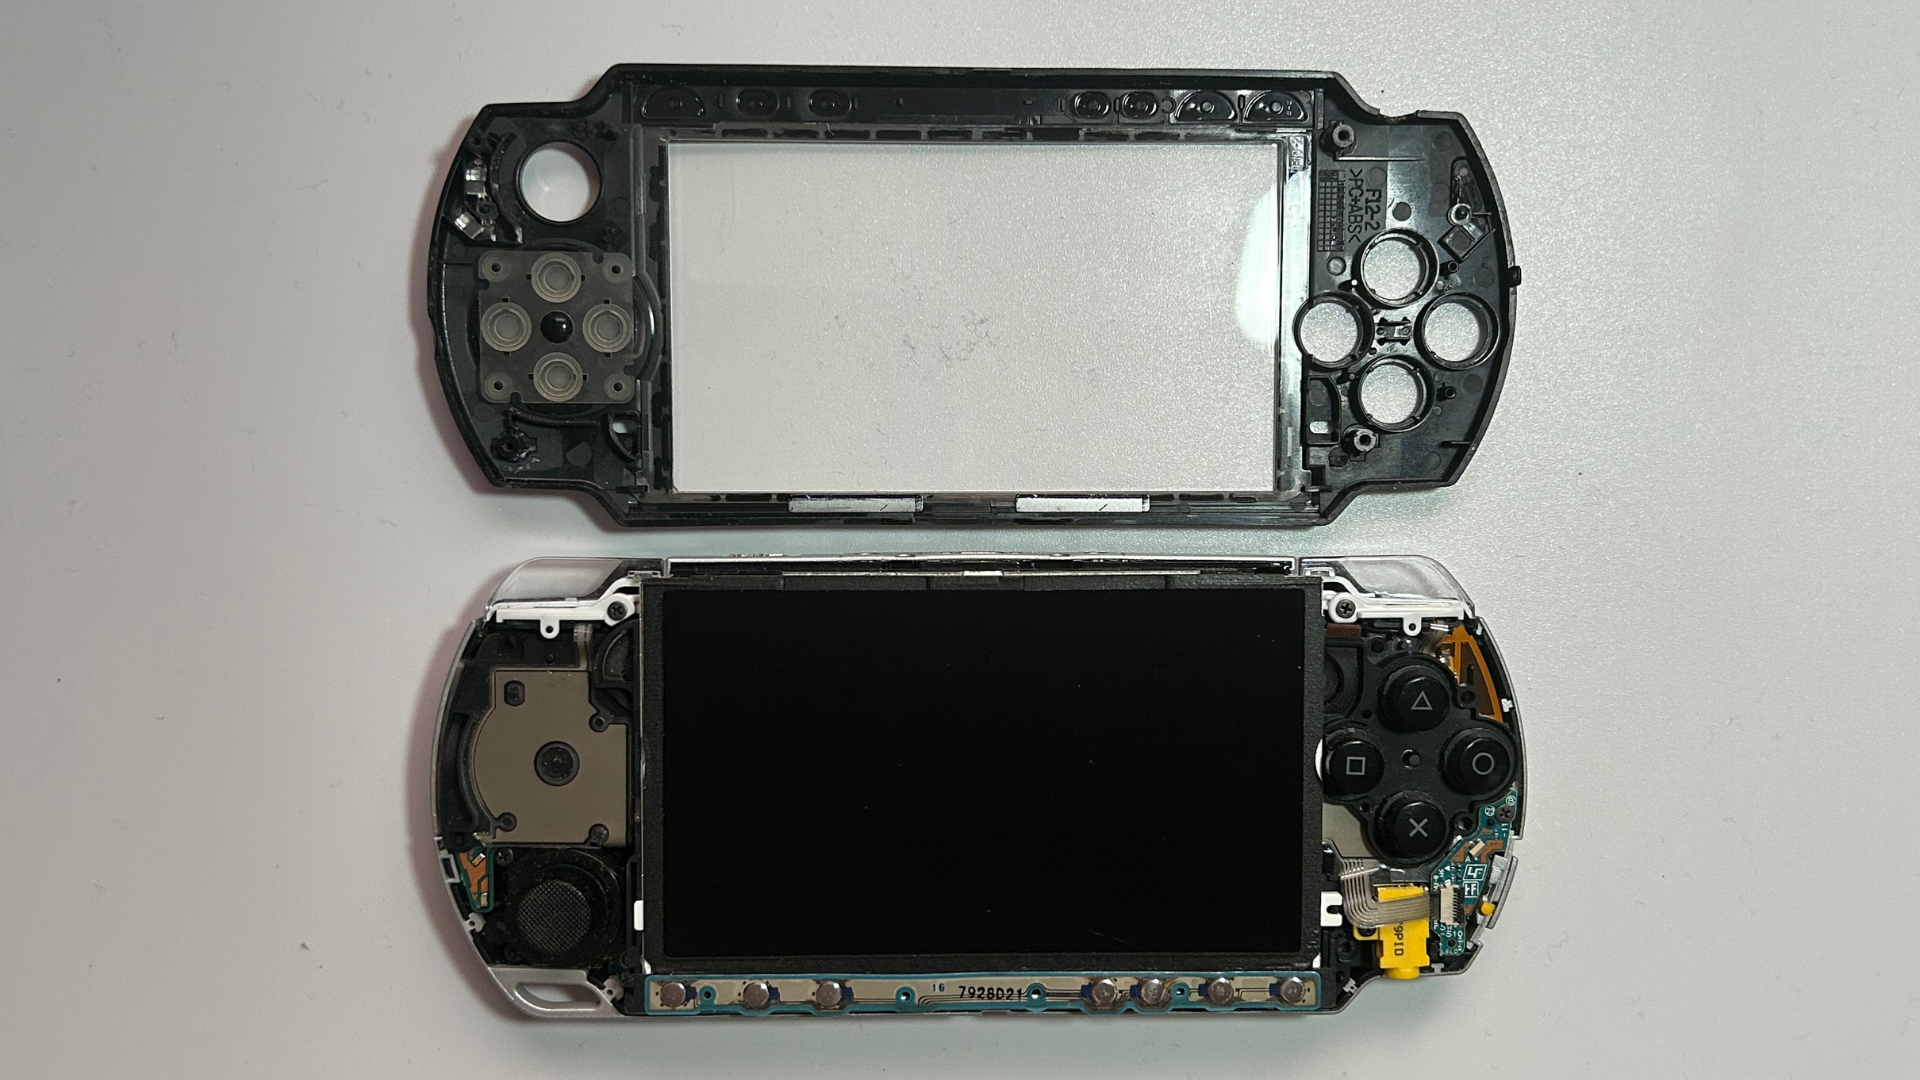
- Gently lift and remove the front faceplate using a plastic pry tool. Work slowly around the edges to avoid damaging or cracking the plastic.
- Set the faceplate aside somewhere clean and safe.
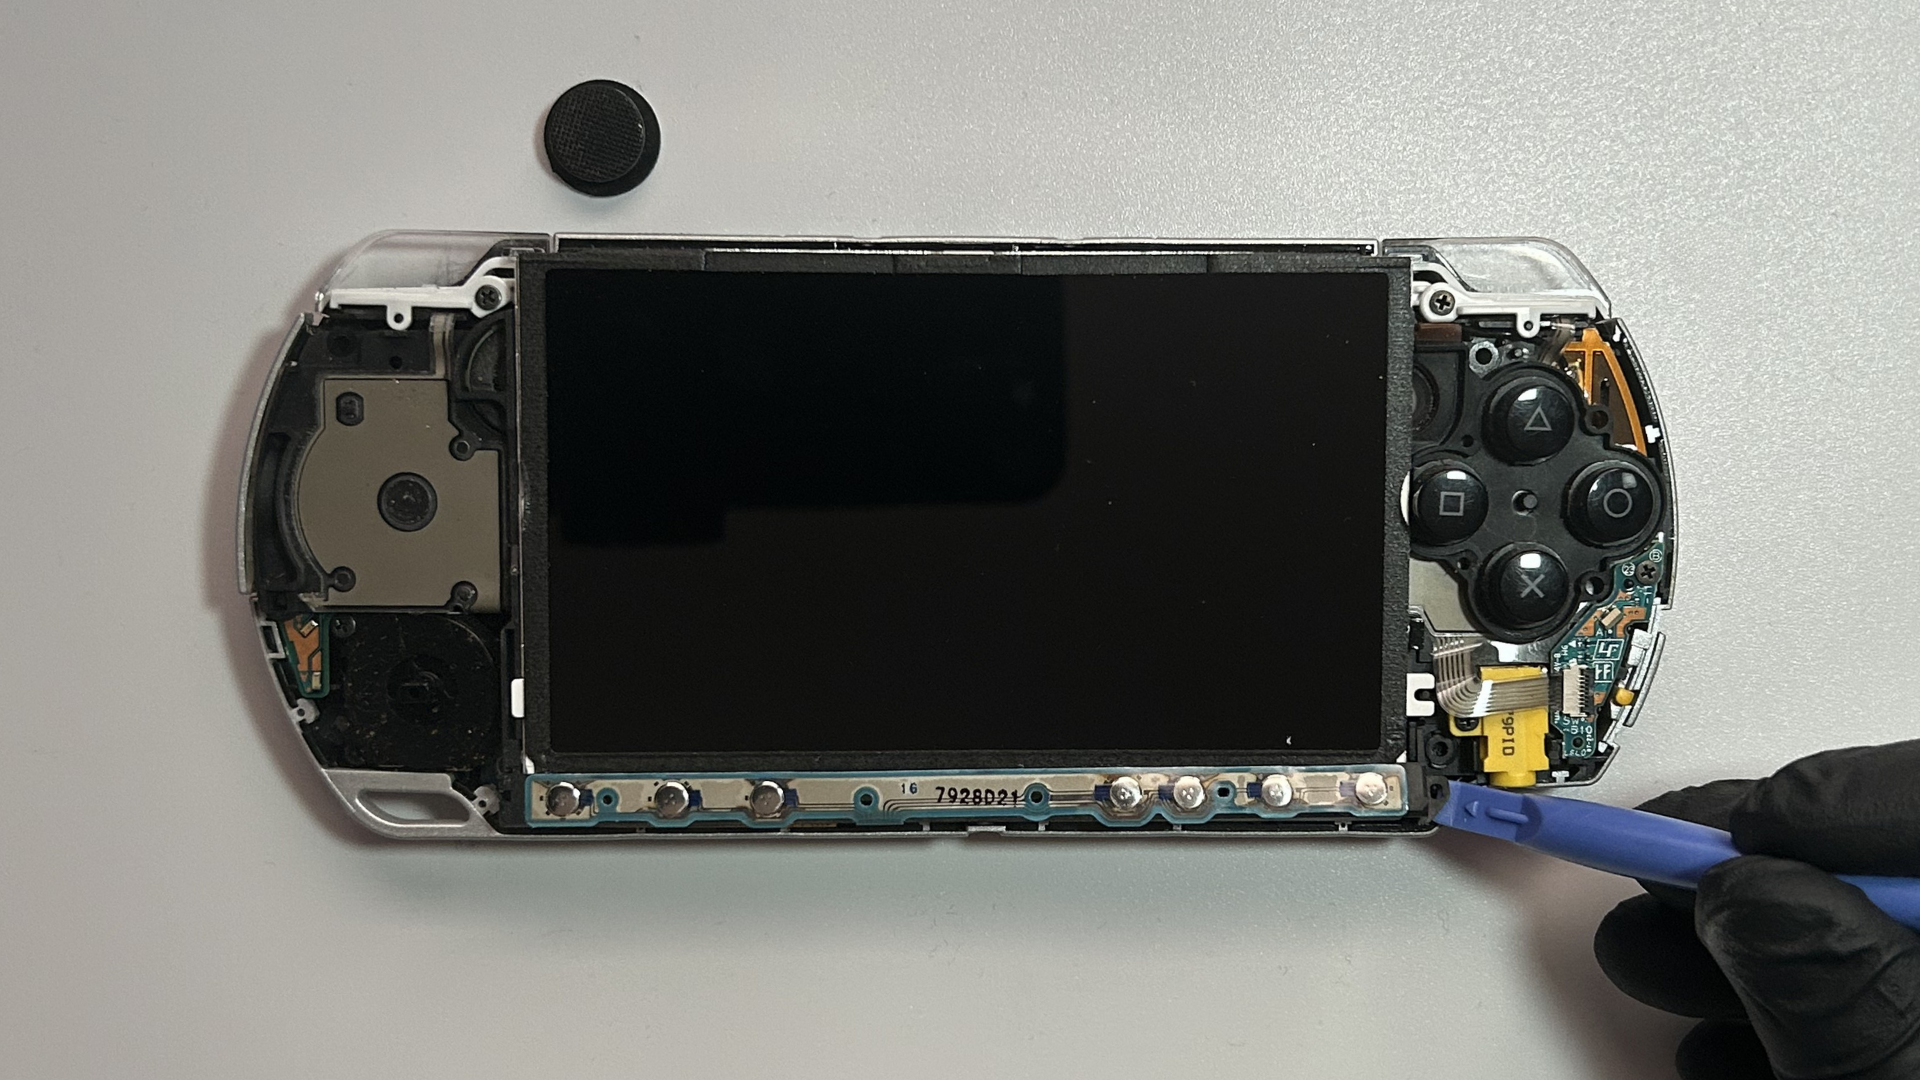
Step 3 – Release the control button strip from the LCD
- Locate the control button strip running along the bottom edge of the LCD.
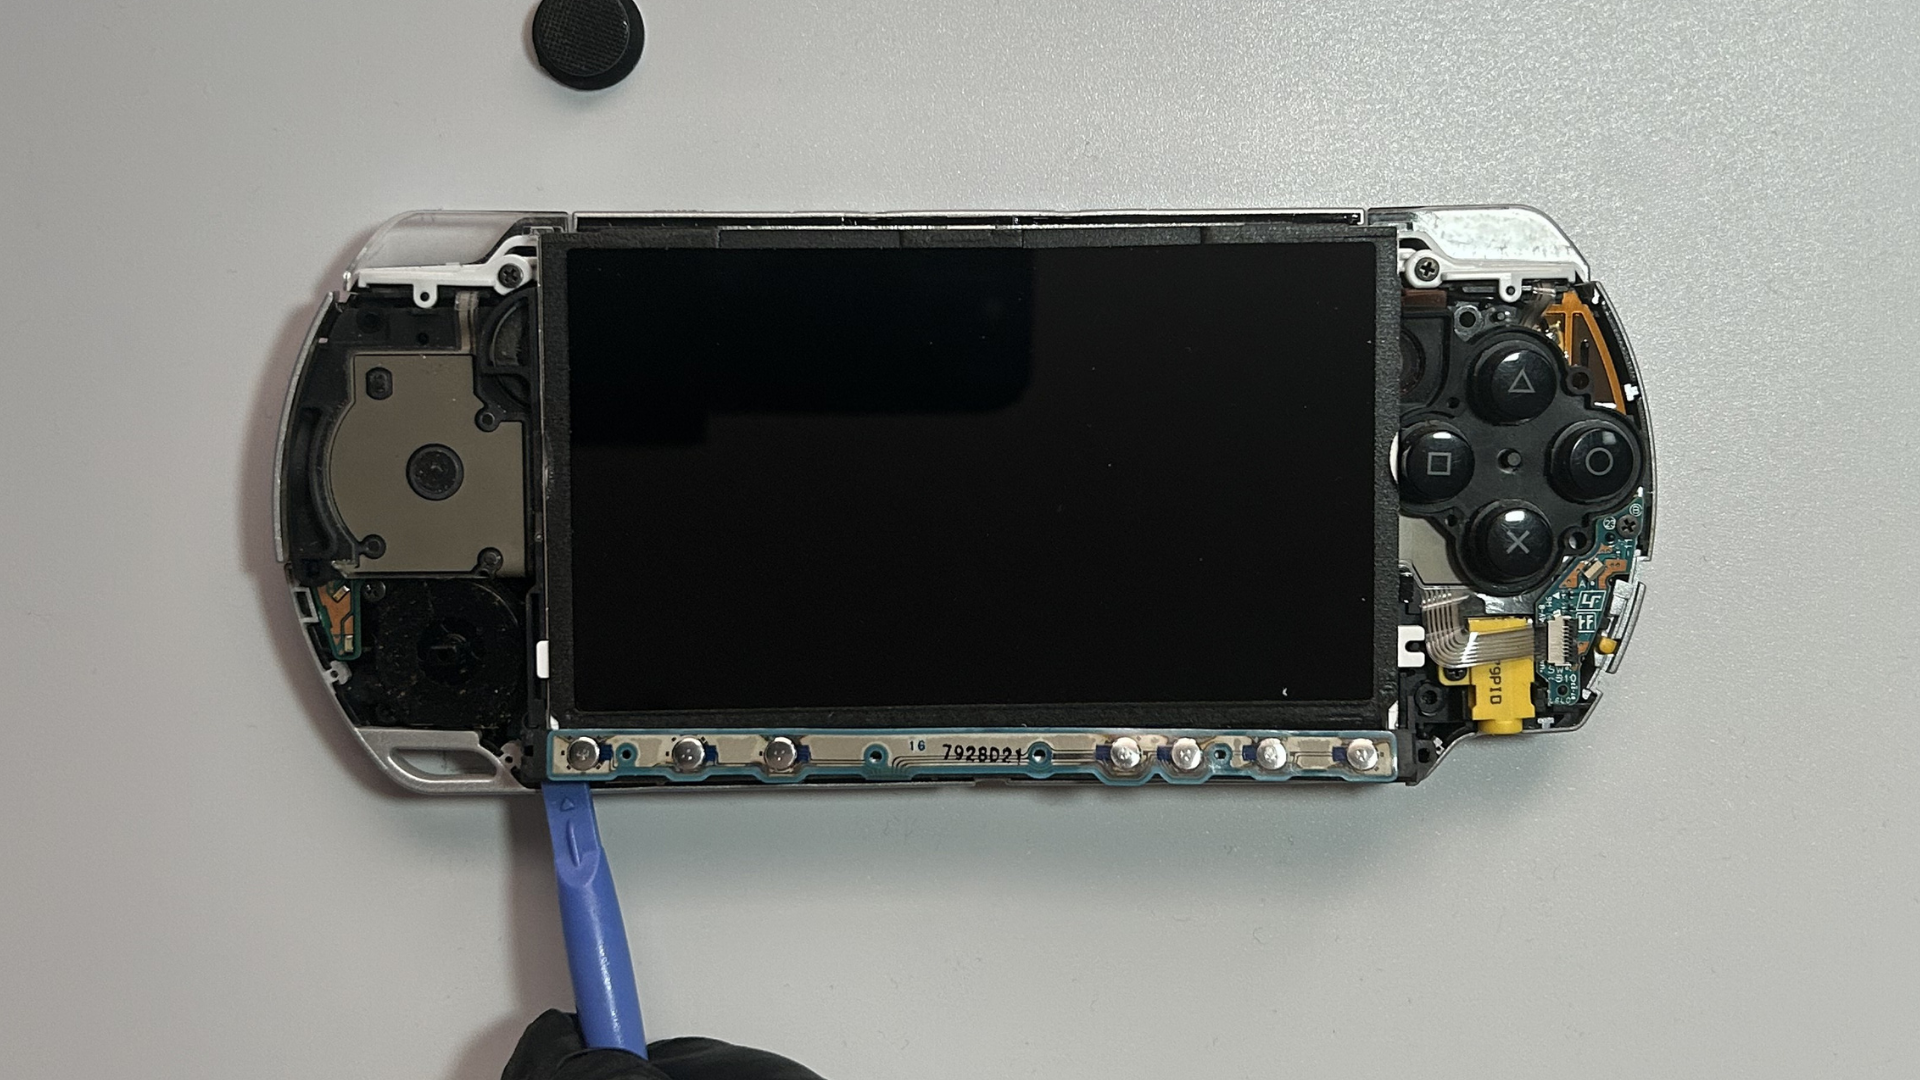
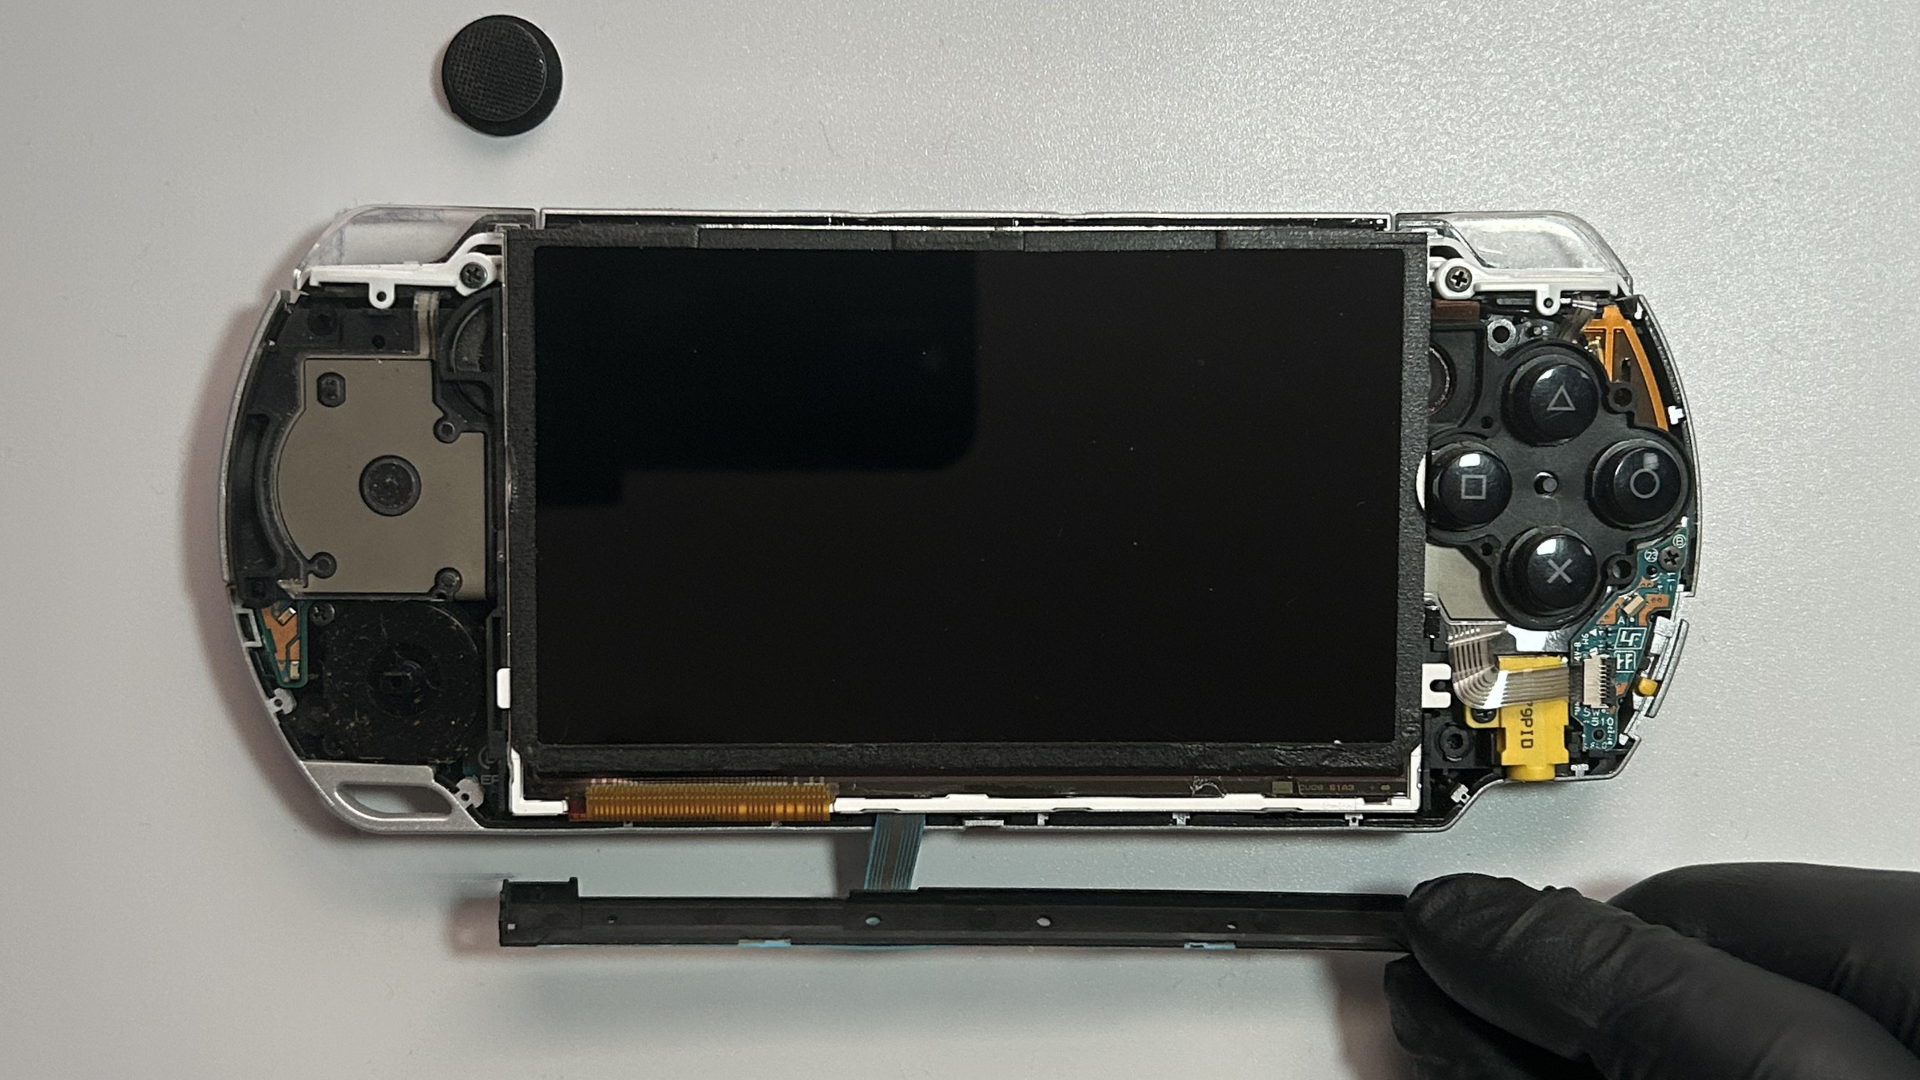
- Using a plastic spudger or pry tool, carefully lift one end of the plastic control button strip away from the LCD frame.
- Move to the opposite end and carefully release it in the same way.
- Once both ends have been released, gently move the control button strip away from the bottom edge of the LCD so that the screen can be lifted in the next step.
Step 4 – Lift the LCD
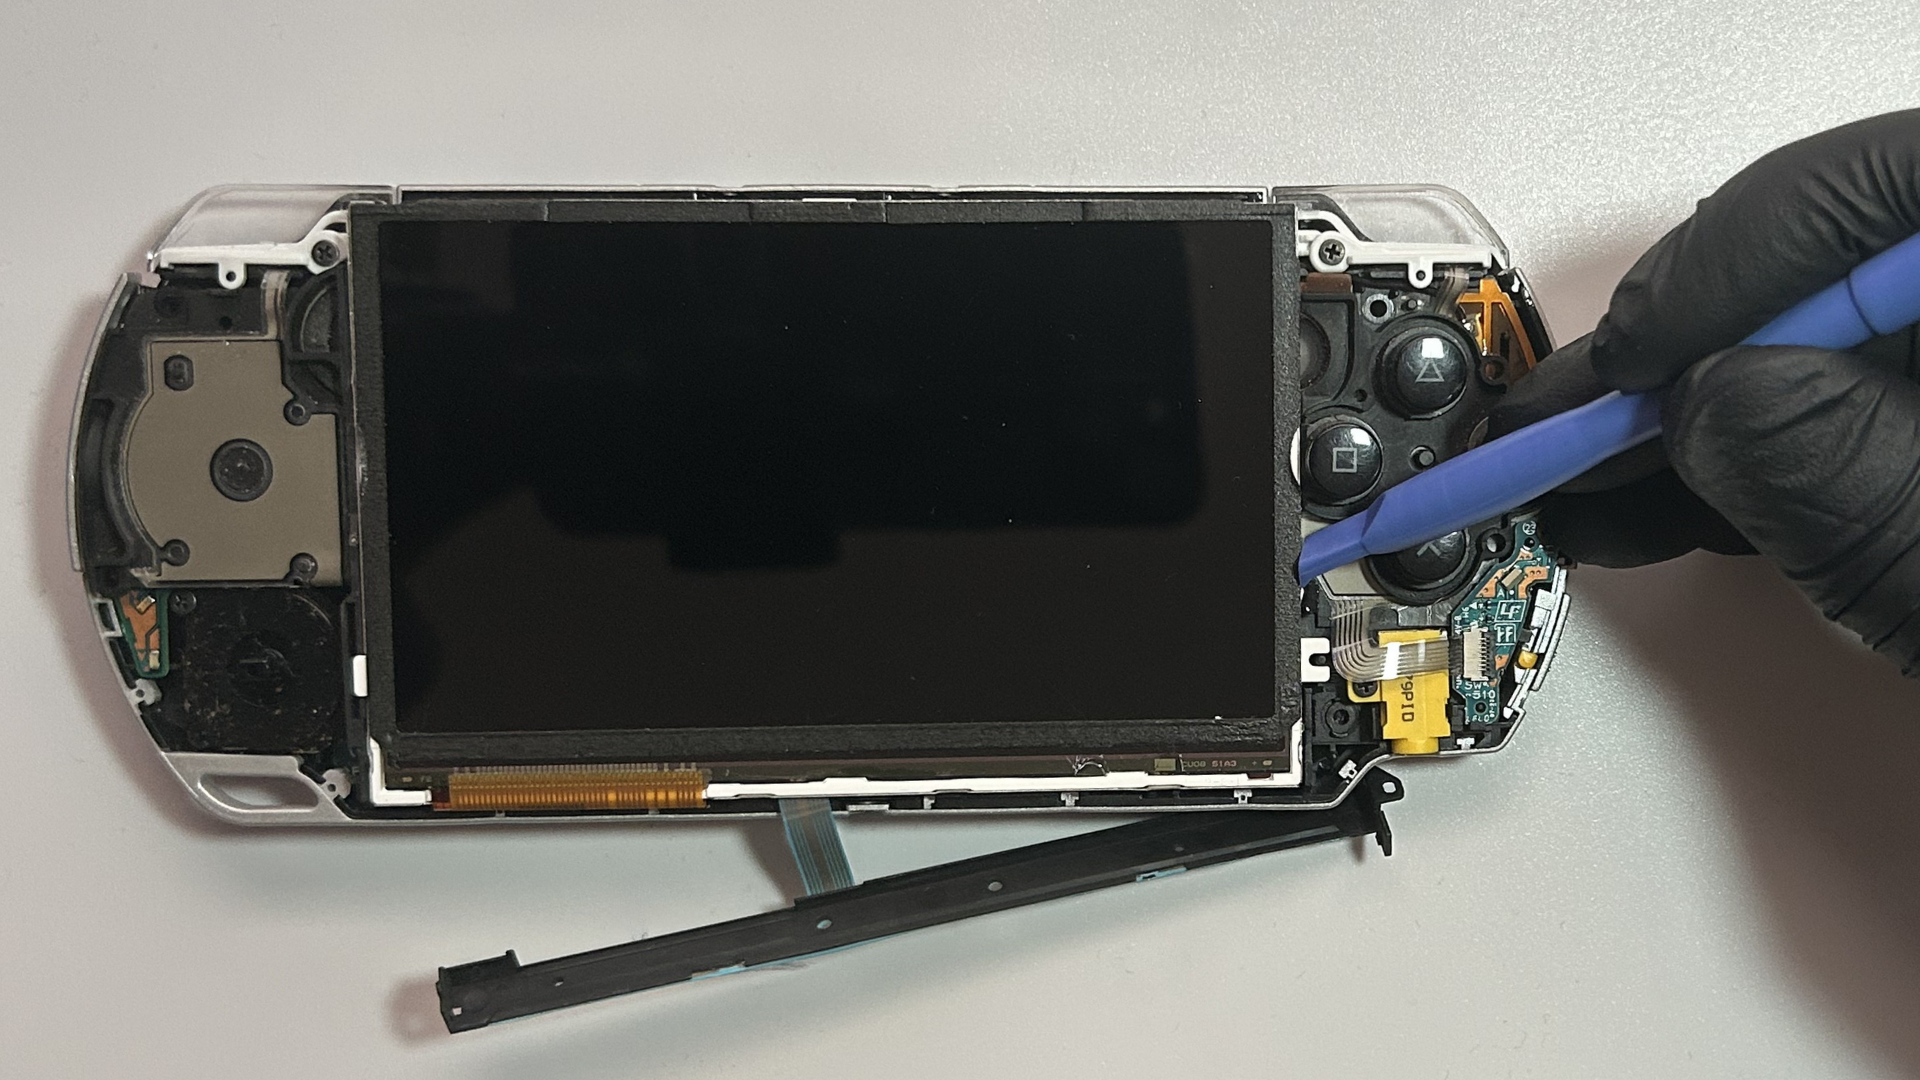
- Carefully begin lifting the LCD from the top edge.
- If the LCD is difficult to lift, use your plastic pry tool to gently release the small retaining clip on the right side of the LCD while lifting the screen.
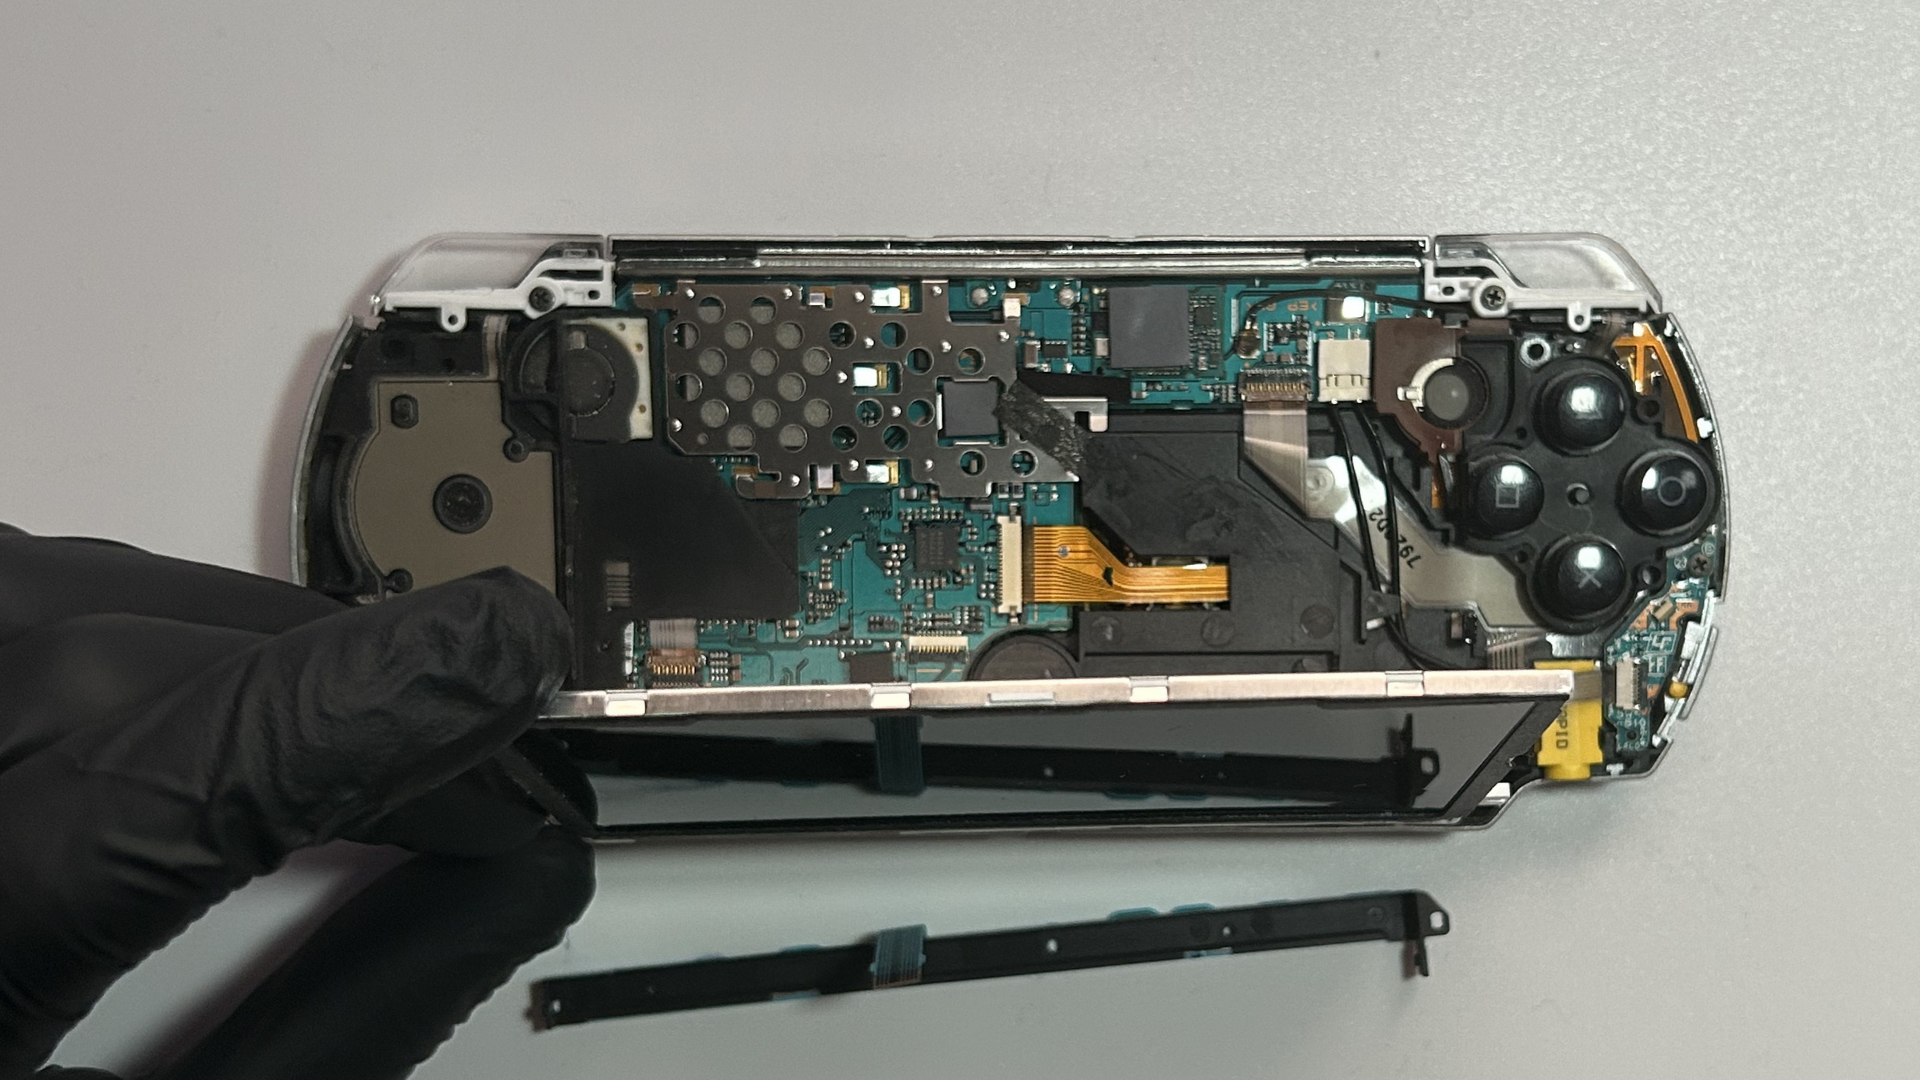
- Lift the LCD only as far as necessary to gain access underneath it. You do not need to disconnect the LCD ribbon cables for this repair.
- Carefully support the LCD while it is lifted and avoid pulling, creasing or placing tension on the ribbon cables.
Step 5 – Remove the thumbstick retaining clip
- With the LCD carefully lifted and supported, locate the Phillips screw securing the black plastic thumbstick retaining clip.
- Remove the Phillips screw while continuing to support the LCD.
- Carefully remove the black plastic retaining clip to expose the analog thumbstick assembly underneath.
- Set the retaining clip and screw aside somewhere safe for reassembly.
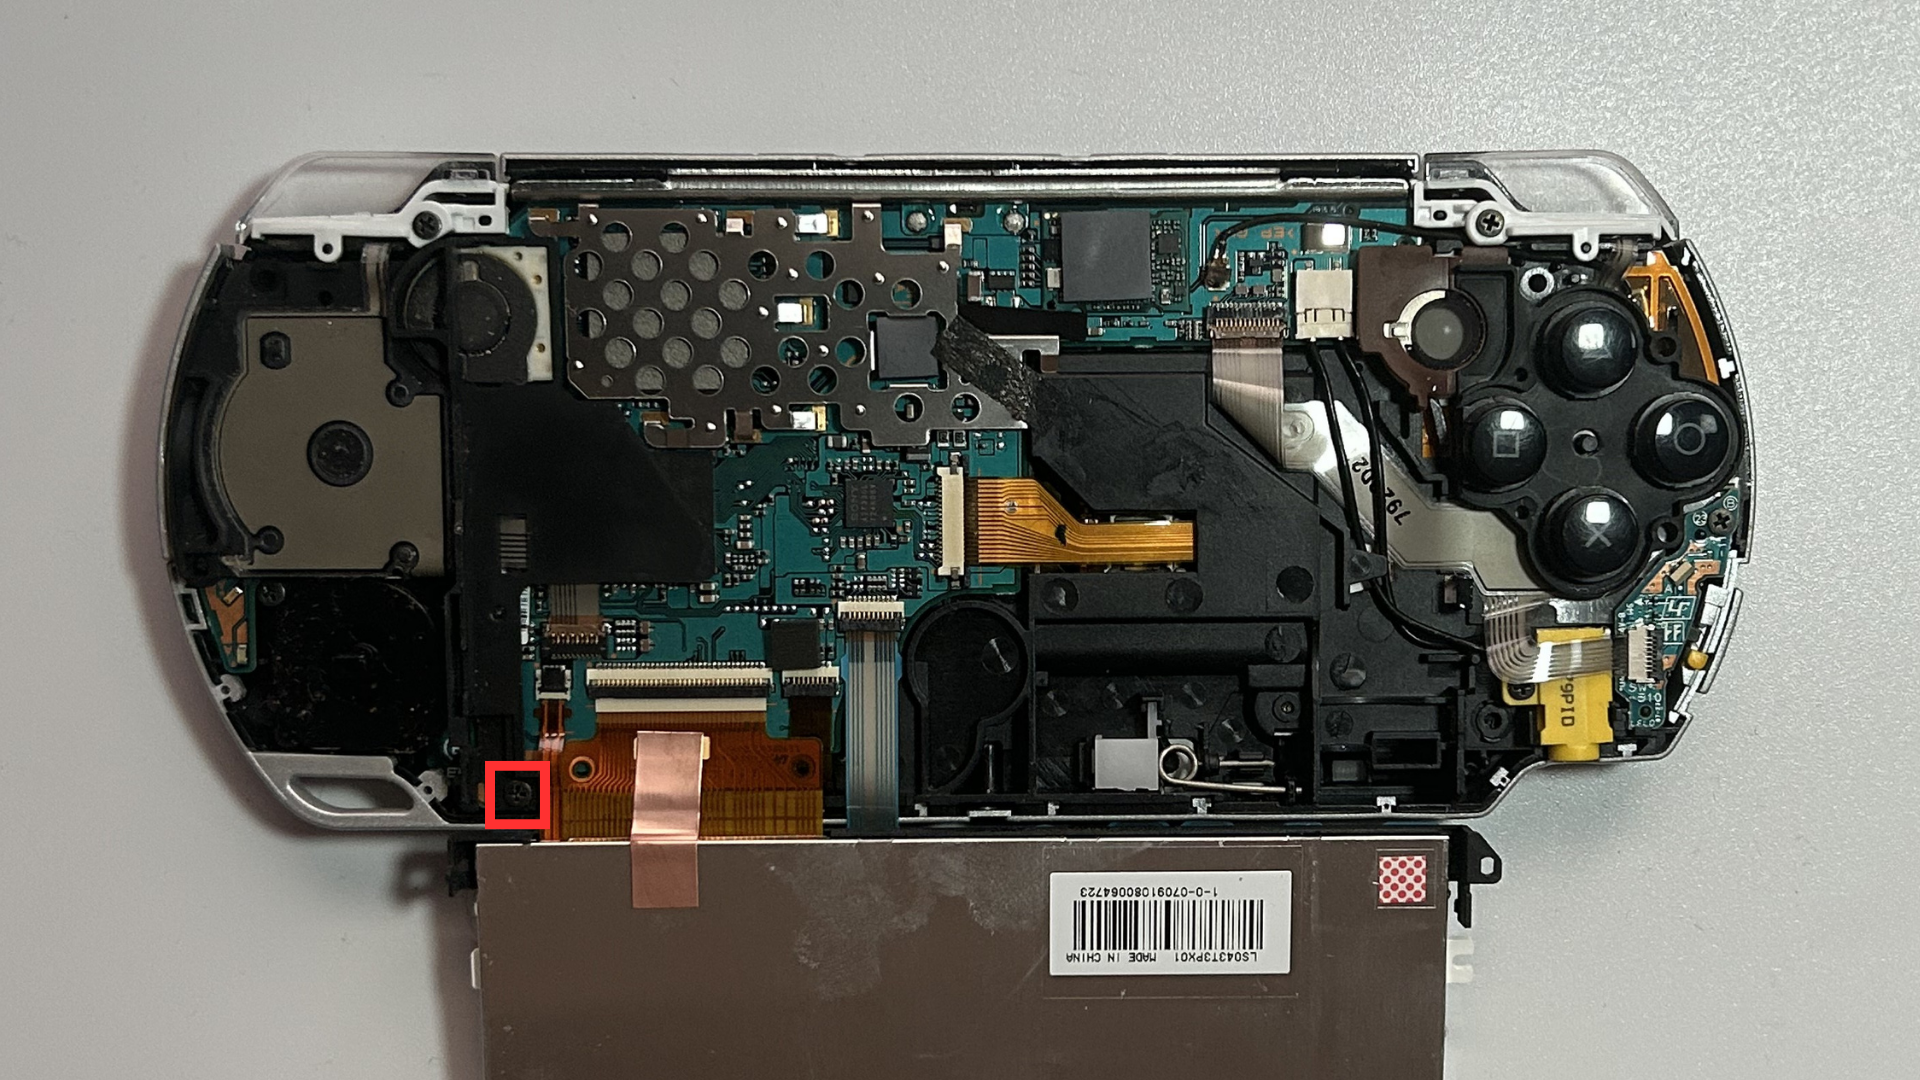
Step 6 – Remove the analog thumbstick
- With the black plastic retaining clip removed, locate the analog thumbstick assembly on the left side of the PSP.
- Take note of the position and orientation of the original thumbstick before removing it.
- Remove the screws securing the analog thumbstick assembly.
- Carefully lift the analog thumbstick assembly out of its position.
Step 7 – Install the replacement analog thumbstick
- Compare the replacement thumbstick with the original and make sure it is the correct type for the PSP 2000.
- Position the replacement analog thumbstick in the same orientation as the original.
- Make sure the thumbstick assembly is sitting flat and correctly aligned.
- Reinstall the screws securing the analog thumbstick assembly.
- Refit the black plastic thumbstick retaining clip over the assembly.
- Reinstall the Phillips screw securing the black plastic retaining clip.
Step 8 – Reassemble and test the PSP
- Carefully lower the LCD back into its original position and make sure it sits flat and correctly within the frame.
- Reposition the control button strip along the bottom edge of the LCD and carefully press it back into place.
- Check that the control button strip and LCD are both correctly seated before reinstalling the faceplate.
- Refit the front faceplate and make sure it sits correctly around the console.
- Reinstall all of the outer screws in their original positions.
- Reinsert the battery and refit the battery cover.
- Power on the PSP.
- Test the analog thumbstick in a game or menu where movement can be checked in multiple directions.
- Test the buttons along the bottom of the LCD to confirm that the control button strip is also working correctly.
Conclusion
Replacing the analog thumbstick on a Sony PSP 2000 requires removing the front faceplate, releasing the control button strip and carefully lifting the LCD to access the thumbstick assembly underneath.
A replacement thumbstick can help resolve problems such as stick drift, inconsistent movement, physical damage or a thumbstick that no longer responds correctly. Take particular care when lifting the LCD and handling the control button flex cable during the repair.
Once the PSP has been reassembled, test the thumbstick in every direction and check the front control buttons before considering the repair complete.