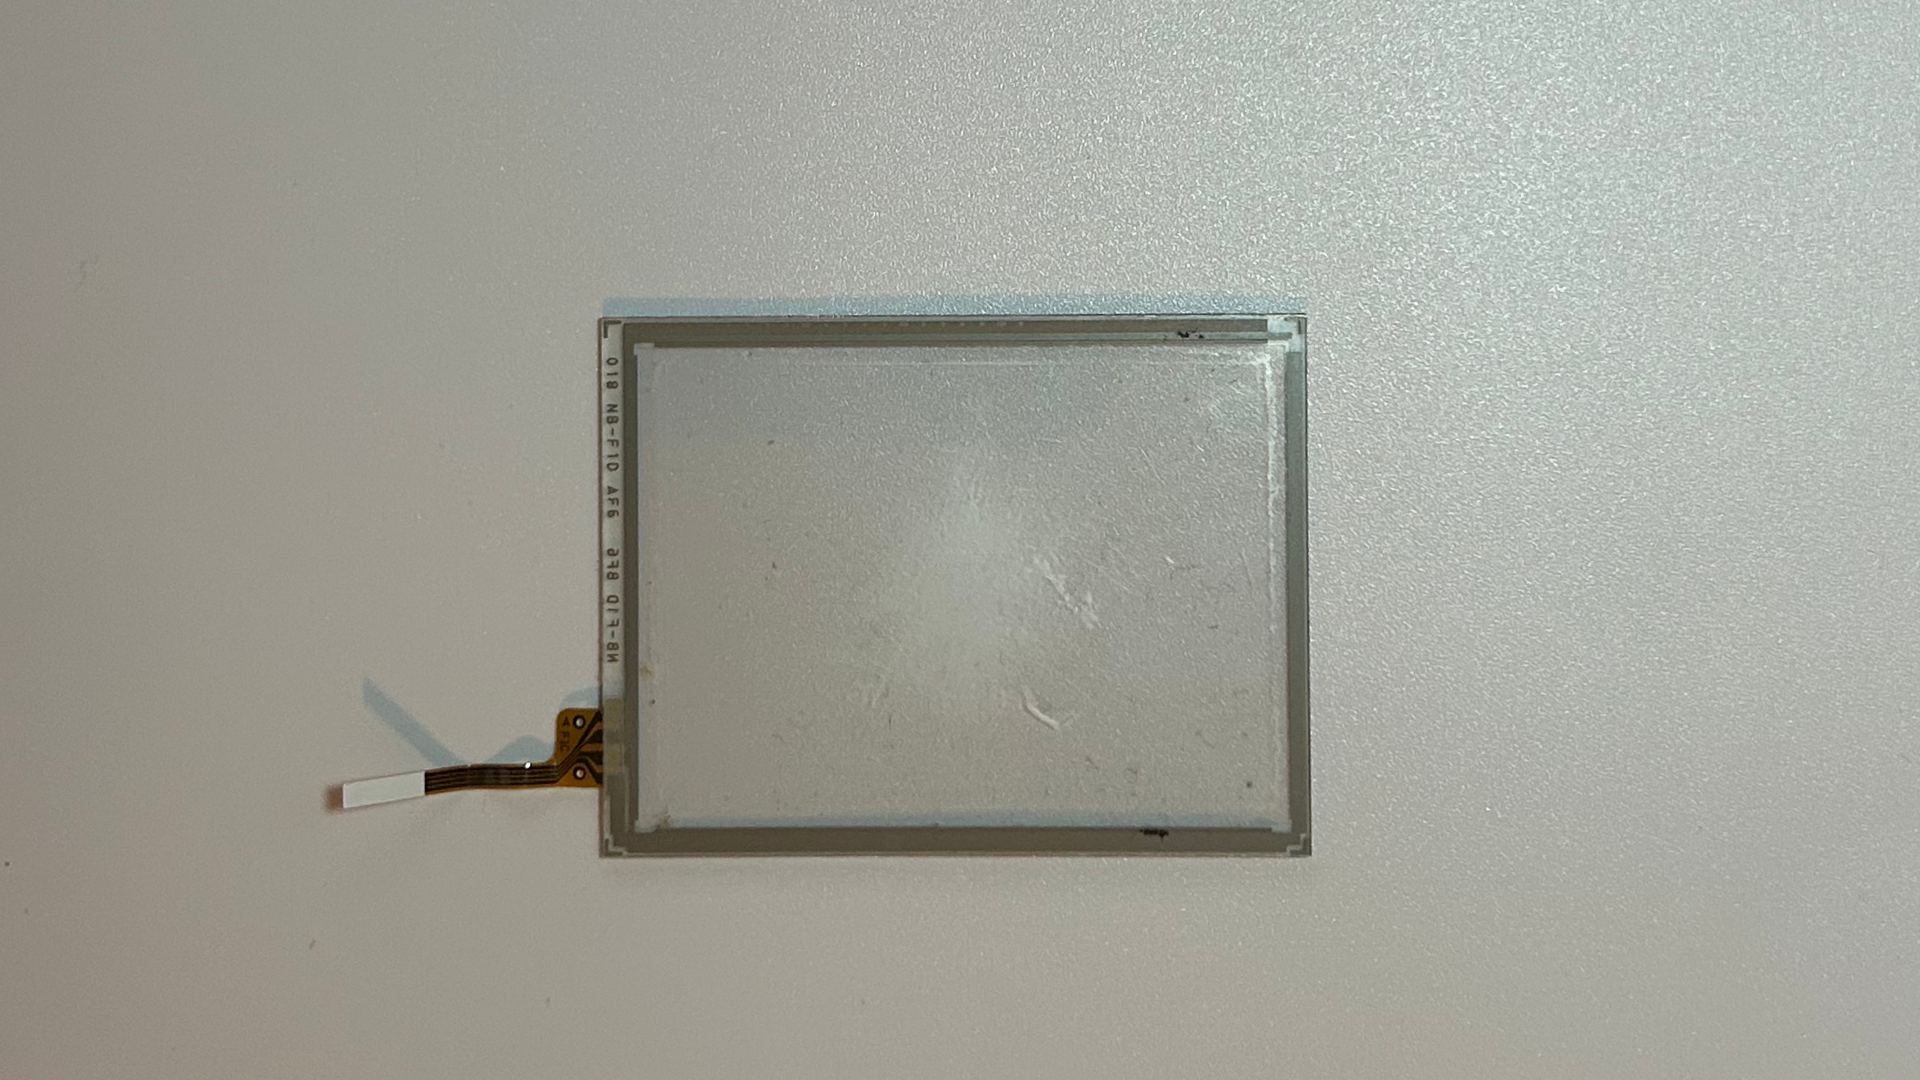
Introduction
In this guide, I'll show you how to replace the touchscreen digitizer on an original Nintendo DS. The digitizer sits over the bottom LCD and is responsible for detecting input from the stylus or your finger.
Replacing the digitizer may help if the touchscreen is cracked, damaged, unresponsive or no longer registers touch accurately.
What you'll need
- Phillips head screwdriver
- Tri-wing head screwdriver
- Plastic pick, spudger or opening tool
- Precision tweezers
- Replacement touchscreen digitizer for the original Nintendo DS
Step 1 – Remove the battery and rear shell
- Power off the Nintendo DS completely and disconnect the charger.
- Close the console and turn it over so the rear shell is facing upwards.
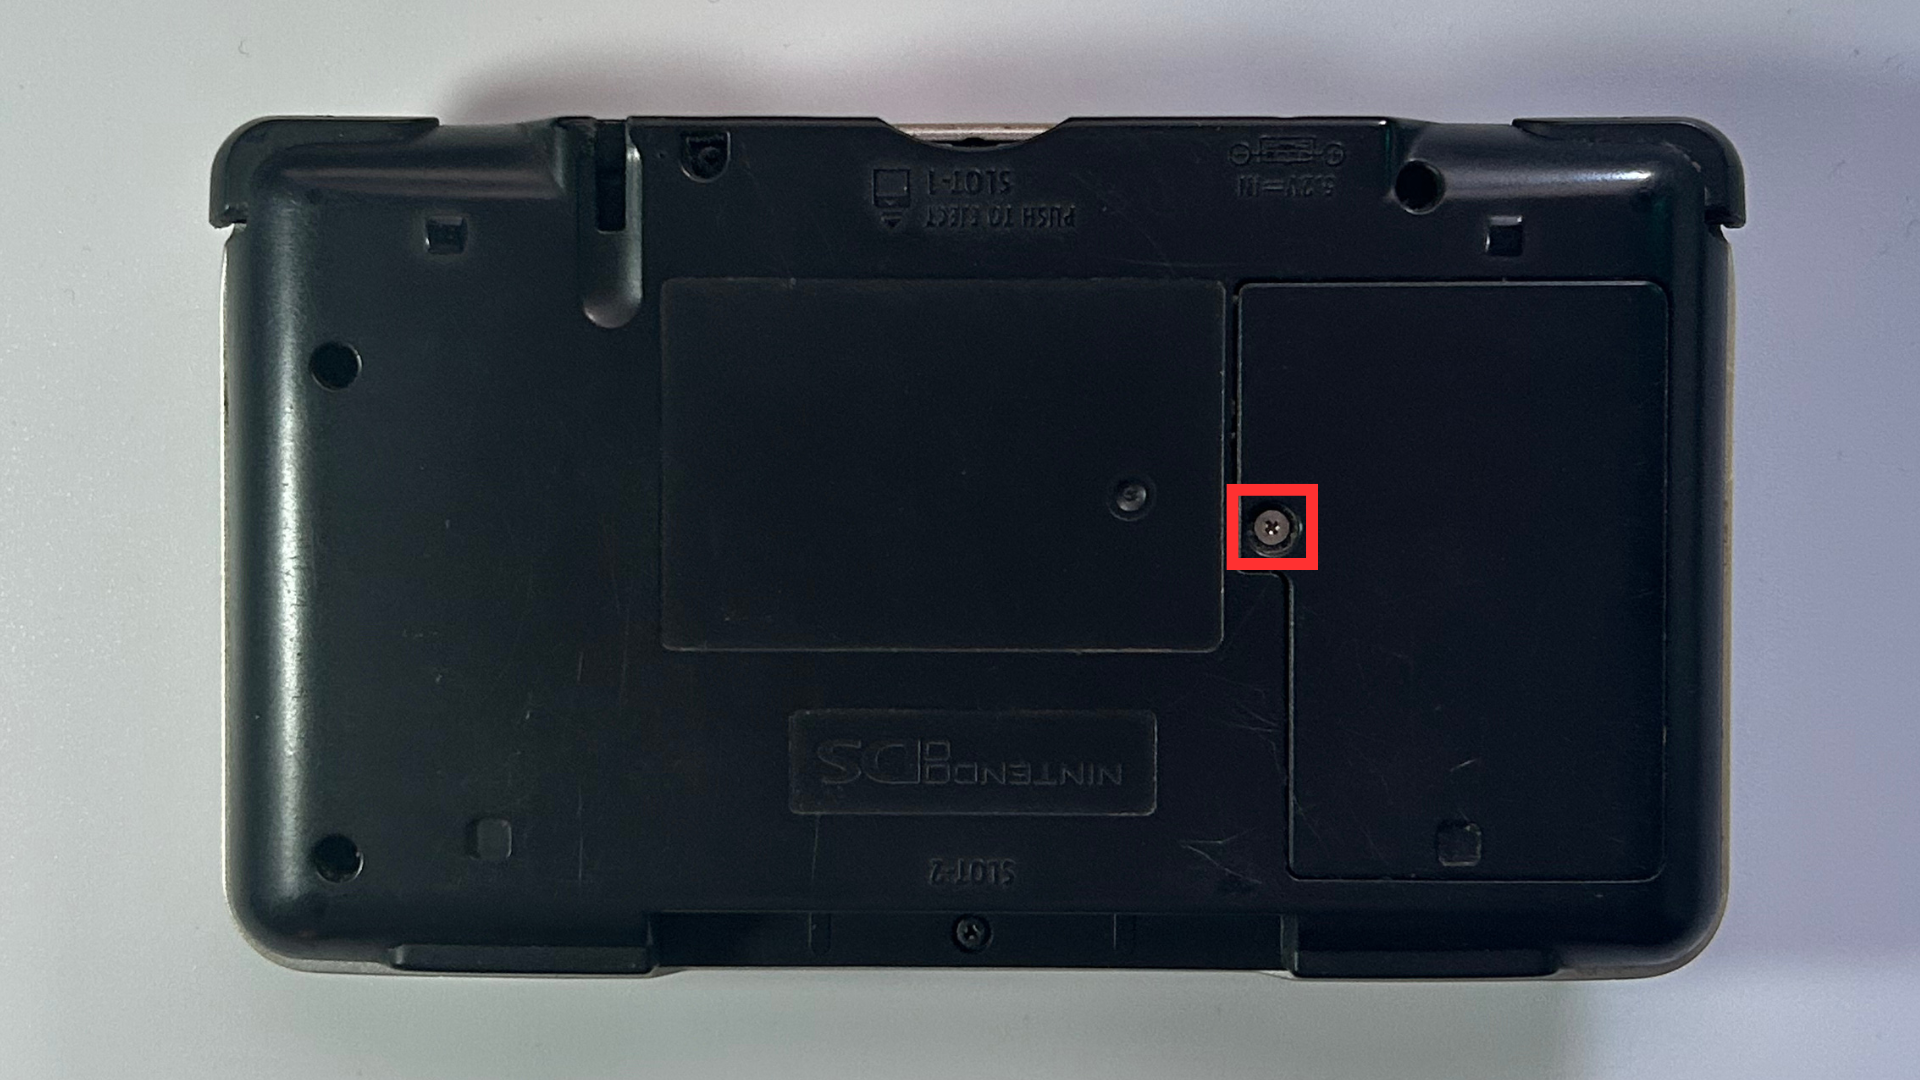
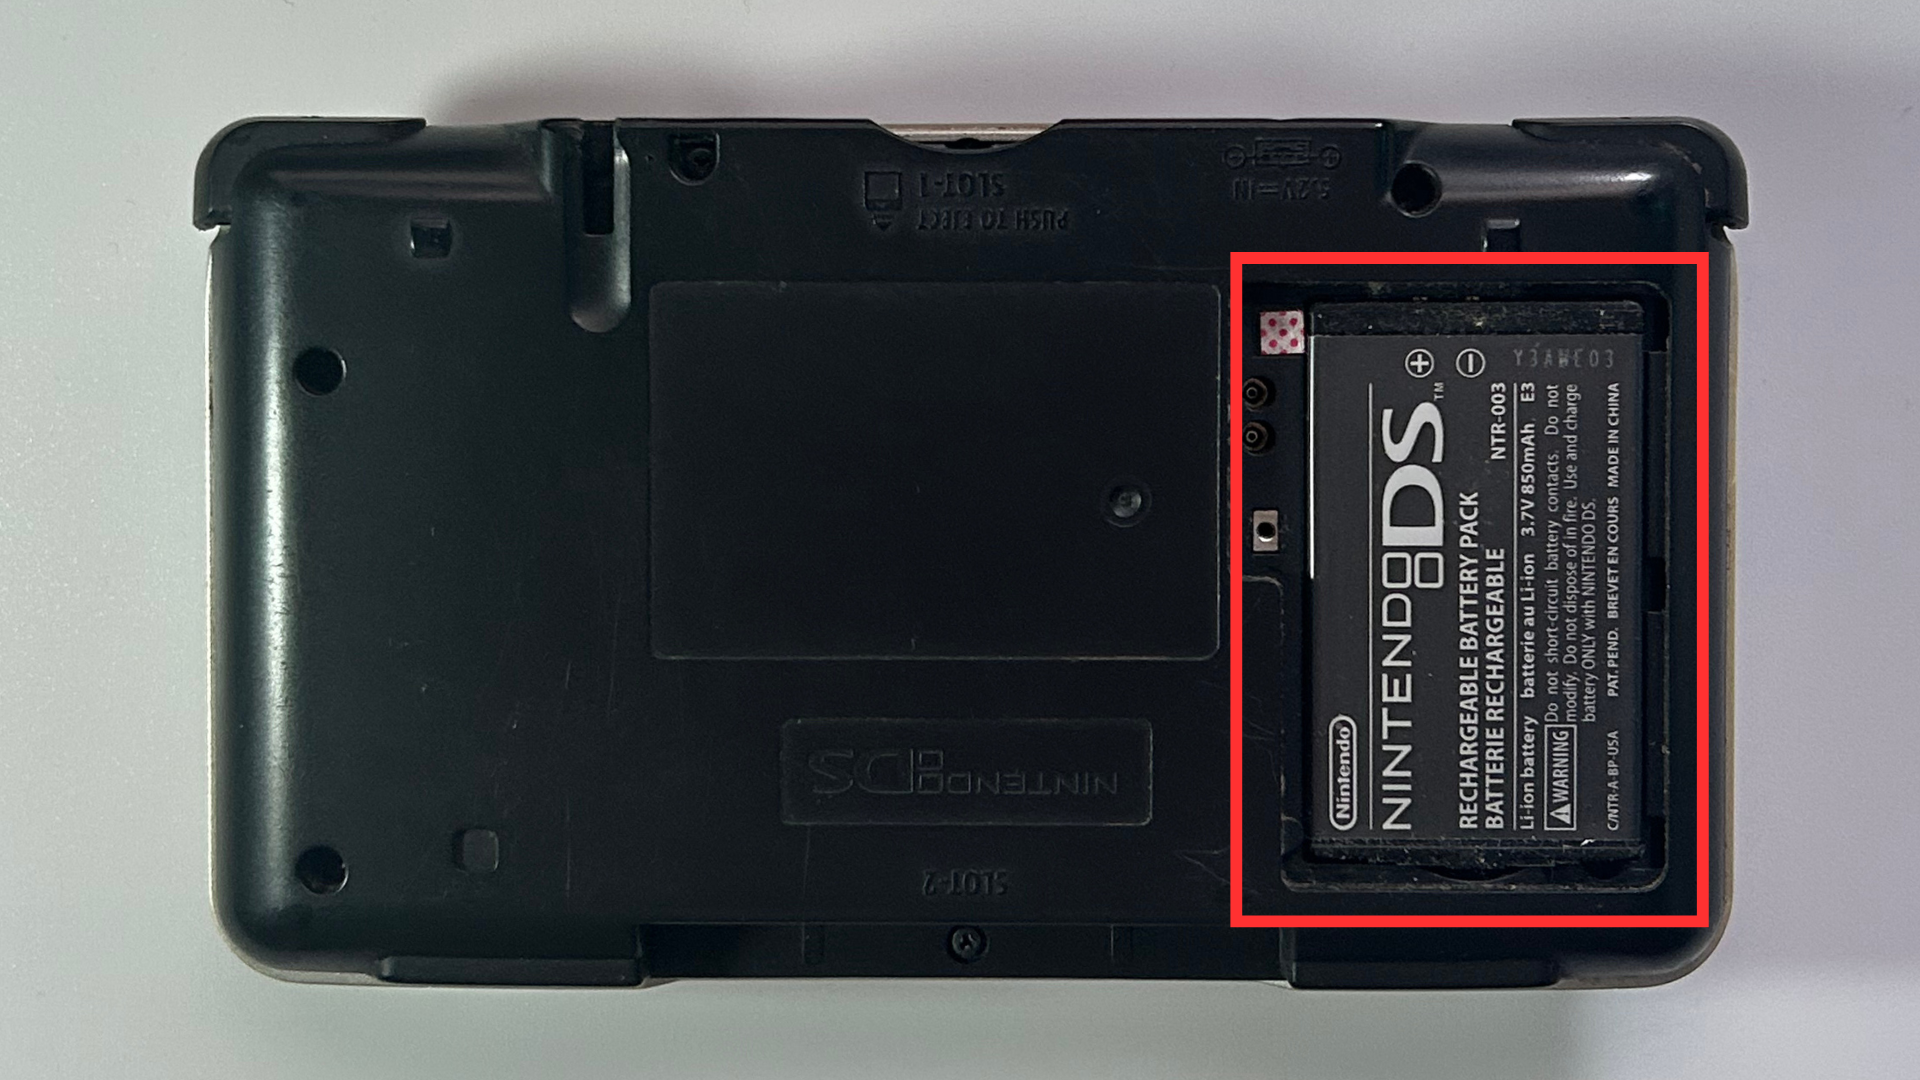
- Remove the screw securing the battery cover, then remove the cover and battery.
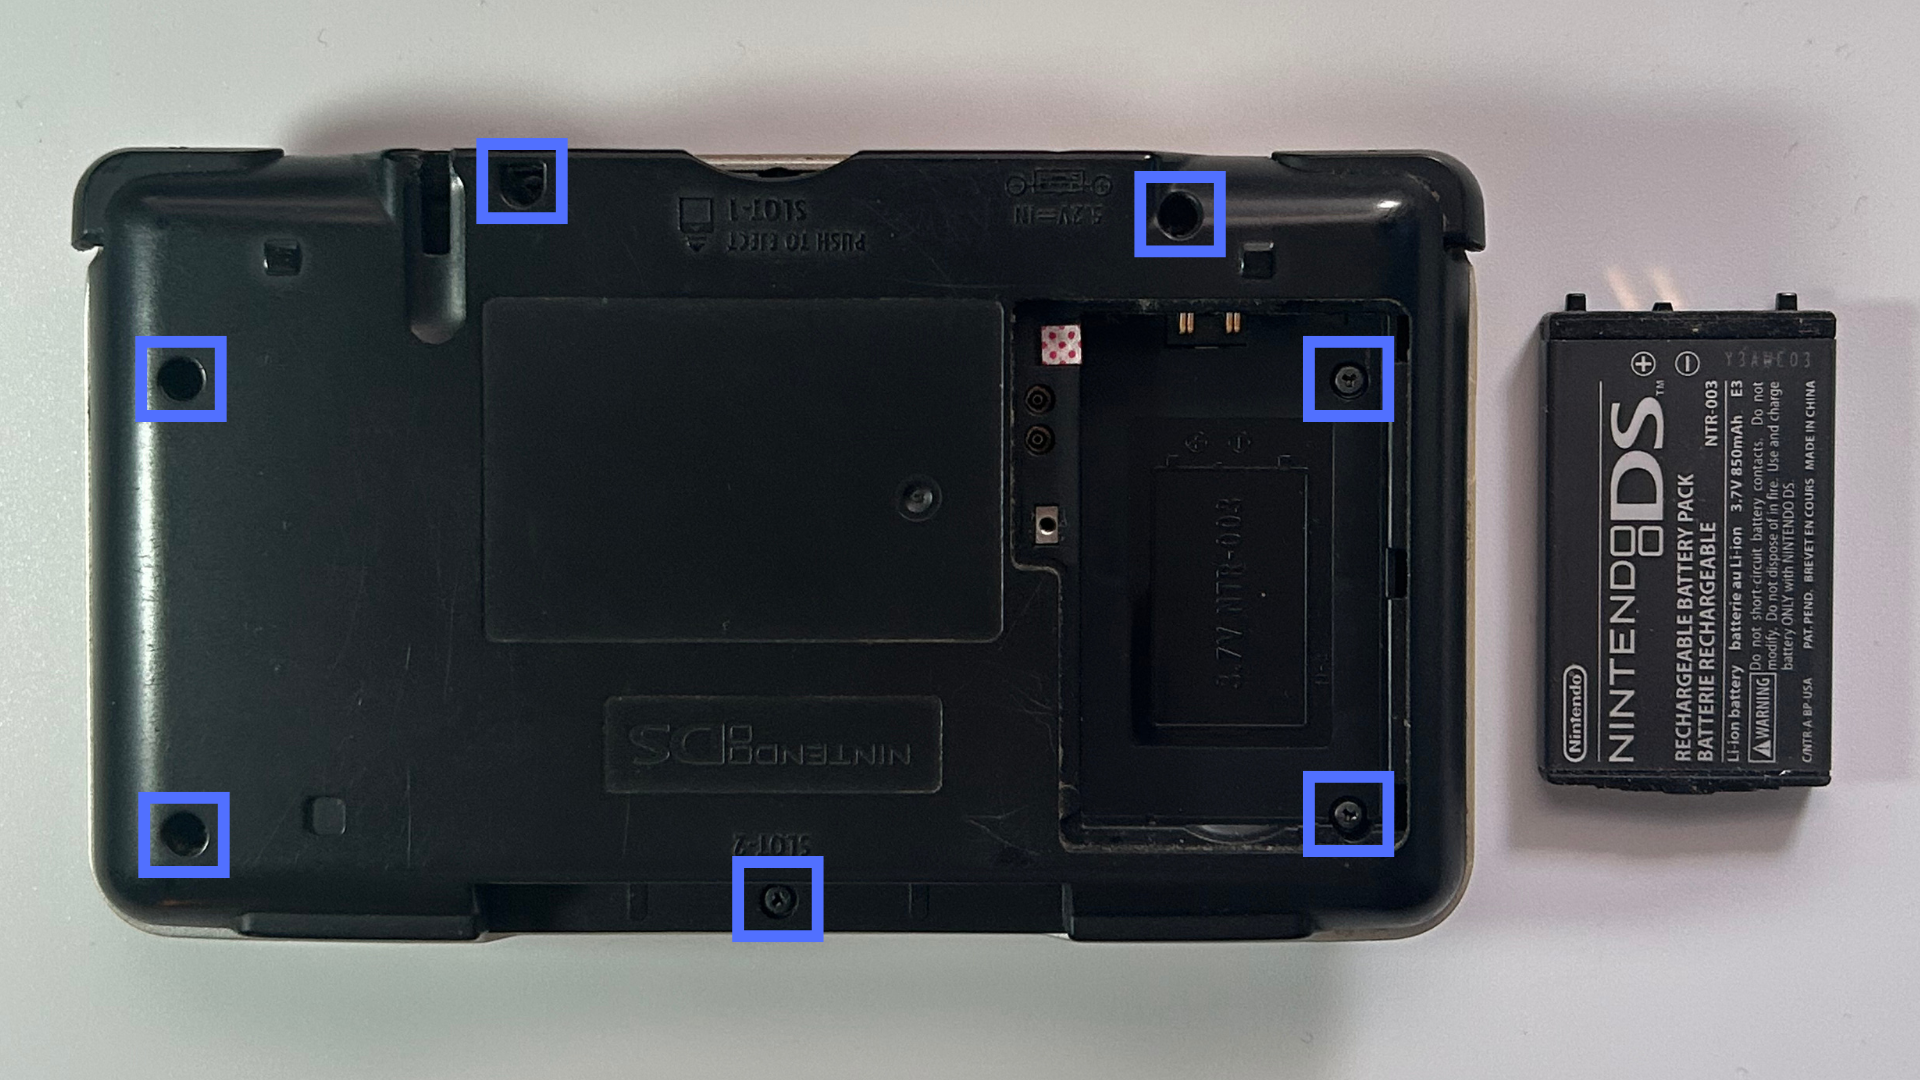
- Remove the remaining screws securing the rear shell.
- Carefully lift the rear shell away from the console to expose the internal components.
Step 2 – Remove the motherboard
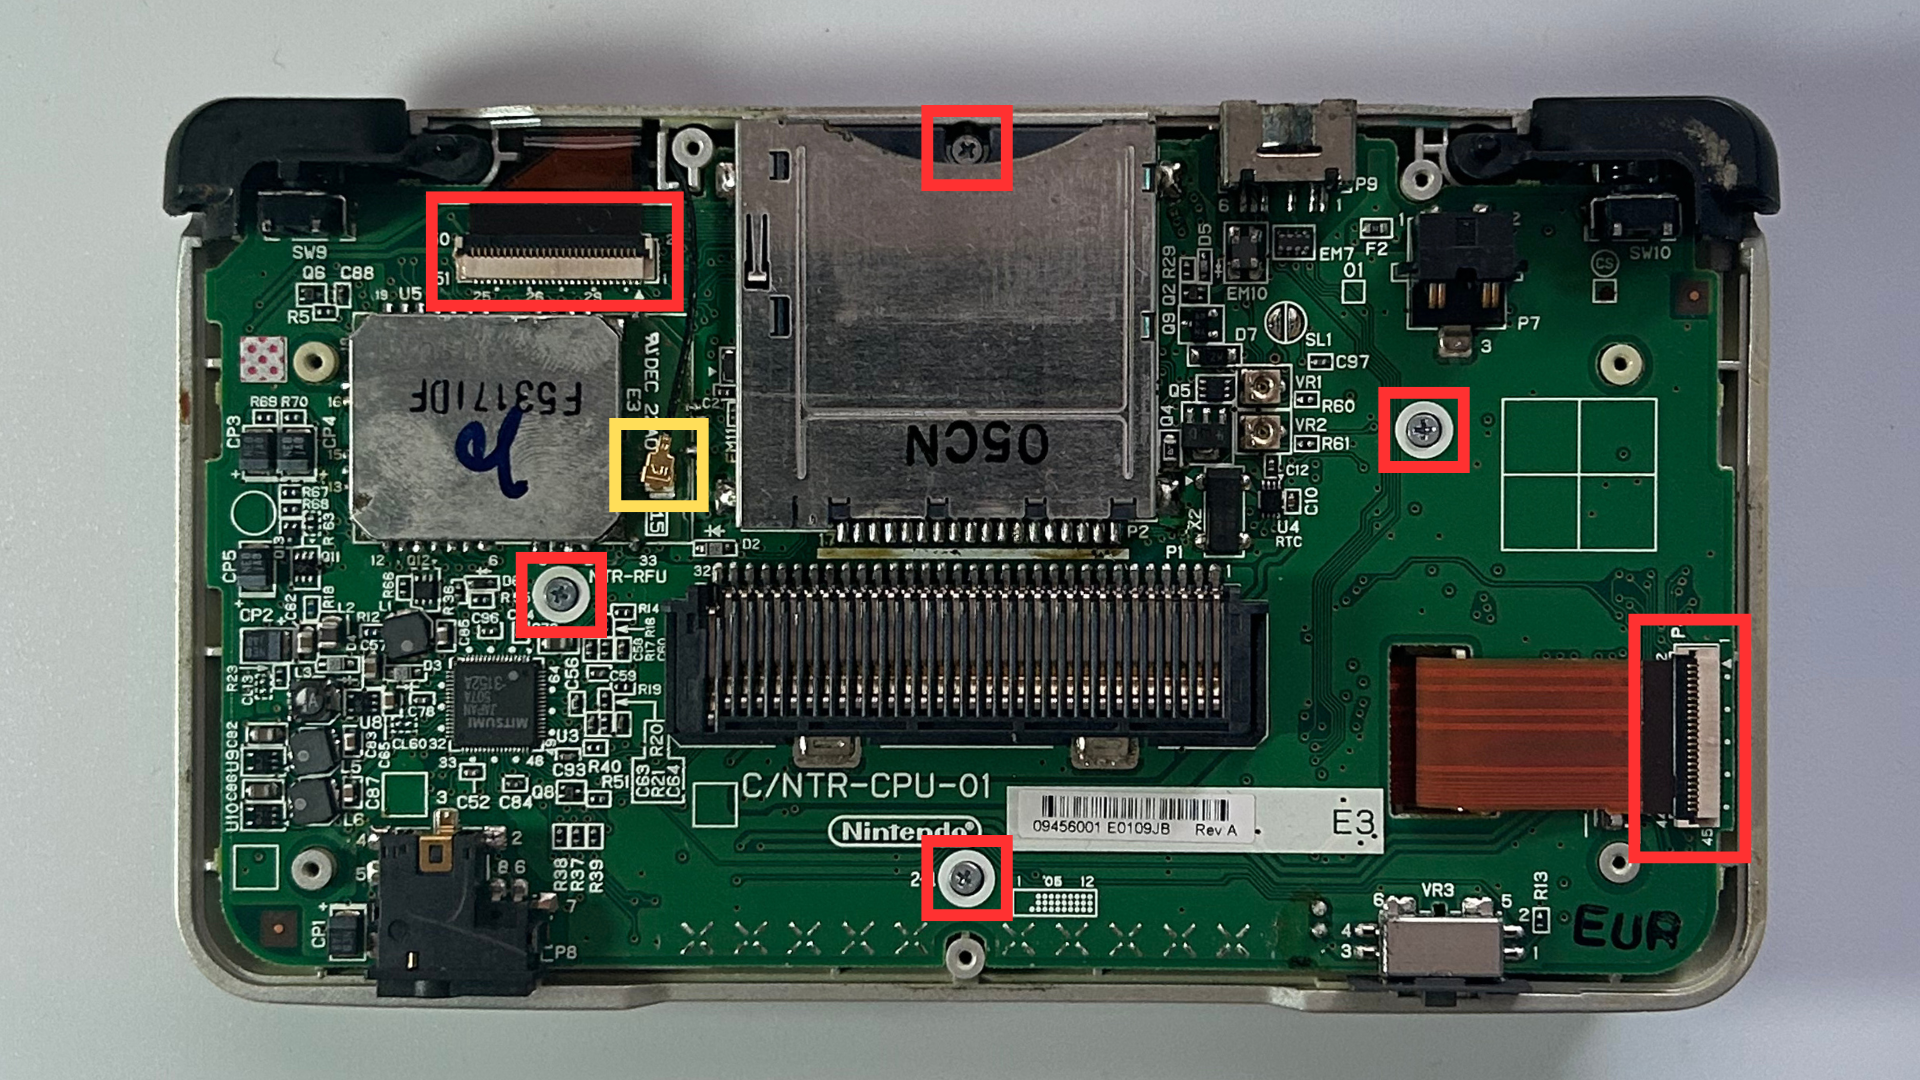
- Remove the four Phillips screws securing the motherboard.
- Disconnect the black antenna wire.
- Carefully release the locking tabs for the two main ribbon cable connectors.
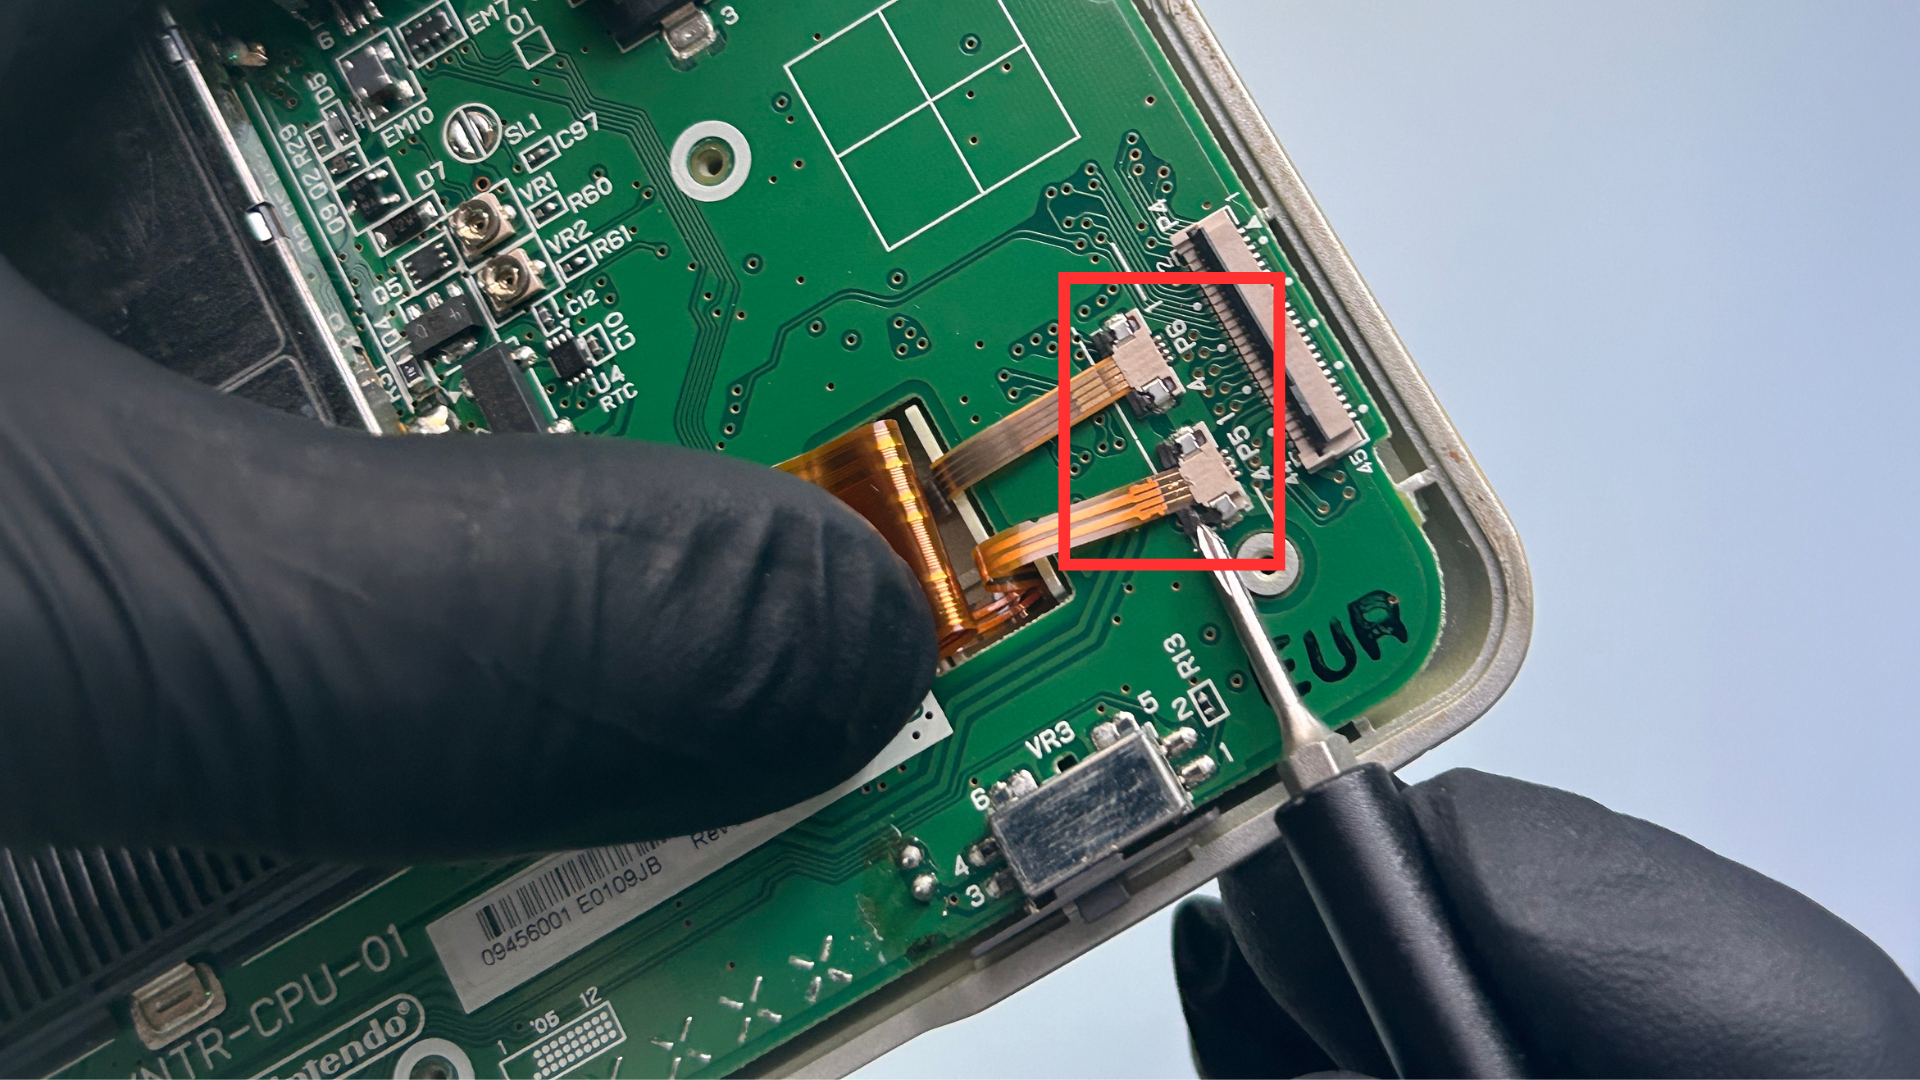
- Beneath the ribbon cable on the right are two smaller ribbon cables. These are secured by very small black locking pieces. Use tweezers or a precision screwdriver to gently release them.
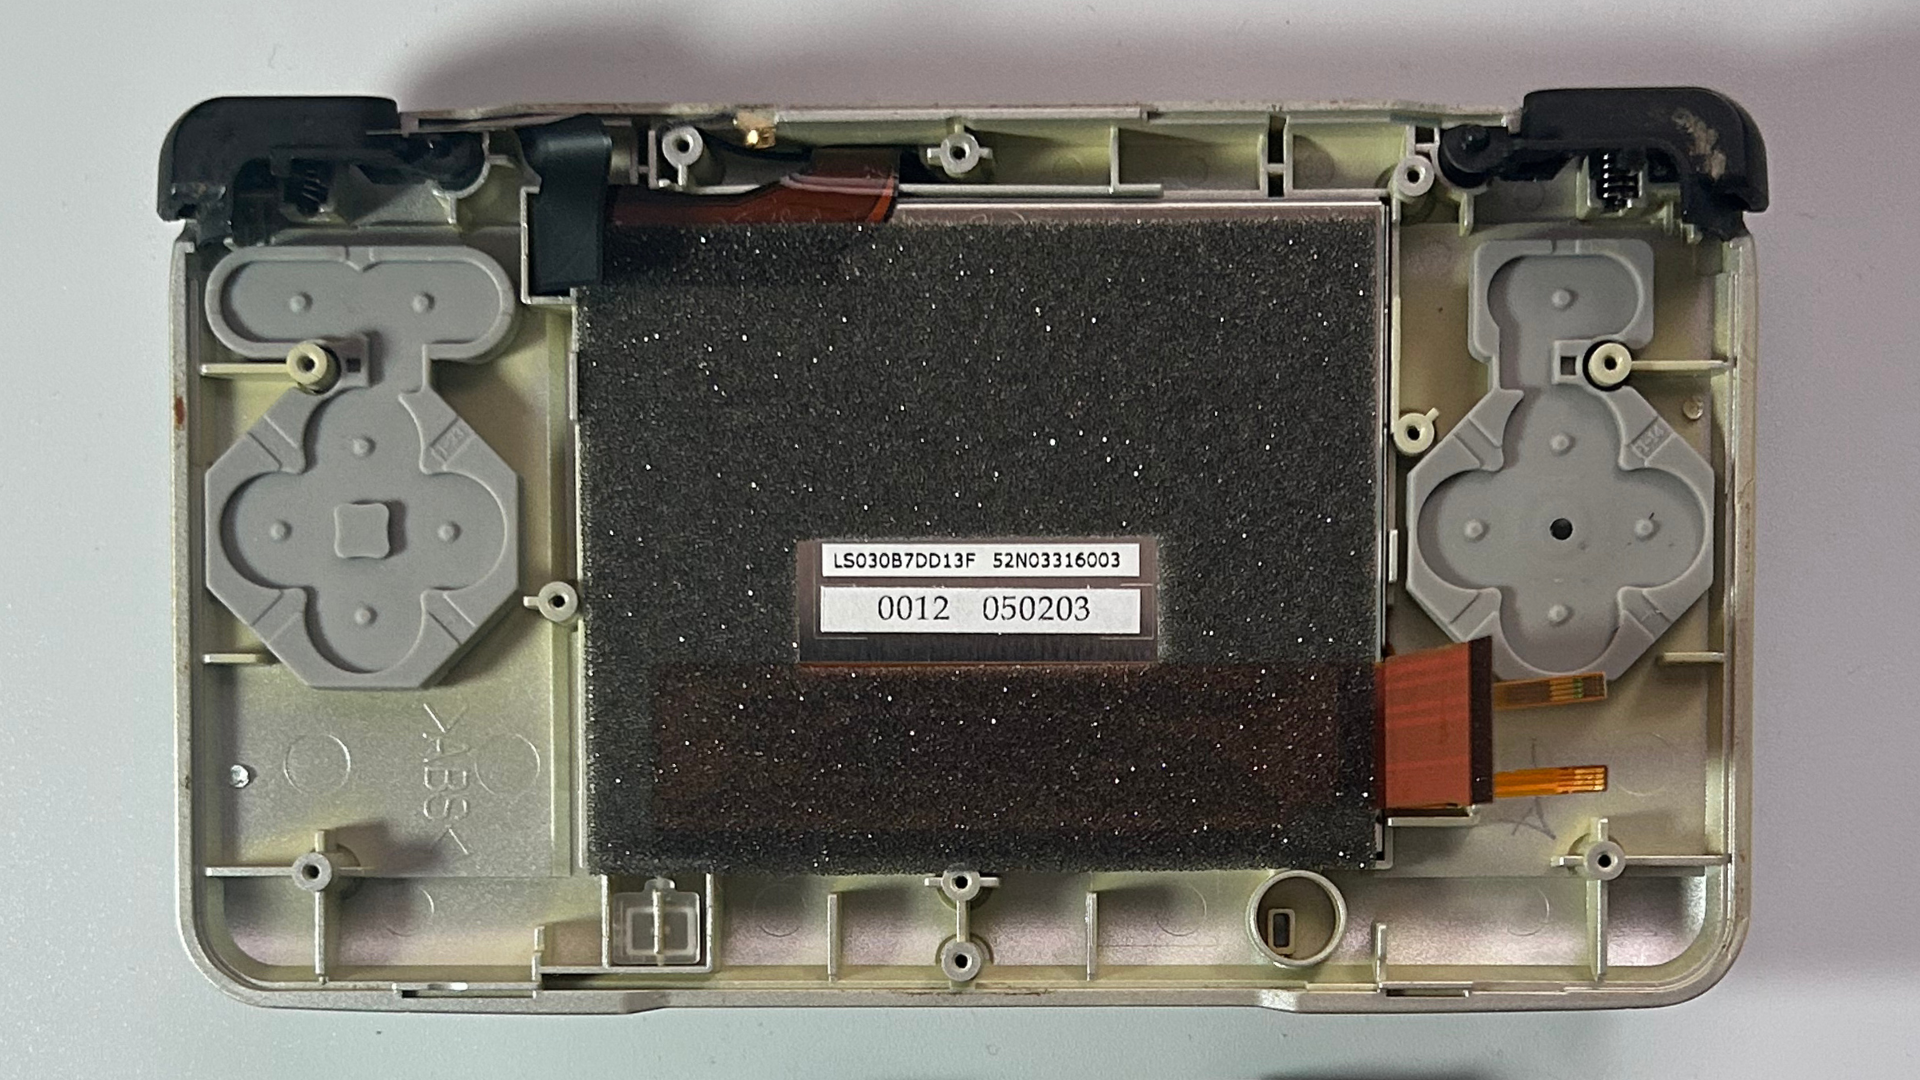
- Once all cables are disconnected, carefully lift the motherboard out of the lower shell.
Step 3 – Remove the bottom LCD
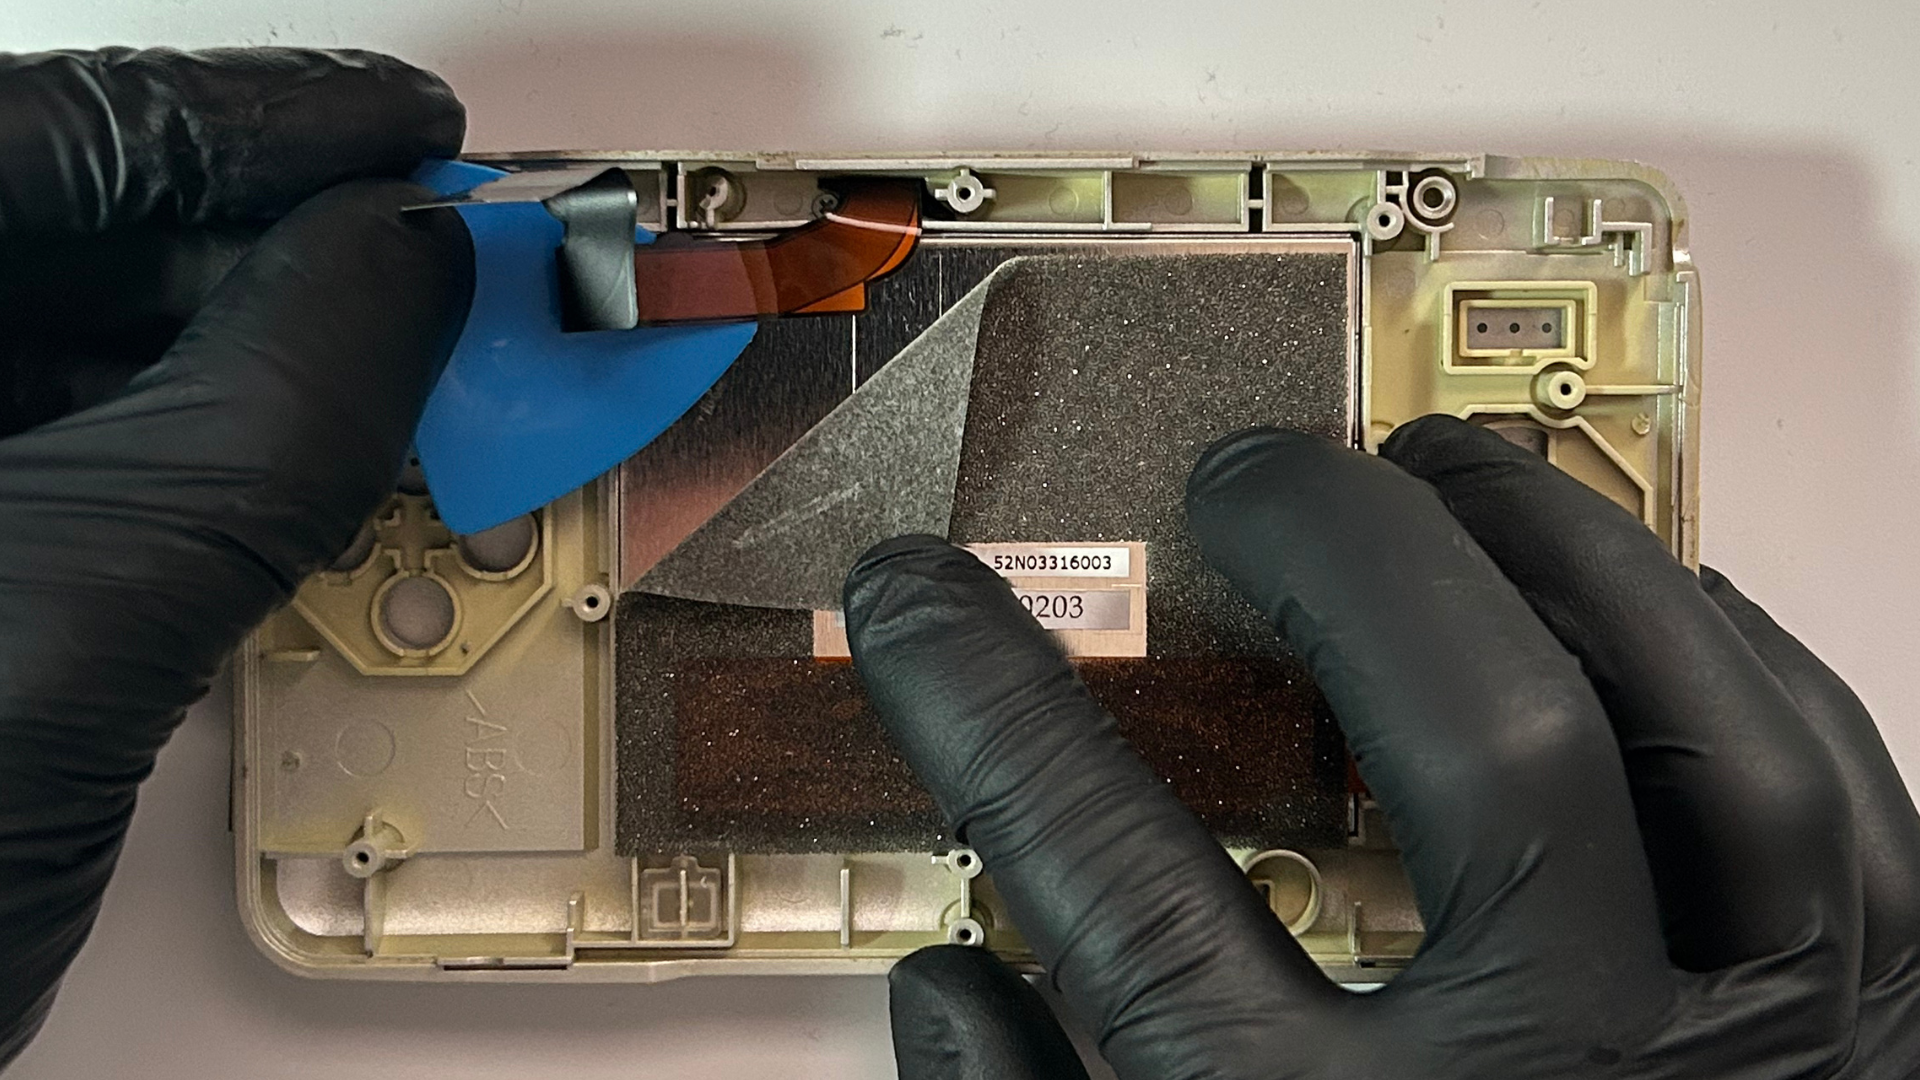
- Gently peel back the top-left corner of the foam layer on the rear of the bottom LCD to expose the ribbon cable adhered underneath.
- Slide a plastic pick between the ribbon cable and LCD and carefully separate the adhesive.
- If the adhesive is difficult to remove, a small amount of gentle heat can be used to help soften it.
- Carefully lift the bottom LCD out of the shell.
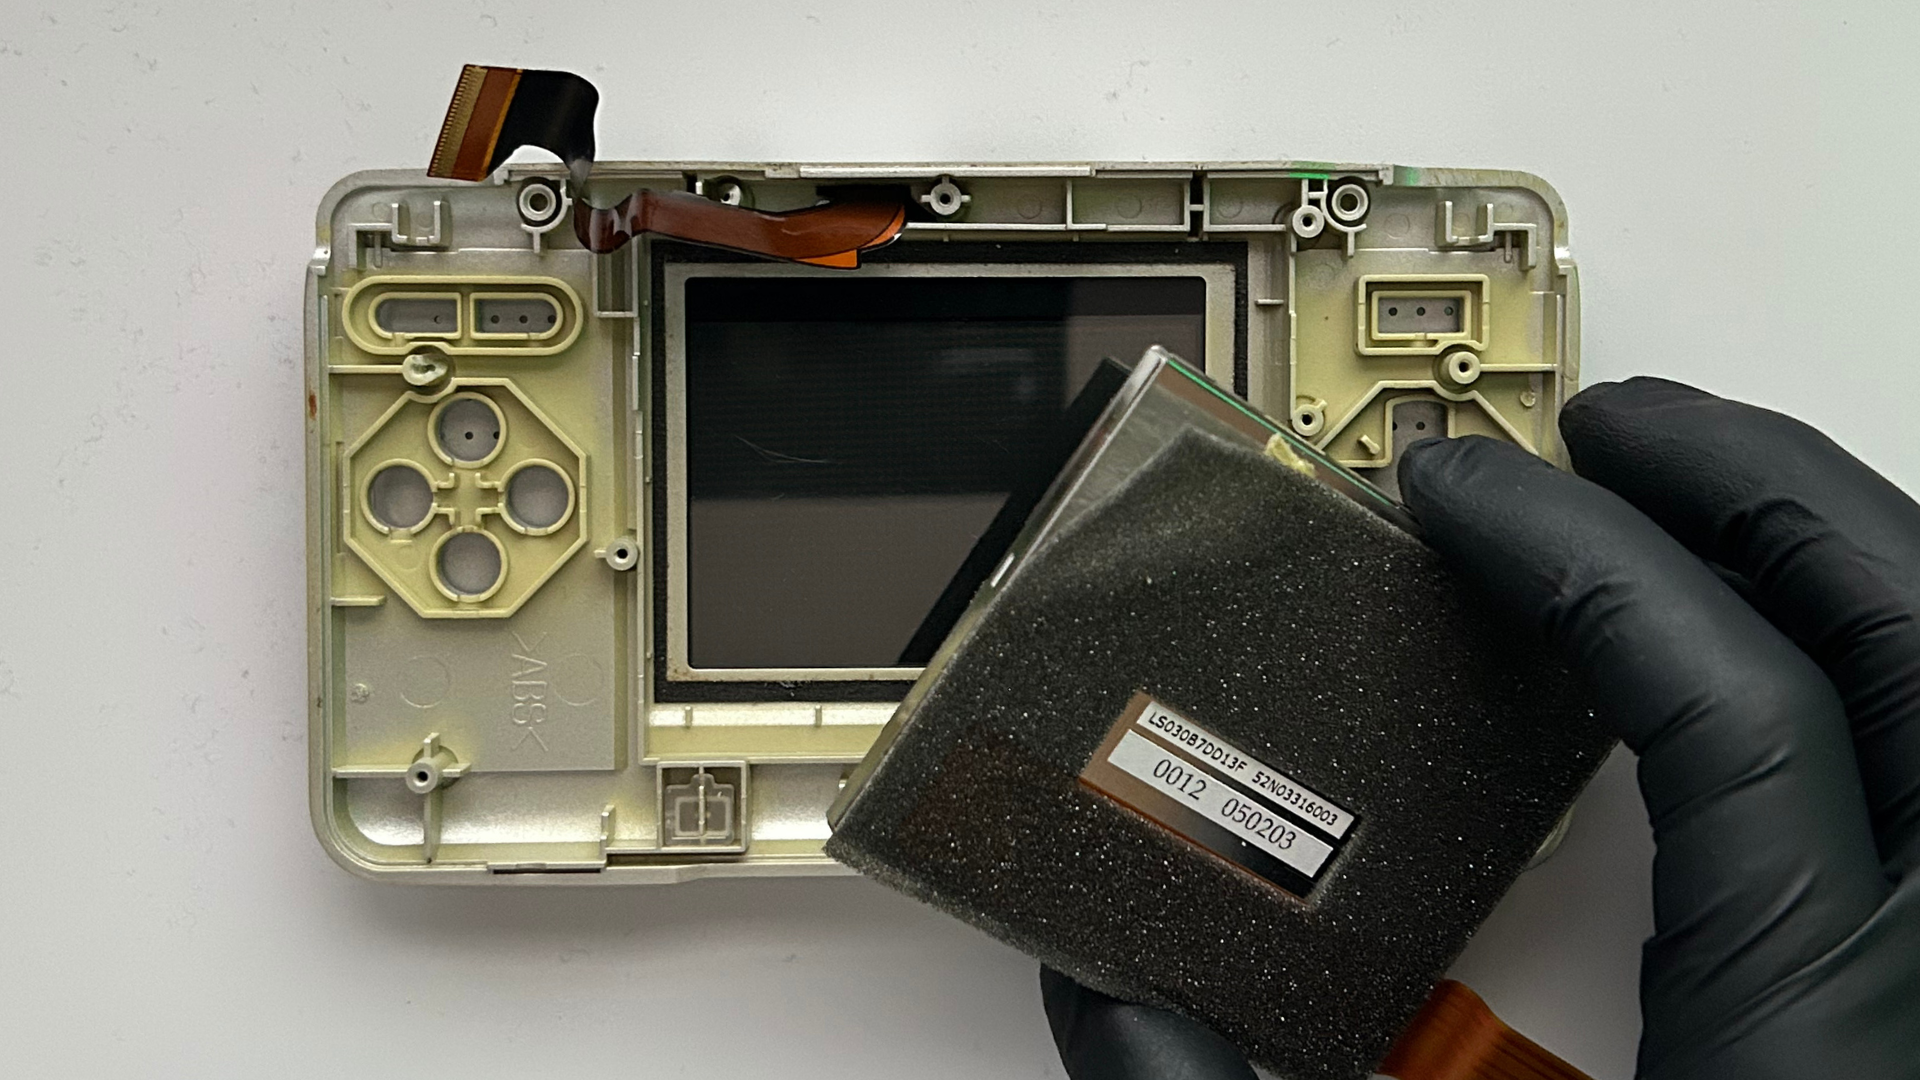
Step 4 – Separate the digitizer from the bottom LCD
- Place the bottom LCD face-up on a clean, flat surface.
- Carefully insert a thin plastic pick between the edge of the digitizer and the LCD assembly.
- Slowly work the pick around the edge to separate the adhesive holding the digitizer in place.
- Take care around the digitizer ribbon cable and avoid applying excessive pressure to the LCD underneath.
- Once the adhesive has been released, carefully lift the old digitizer away from the LCD.
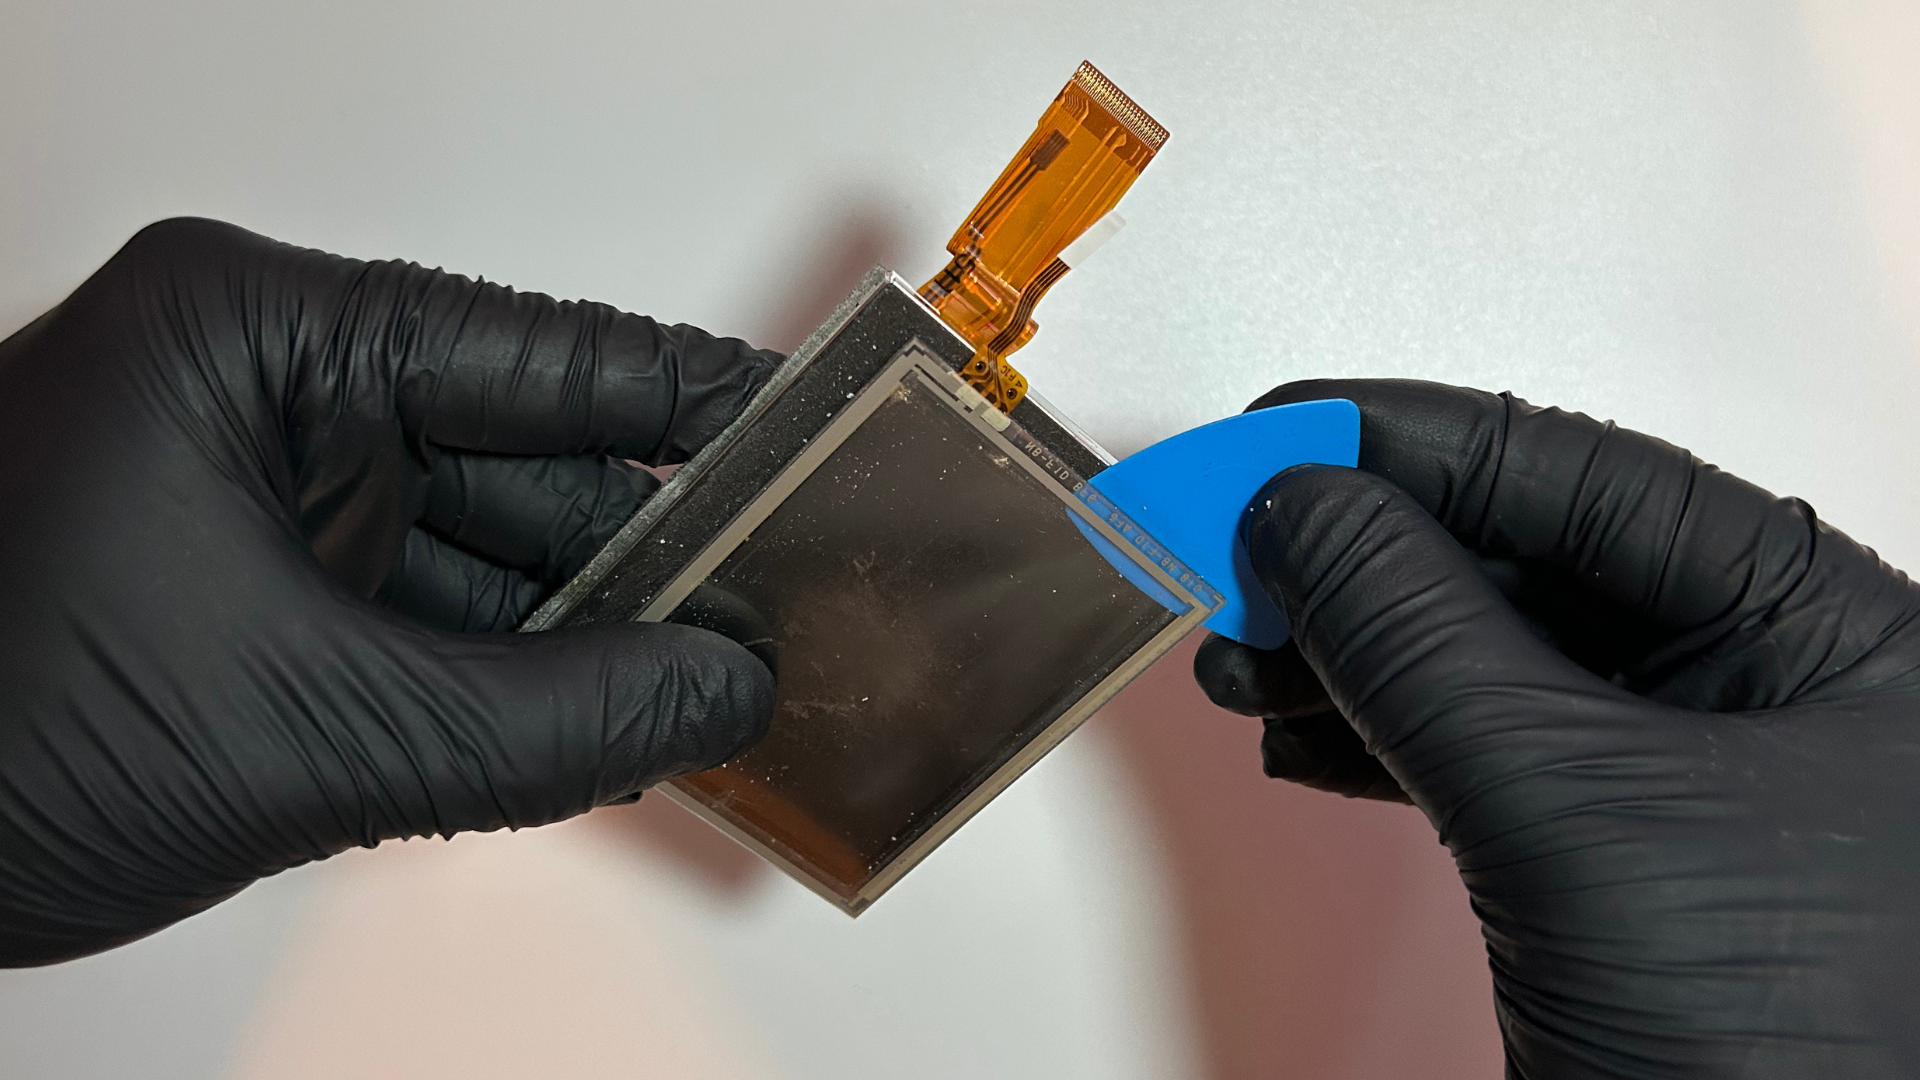
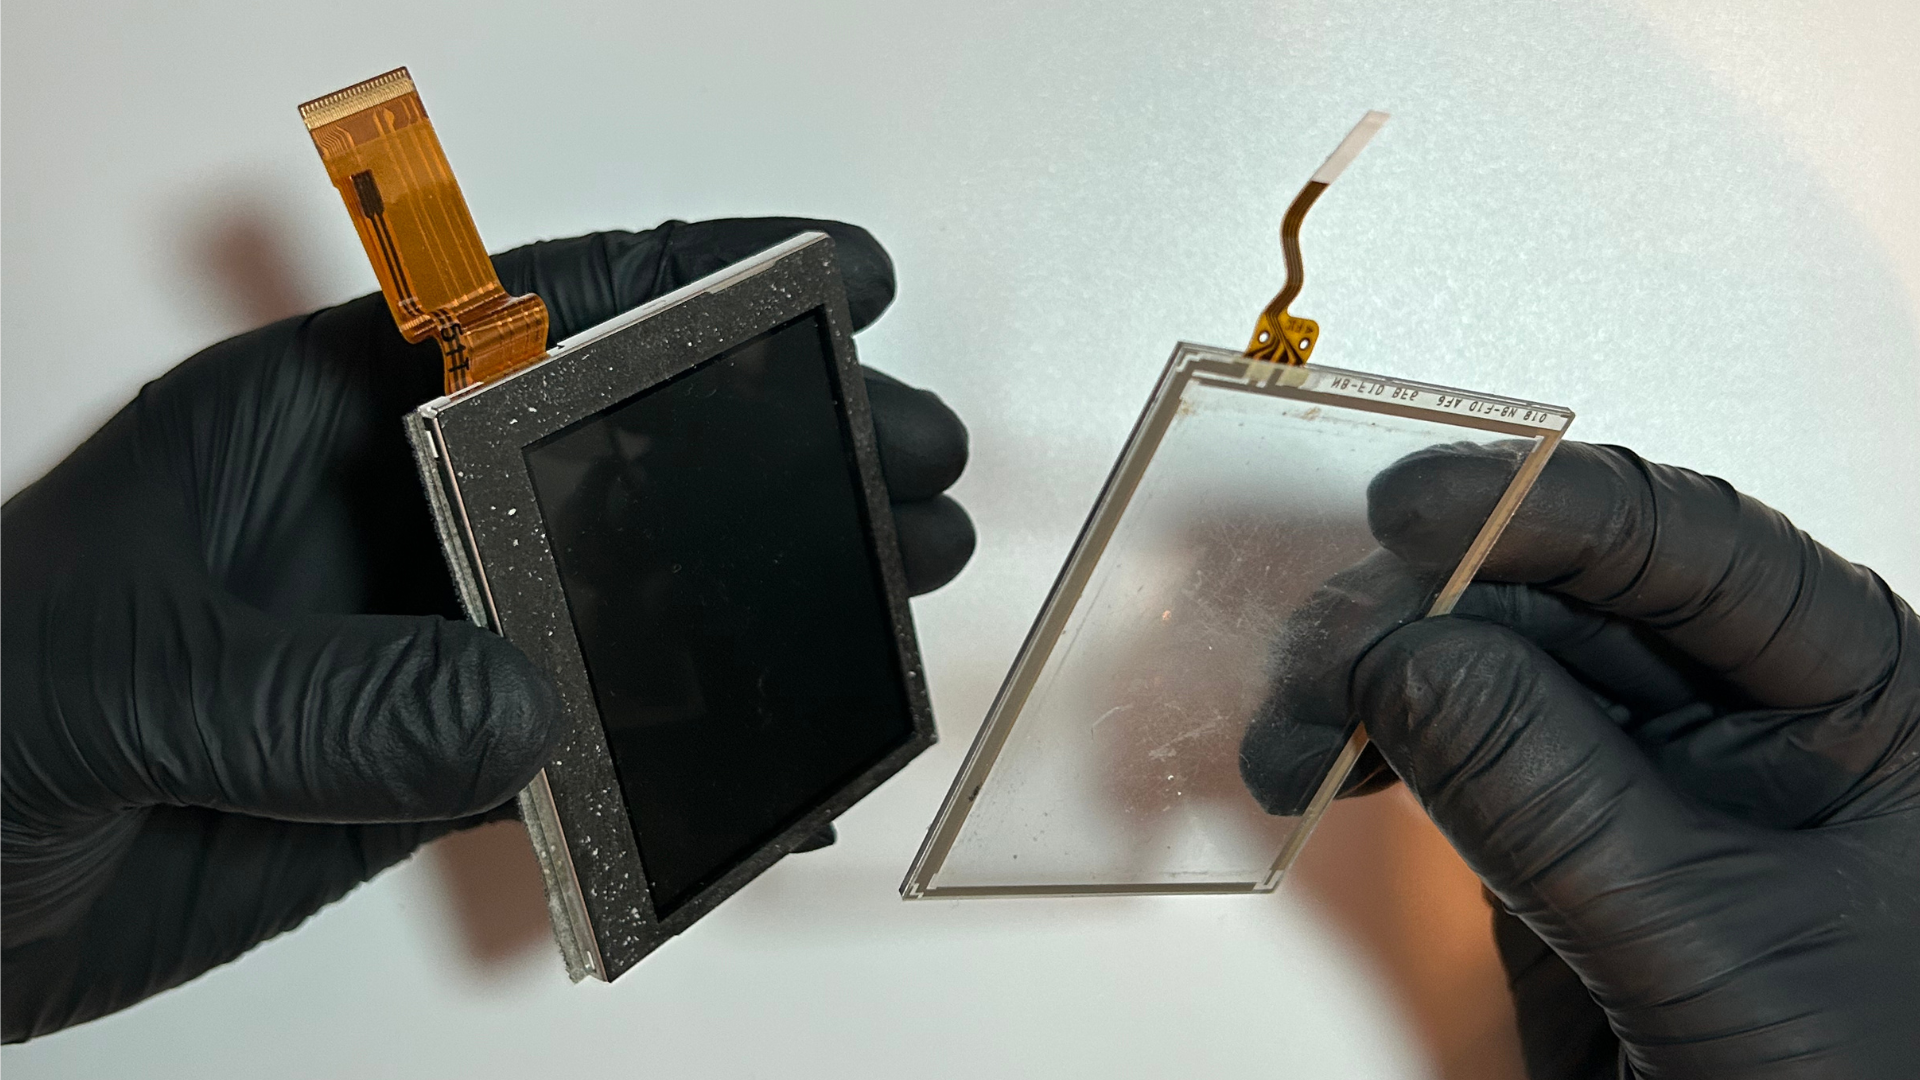

Step 5 – Install the replacement digitizer
- Remove any remaining adhesive or debris from around the edge of the bottom LCD.
- Make sure the LCD surface and inside of the replacement digitizer are clean and free from dust.
- Remove the protective backing from the adhesive on the replacement digitizer.
- Align the replacement digitizer carefully with the LCD before pressing it into place.
- Gently press around the edges to make sure the adhesive is properly secured.

Step 6 – Reassemble and test the Nintendo DS
- Place the bottom LCD and digitizer assembly back into the lower shell.
- Reinstall the buttons and button membranes if they were removed.
- Reinstall the motherboard and reconnect all ribbon cables and the antenna wire.
- Refit the rear shell and reinstall the screws.
- Reinstall the battery and battery cover.
- Power on the Nintendo DS and test the touchscreen across different areas of the display.
Conclusion
Replacing the touchscreen digitizer on an original Nintendo DS can restore touch functionality if the original digitizer is cracked, damaged or no longer responding correctly.
After reassembly, test the touchscreen across the entire display. If touch input is inaccurate, use the touchscreen calibration option in the Nintendo DS system settings before reopening the console.