Introduction
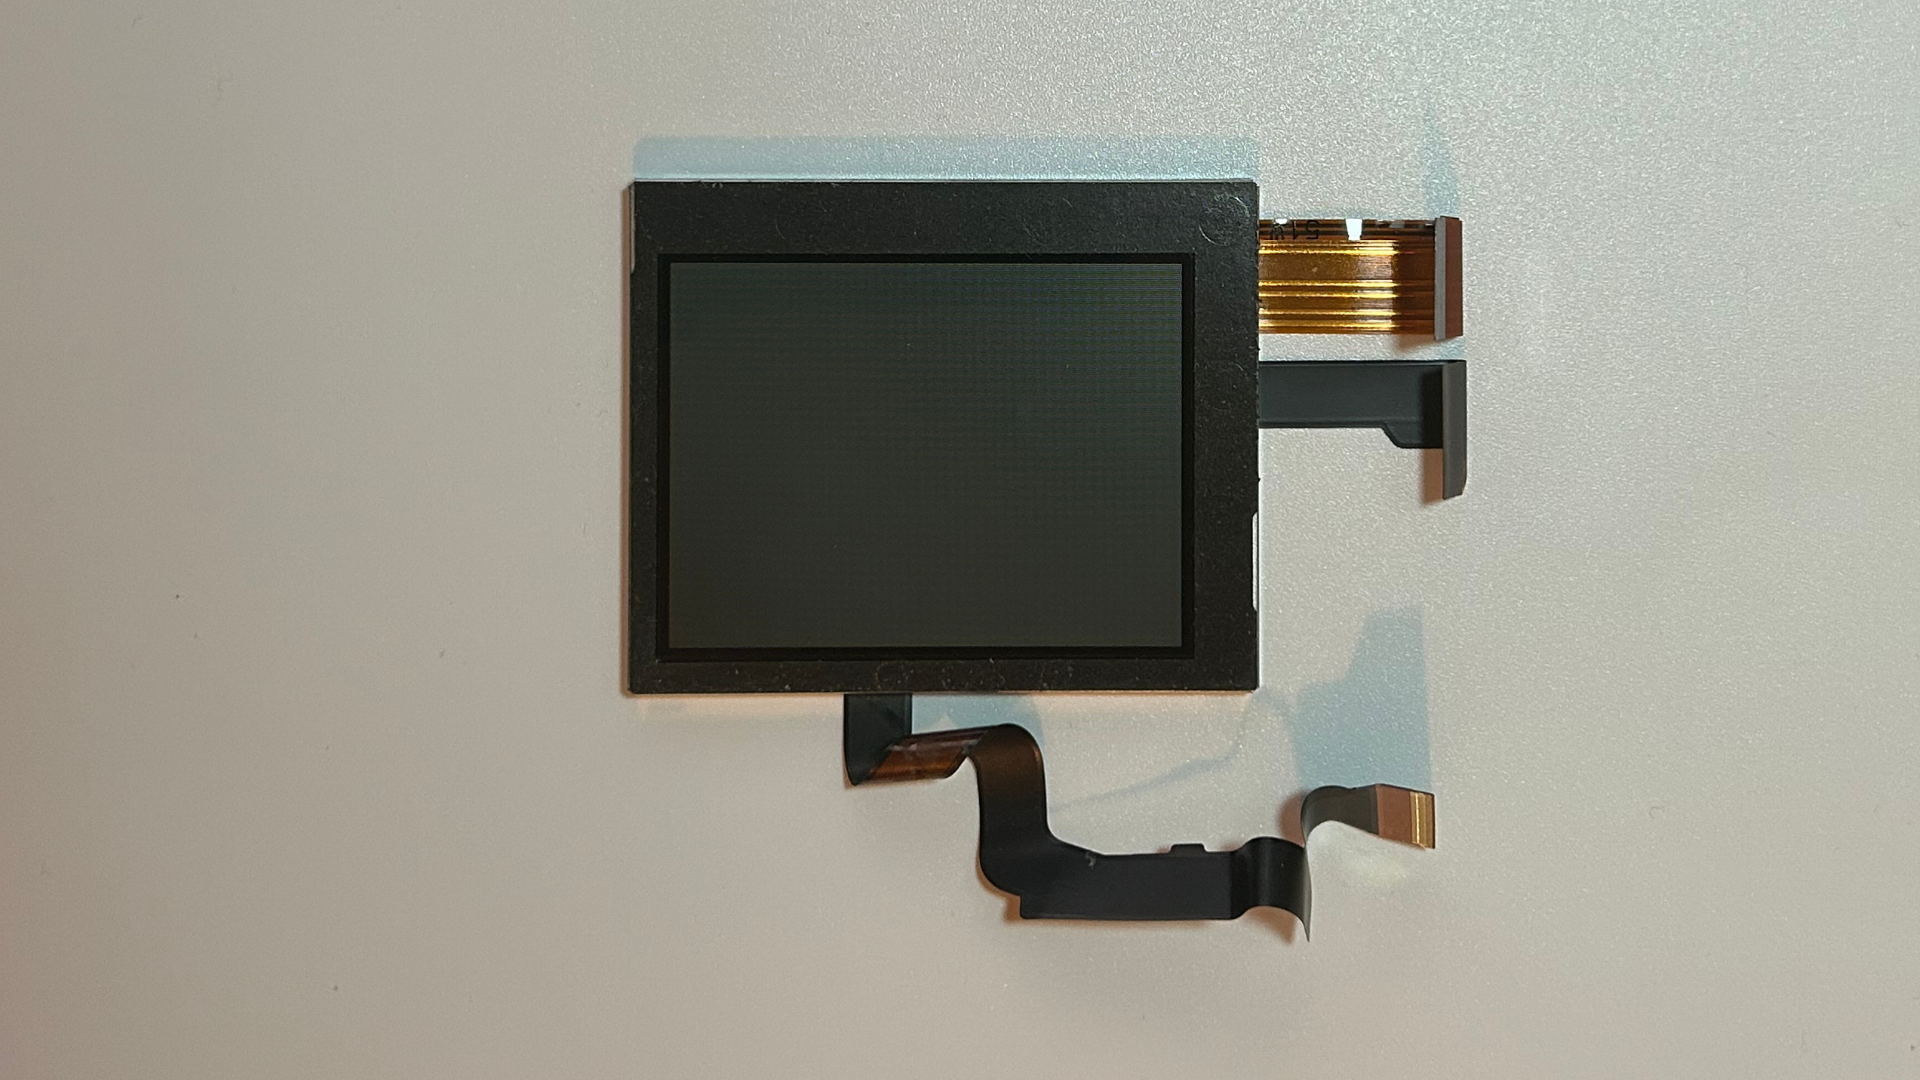
In this guide, I'll show you how to replace the top LCD screen on an original Nintendo DS.
This repair requires significant disassembly because the top screen ribbon cable passes through the hinge and connects to the motherboard in the lower half of the console.
Replacing the top LCD may help if the display is cracked, damaged, has dead pixels, displays incorrect colours, flickers or no longer displays an image.
What you'll need
- Phillips screwdriver
- Tri-wing screwdriver
- Plastic pick, spudger or opening tool
- Precision tweezers
- Hand squeeze air blower (optional, for removing dust)
- Replacement top LCD for the original Nintendo DS
Step 1 – Remove the rear screws and battery
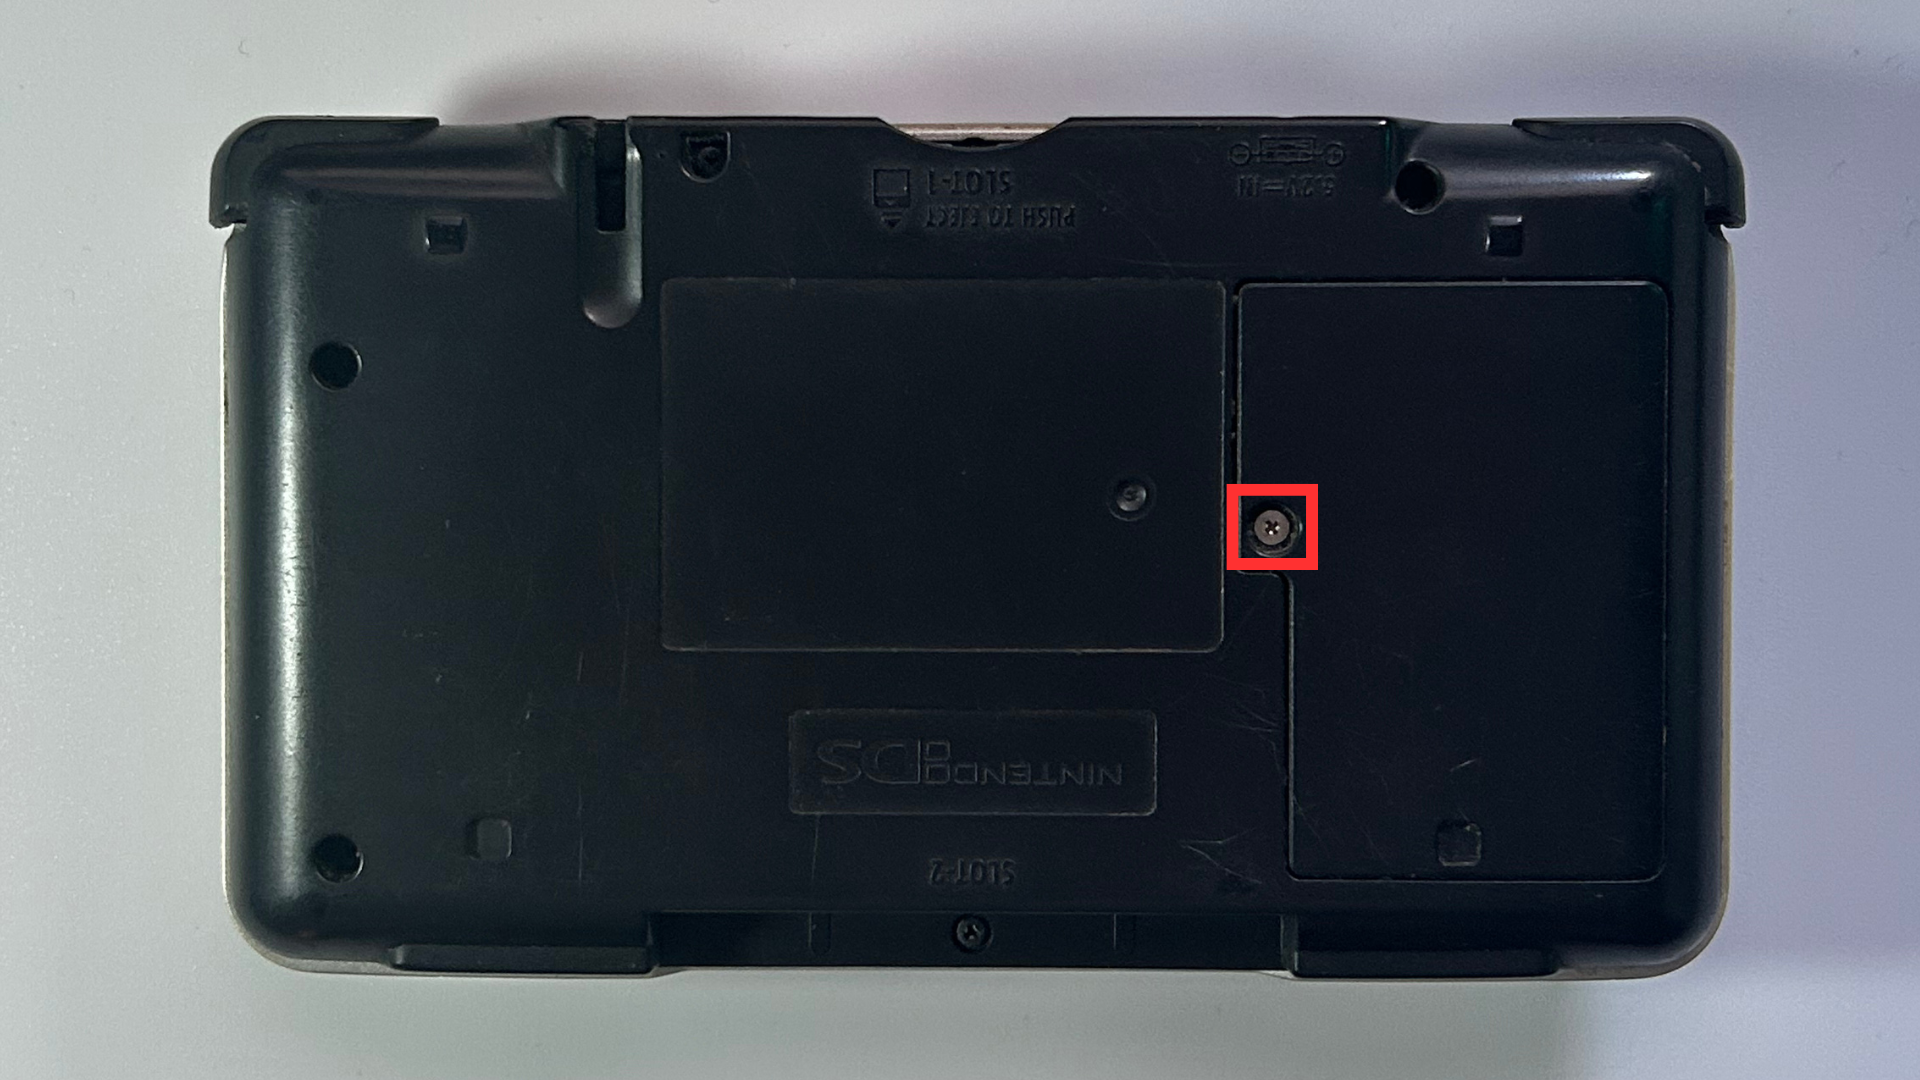
- Turn the Nintendo DS over so the rear shell is facing upwards.
- Remove the screw securing the battery cover.
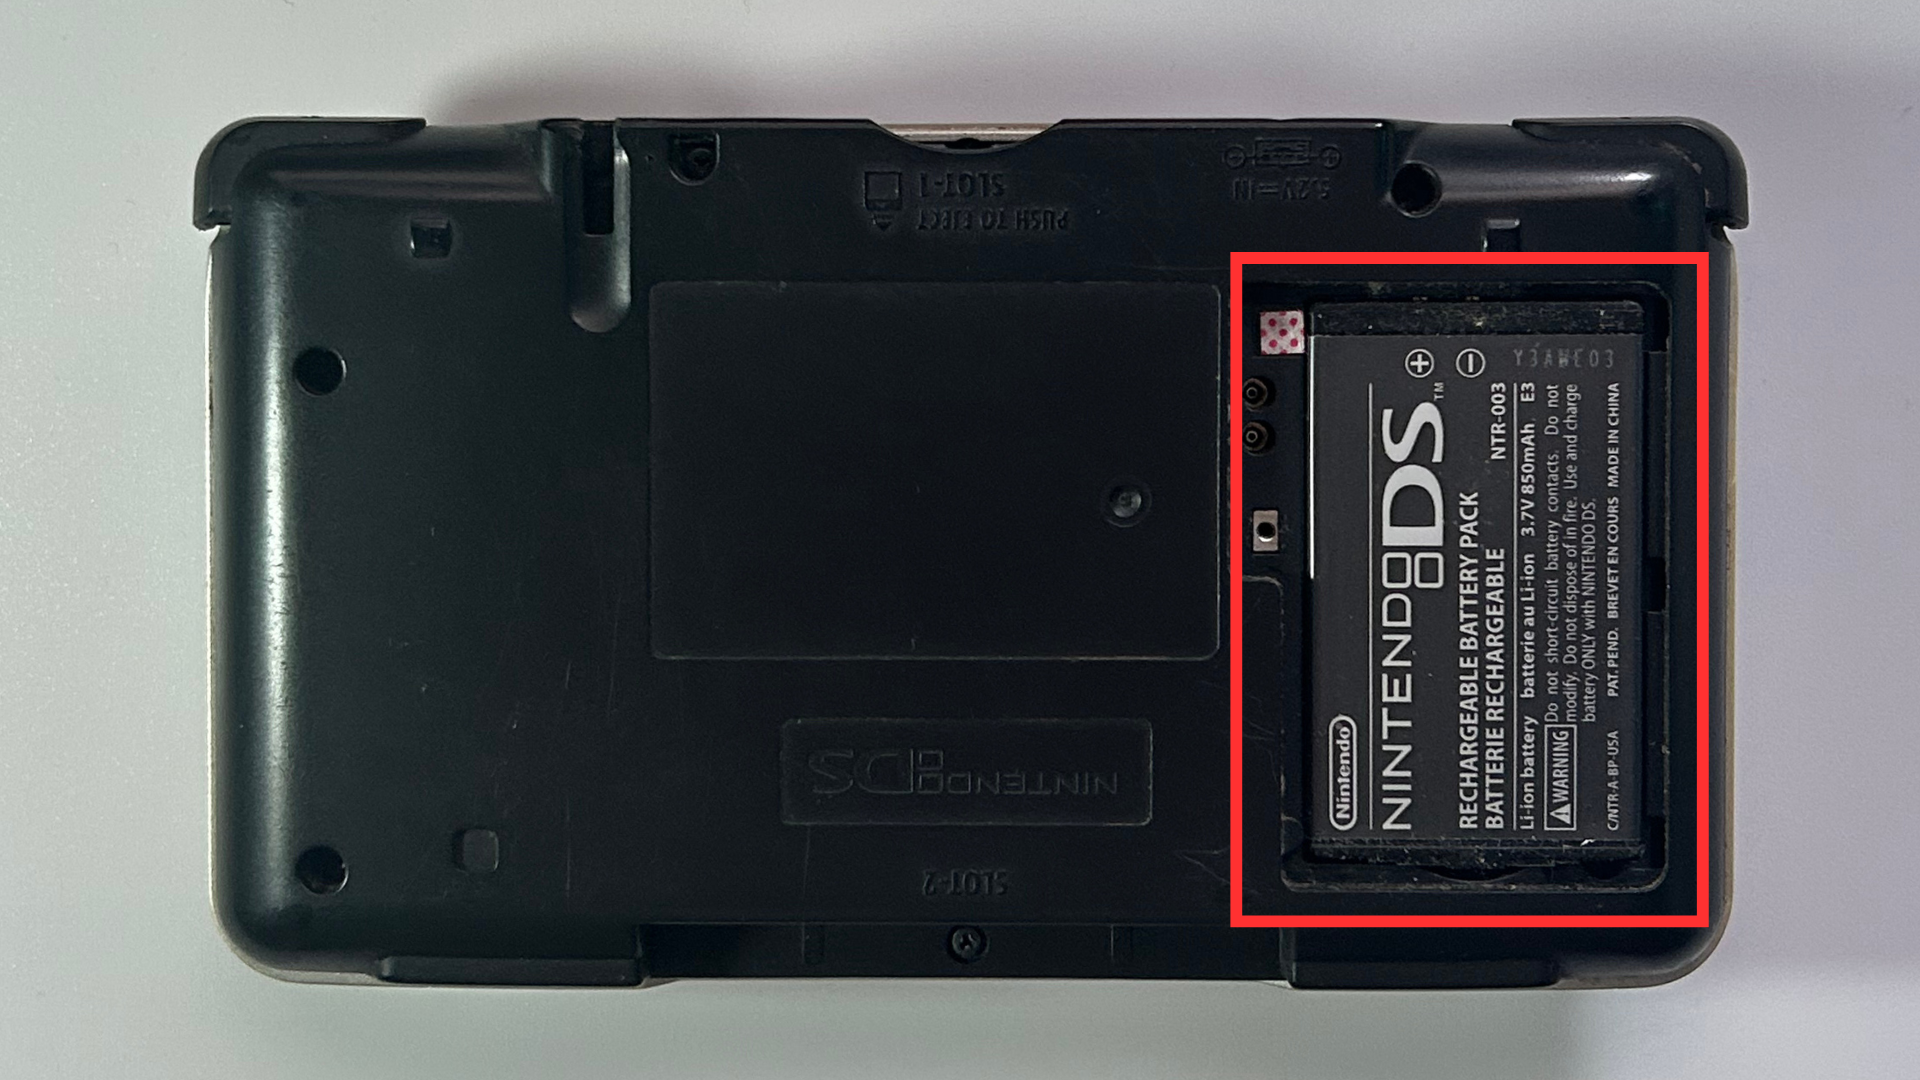
- Lift off the battery cover and remove the battery.
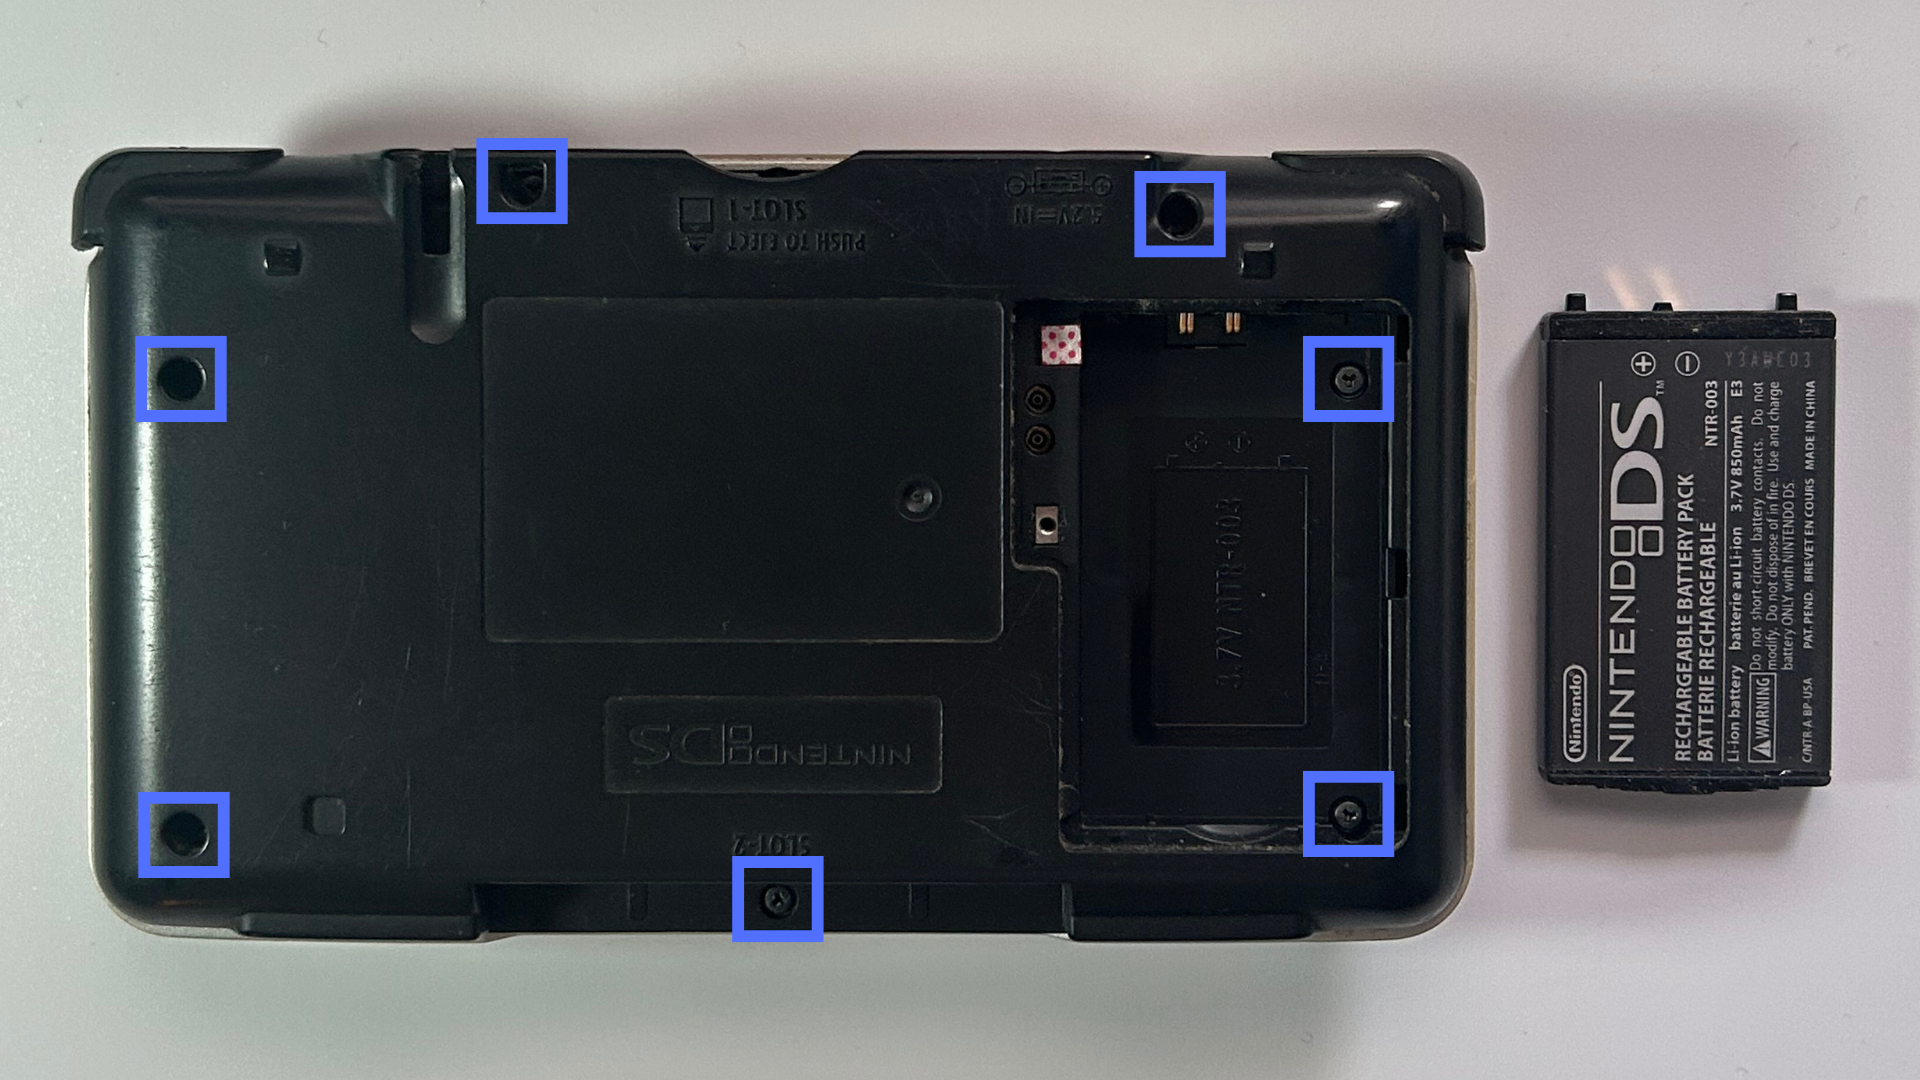
- Remove the remaining screws securing the rear shell.
Step 2 – Remove the motherboard from the shell
- Lift the rear shell away to expose the internal components.
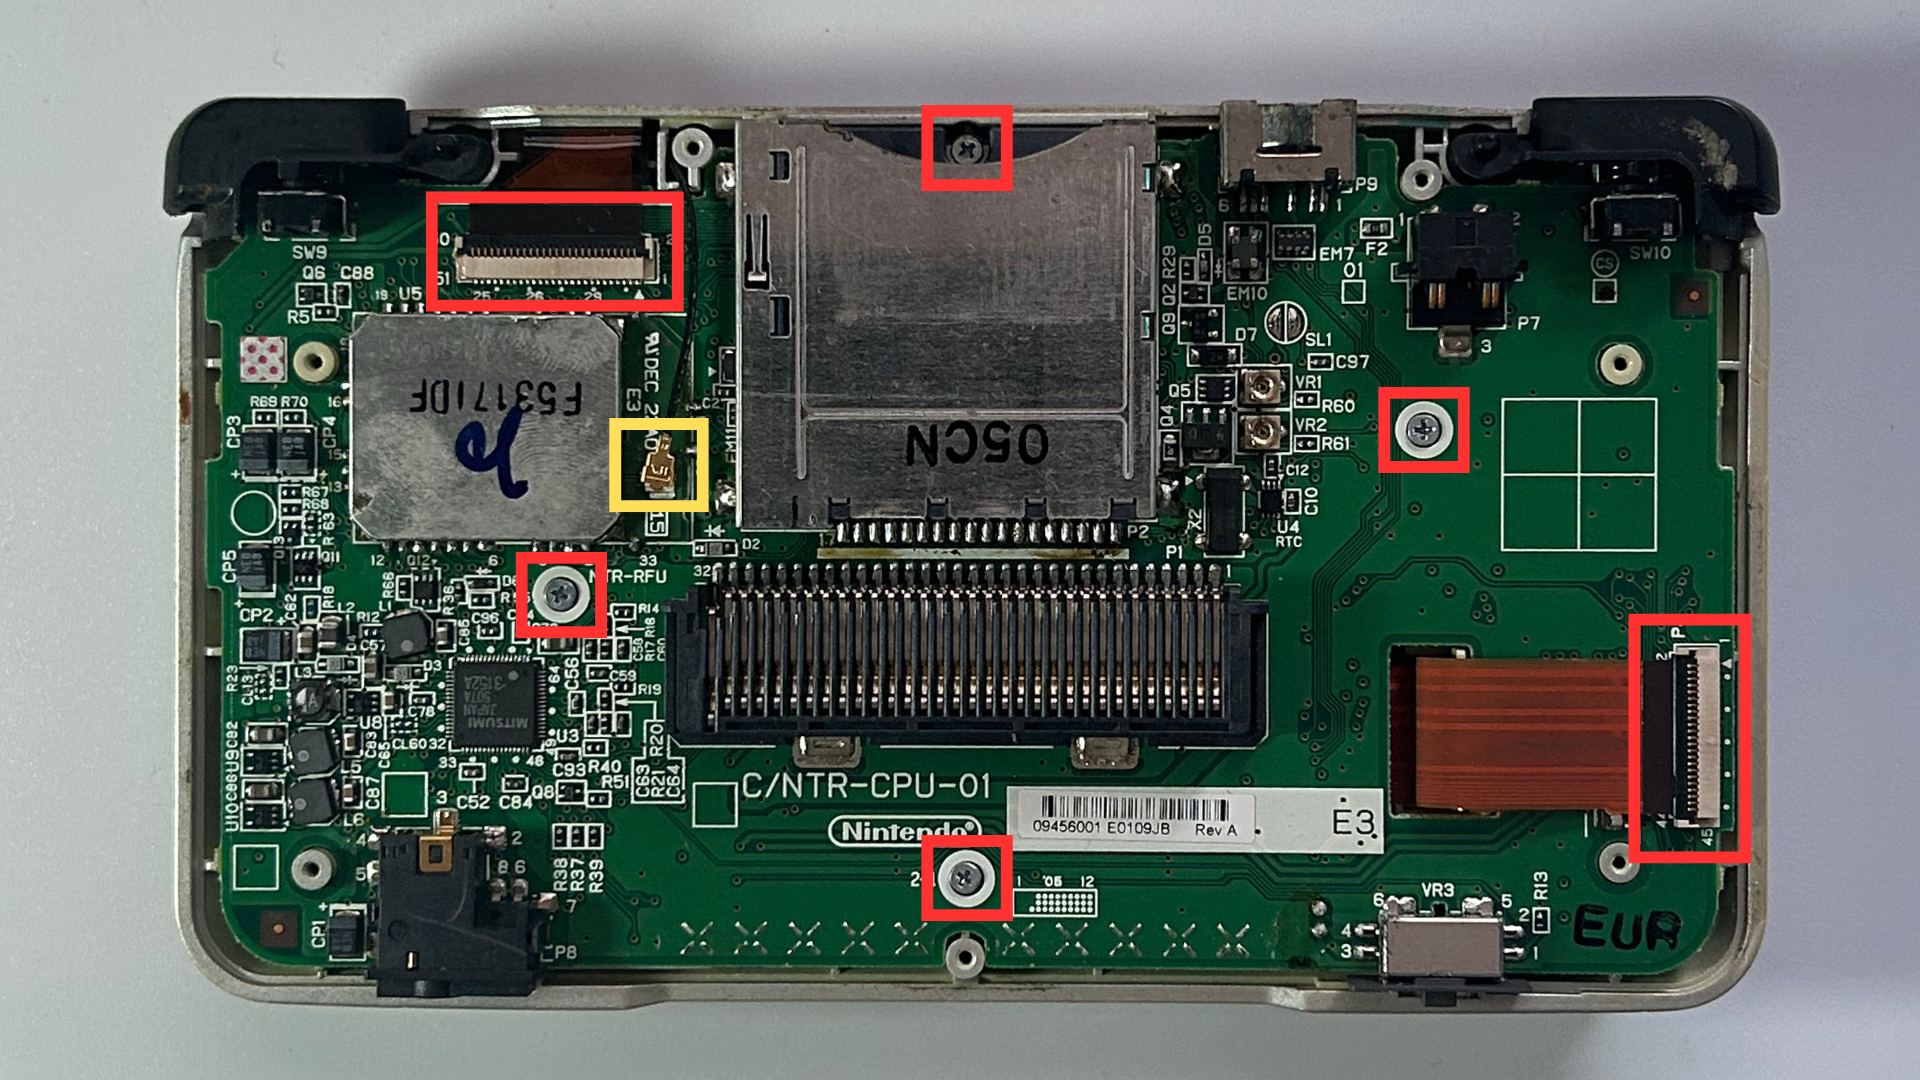
- Remove the four Phillips screws securing the motherboard.
- Disconnect the black antenna wire.
- Carefully release the locking tabs for the two main ribbon cable connectors.
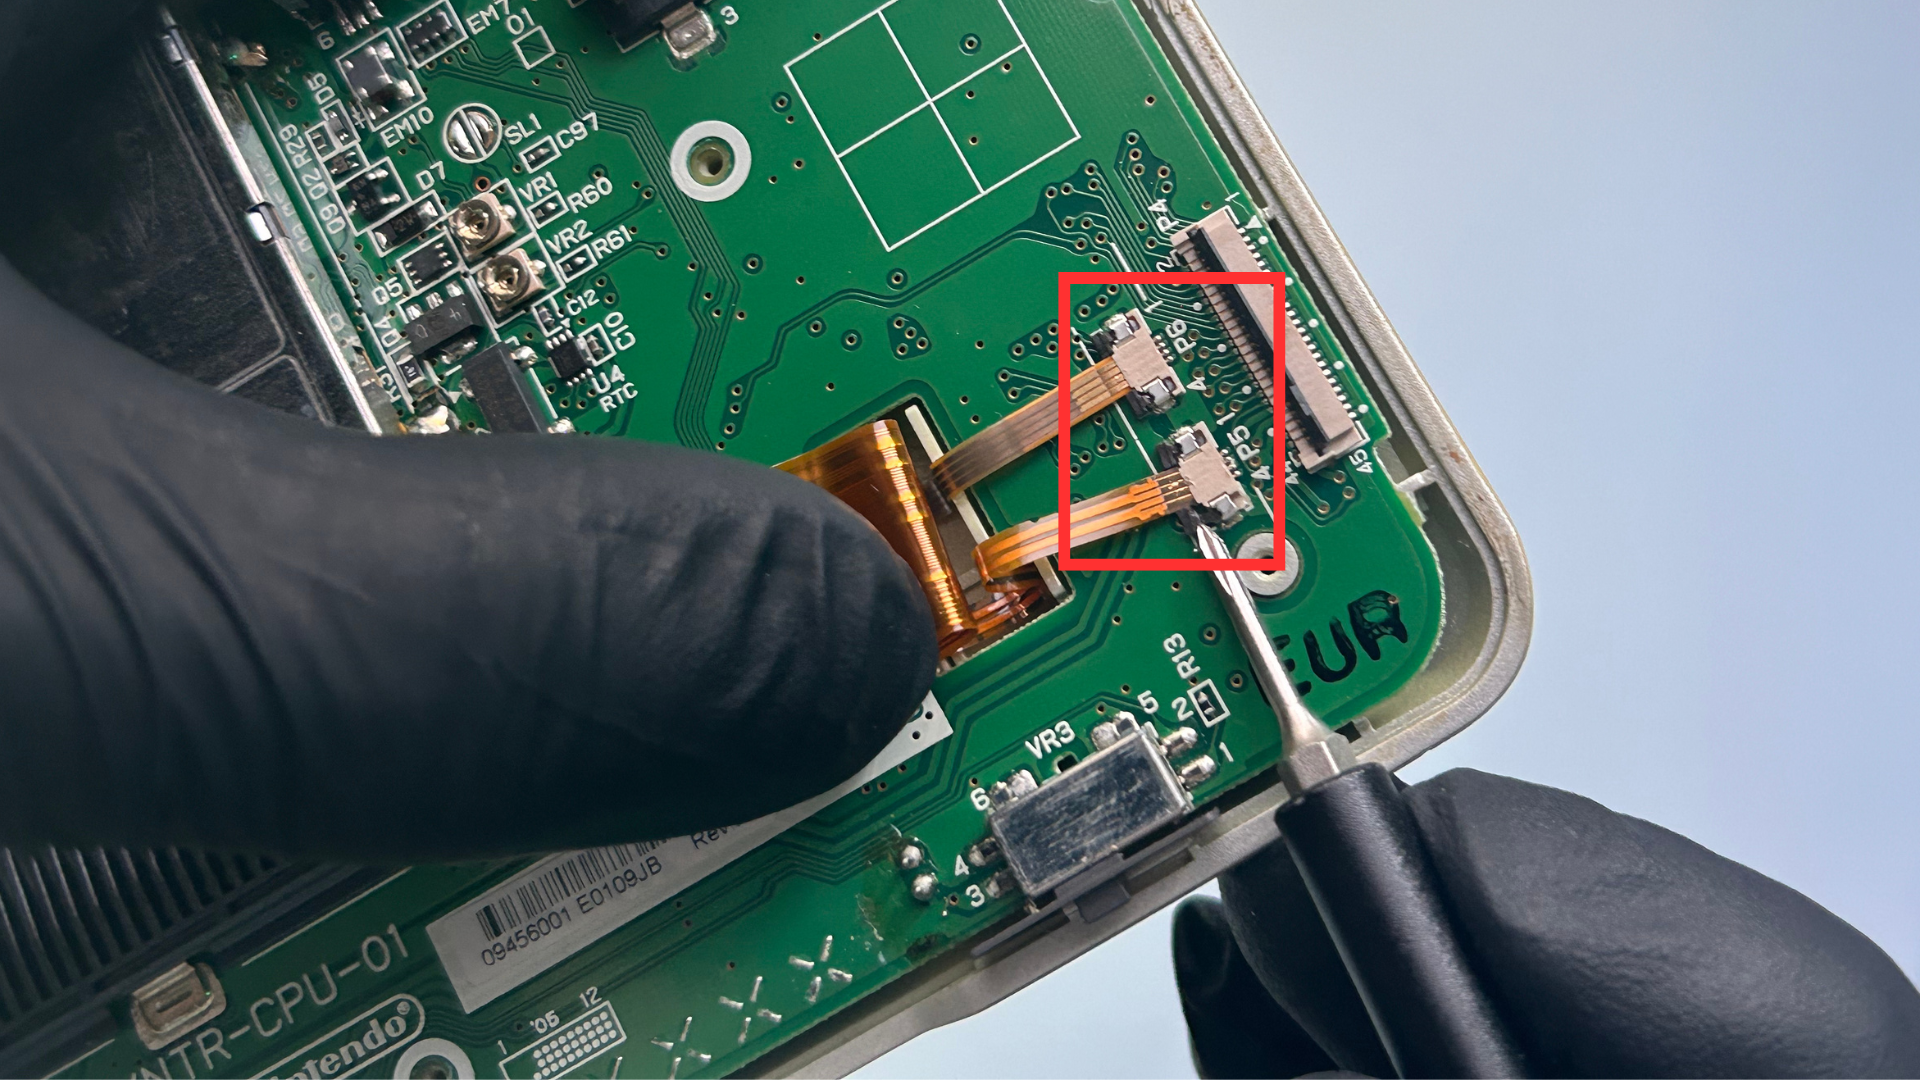
- Beneath the ribbon cable on the right are two smaller ribbon cables. These are secured by very small black locking tabs. Use tweezers or a precision screwdriver to gently release them.
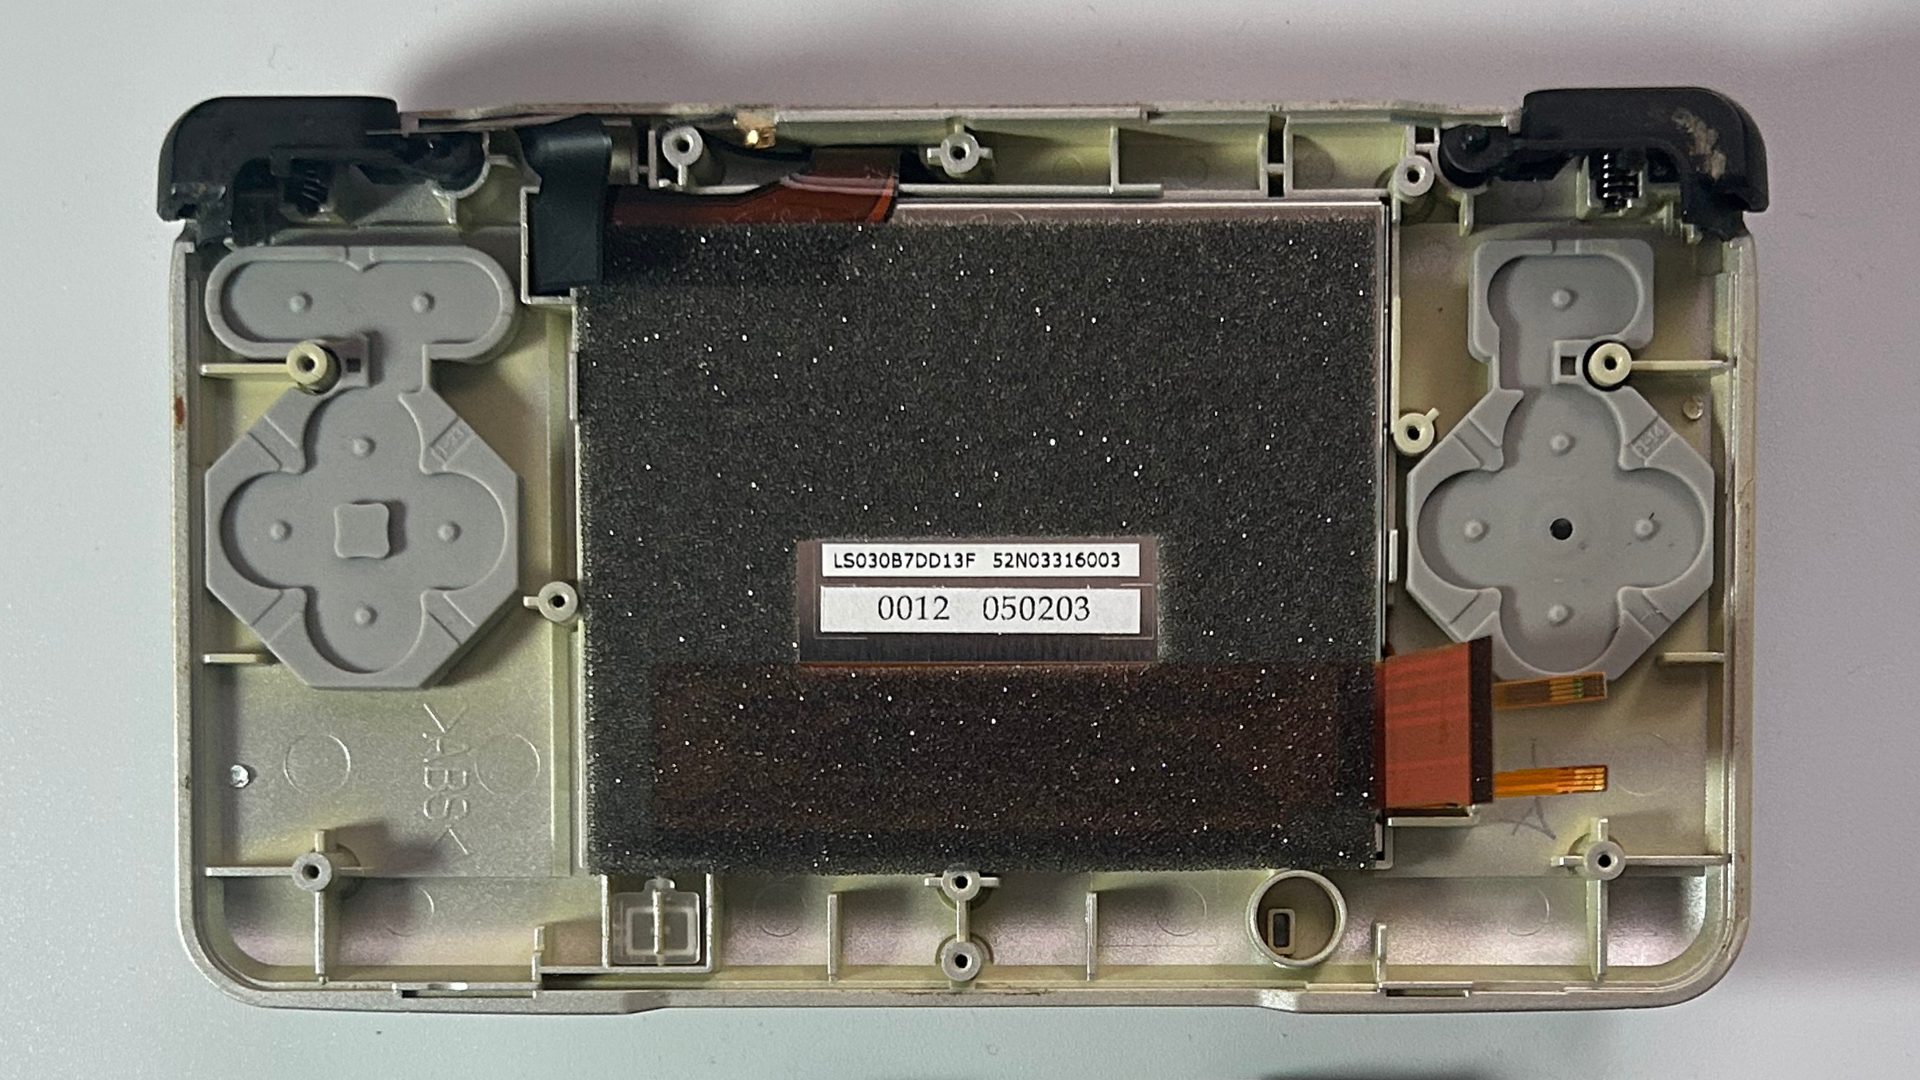
- Once the required cables are disconnected, carefully lift the motherboard away from the lower shell.
Step 3 – Open the upper screen housing
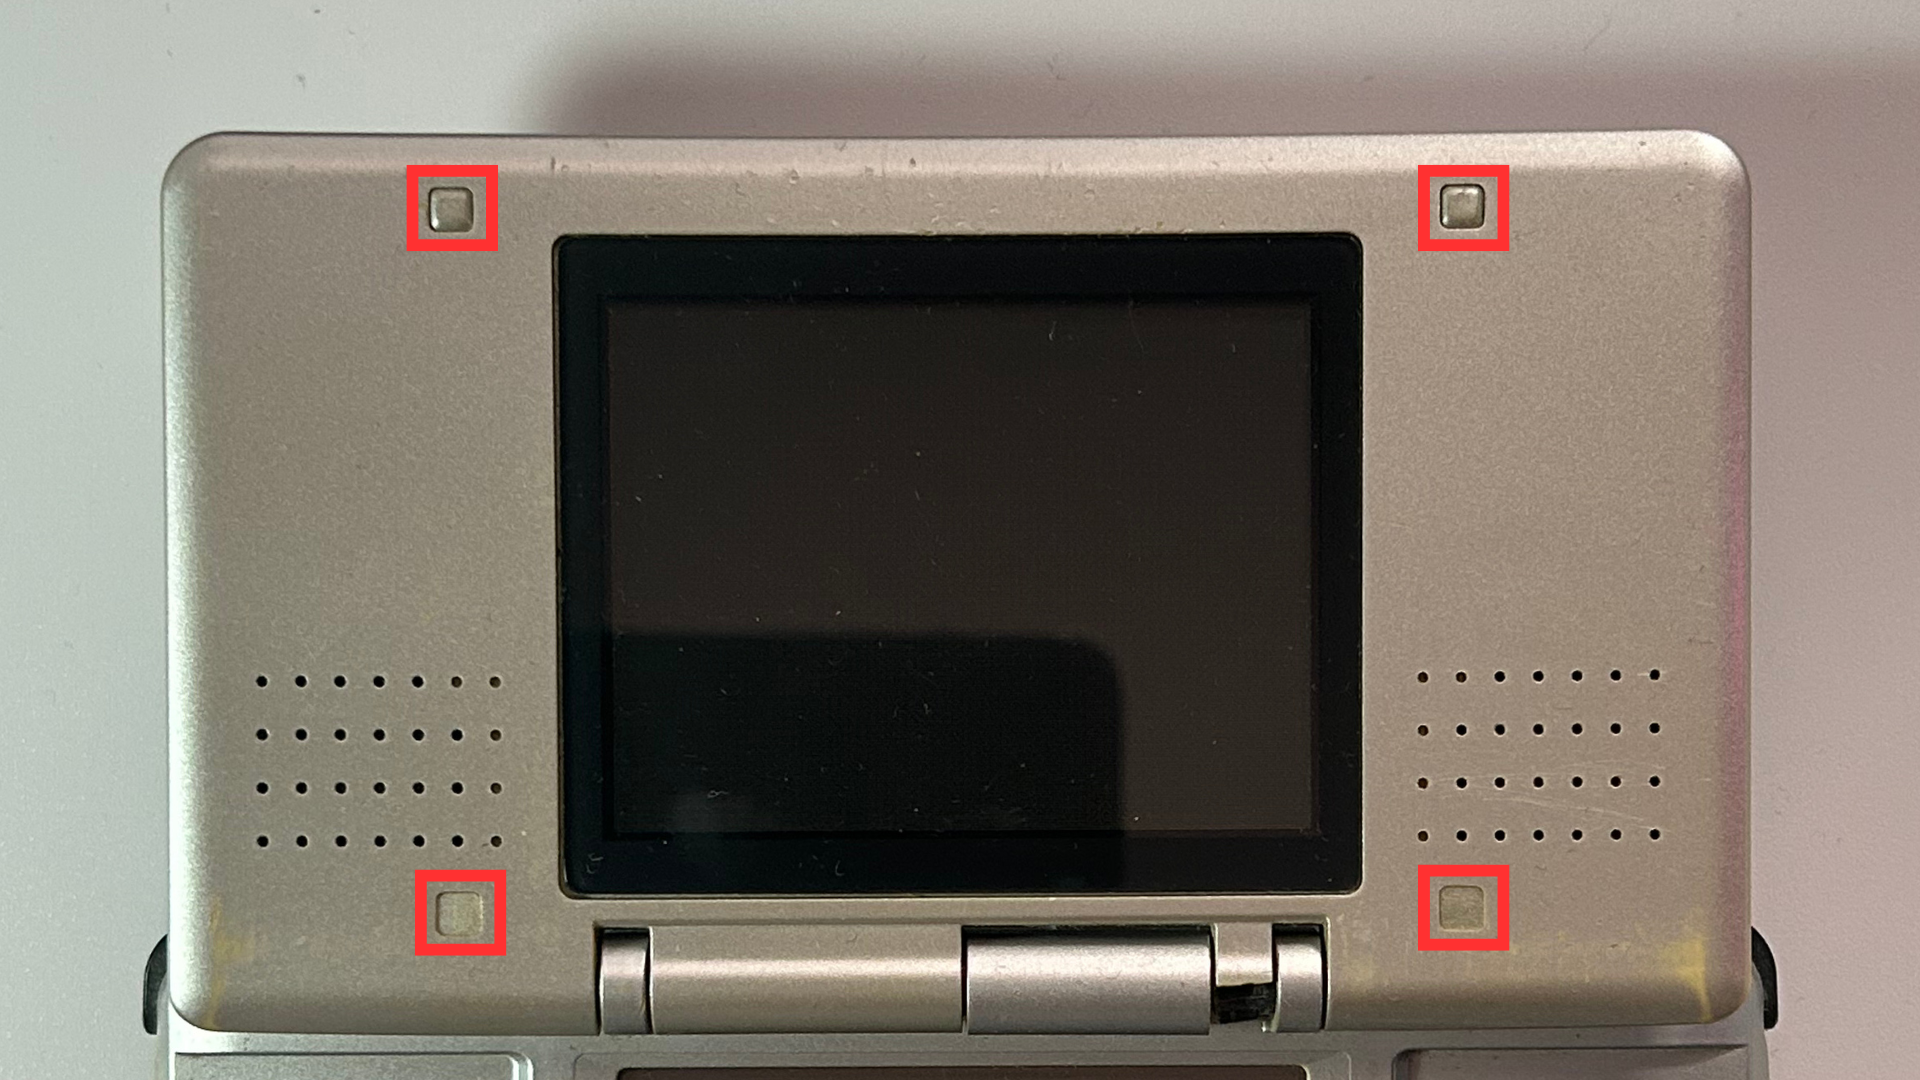
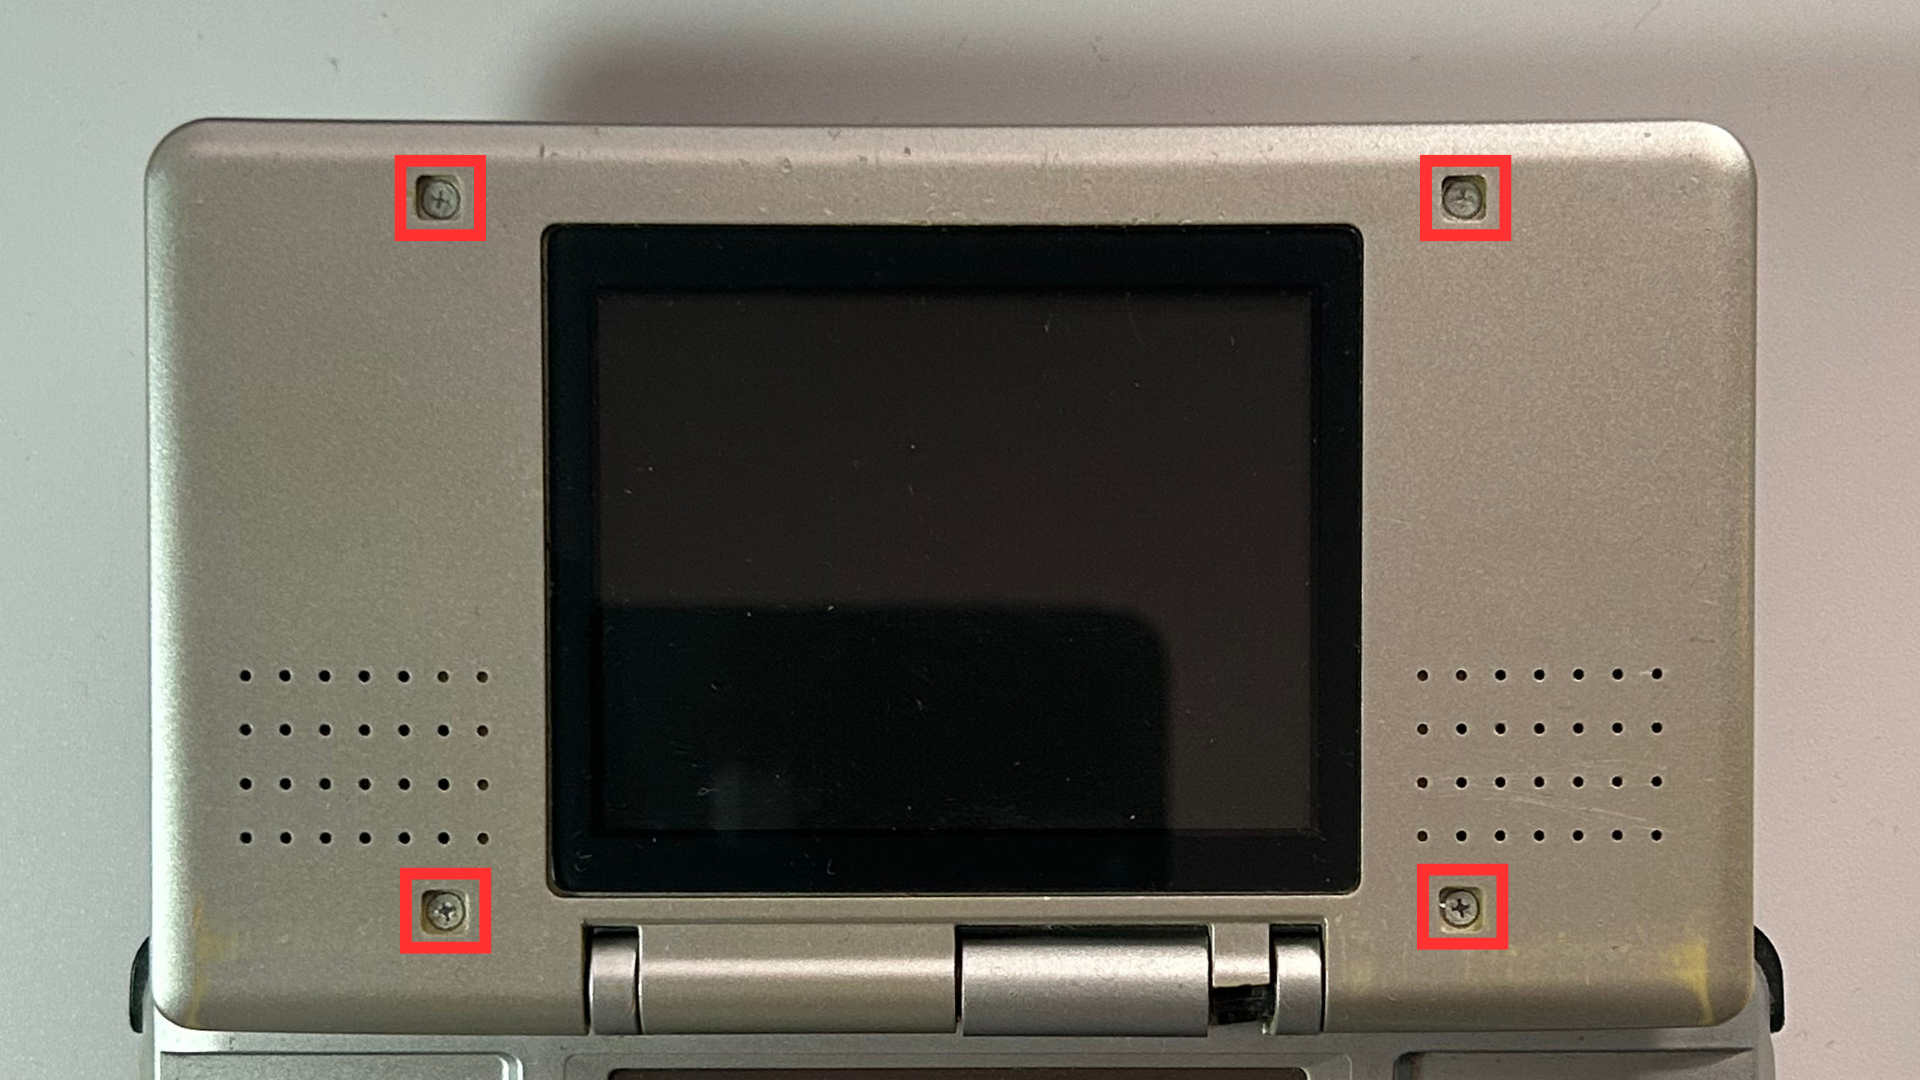
- Remove the four rubber covers surrounding the top screen to expose the Phillips screws underneath.
- Remove all four Phillips screws.
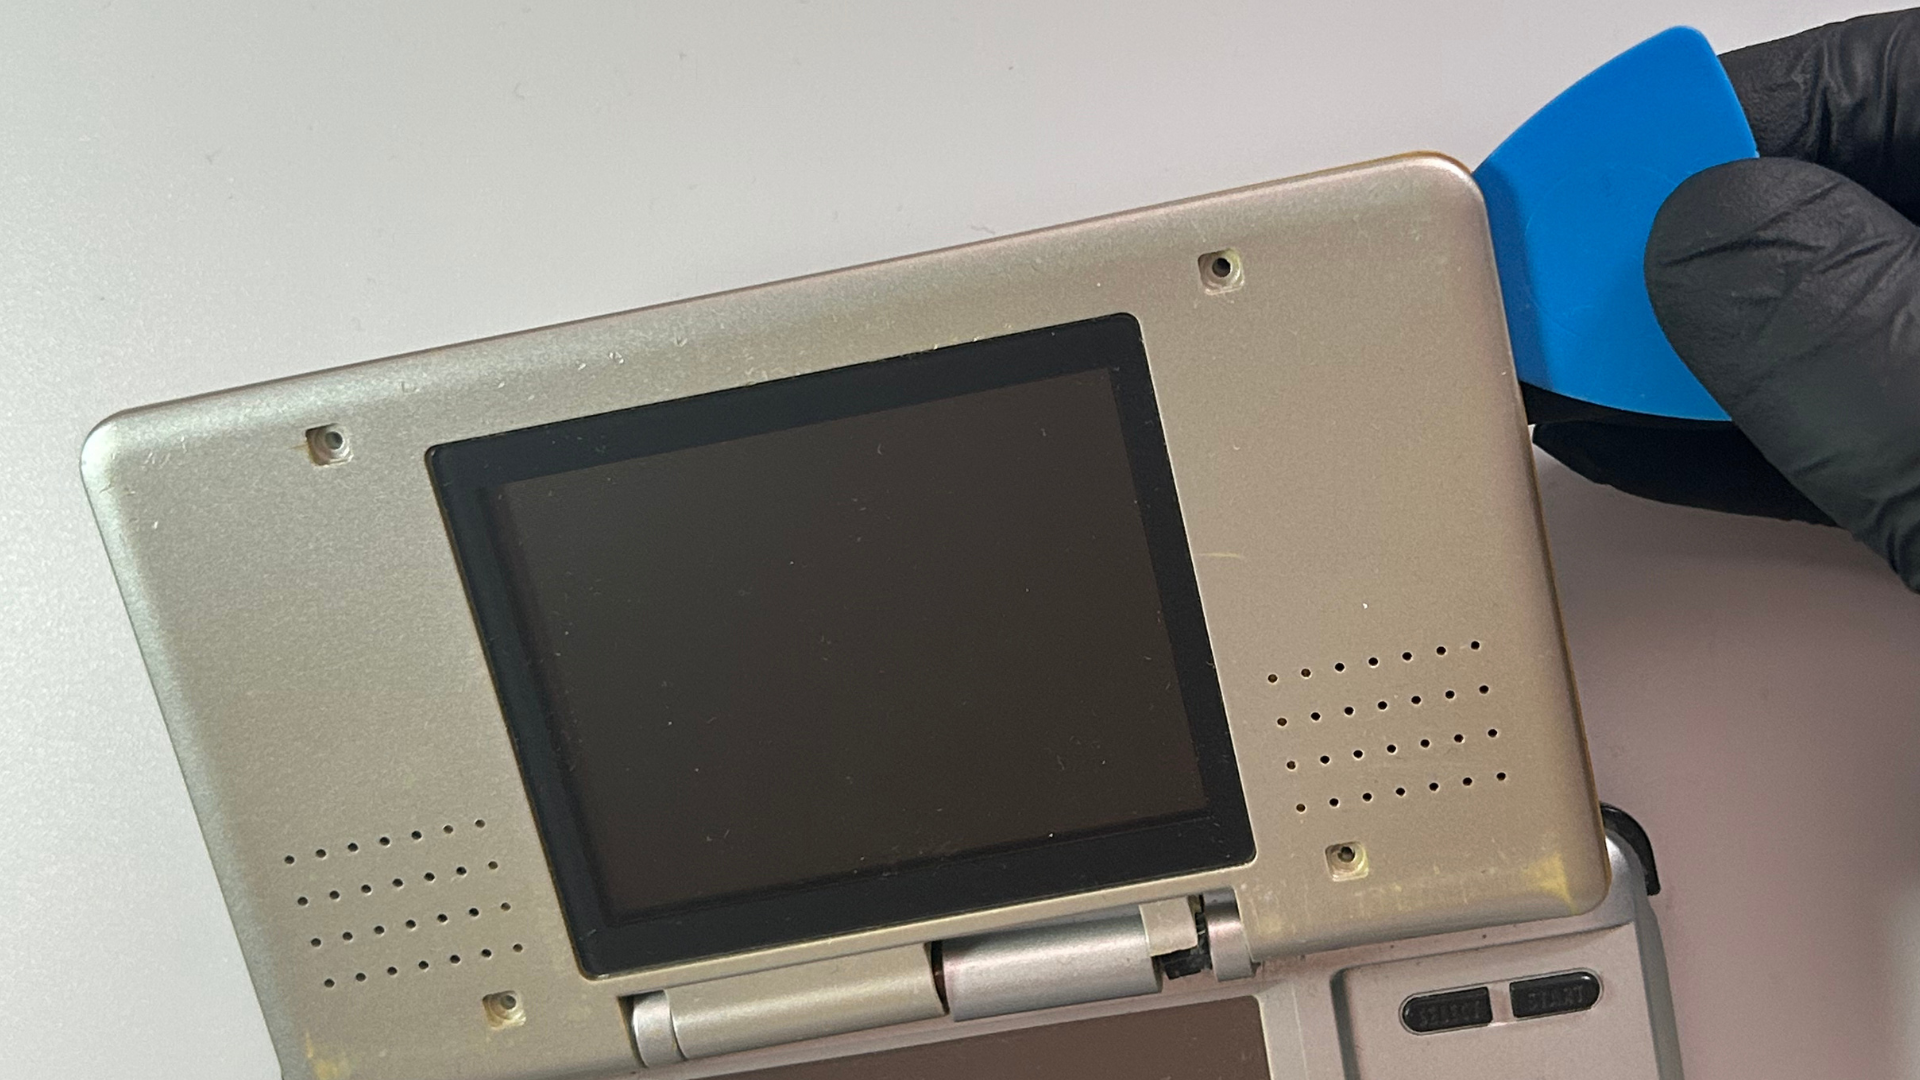
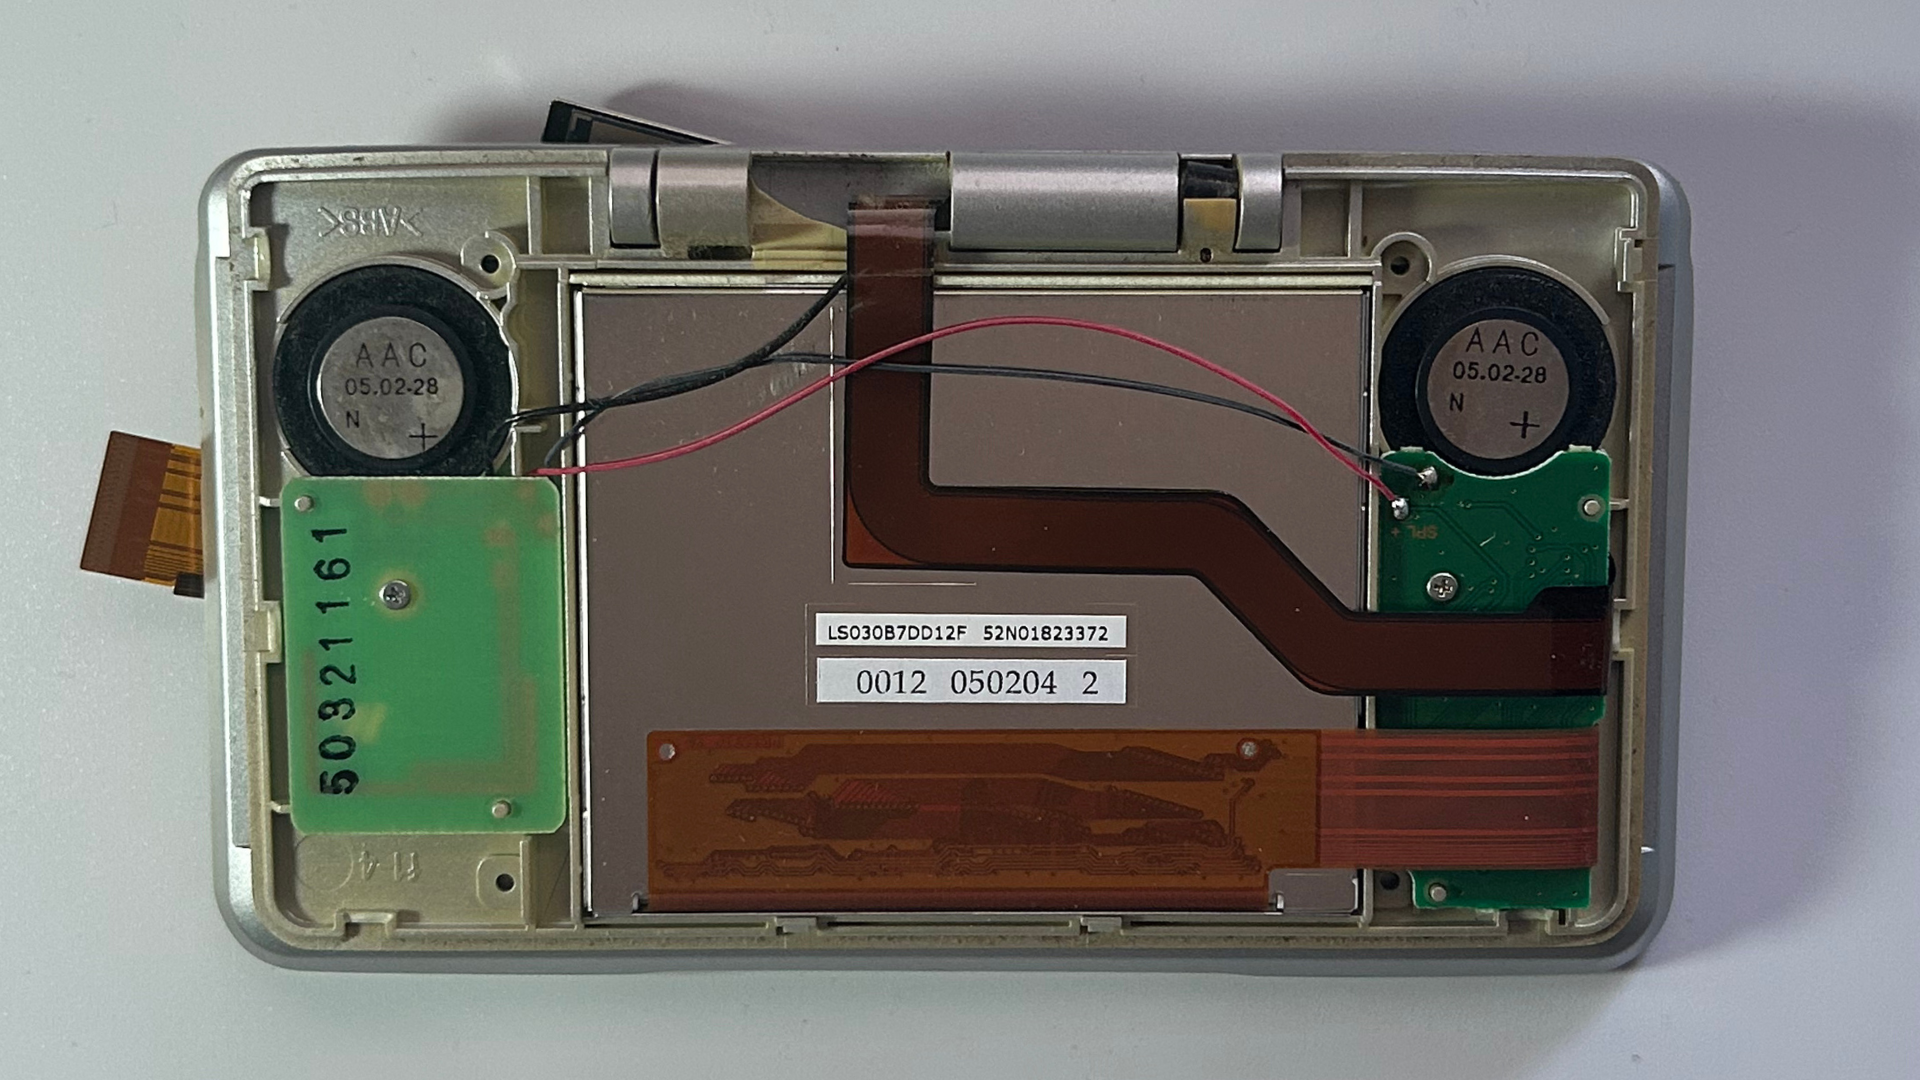
- Use a plastic pick or pry tool to carefully separate and remove the rear section of the upper screen housing.
Step 4 – Remove the hinge piece and LCD spacer
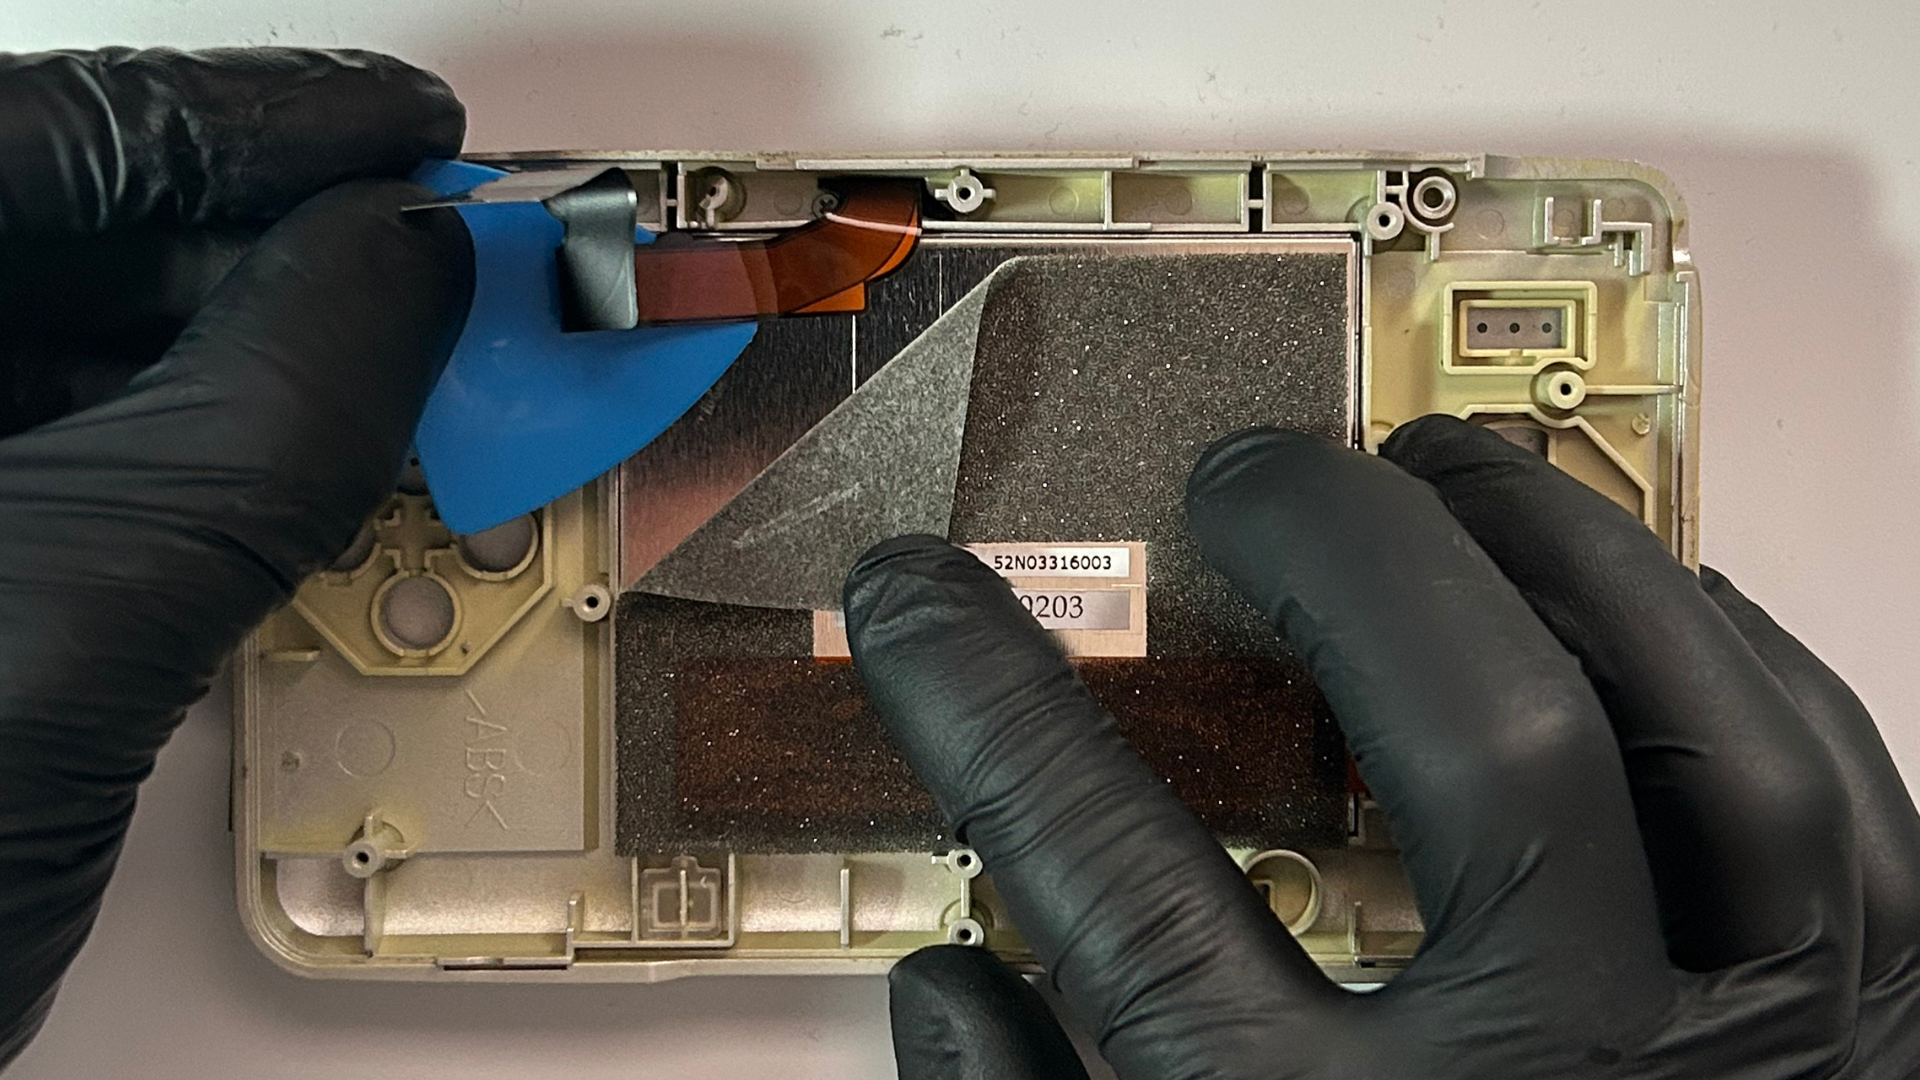
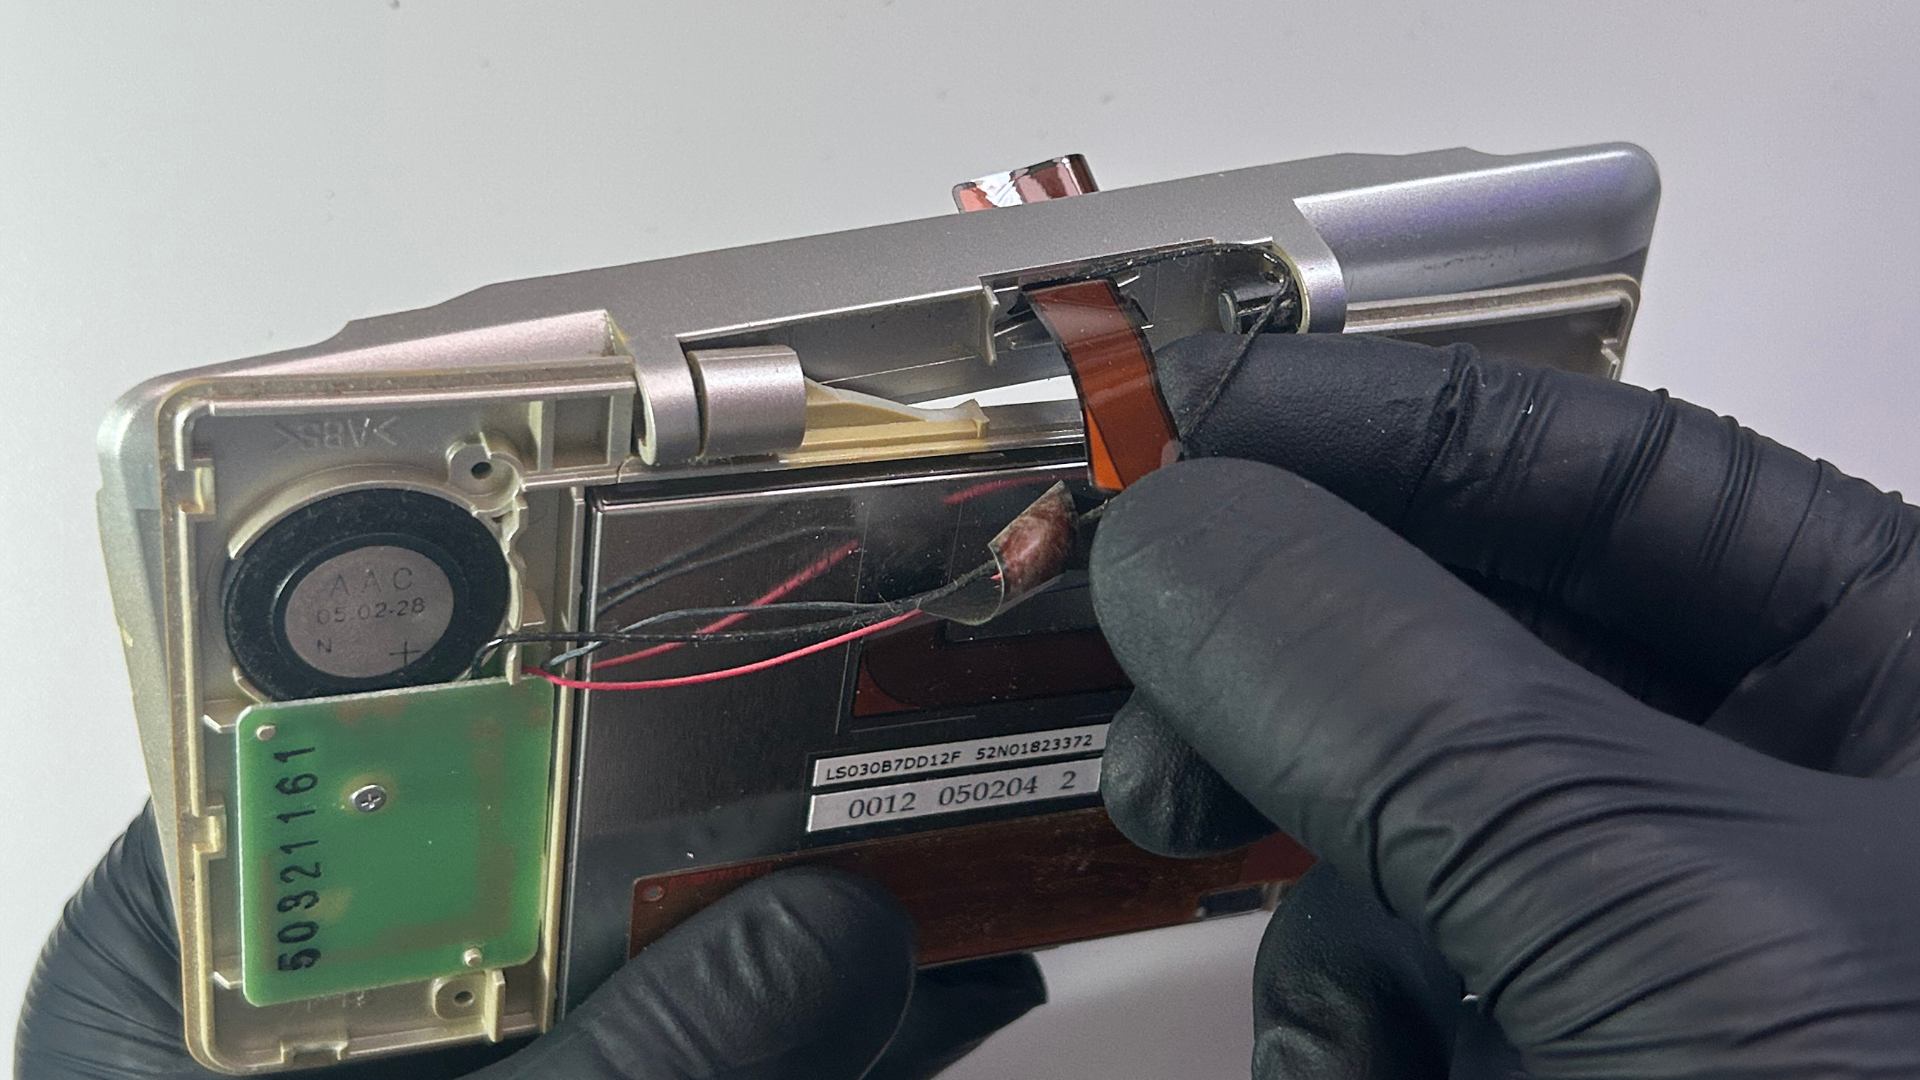
- Turn the console over and gently peel back the foam layer on the rear of the bottom LCD, this will expose the top-screen ribbon cable.
- Now carefully separate the top-screen ribbon cable from the rear of the bottom LCD panel.
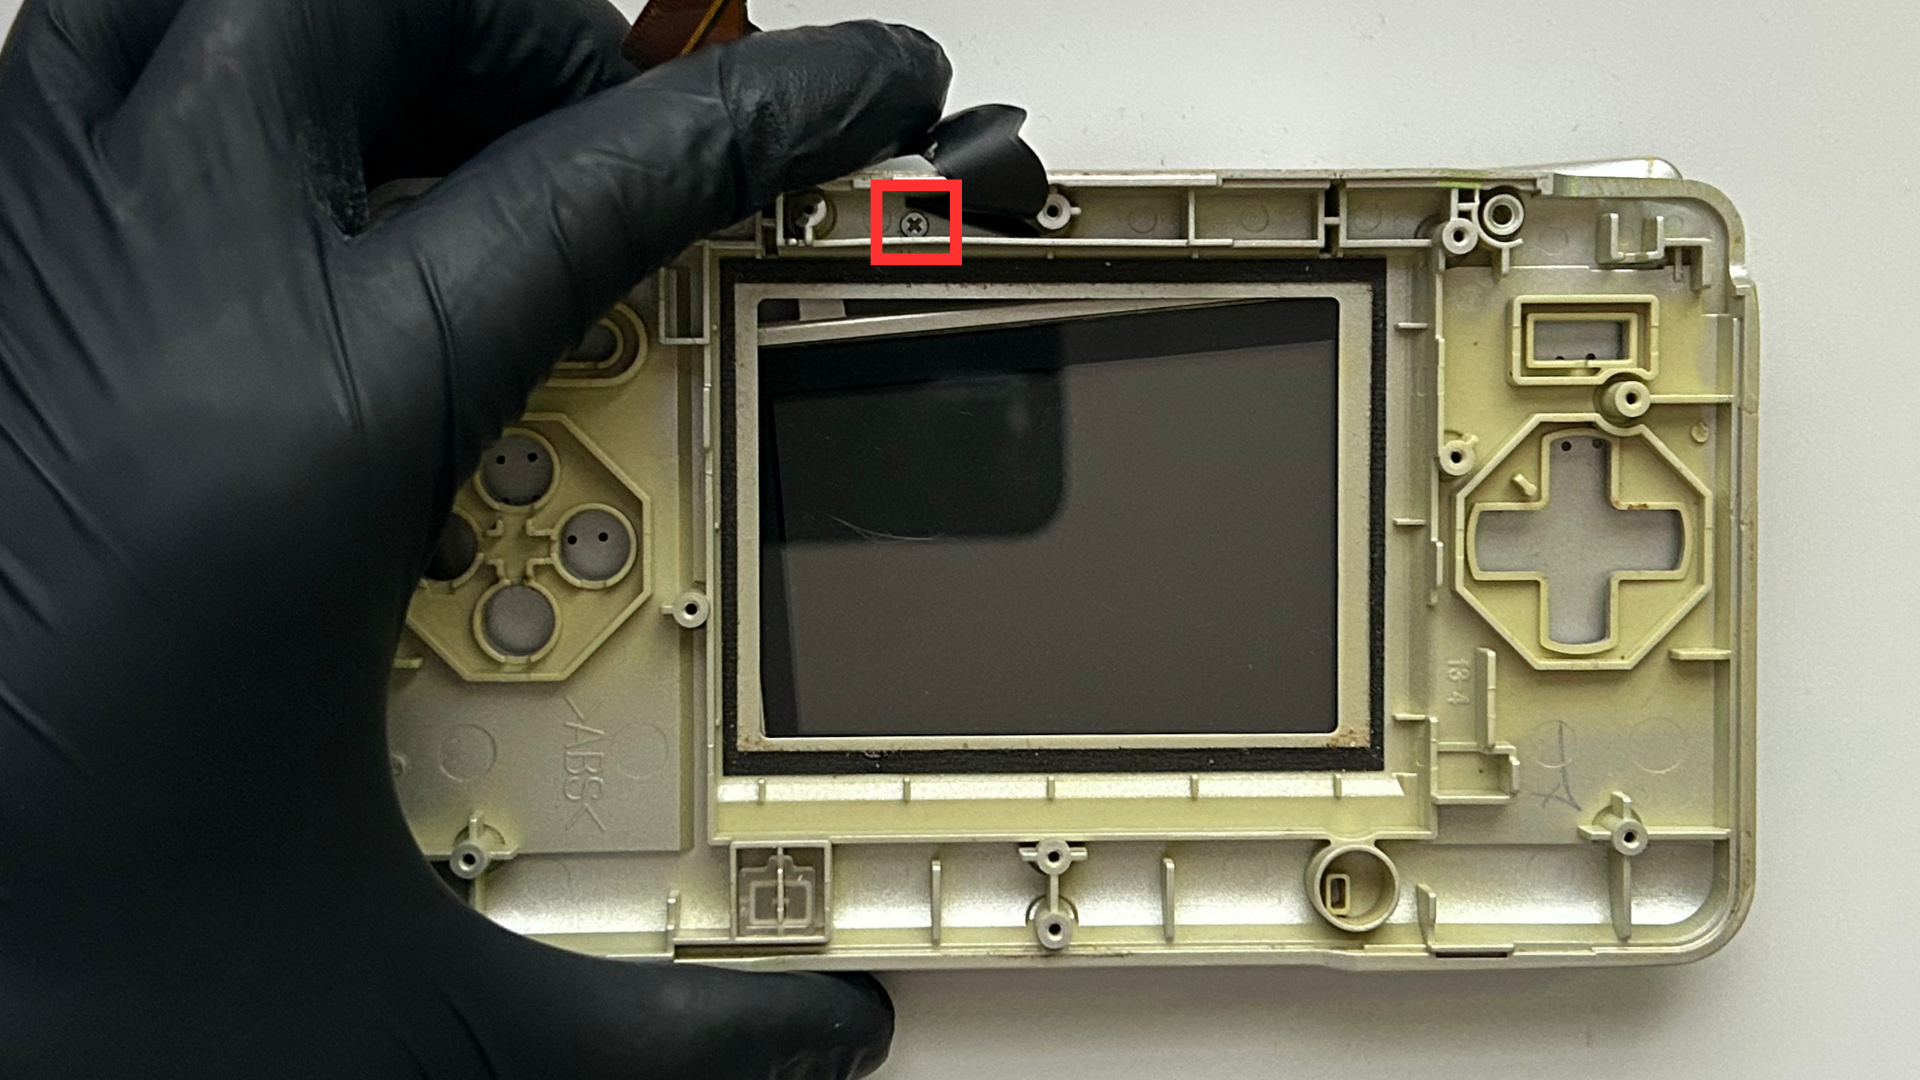
- Now you can easily remove the hidden screw underneath the top-screen ribbon cable.
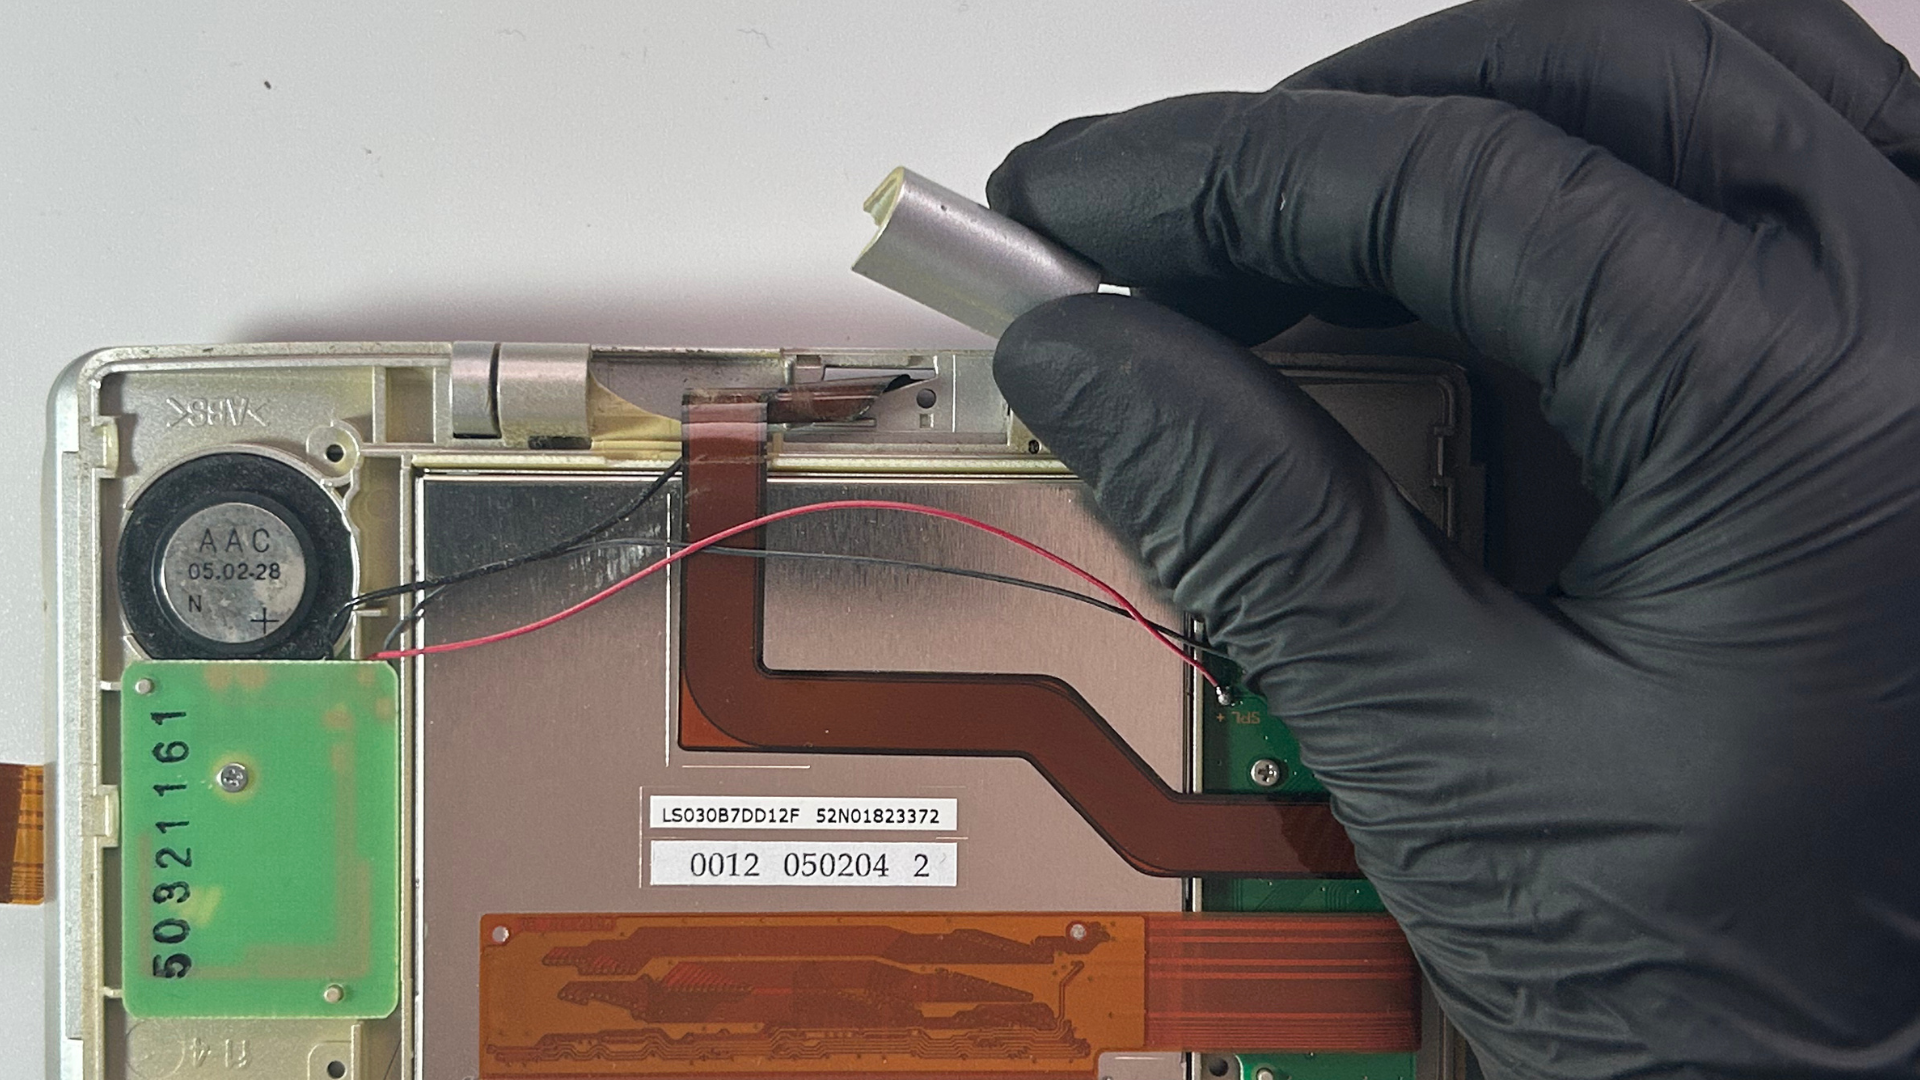
- Remove the hinge piece through which the top-screen ribbon cable passes.
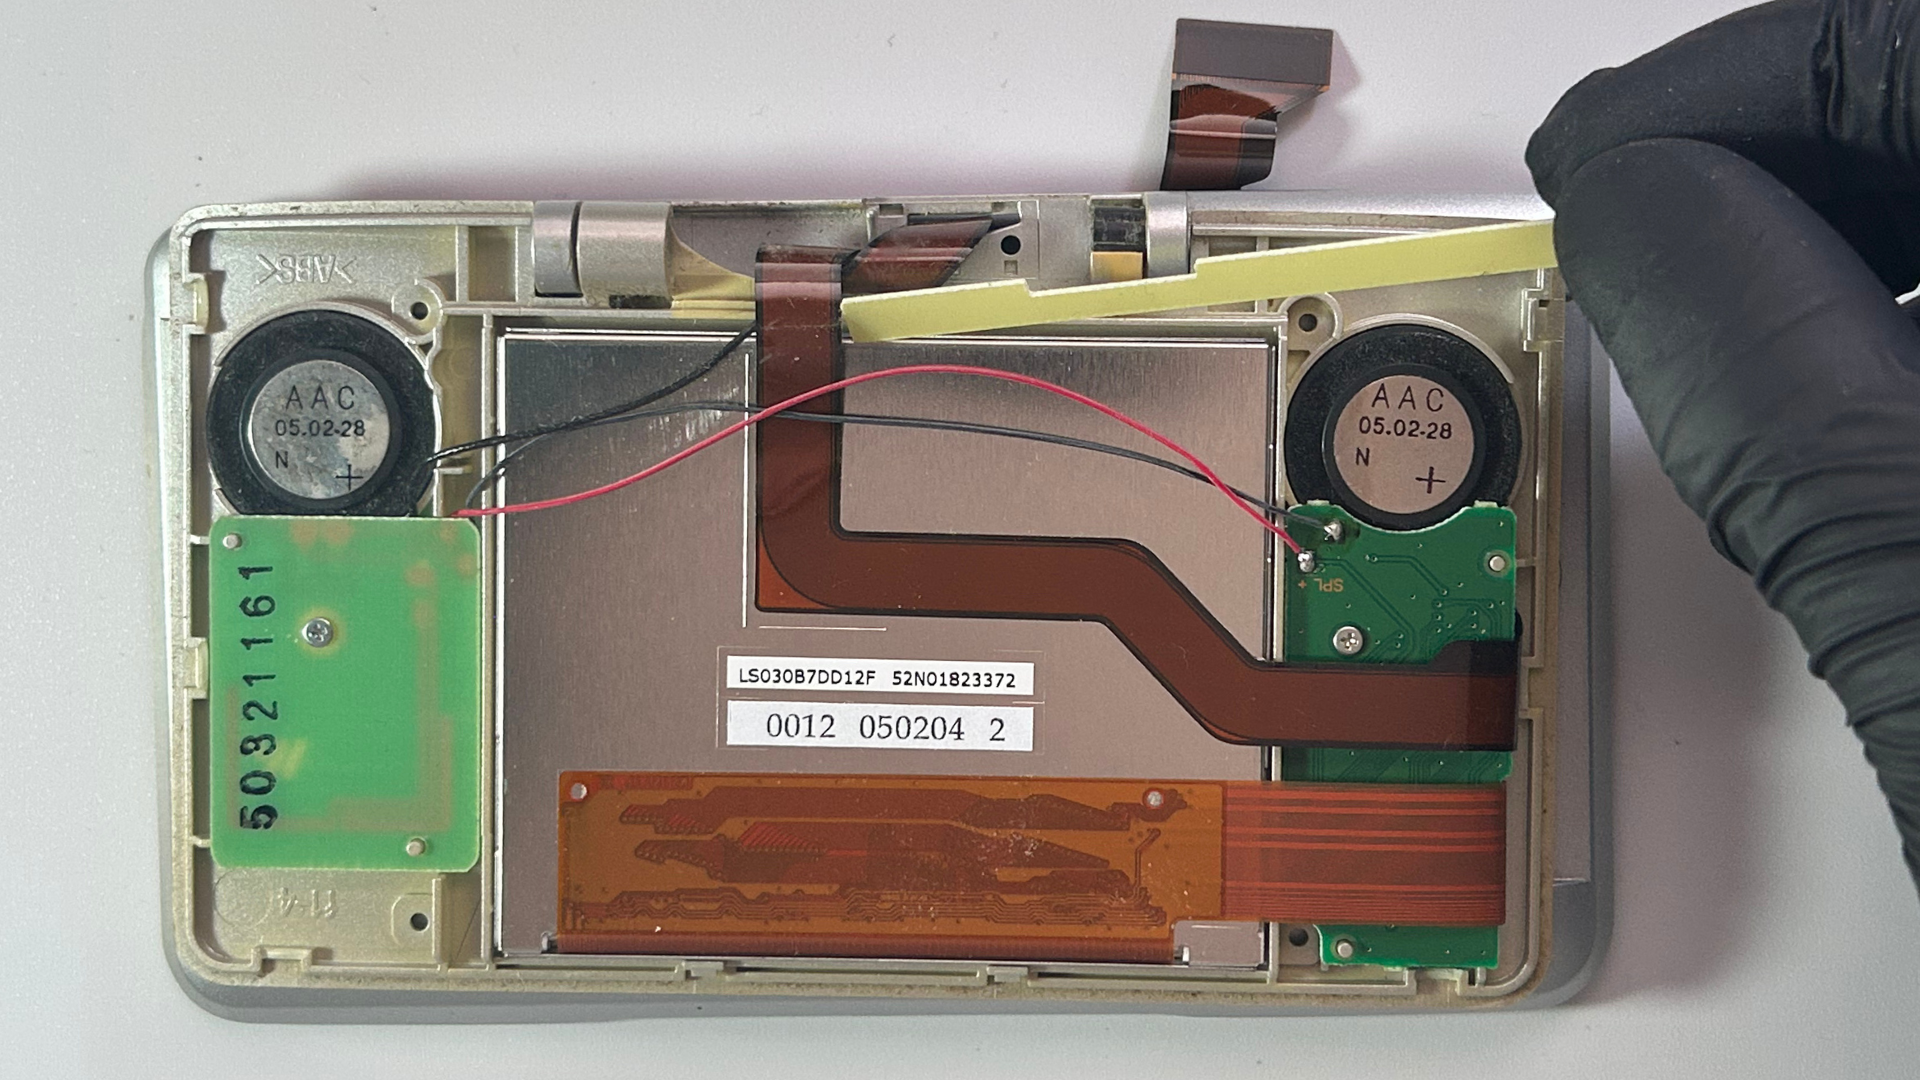
- Turn the console back over and remove the yellow plastic spacer positioned along the top edge of the LCD.
- Carefully feed the top LCD ribbon cable through the opening in the hinge.
Step 5 – Remove the speaker daughterboards
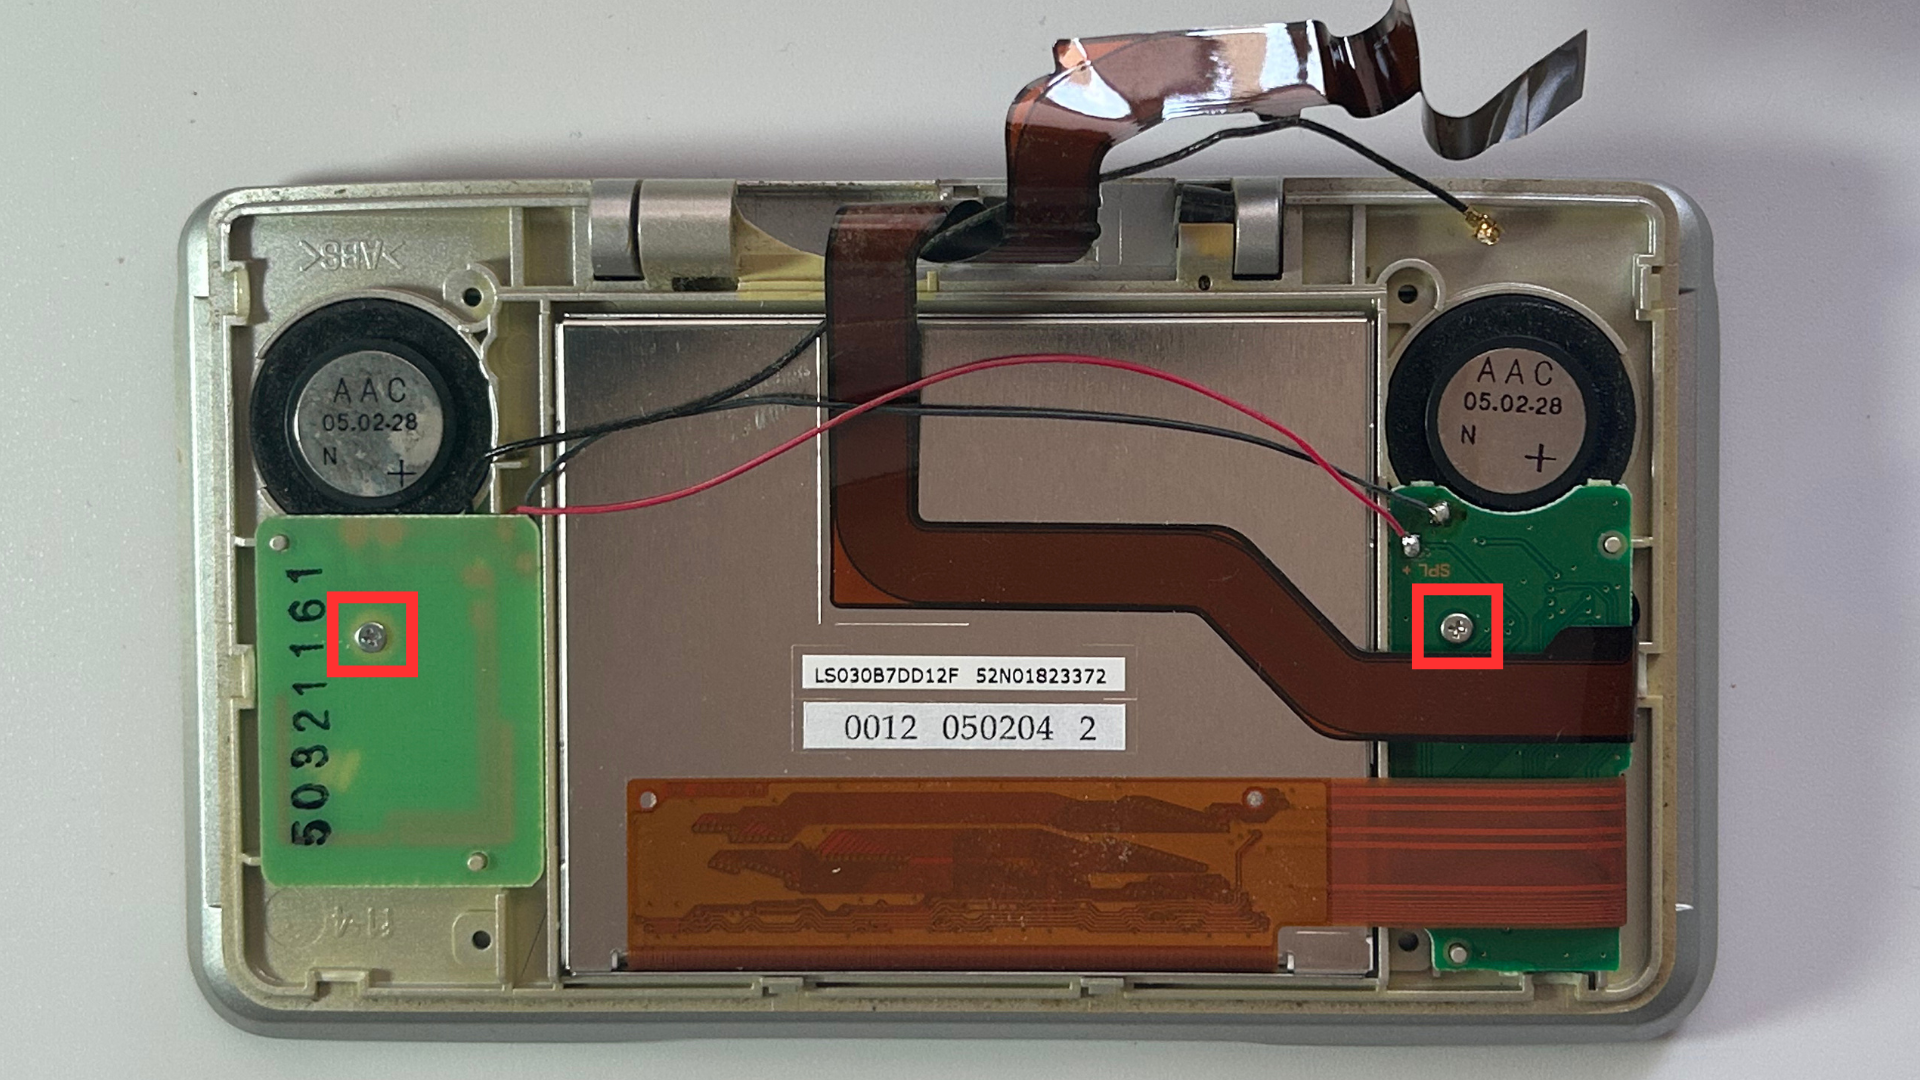
- Remove the Phillips screw securing each speaker daughterboard.
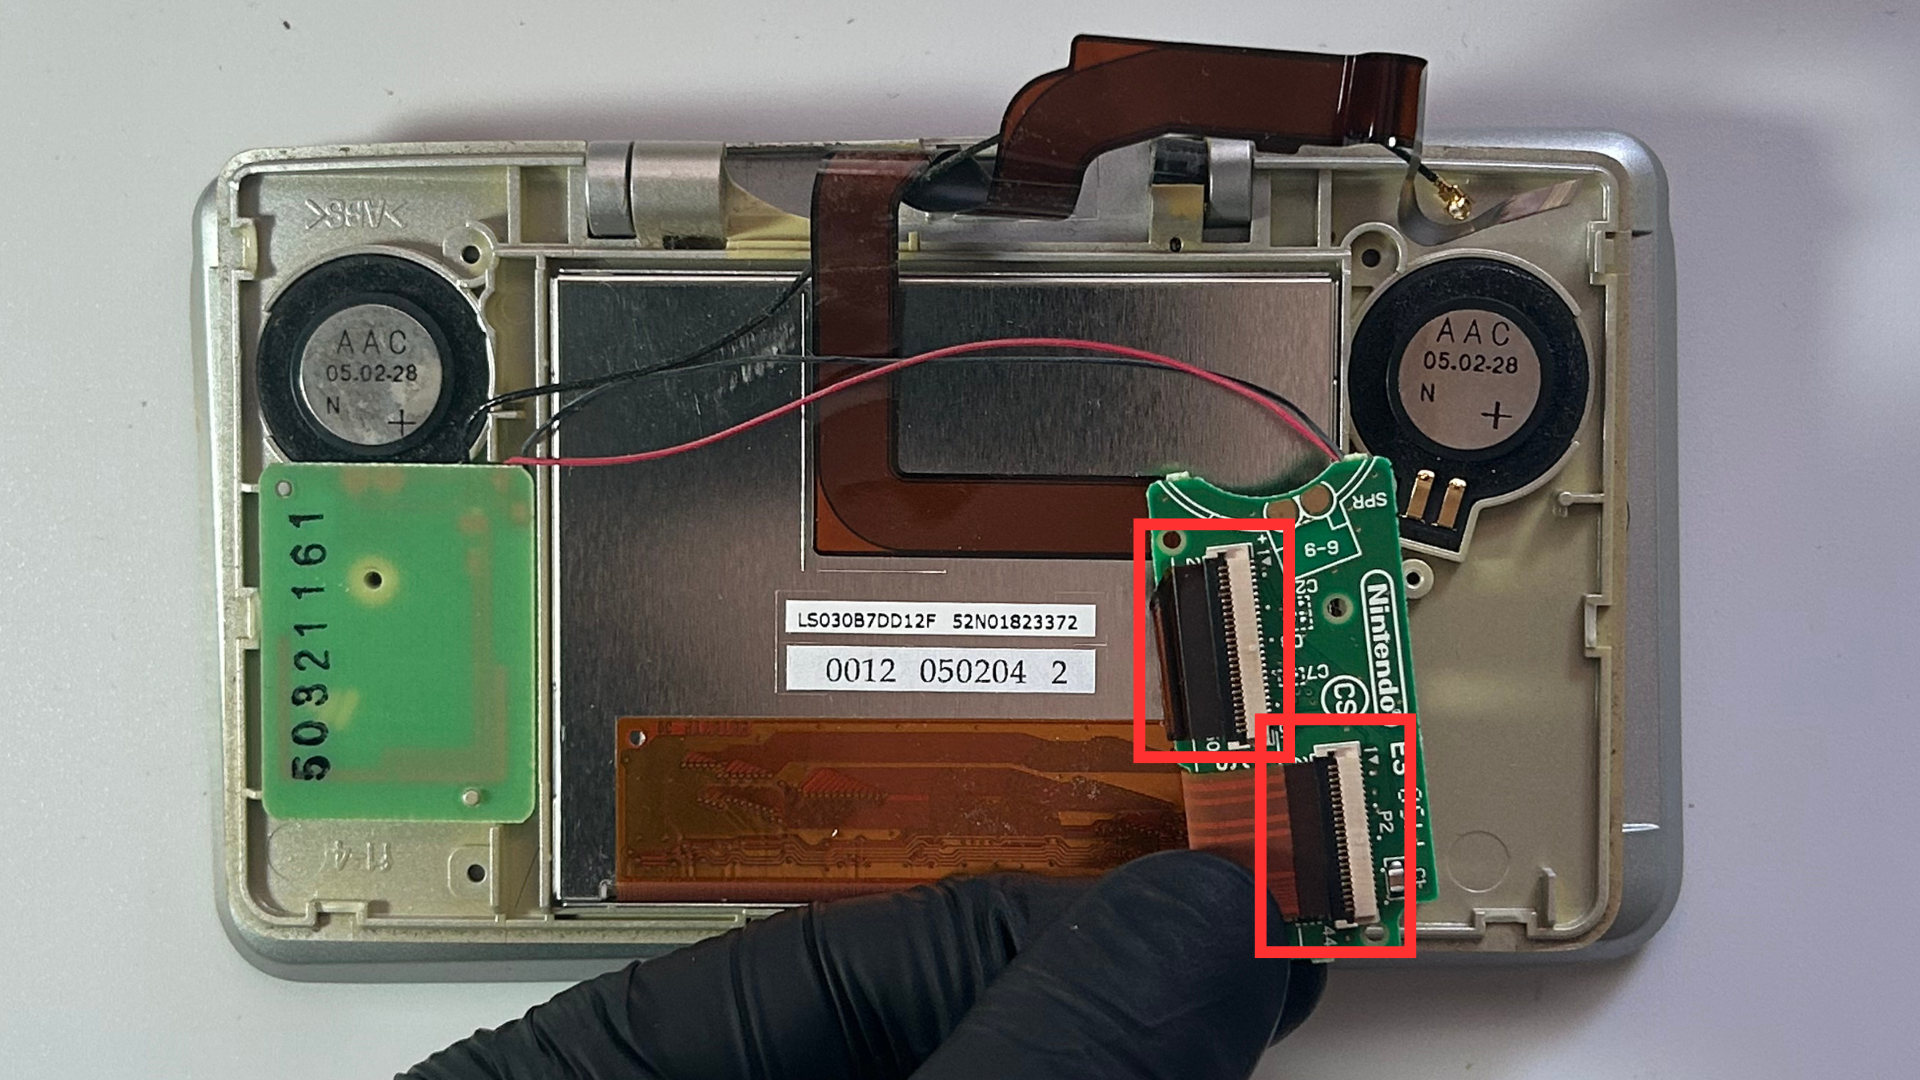
- Carefully lift the black locking tabs on the ribbon cable connectors.
- Disconnect the ribbon cables from the daughterboards.
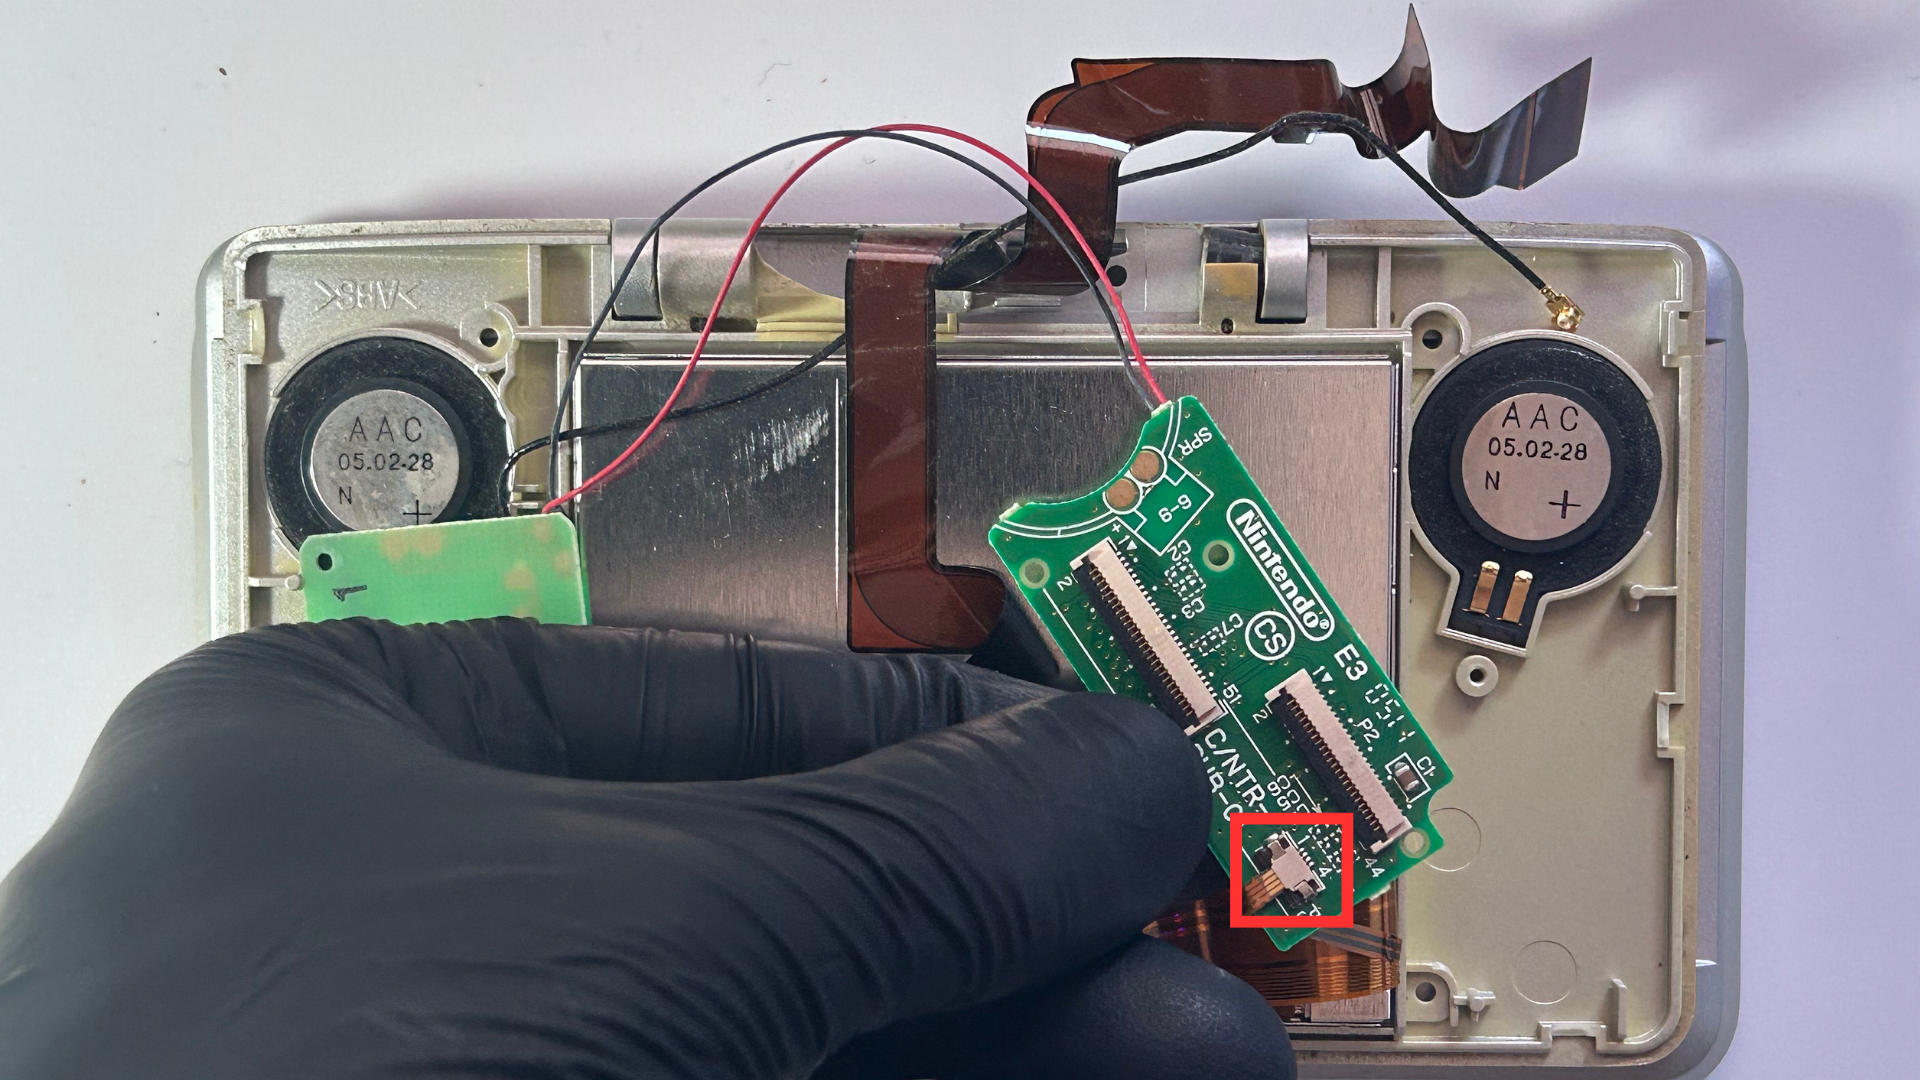
- Disconnect the smaller ribbon cable positioned underneath one of the larger ribbons.
- Lift both speaker daughterboards out of the upper housing.
Step 6 – Remove the top LCD and speakers
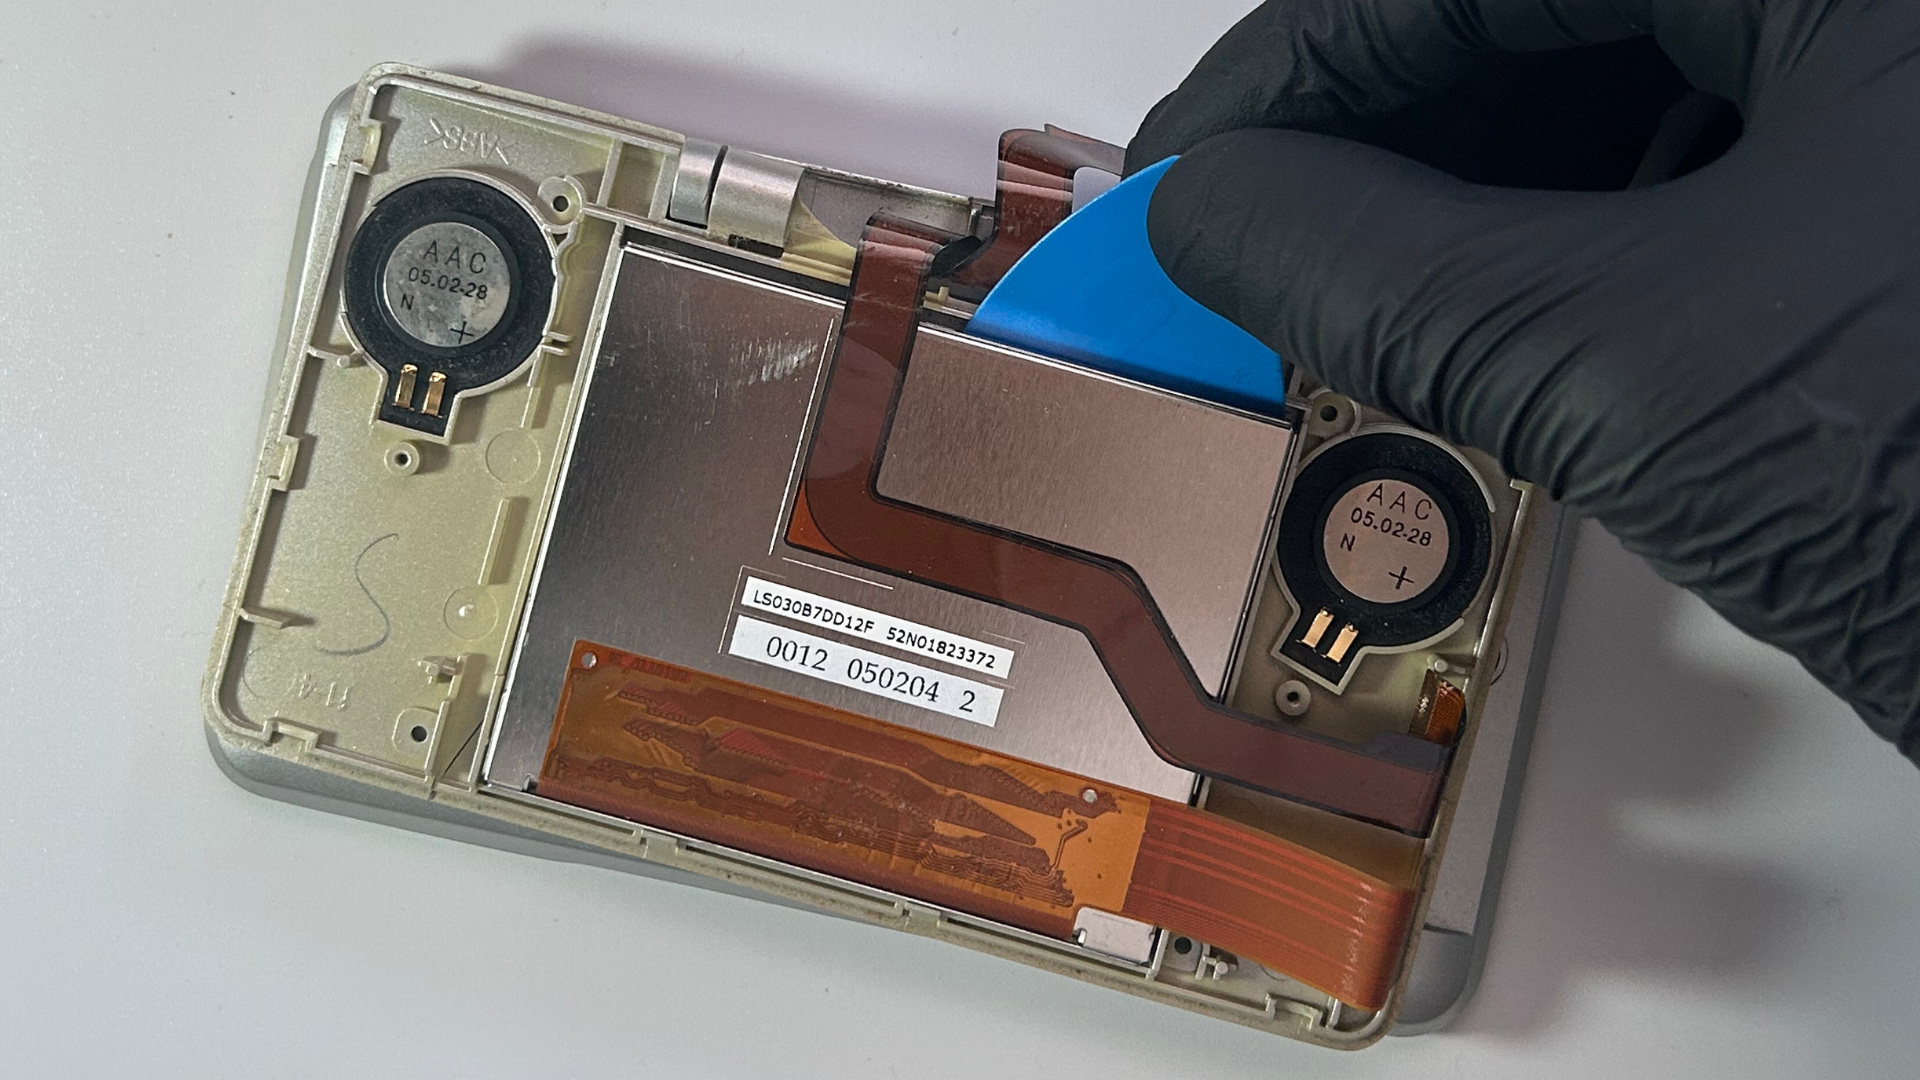
- Use a plastic pick or another thin opening tool to carefully lift the top LCD out of the upper housing.
- Remove the left and right speakers from their positions in the housing.
- Set the speakers aside somewhere safe, as they will be reinstalled into the upper screen housing during reassembly.

Step 7 – Install the replacement top LCD
- Clean the inside of the upper screen lens and remove any dust or debris before installing the replacement display.
- Carefully position the replacement LCD inside the upper housing.
- Make sure the display is sitting flat and correctly aligned behind the screen lens.
- Reinstall the left and right speakers into their positions in the upper housing.
- Carefully route the replacement LCD ribbon cable through the hinge opening.
- Reinstall the yellow LCD spacer and hinge piece.

Step 8 – Reassemble the Nintendo DS
- Reinstall the speaker daughterboards and reconnect their ribbon cables.
- Reinstall the upper rear housing and its four screws.
- Refit the rubber screw covers around the top screen.
- Carefully route the top-screen ribbon cable back into the lower section of the console.
- Reinstall the motherboard.
- Reconnect all ribbon cables and the black antenna wire.
- Check that every ribbon cable is fully inserted and each locking tab is secured.
- Refit the rear shell and reinstall its screws.
- Reinstall the battery and battery cover.
Step 9 – Test the replacement top screen
- Power on the Nintendo DS.
- Check that the replacement top LCD displays an image correctly.
- Look for flickering, lines, incorrect colours or other display problems.
- Test both speakers and the volume control.
- Open and close the hinge gently and confirm that the top screen remains stable.
- Check that the bottom screen, touchscreen and buttons still function correctly.
Conclusion
Replacing the top LCD on an original Nintendo DS is a fairly involved repair because the display ribbon cable must be routed through the hinge and connected to the motherboard in the lower half of the console.
Take particular care with the ribbon cable during removal and installation. Once the repair is complete, test the replacement display, both speakers, hinge movement and the remaining console controls before considering the repair finished.