Introduction
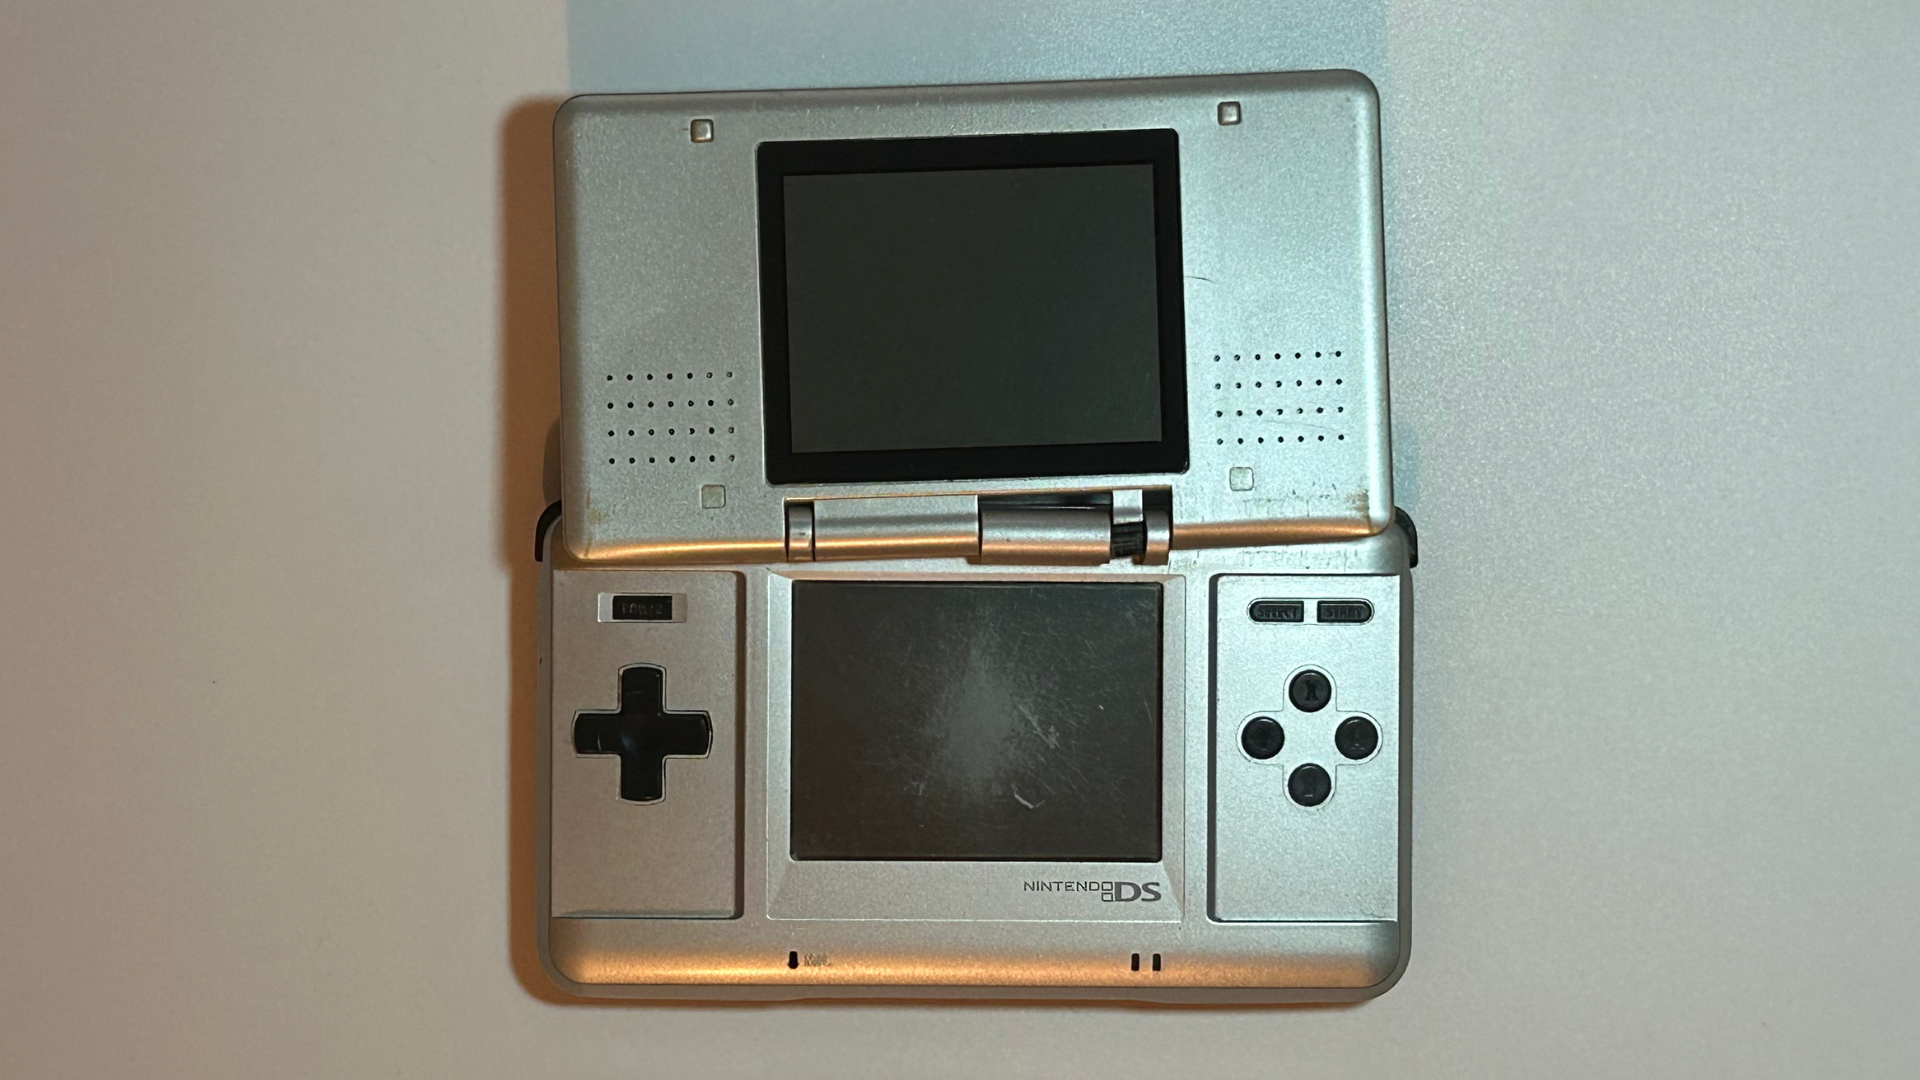
In this guide, I'll show you how to completely replace the shell on an original Nintendo DS. This involves almost fully disassembling the console and transferring the internal components, screens, buttons and speakers into the replacement housing.
A full reshell can be a great way to restore a Nintendo DS with a cracked, heavily scratched or damaged housing.
What you'll need
- 51-in-1 Precision Screwdriver Set
- Plastic pick, spudger or opening tool
- Precision Tweezers
- Hand squeeze air blower (optional, for removing dust)
- Replacement Nintendo DS shell
Step 1 – Remove the rear screws and battery
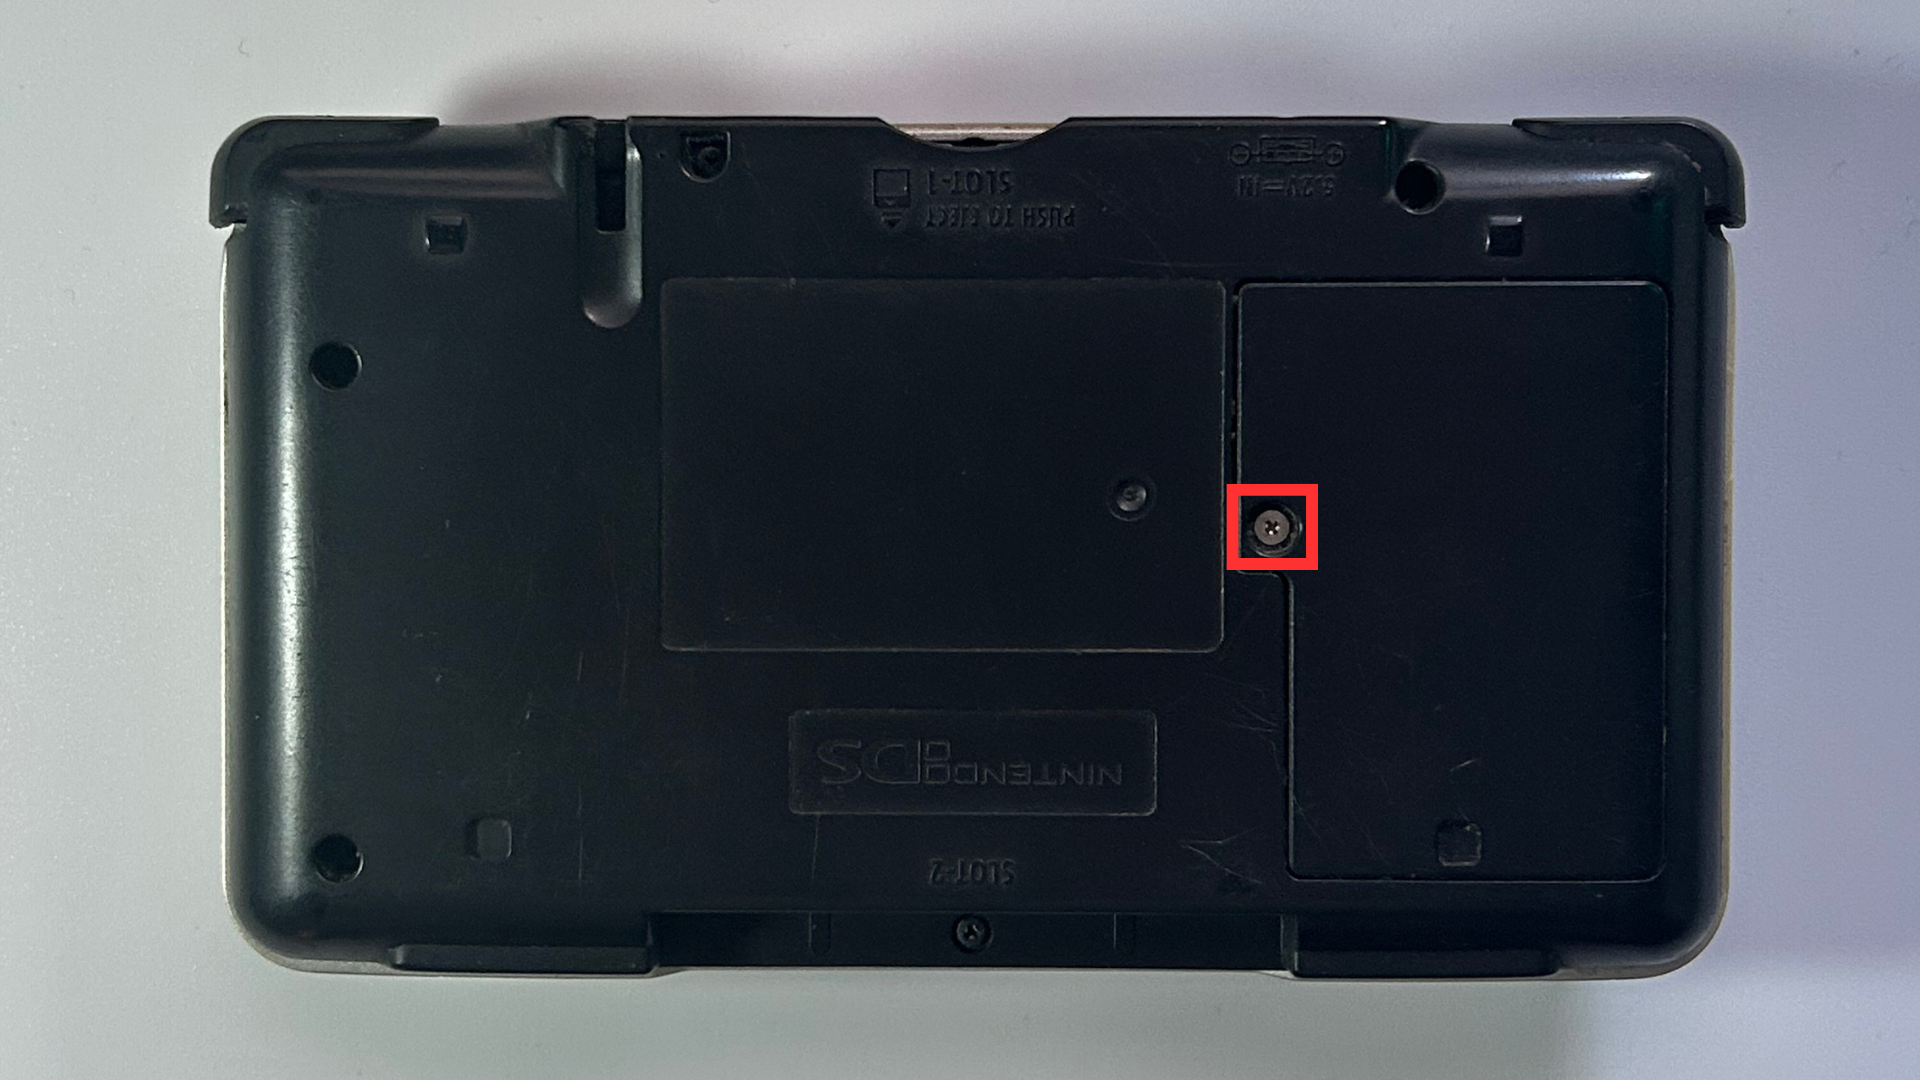
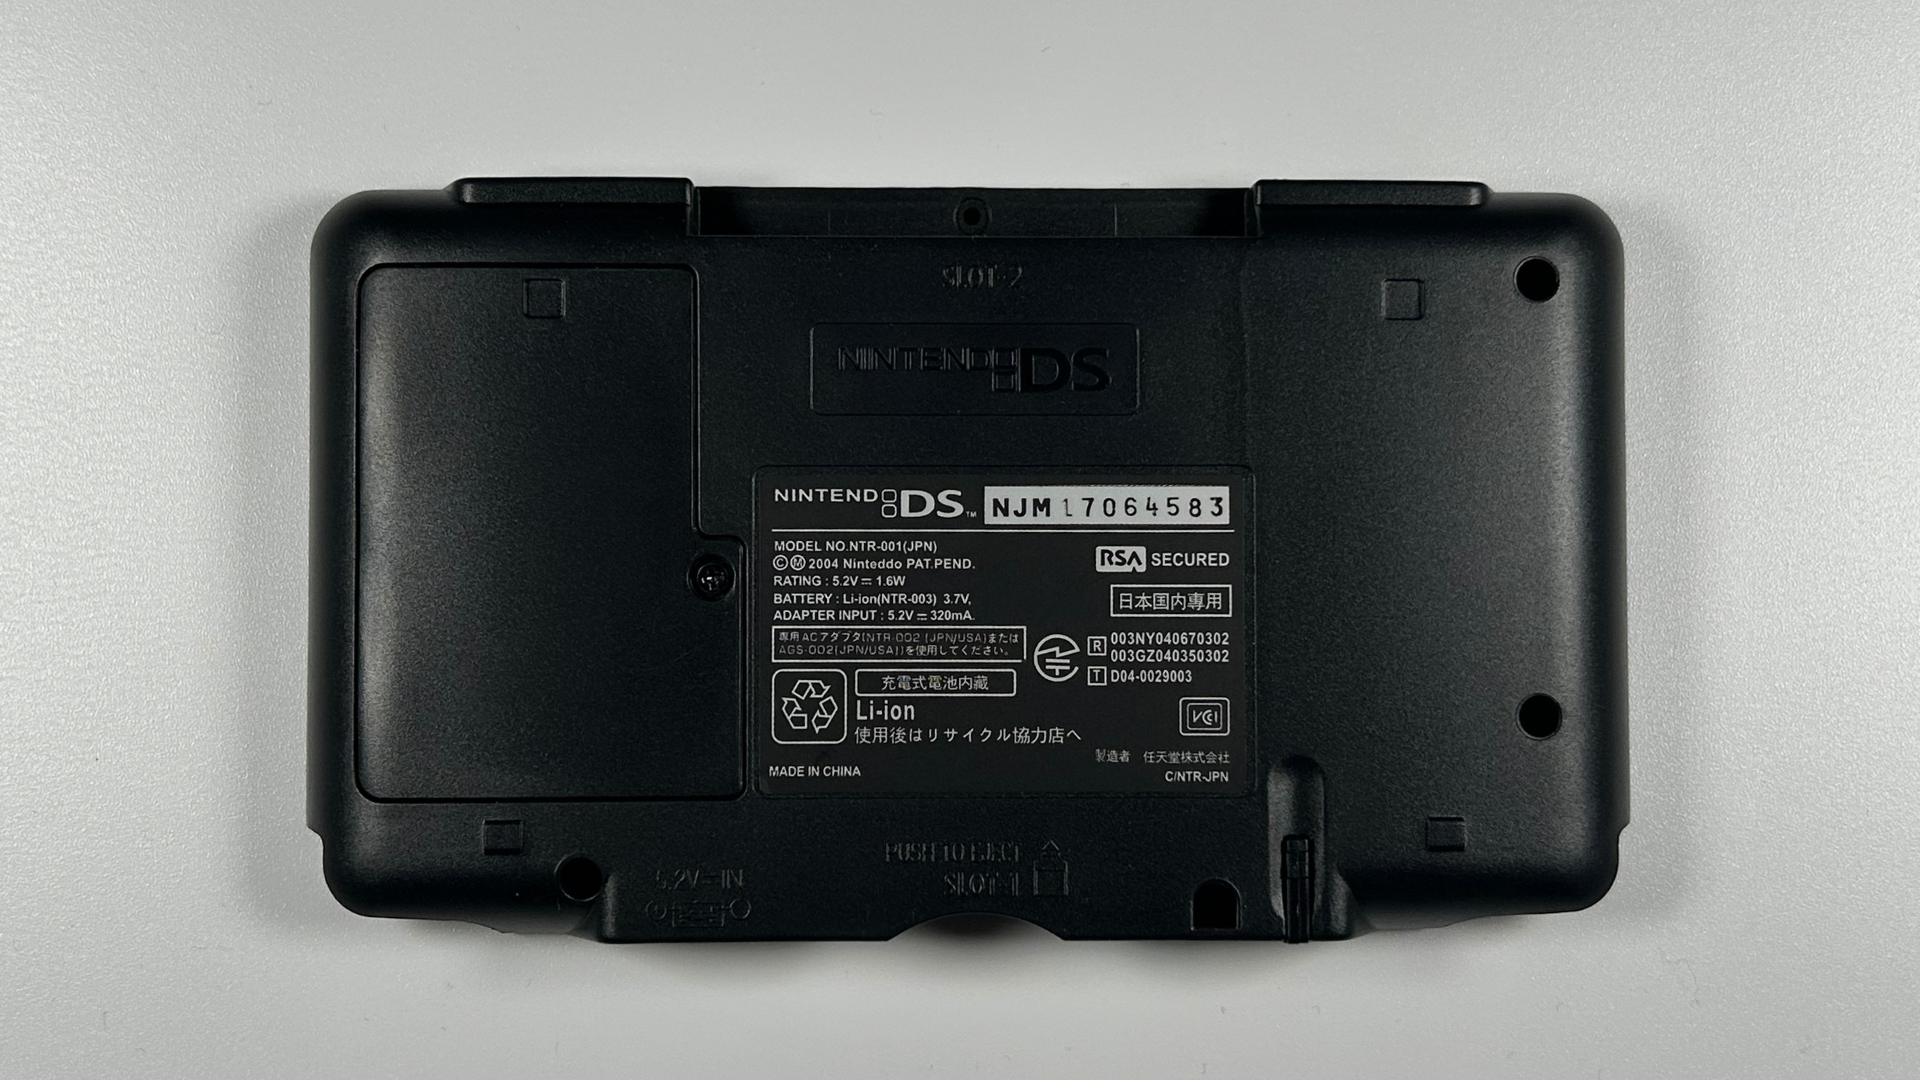
- Turn the Nintendo DS over so the rear shell is facing upwards.
- Remove the screw securing the battery cover.
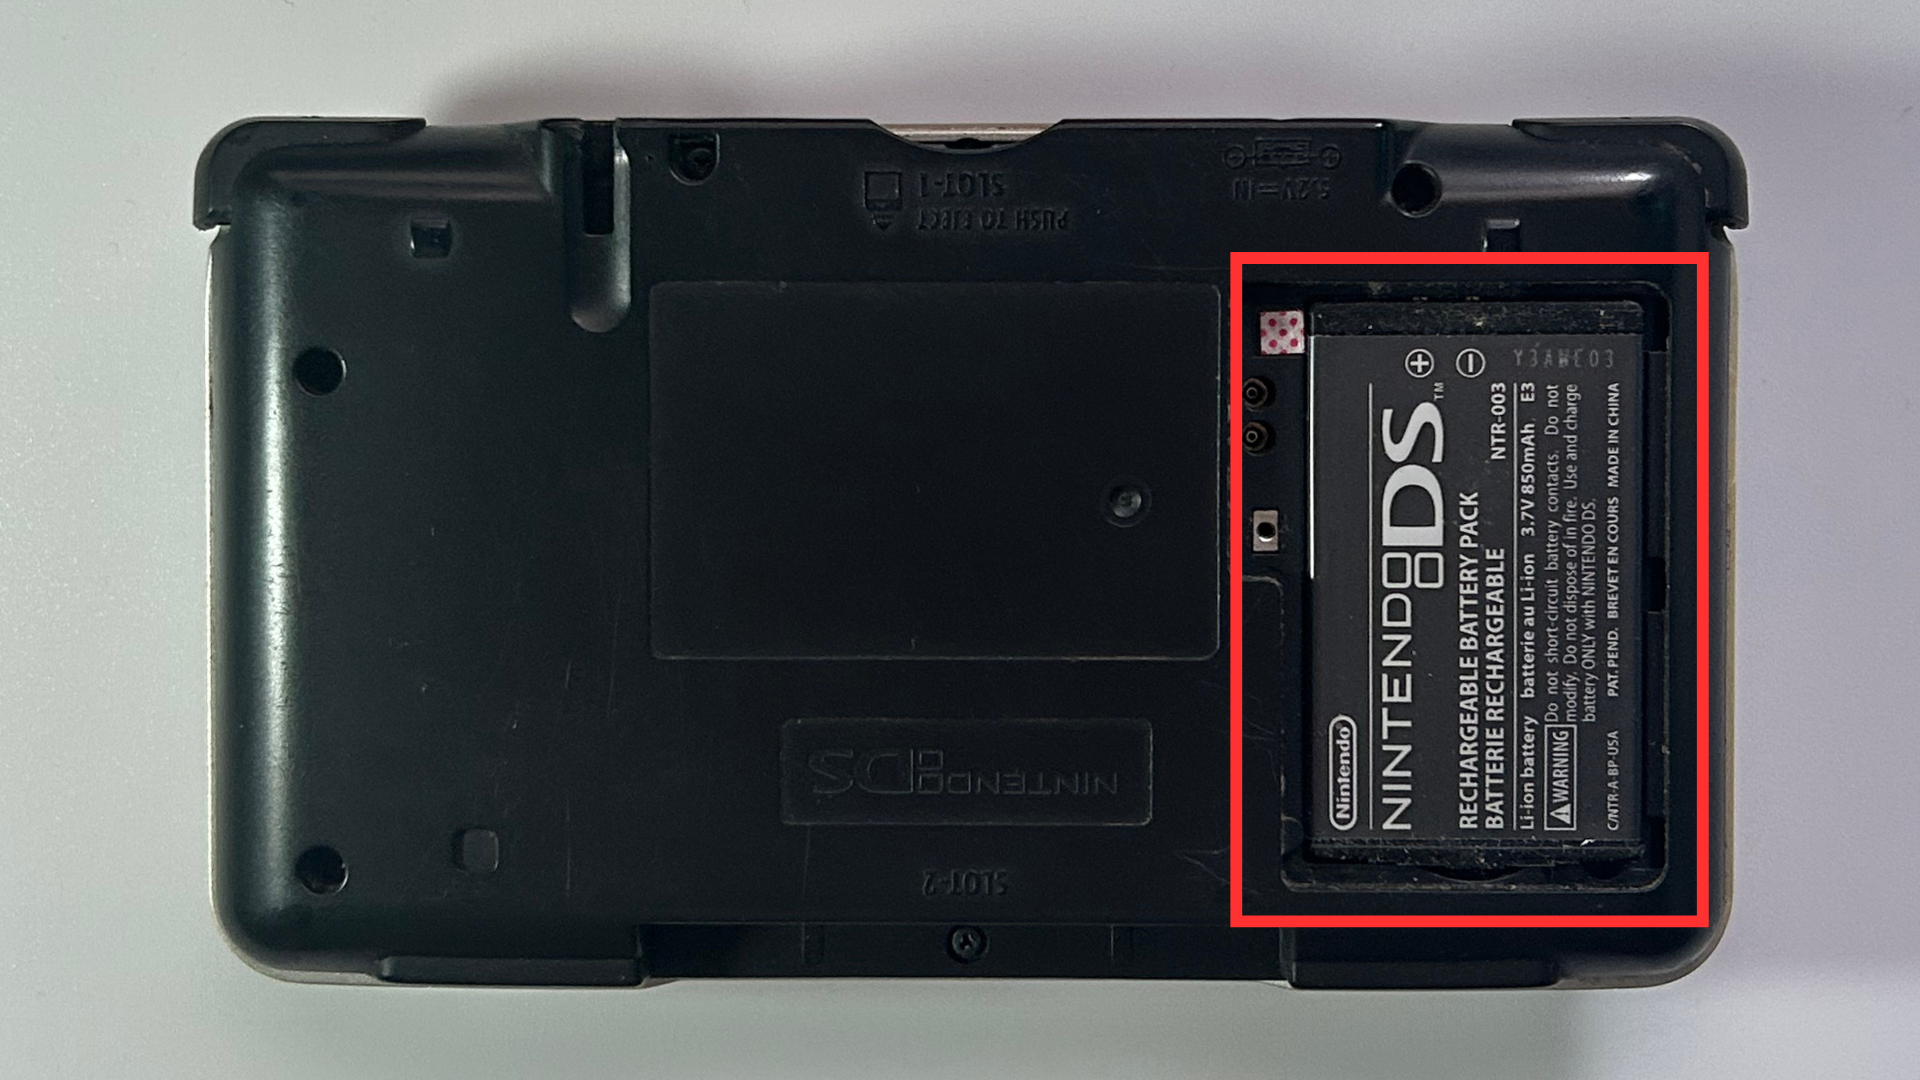
- Lift off the battery cover and remove the battery.
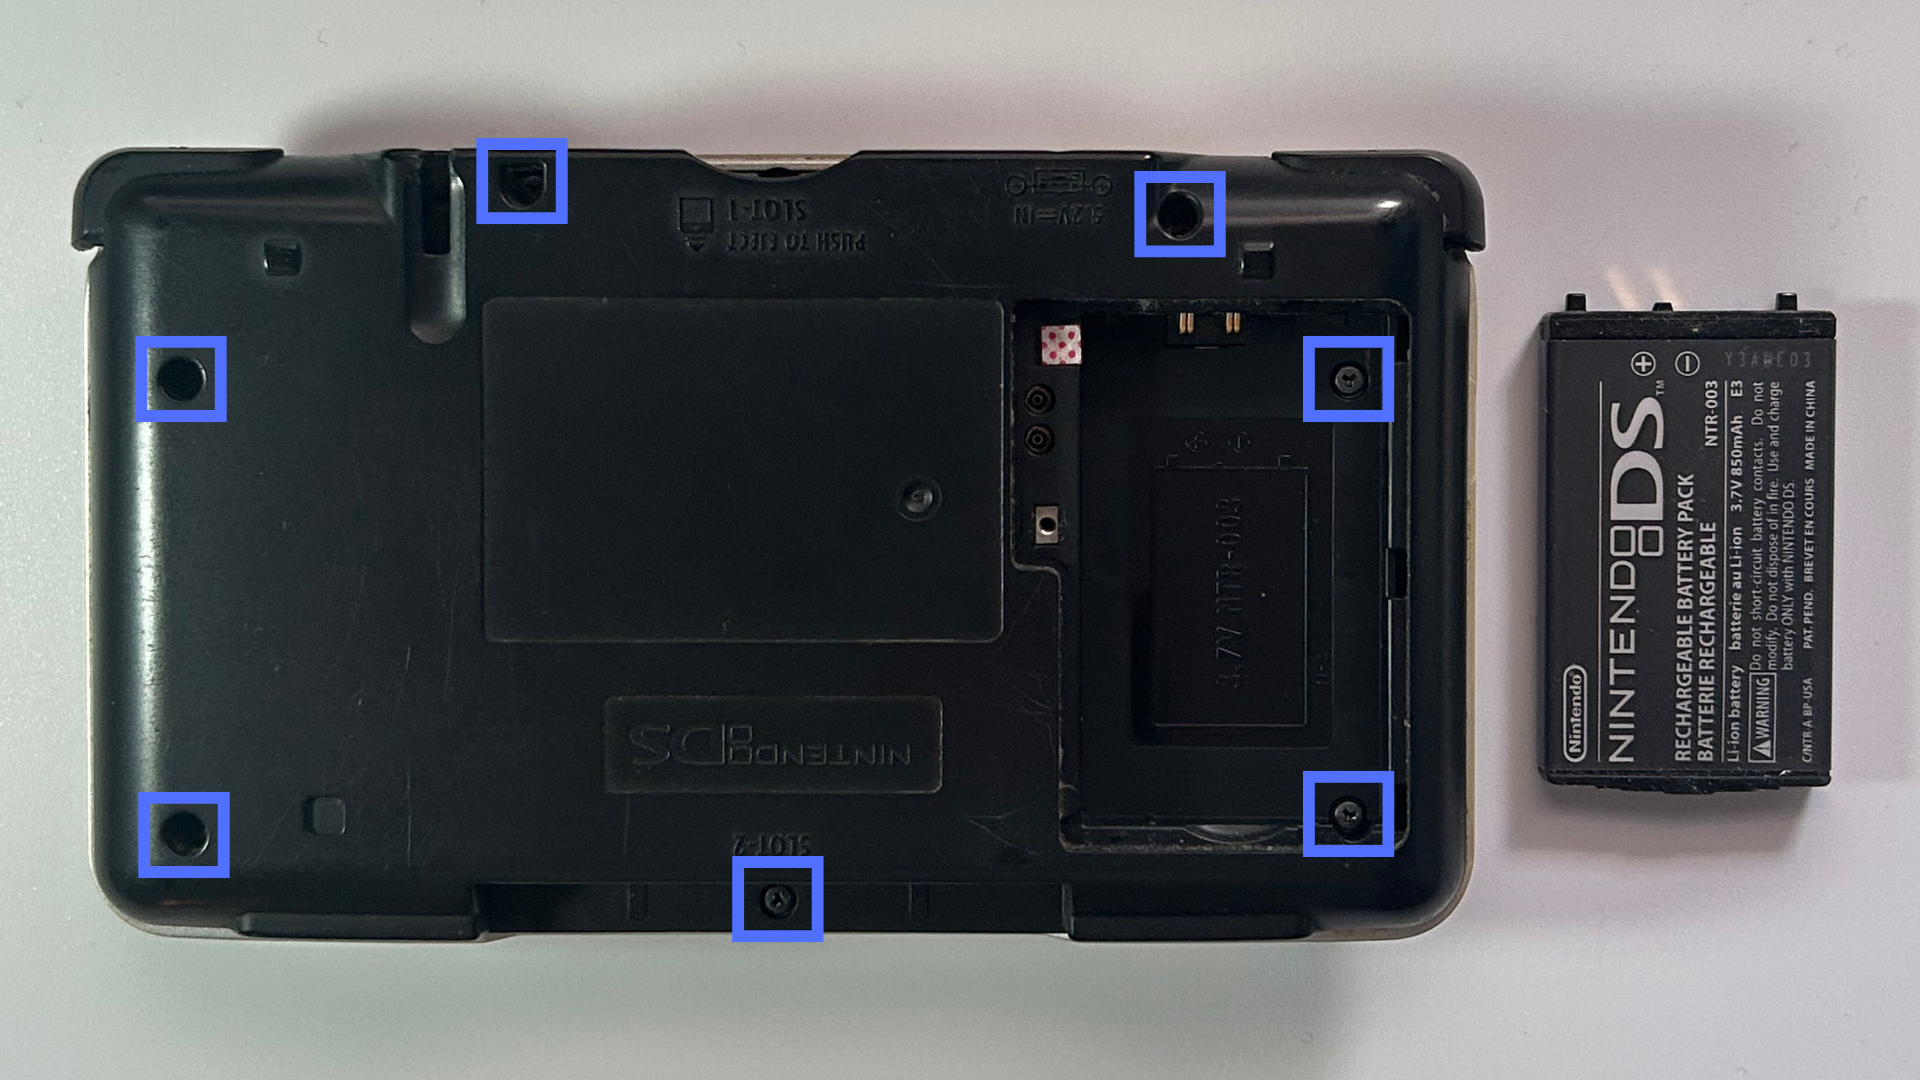
- Remove the remaining screws securing the rear shell.
Step 2 – Remove the motherboard from the shell
- Lift the rear shell off exposing the internal components.
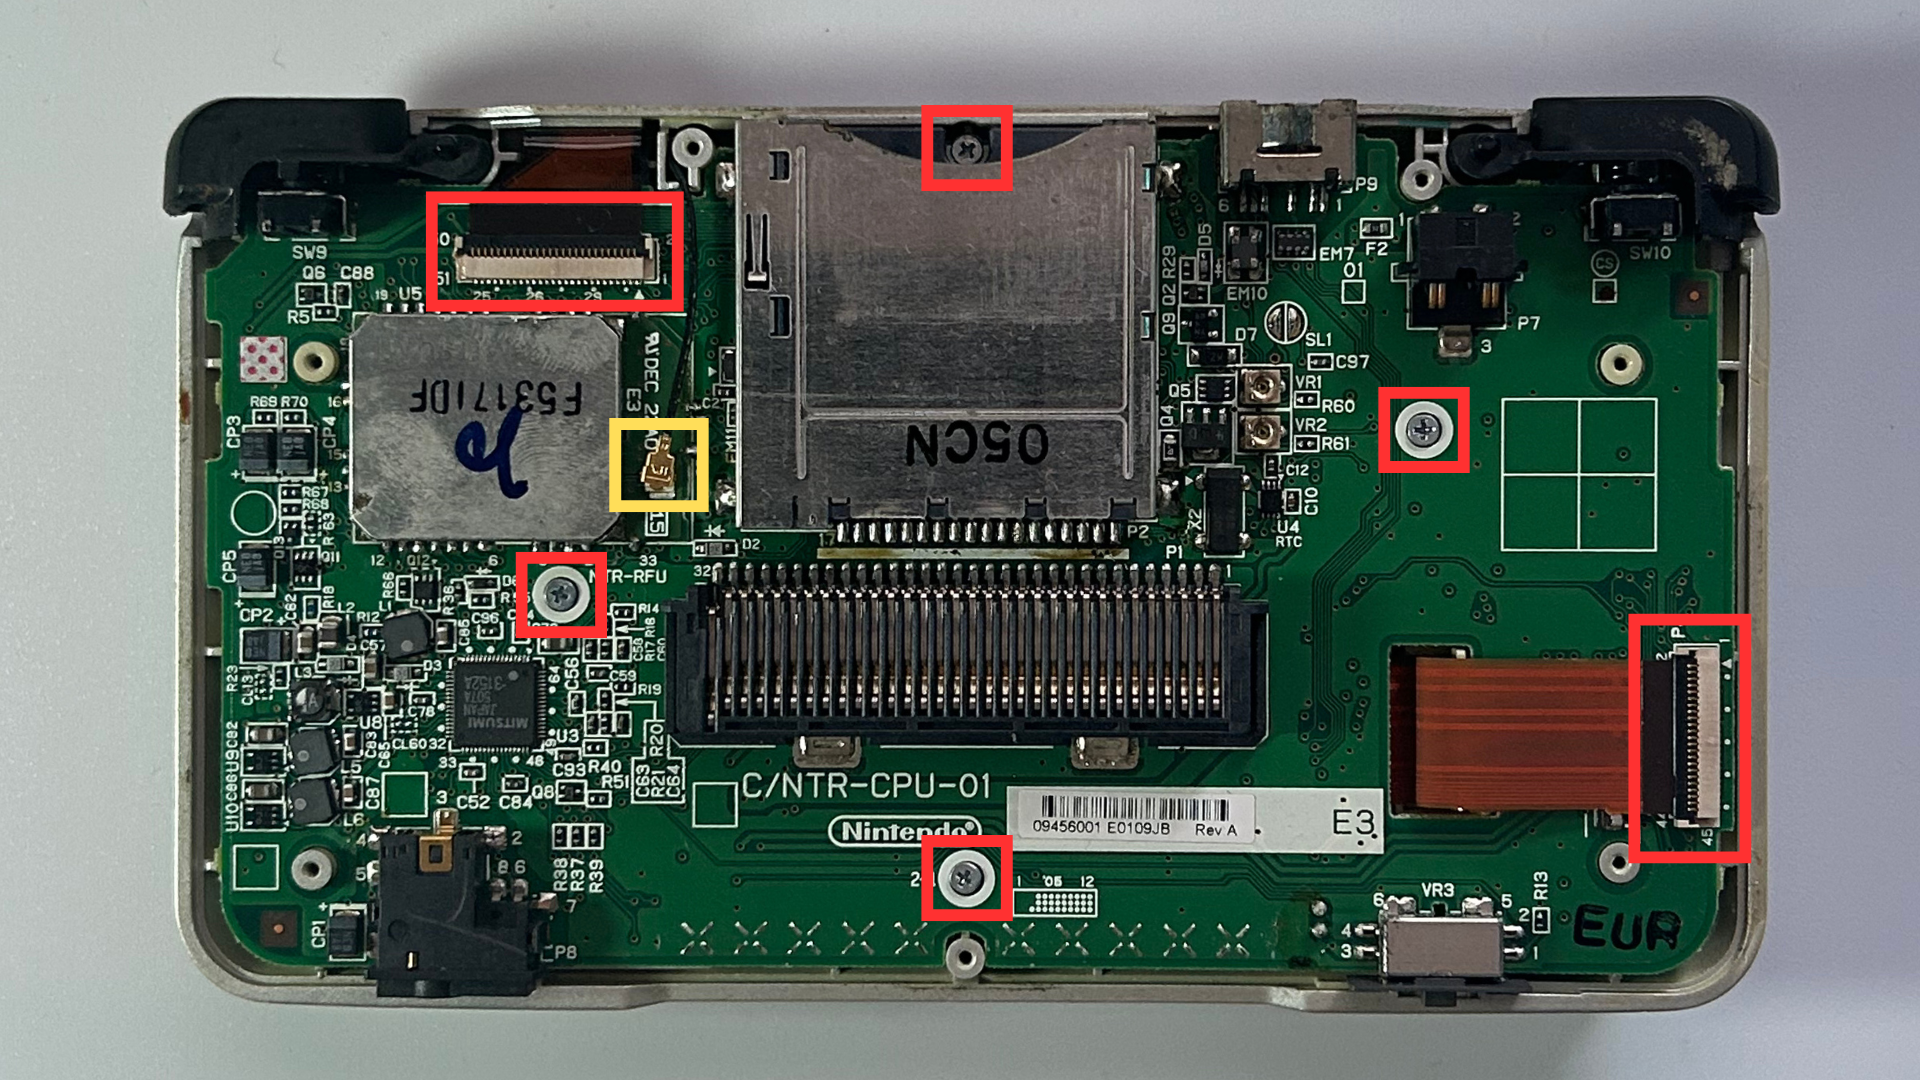
- Remove the 4 Phillips head screws.
- Detach the black antenna wire.
- Carefully lift the tabs for the two ribbon wires.
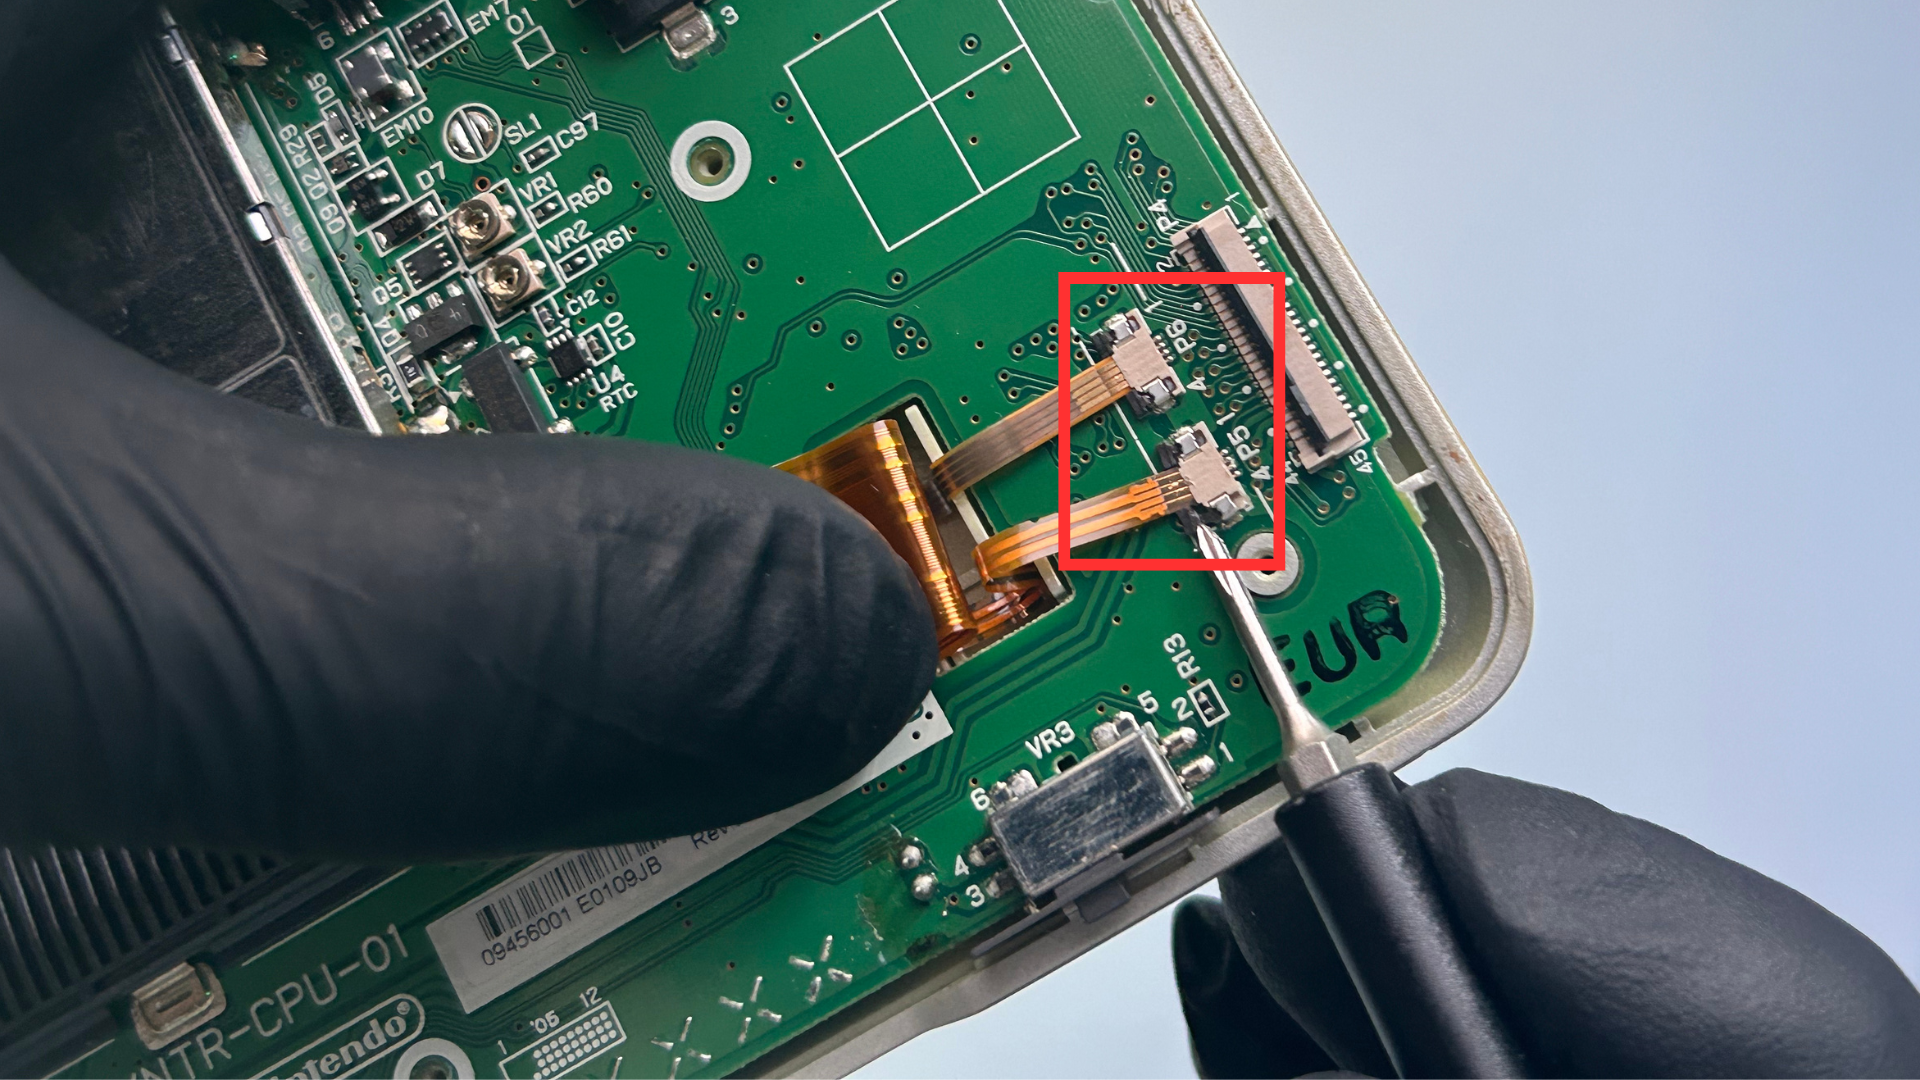
- Beneath the ribbon cable on the right are two smaller ribbon cables. These are secured by very small black locking tabs. Use tweezers or a precision screwdriver to gently release them. Take care, as the connectors are fragile.
Step 3 – Remove the bottom LCD
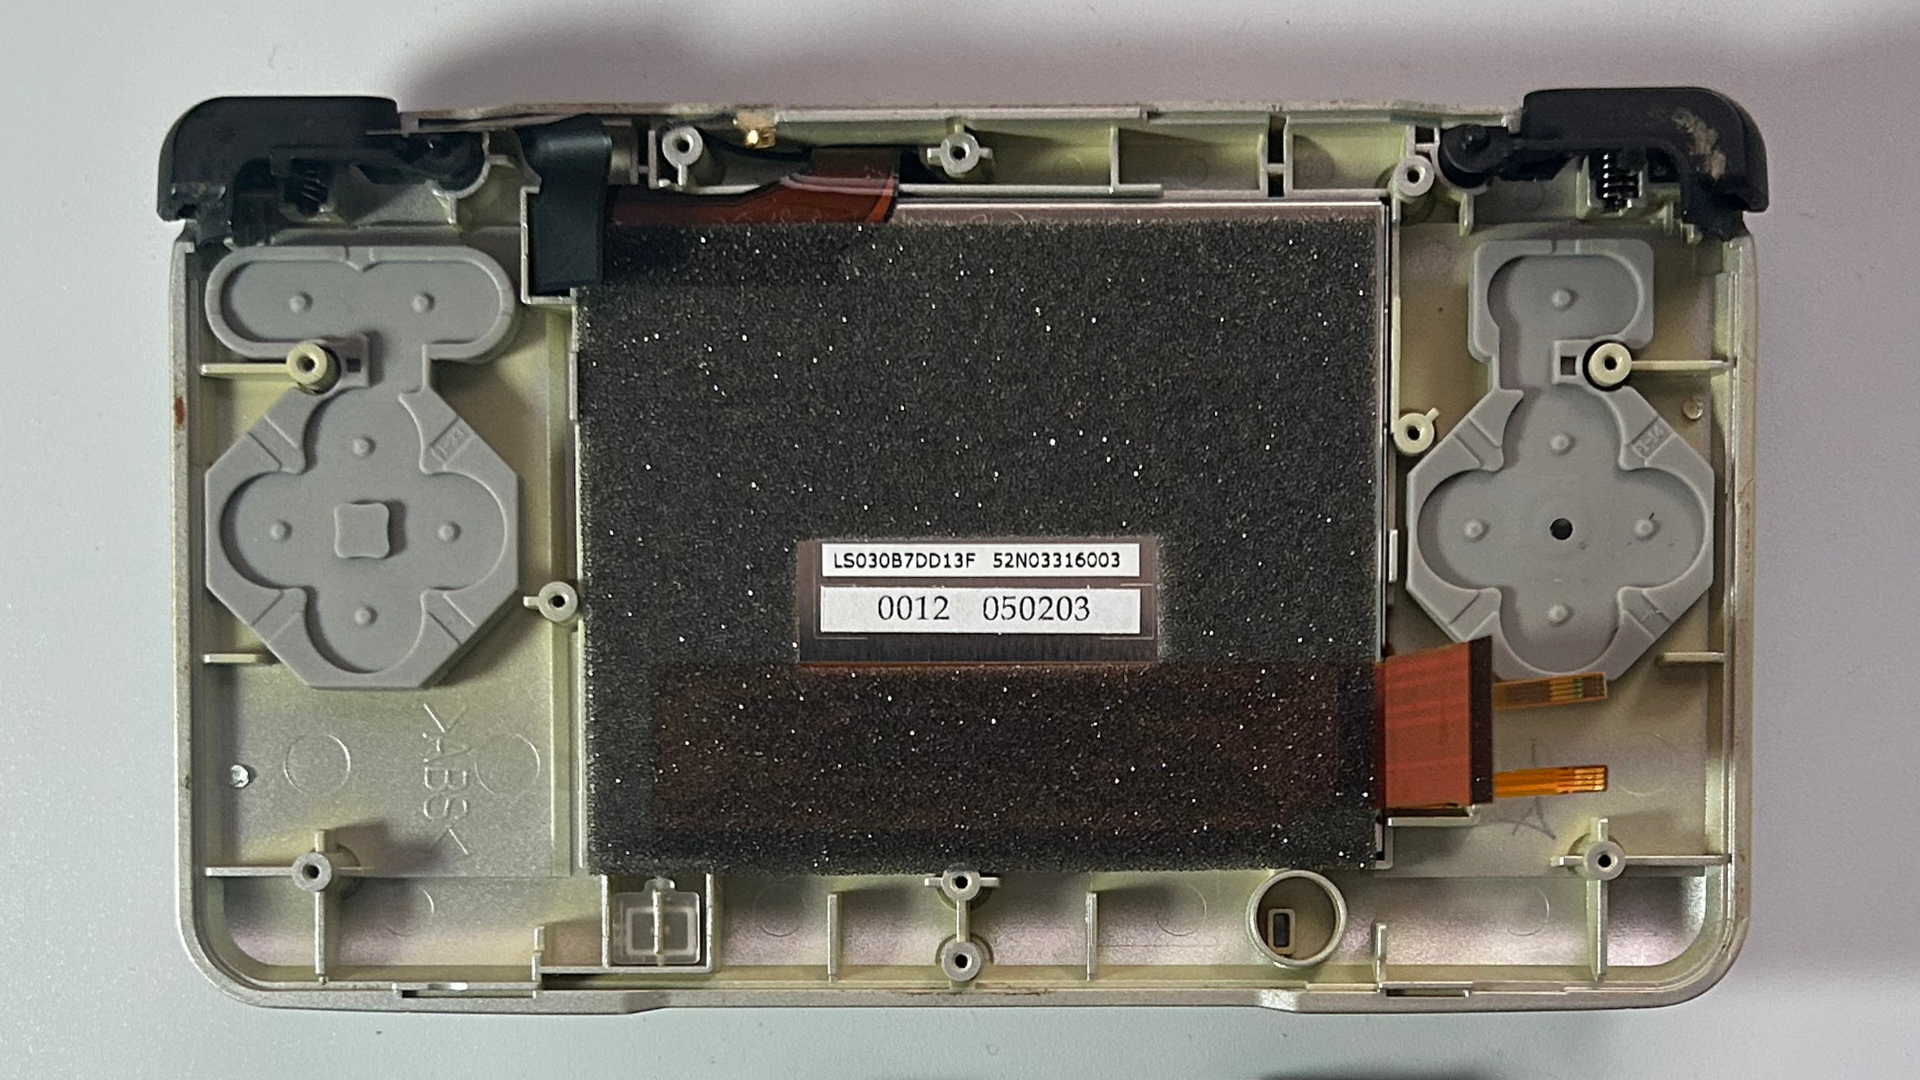
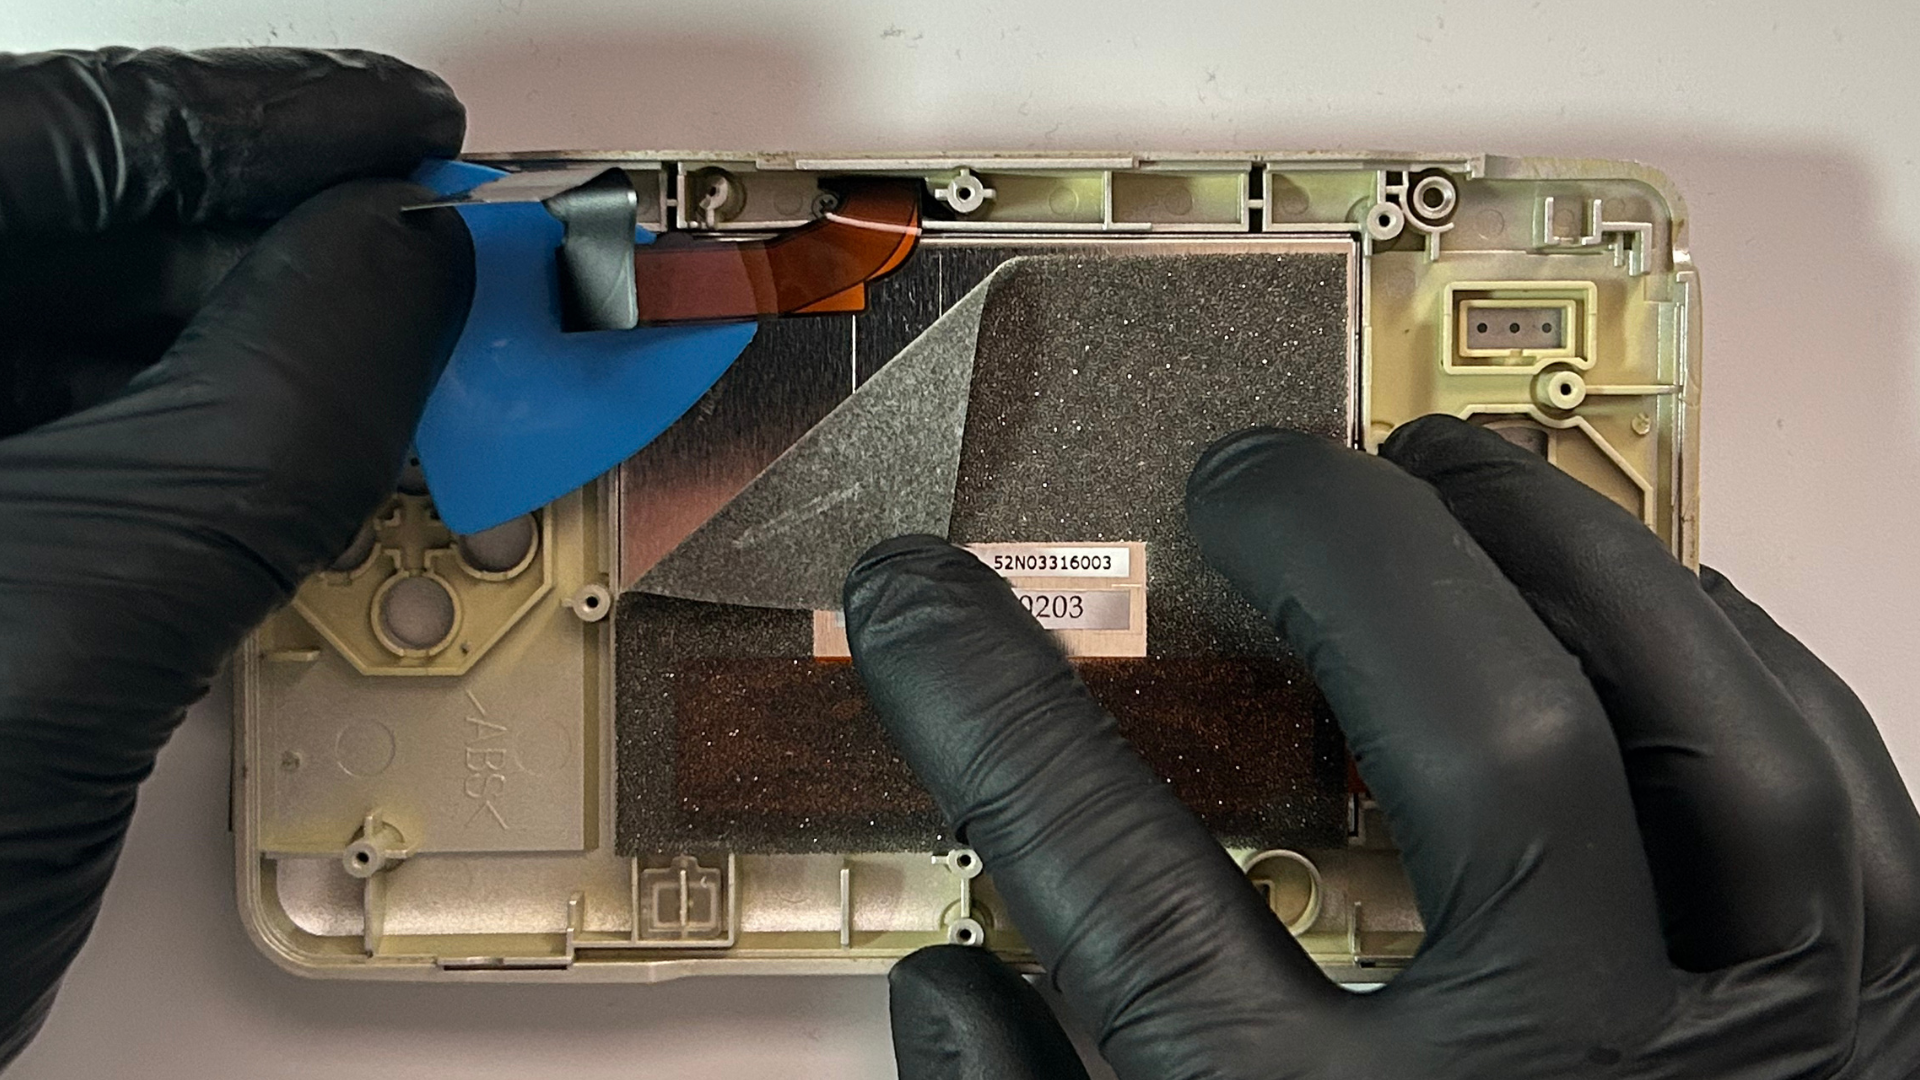
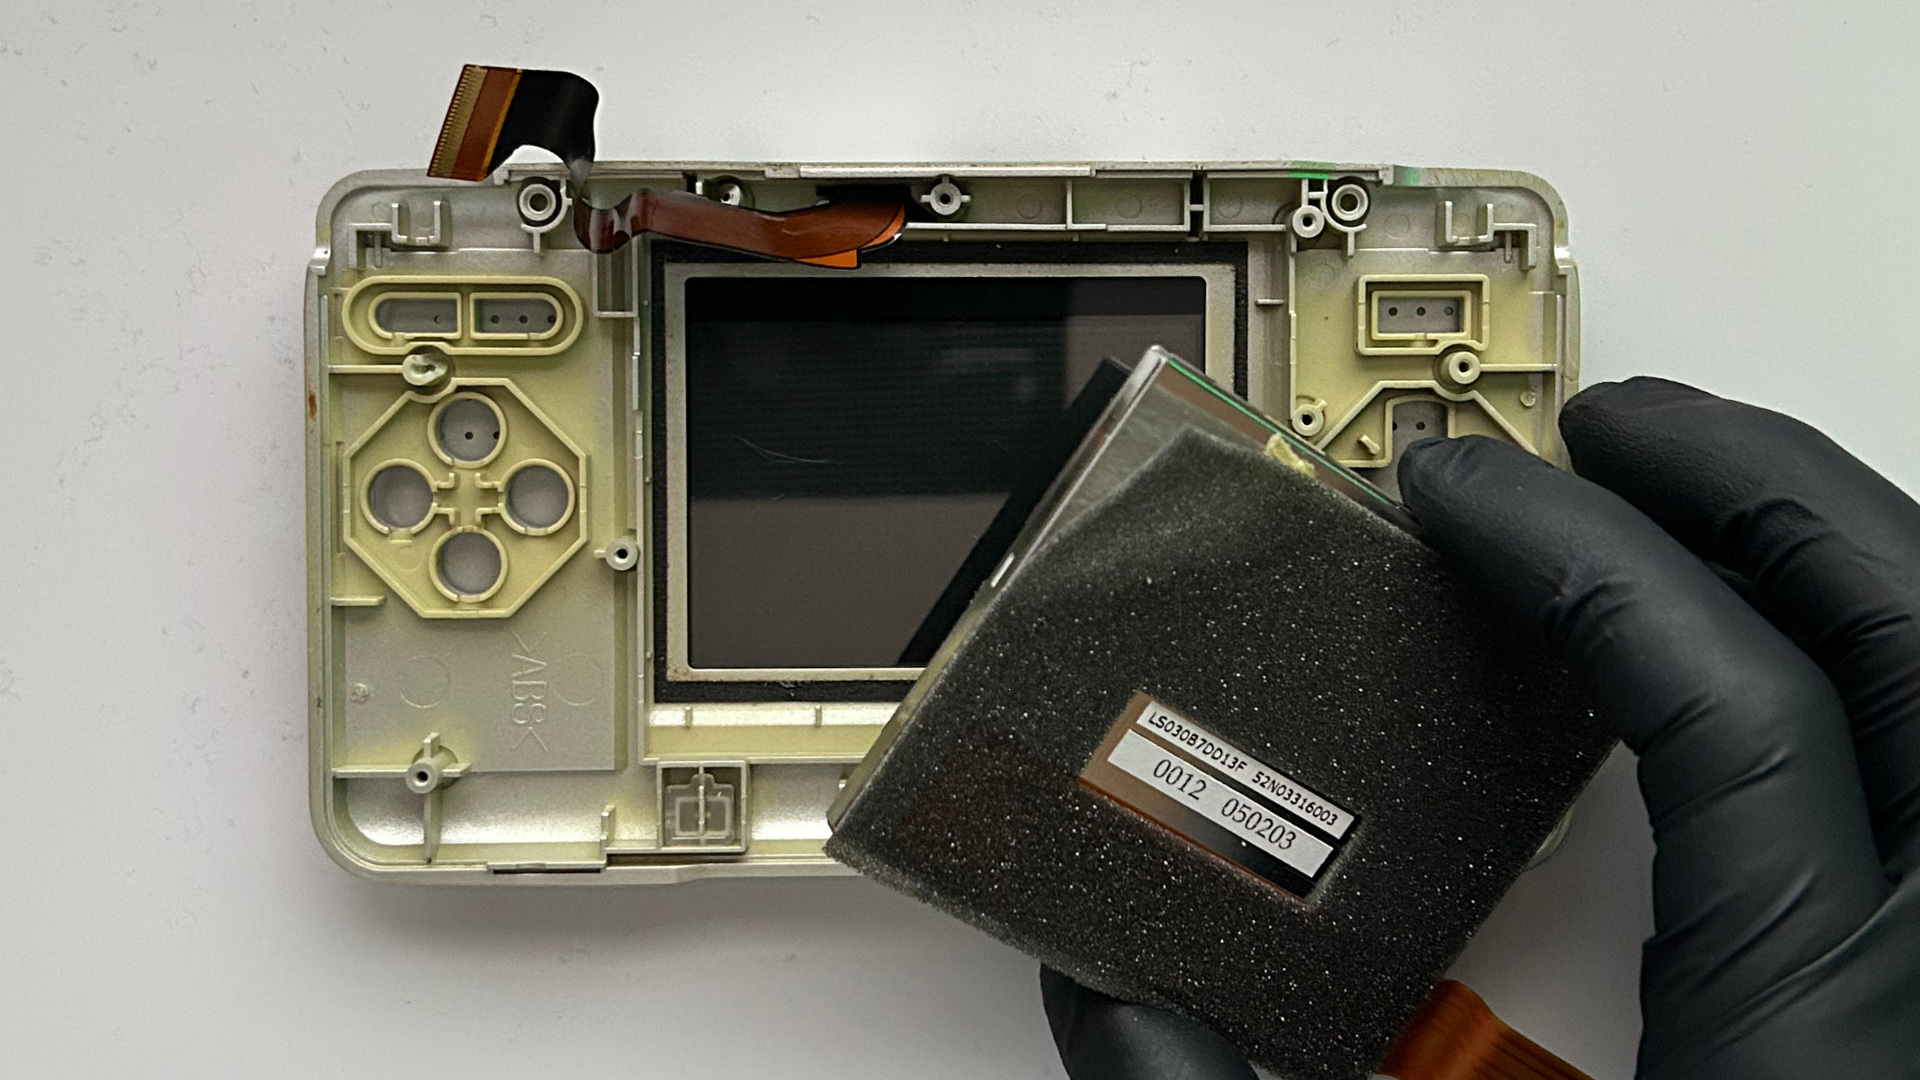
- Gently peel back the top-left corner of the foam layer on the rear of the bottom LCD. This will expose a ribbon cable adhered to the display.
- Slide a plastic pick between the ribbon cable and LCD and carefully separate the adhesive. If necessary, a small amount of gentle heat can help soften the adhesive.
- Once the ribbon cable is free, carefully lift the bottom LCD out of the shell.
Step 4 – Open the upper screen housing
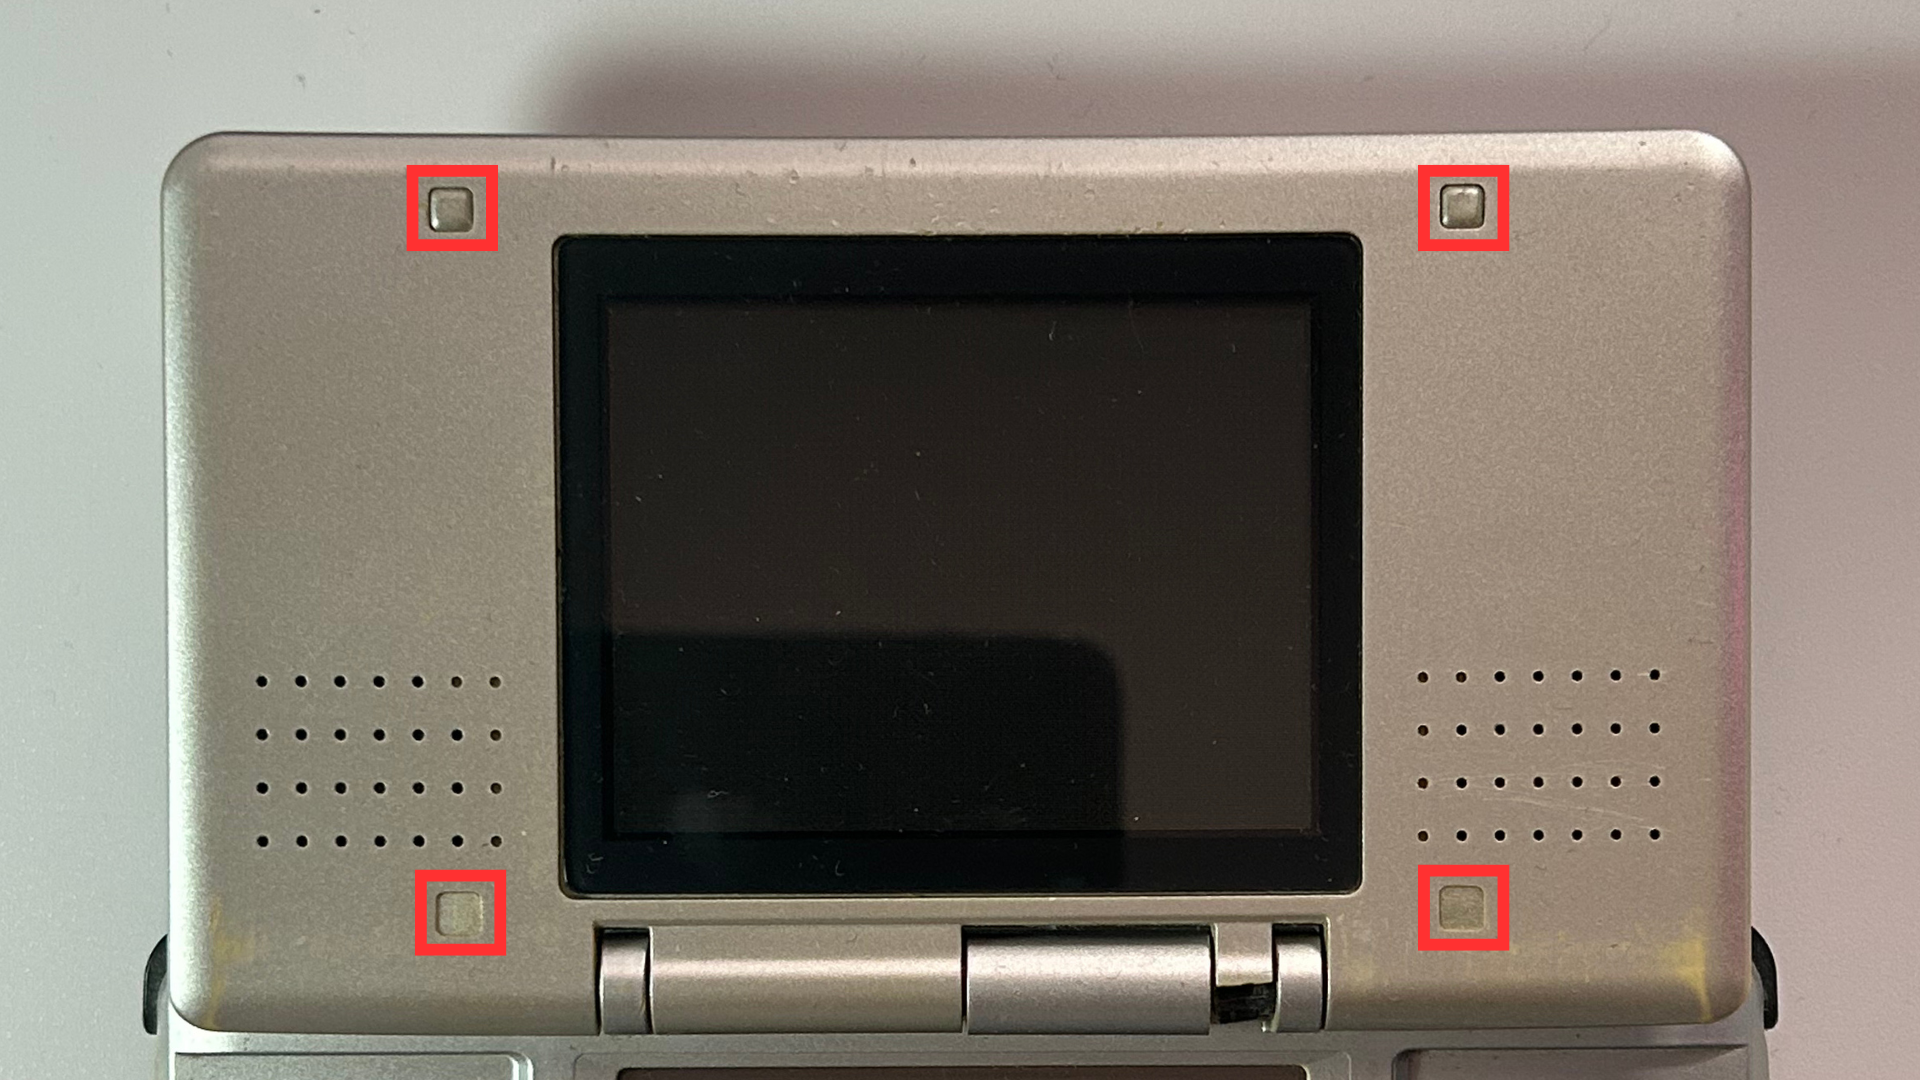
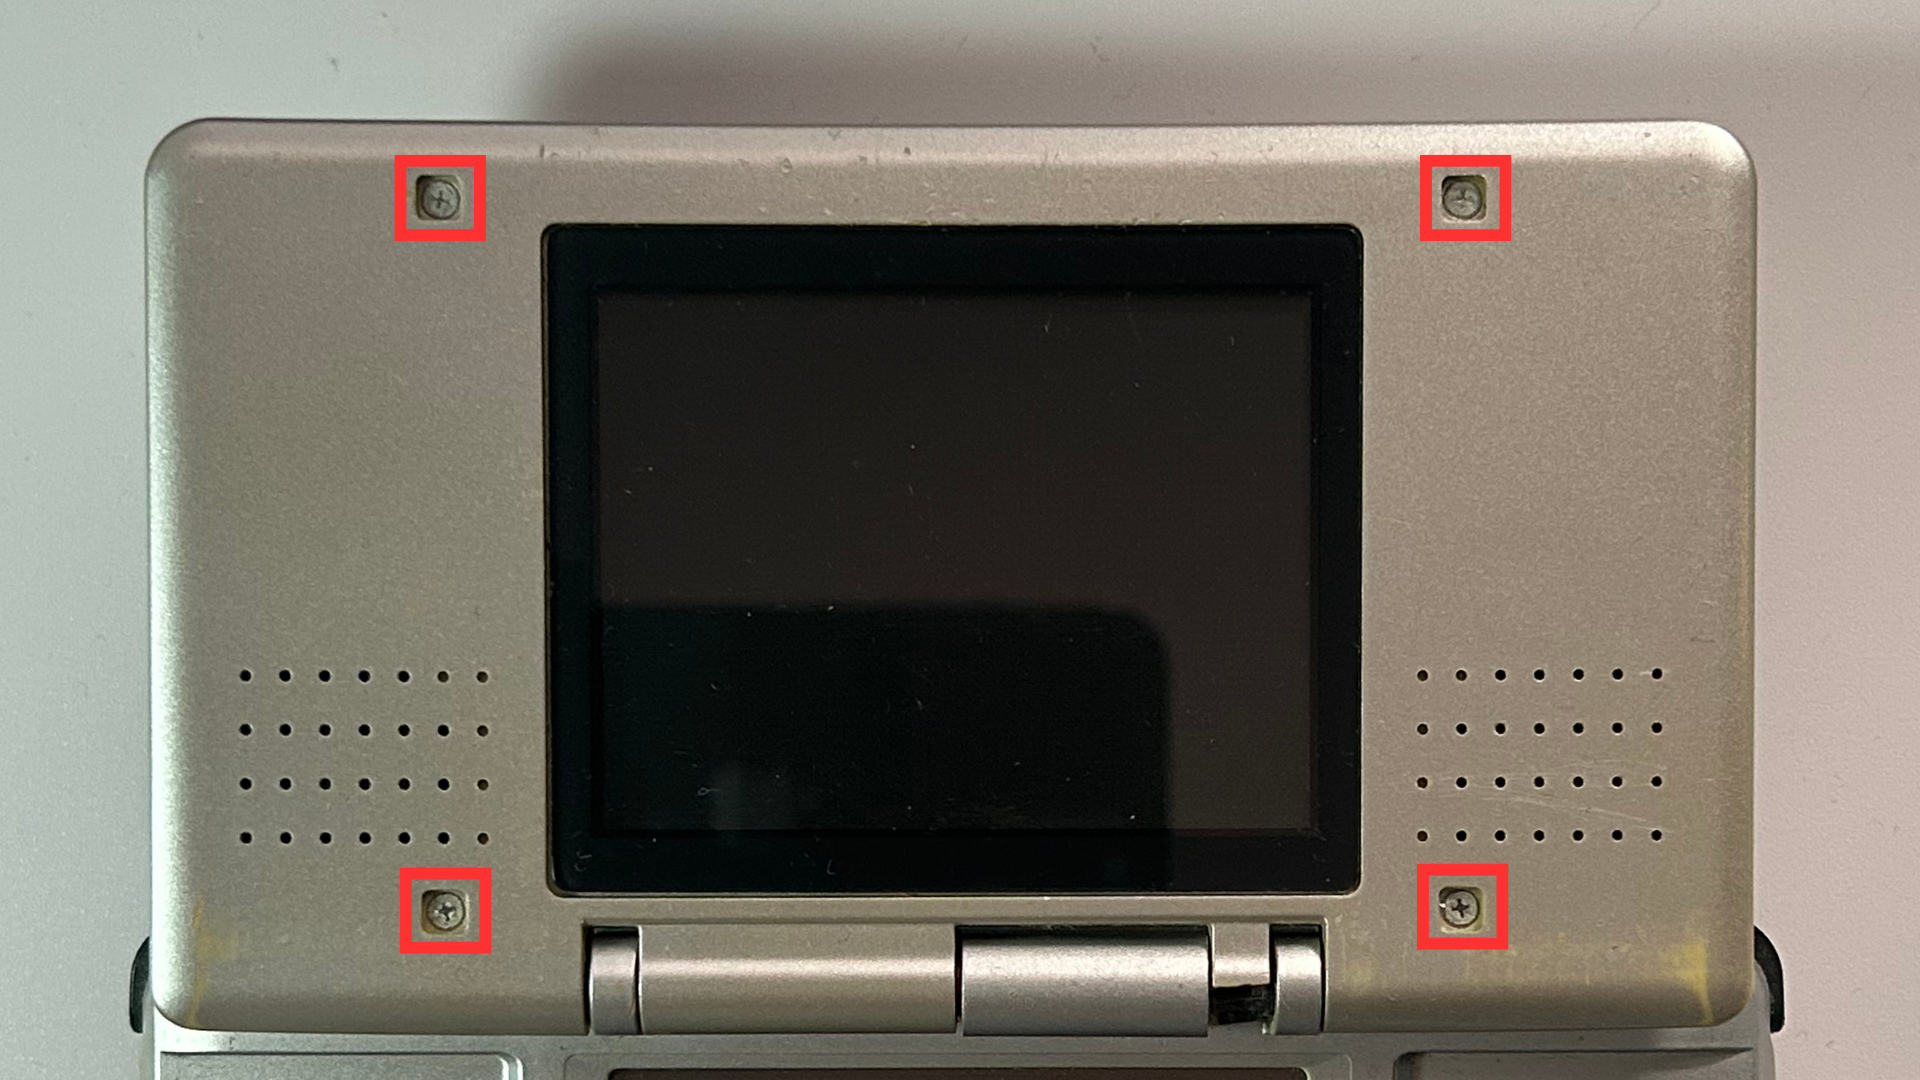
- Remove the four rubber squares around the top screen to expose the Phillips screws.
- Unscrew and remove the four screws.
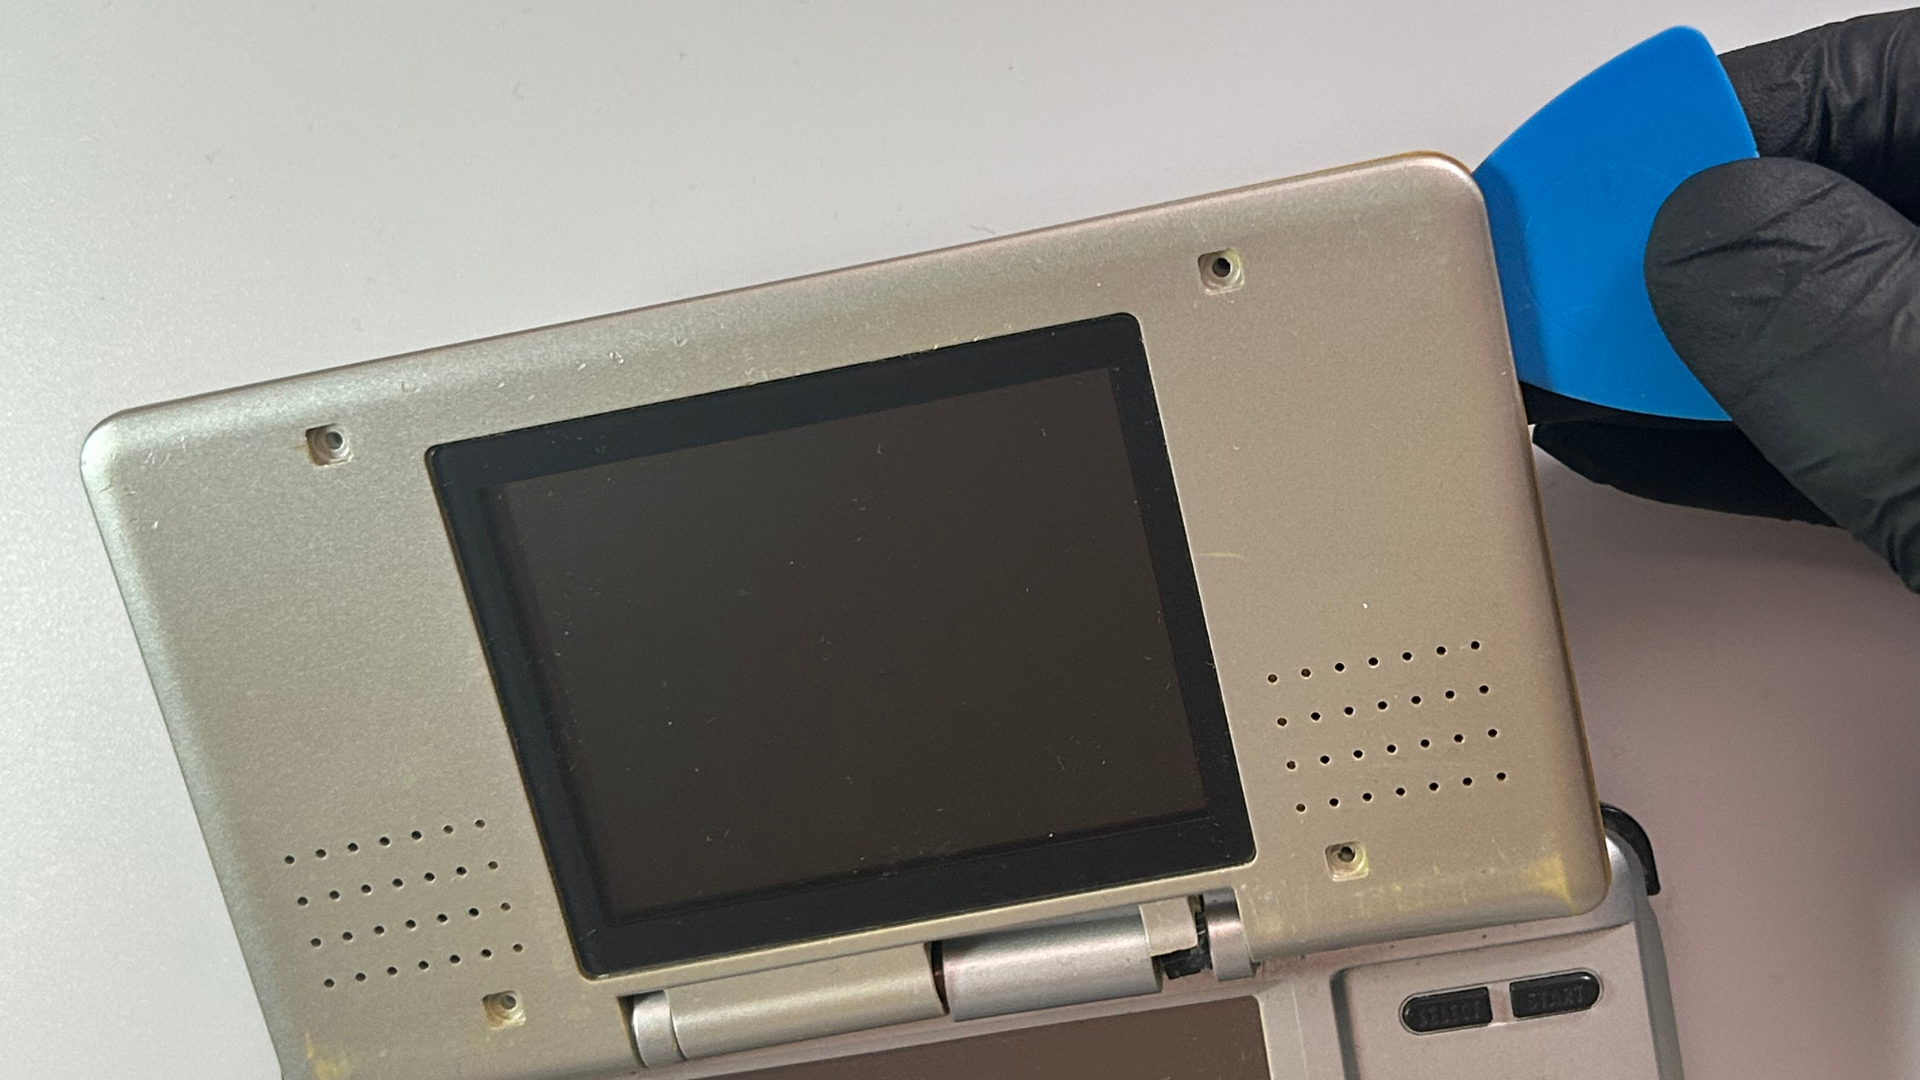
- Use your plastic pick or pry tool to remove the rear shell of the top screen.
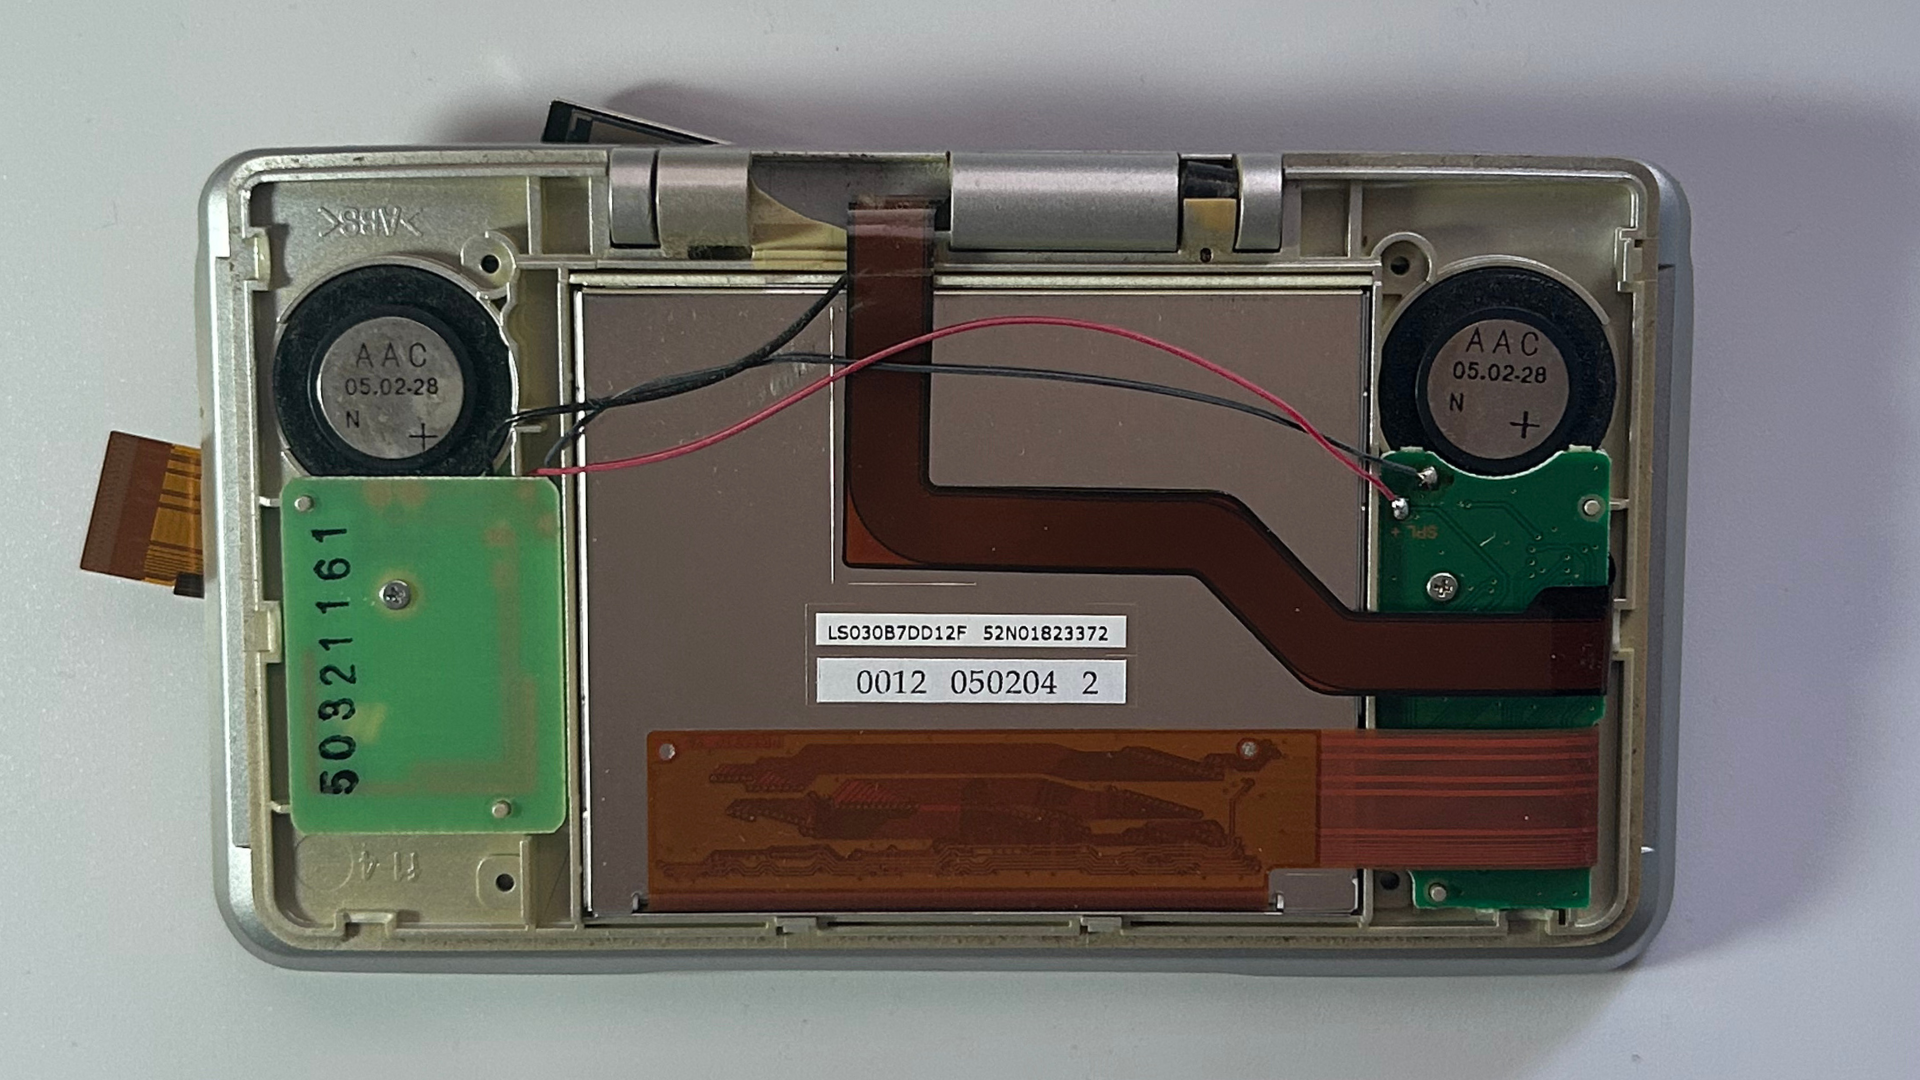
Step 5 – Remove hinge piece and LCD spacer
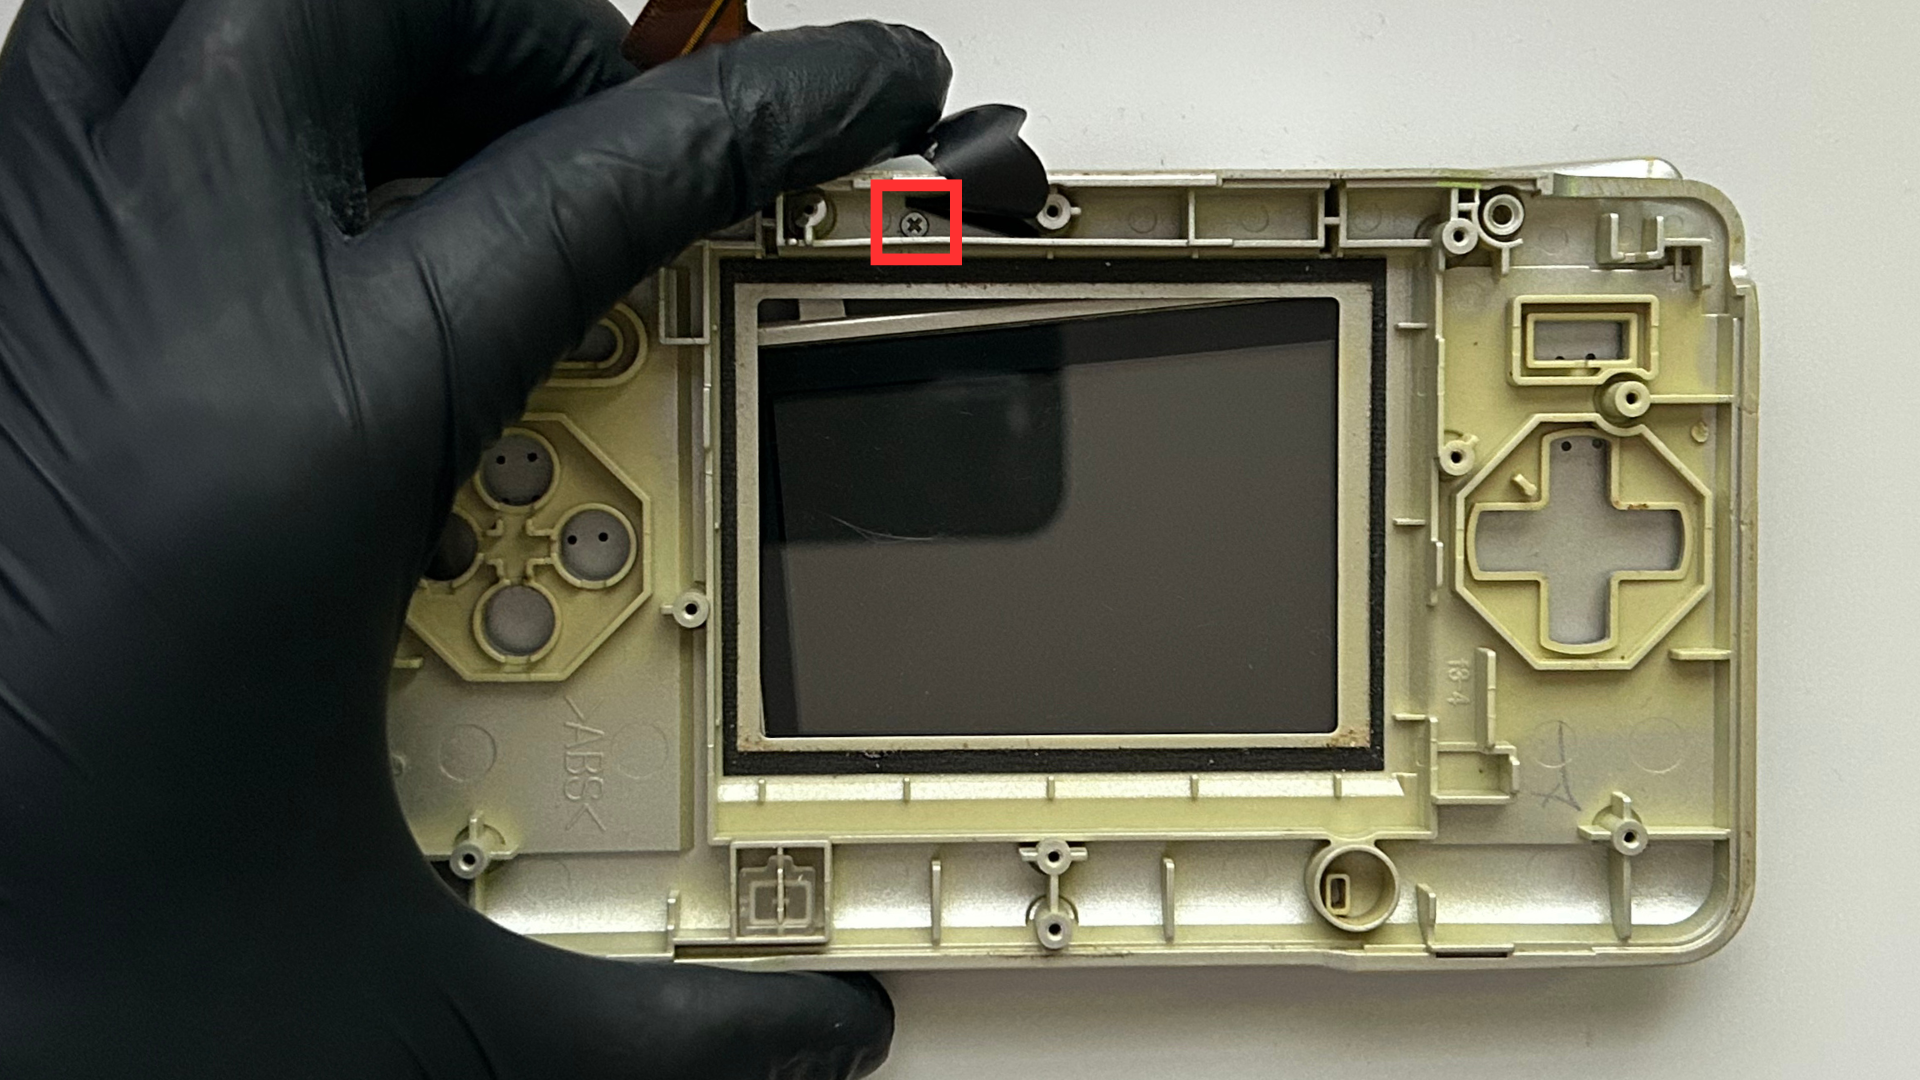
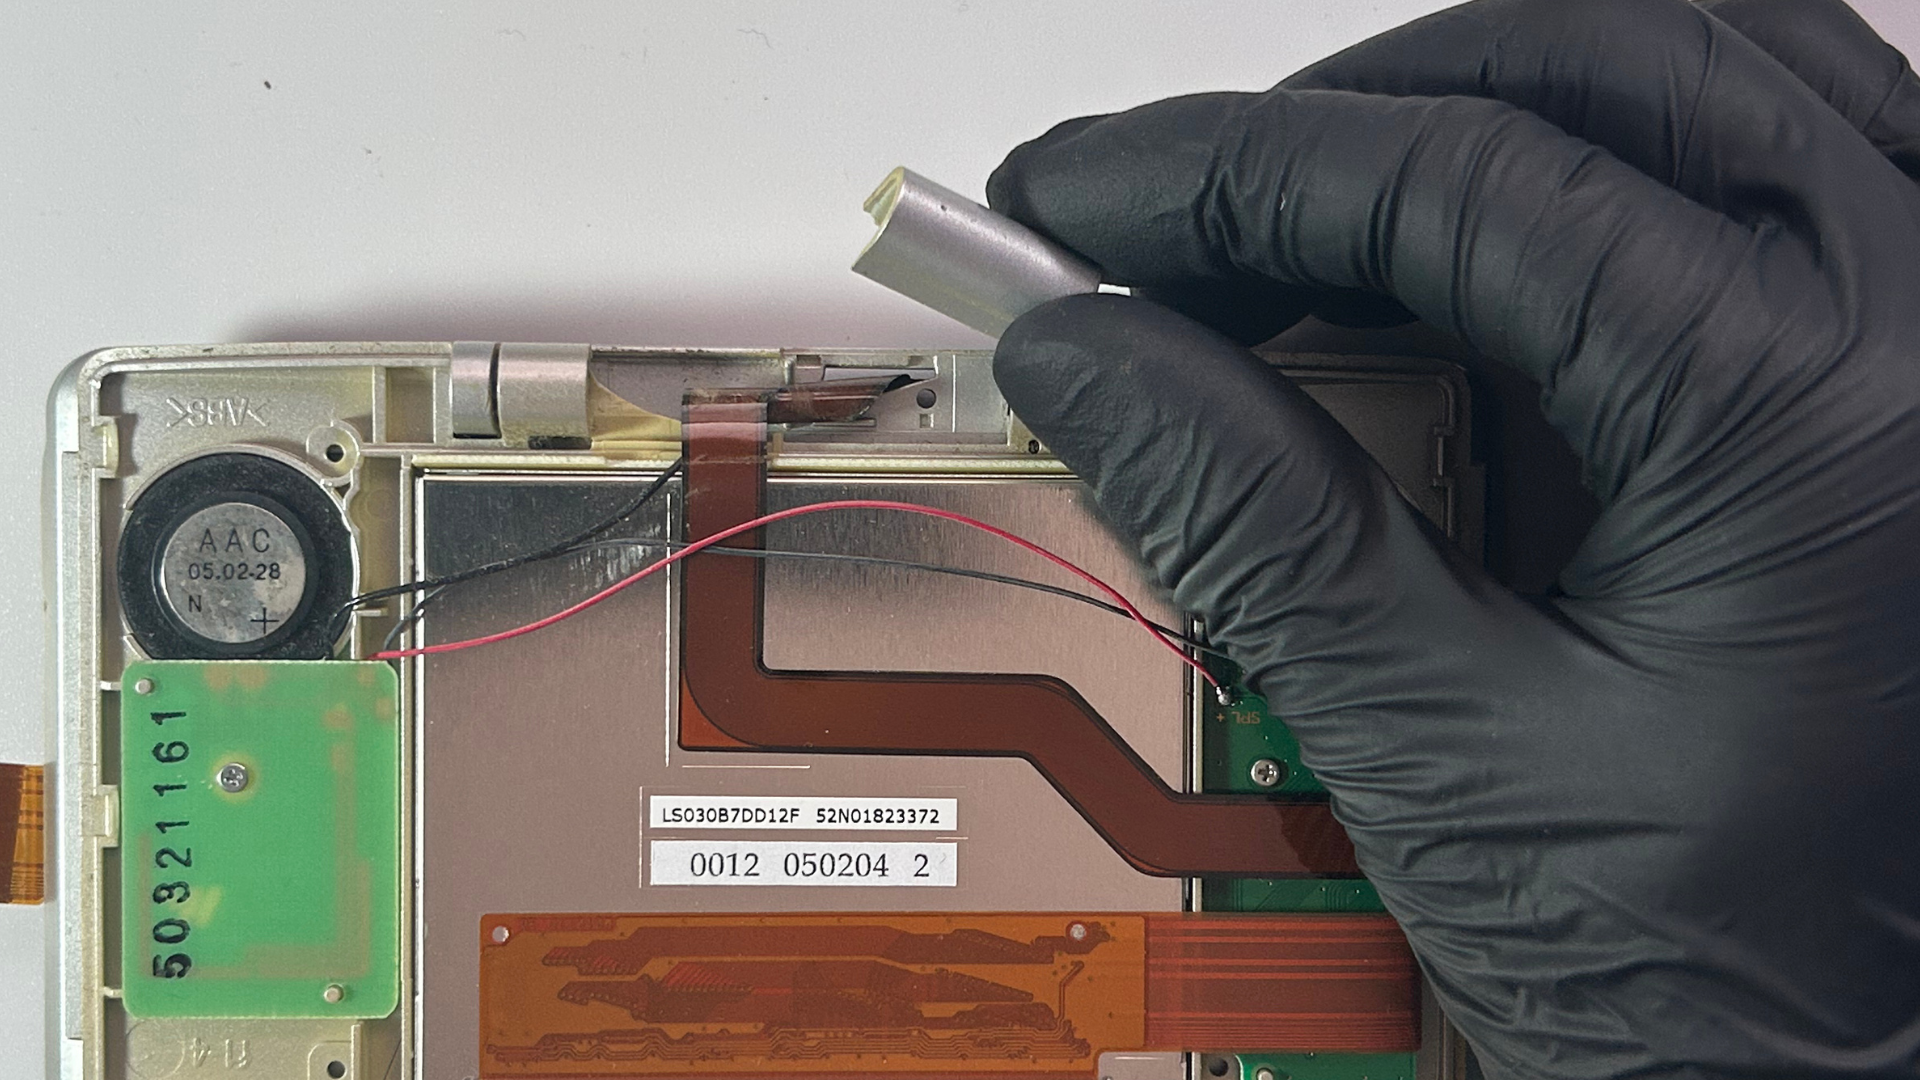
- Flip the device over and remove the hidden screw underneath the top screen ribbon wire. This will allow you to remove the hinge part where the ribbon wire feeds through.
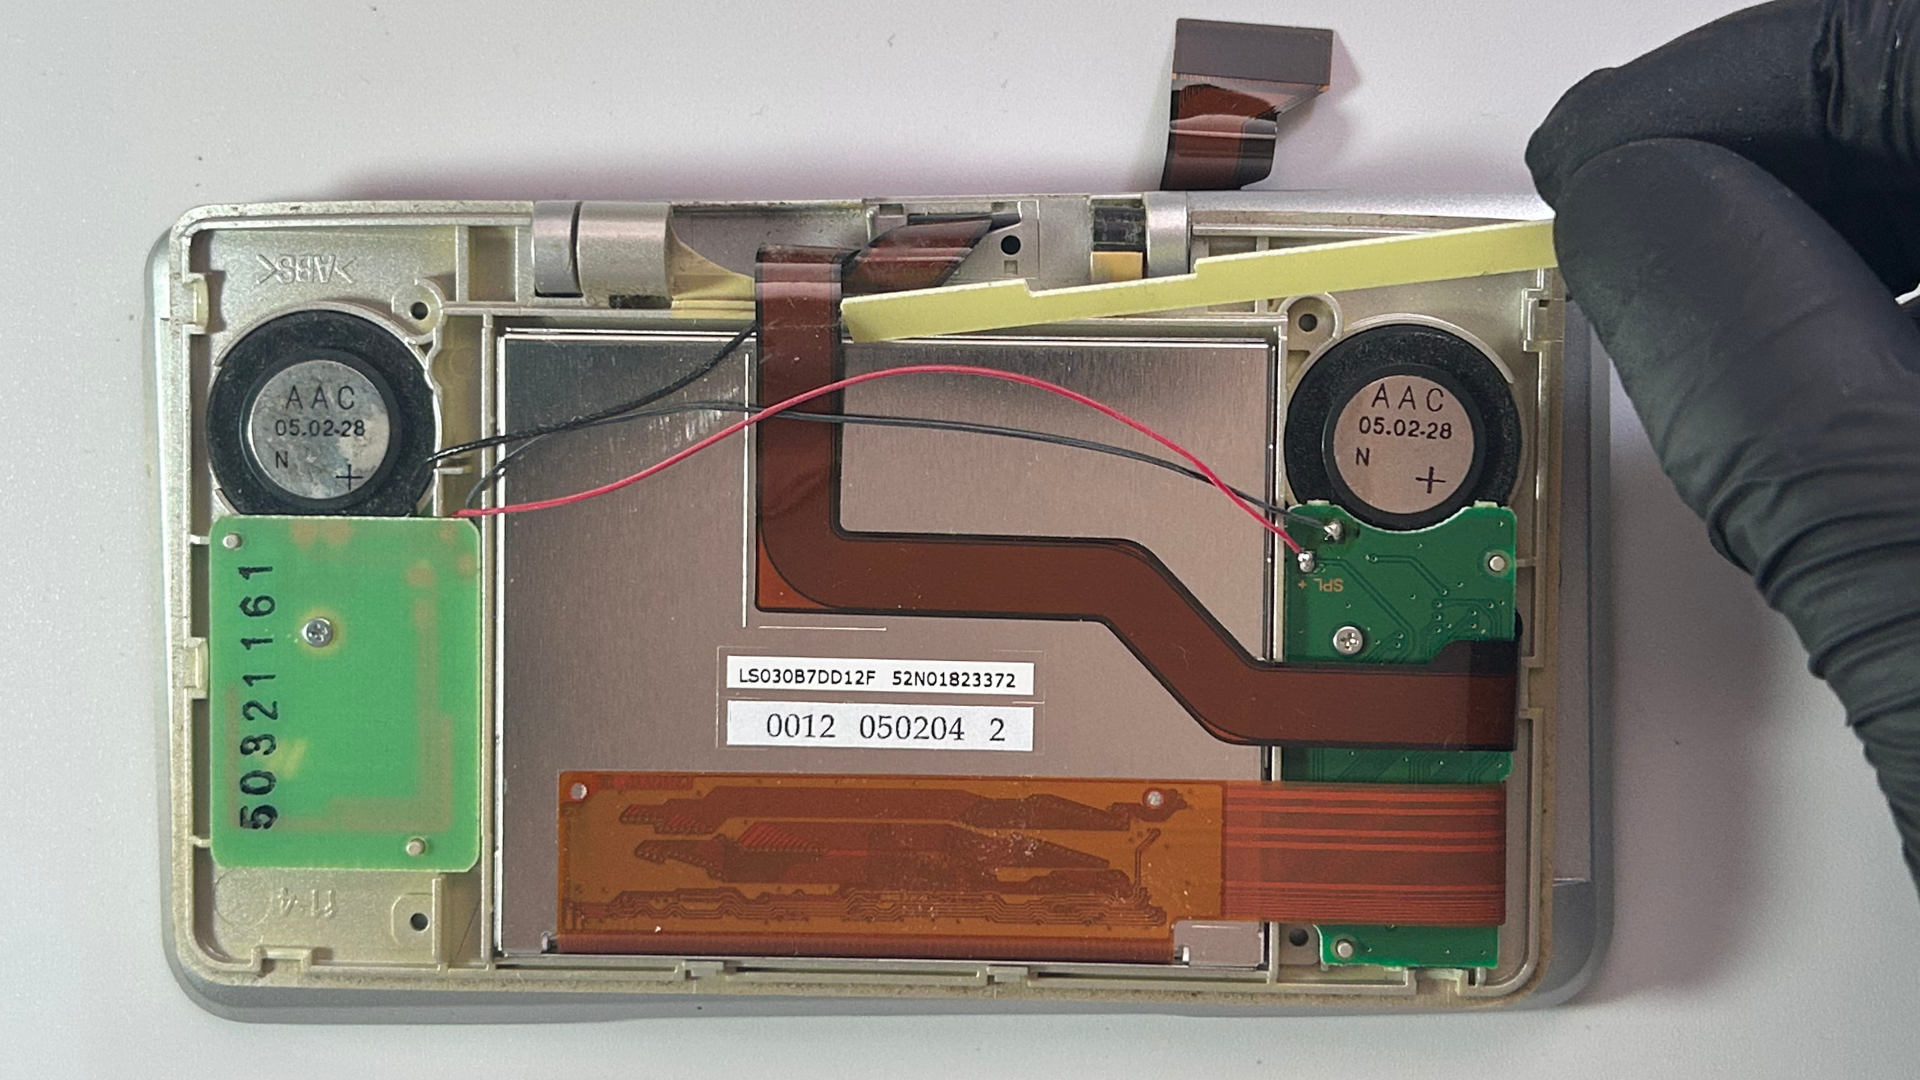
- Flip the device over again and remove the yellow plastic spacer that sits along the top edge of the top LCD.
- Now very carefully feed the top LCD ribbon wire through the slit.
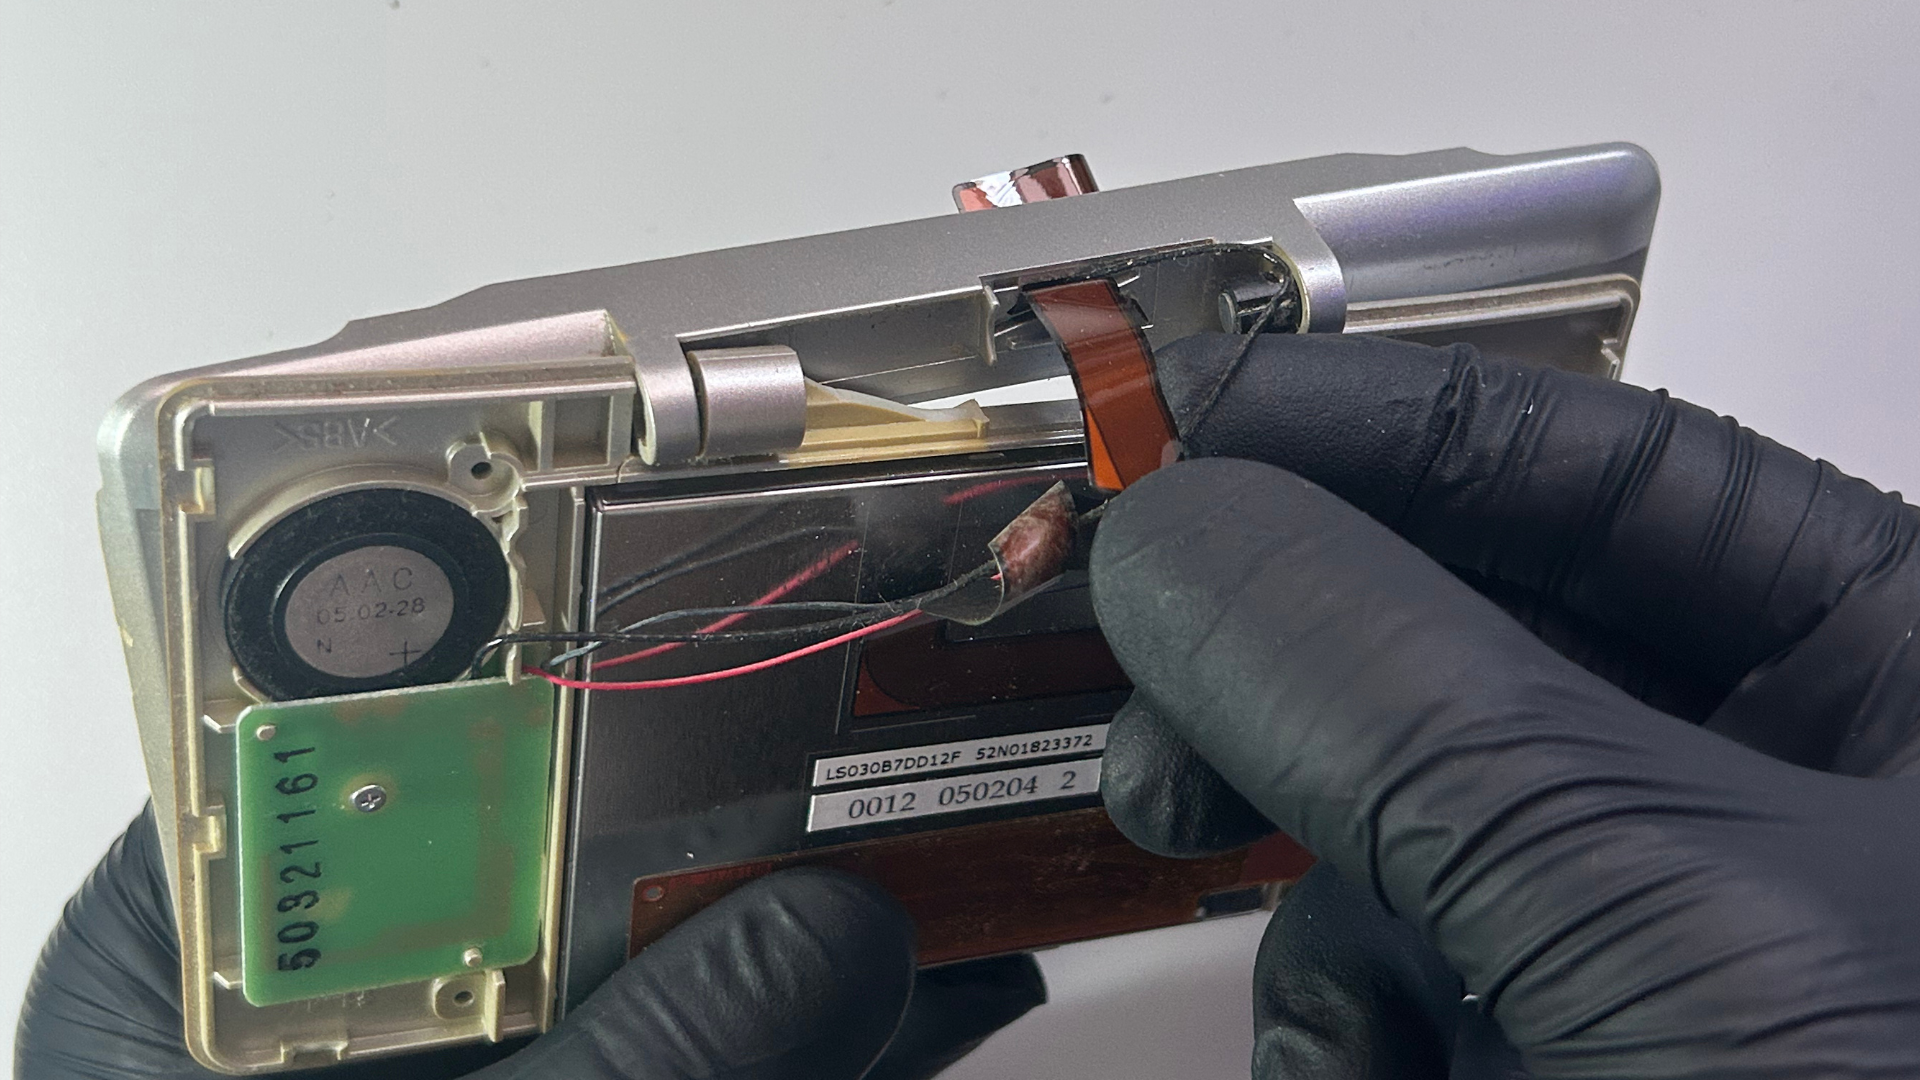
Step 6 – Remove the speaker daughterboards
- Remove the Phillips screw from both daughterboards.
- Carefully lift the black tabs on the two ribbon wires and disconnect them.
- Remove the smaller ribbon wire found under one of the bigger ribbons.
- Lift the two daughterboards out of the shell.
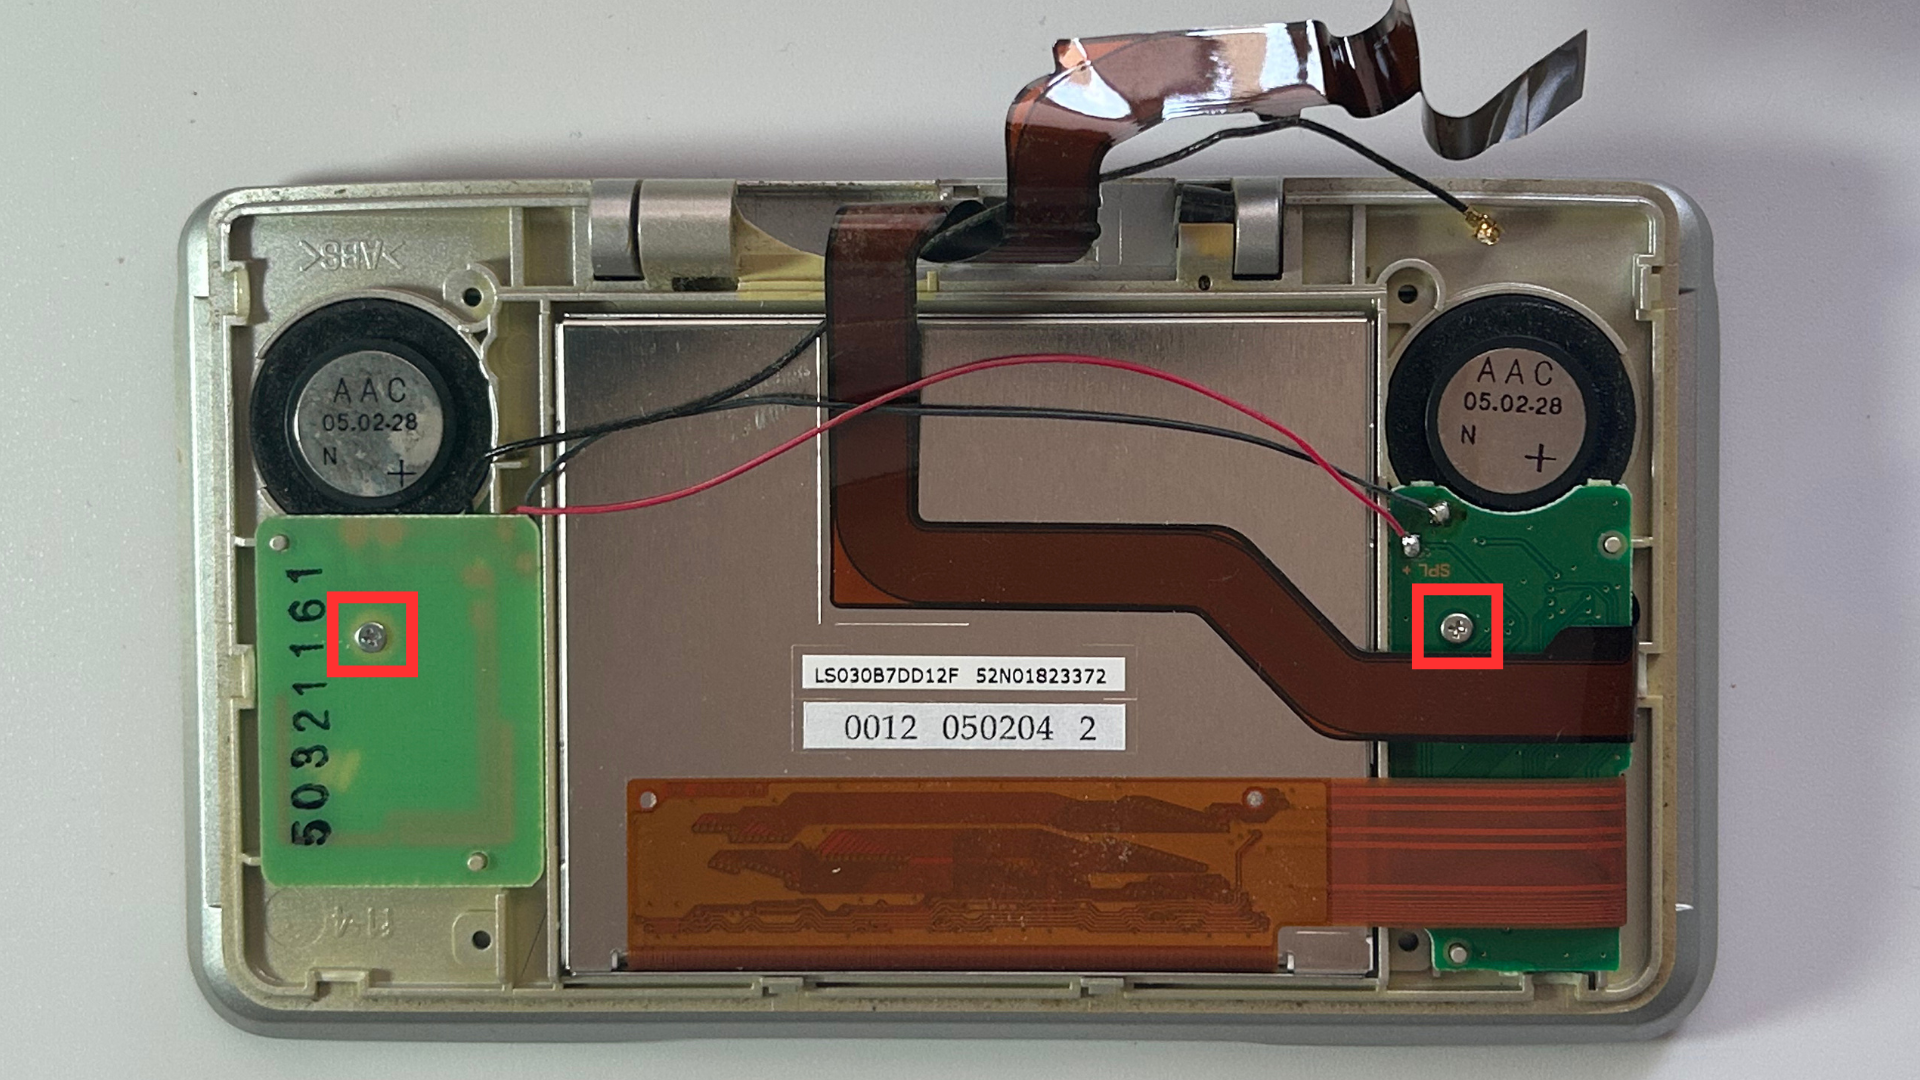
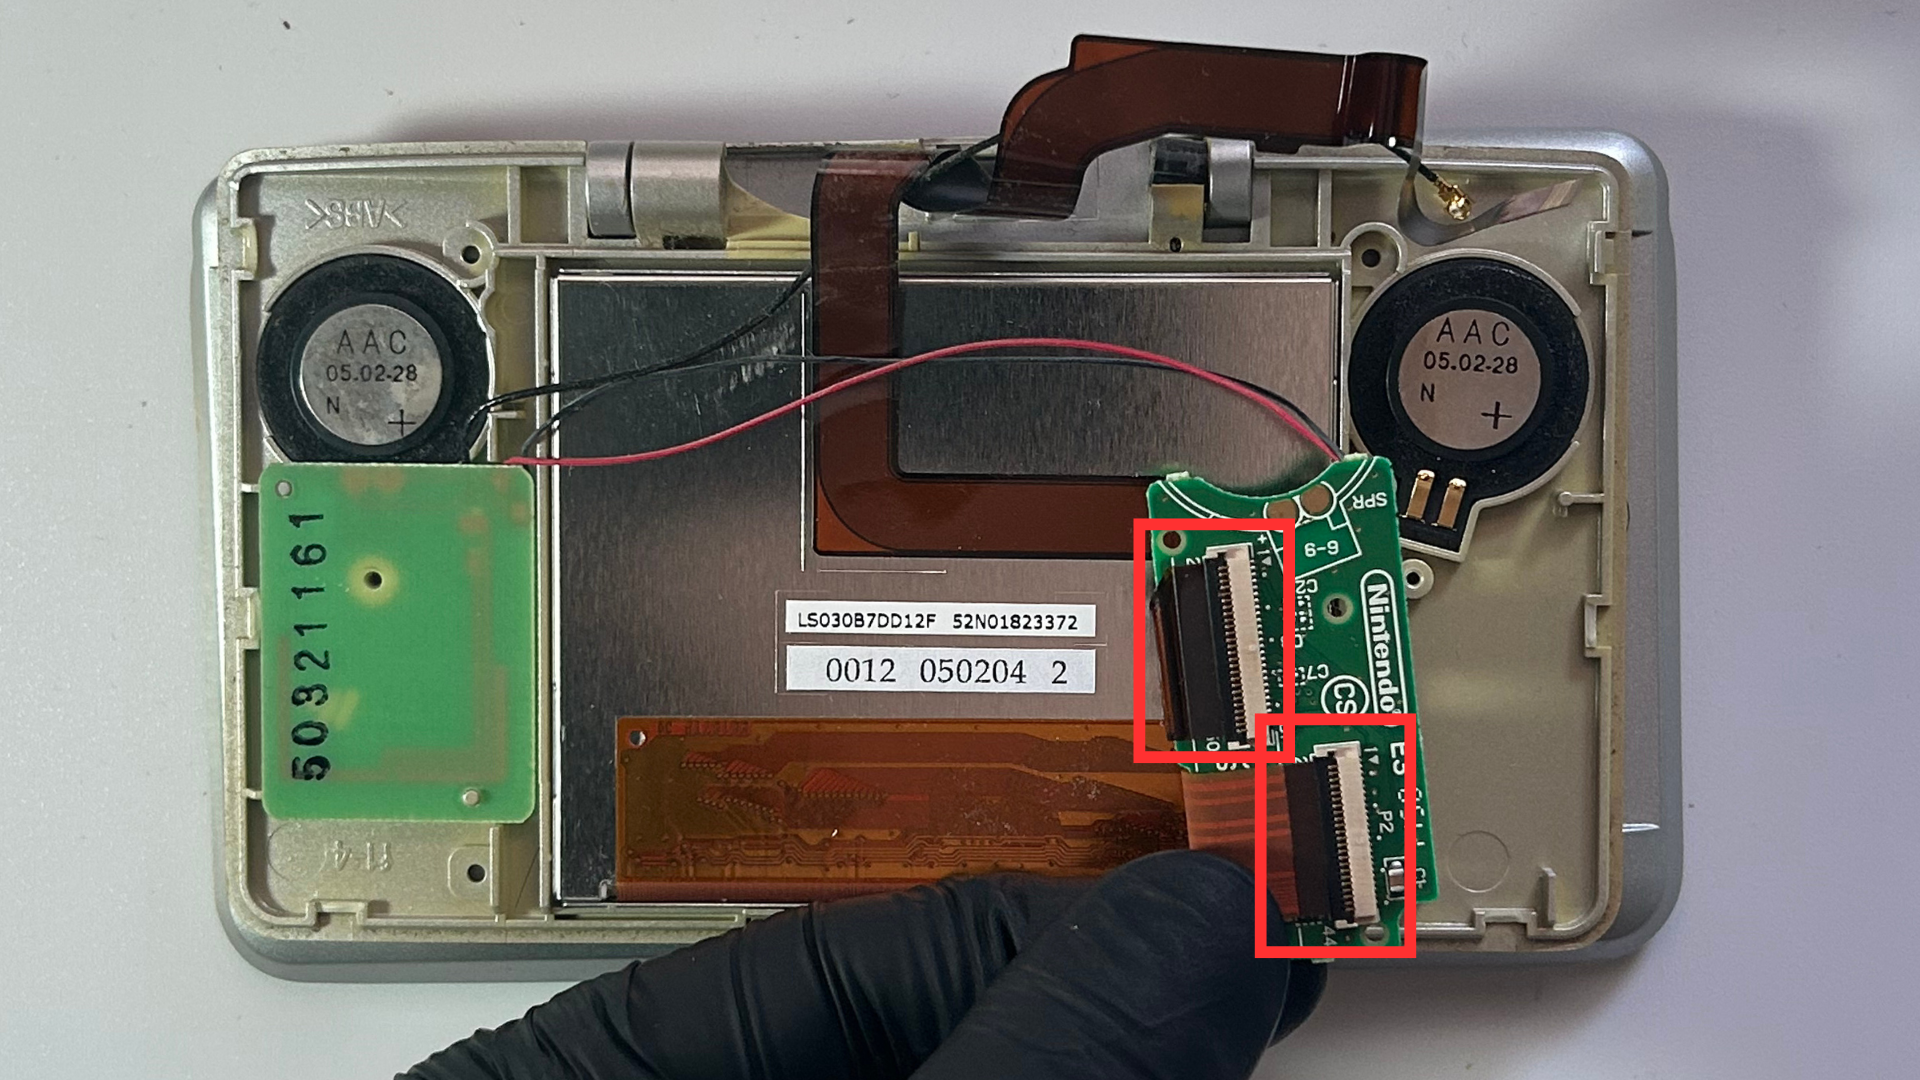
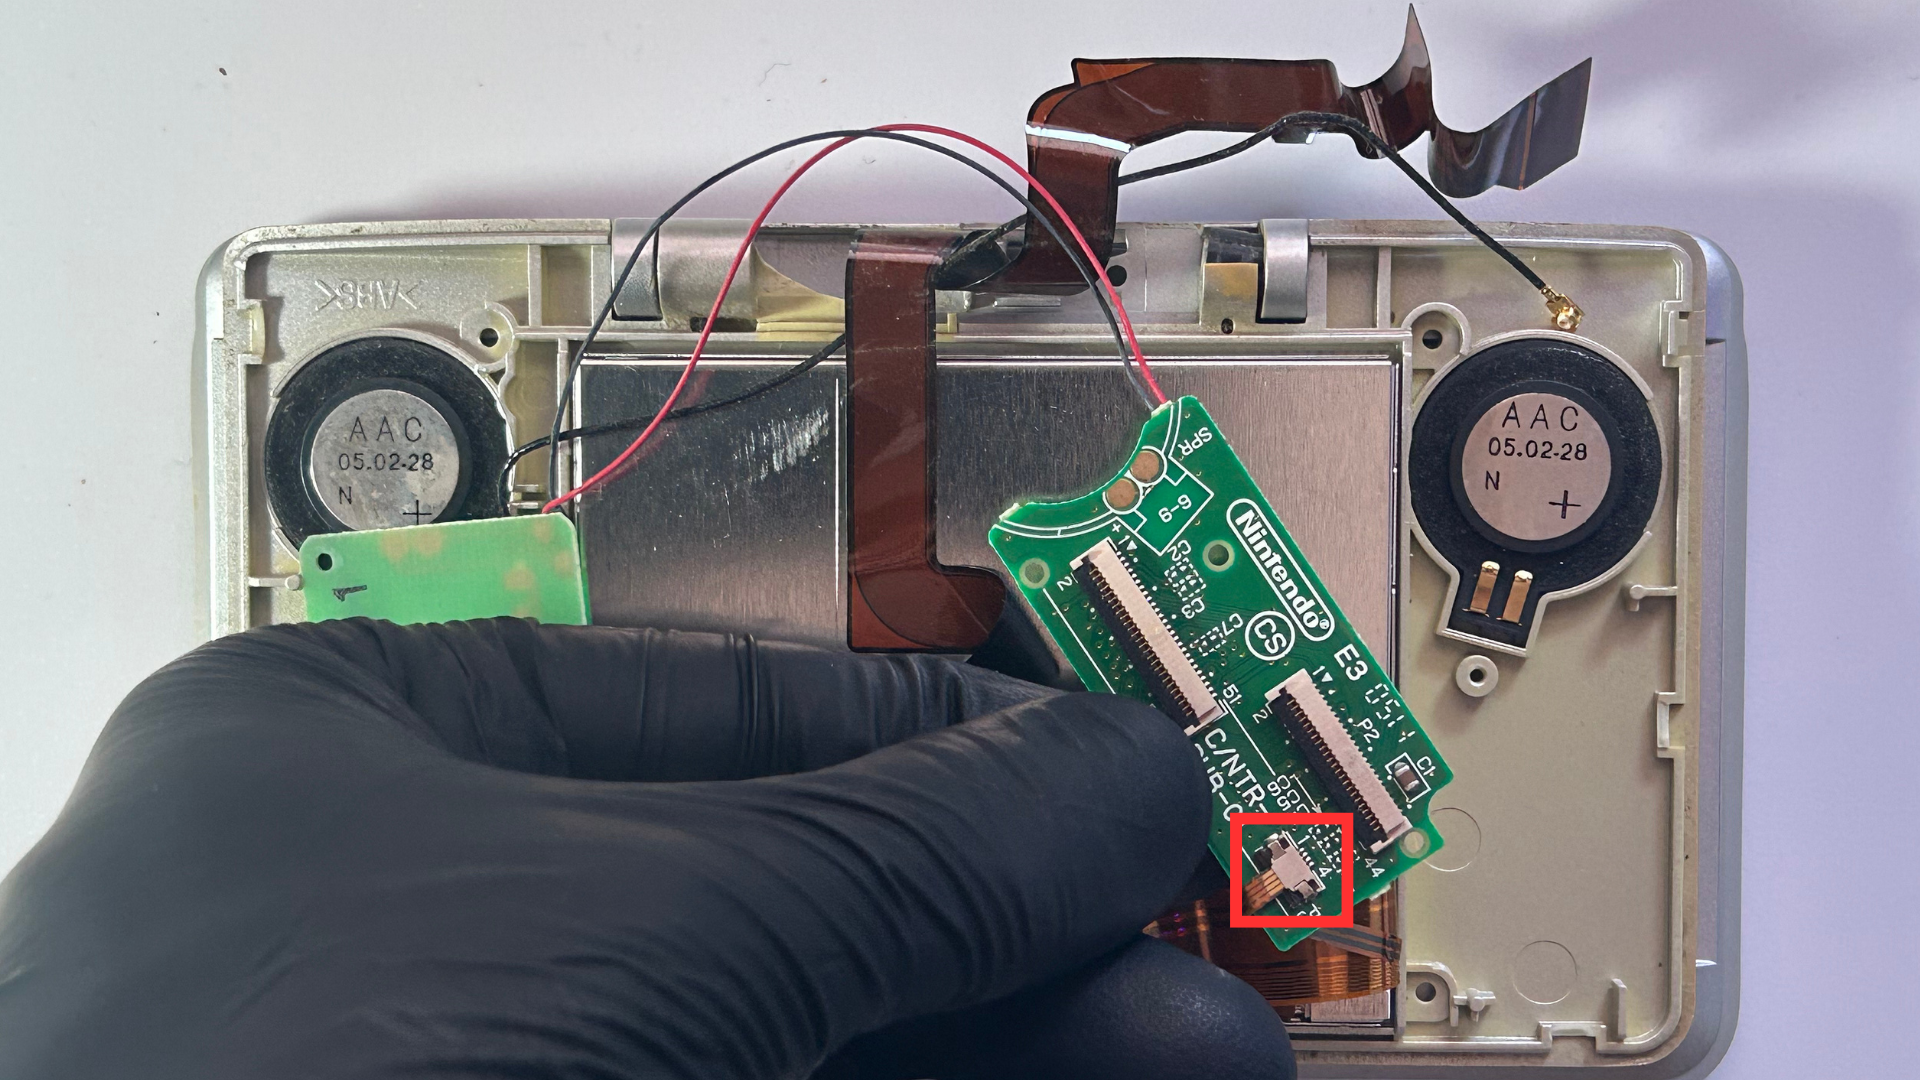
Step 7 – Remove the top LCD, speakers and hinge pieces
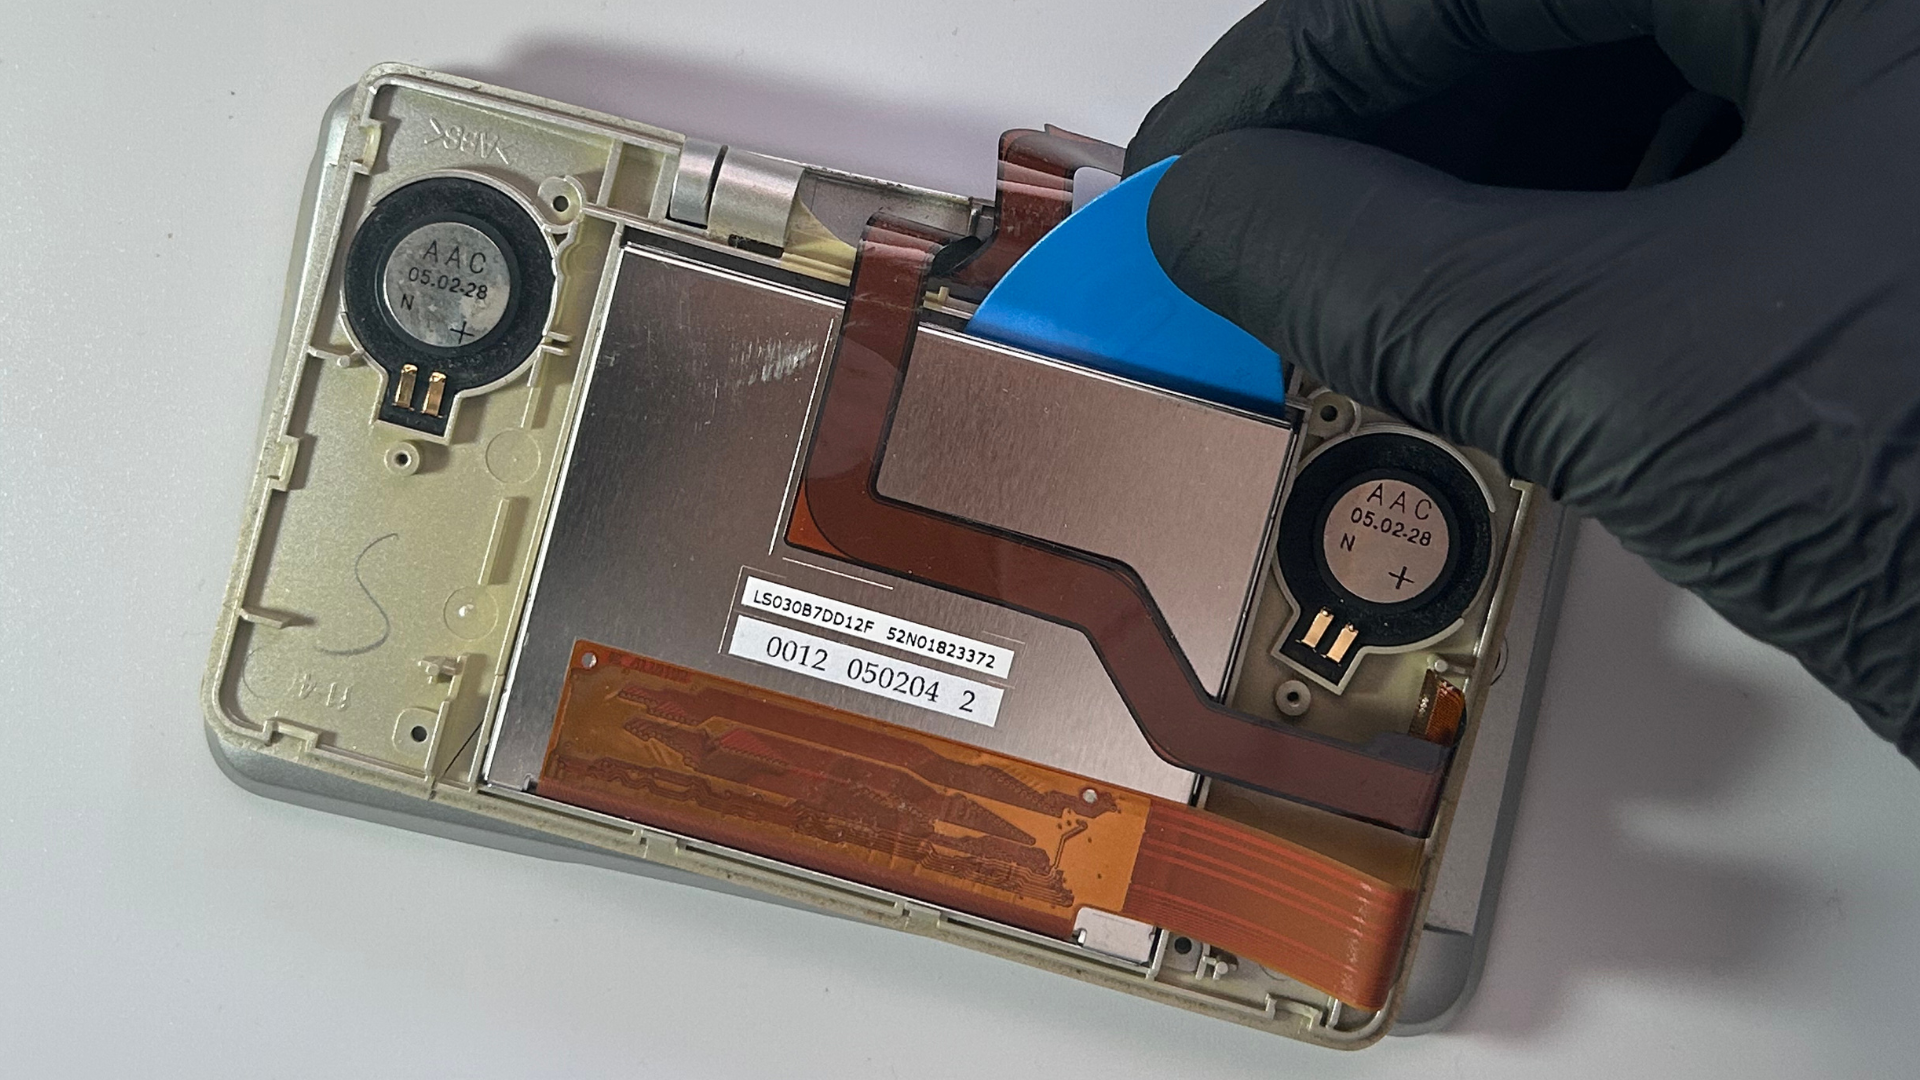
- Use your plastic pick or another thin pry tool to gently lift the top LCD out of the shell.
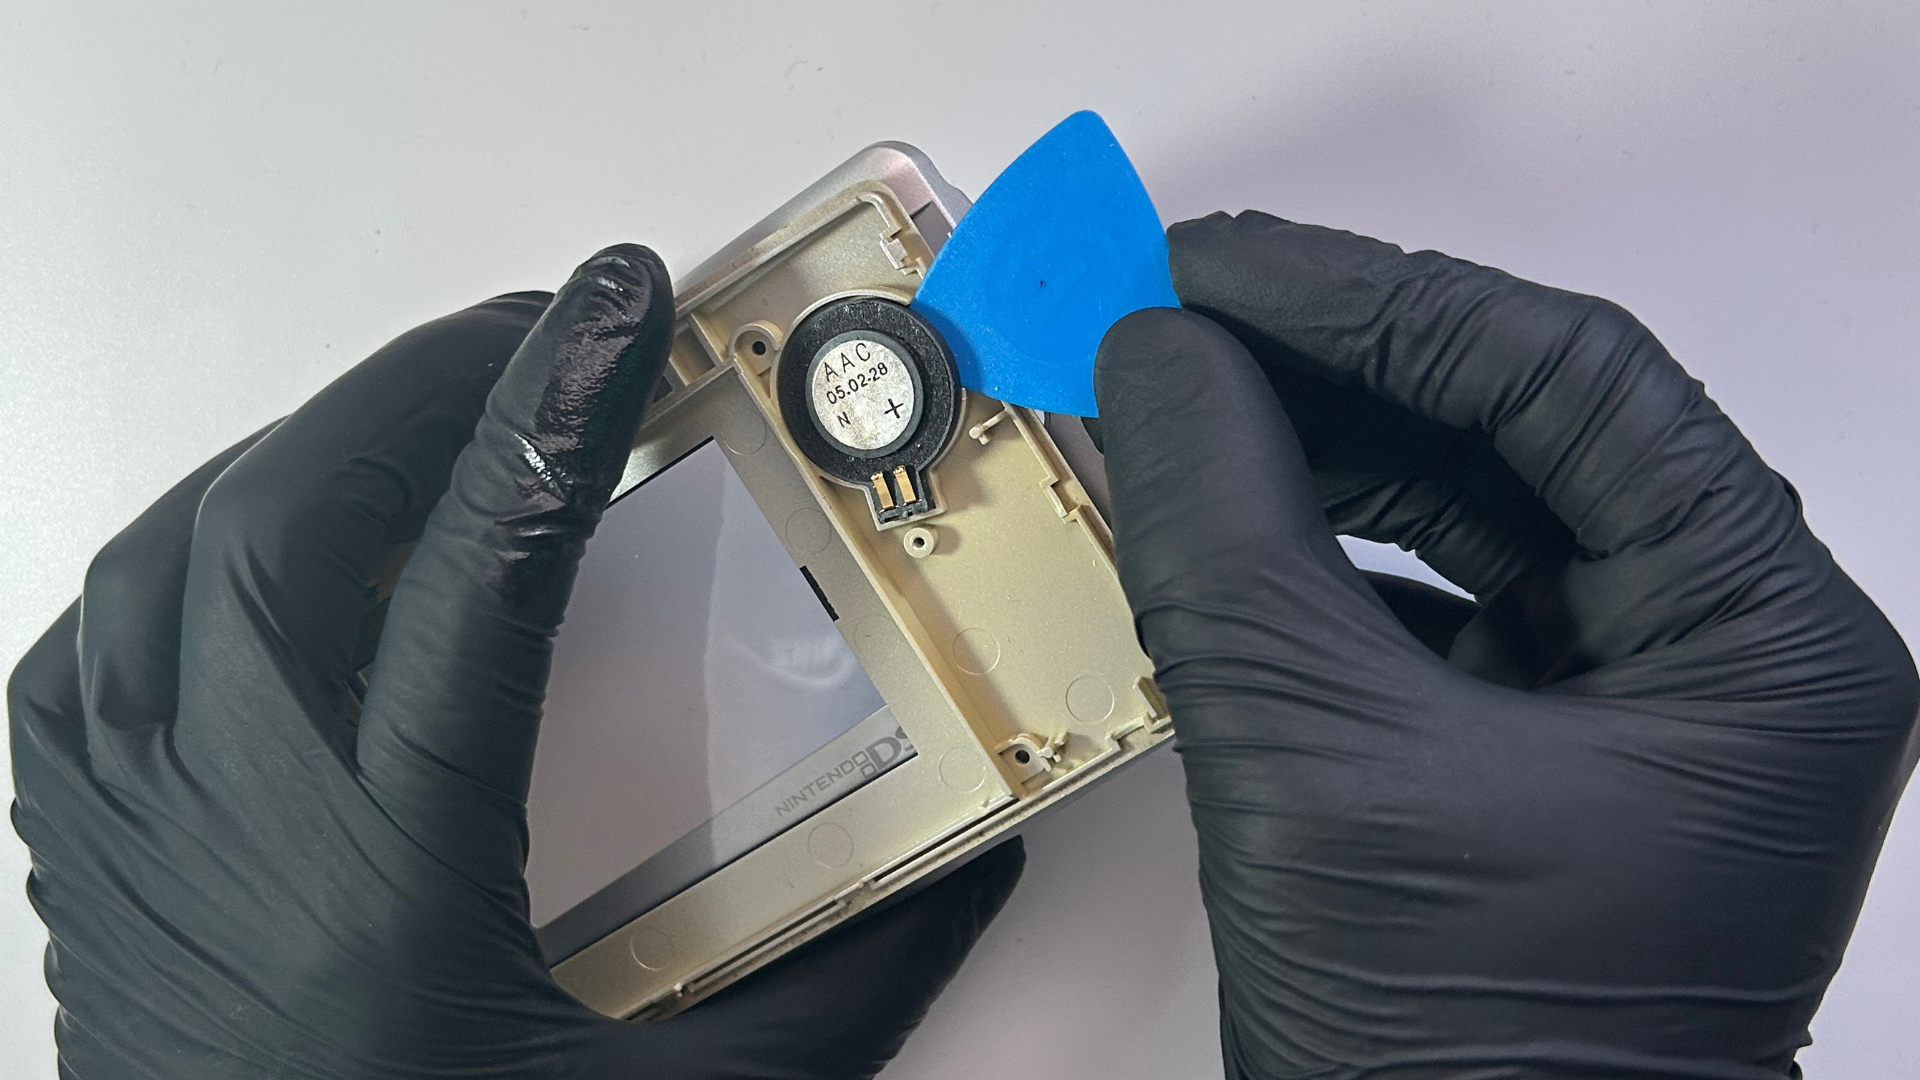
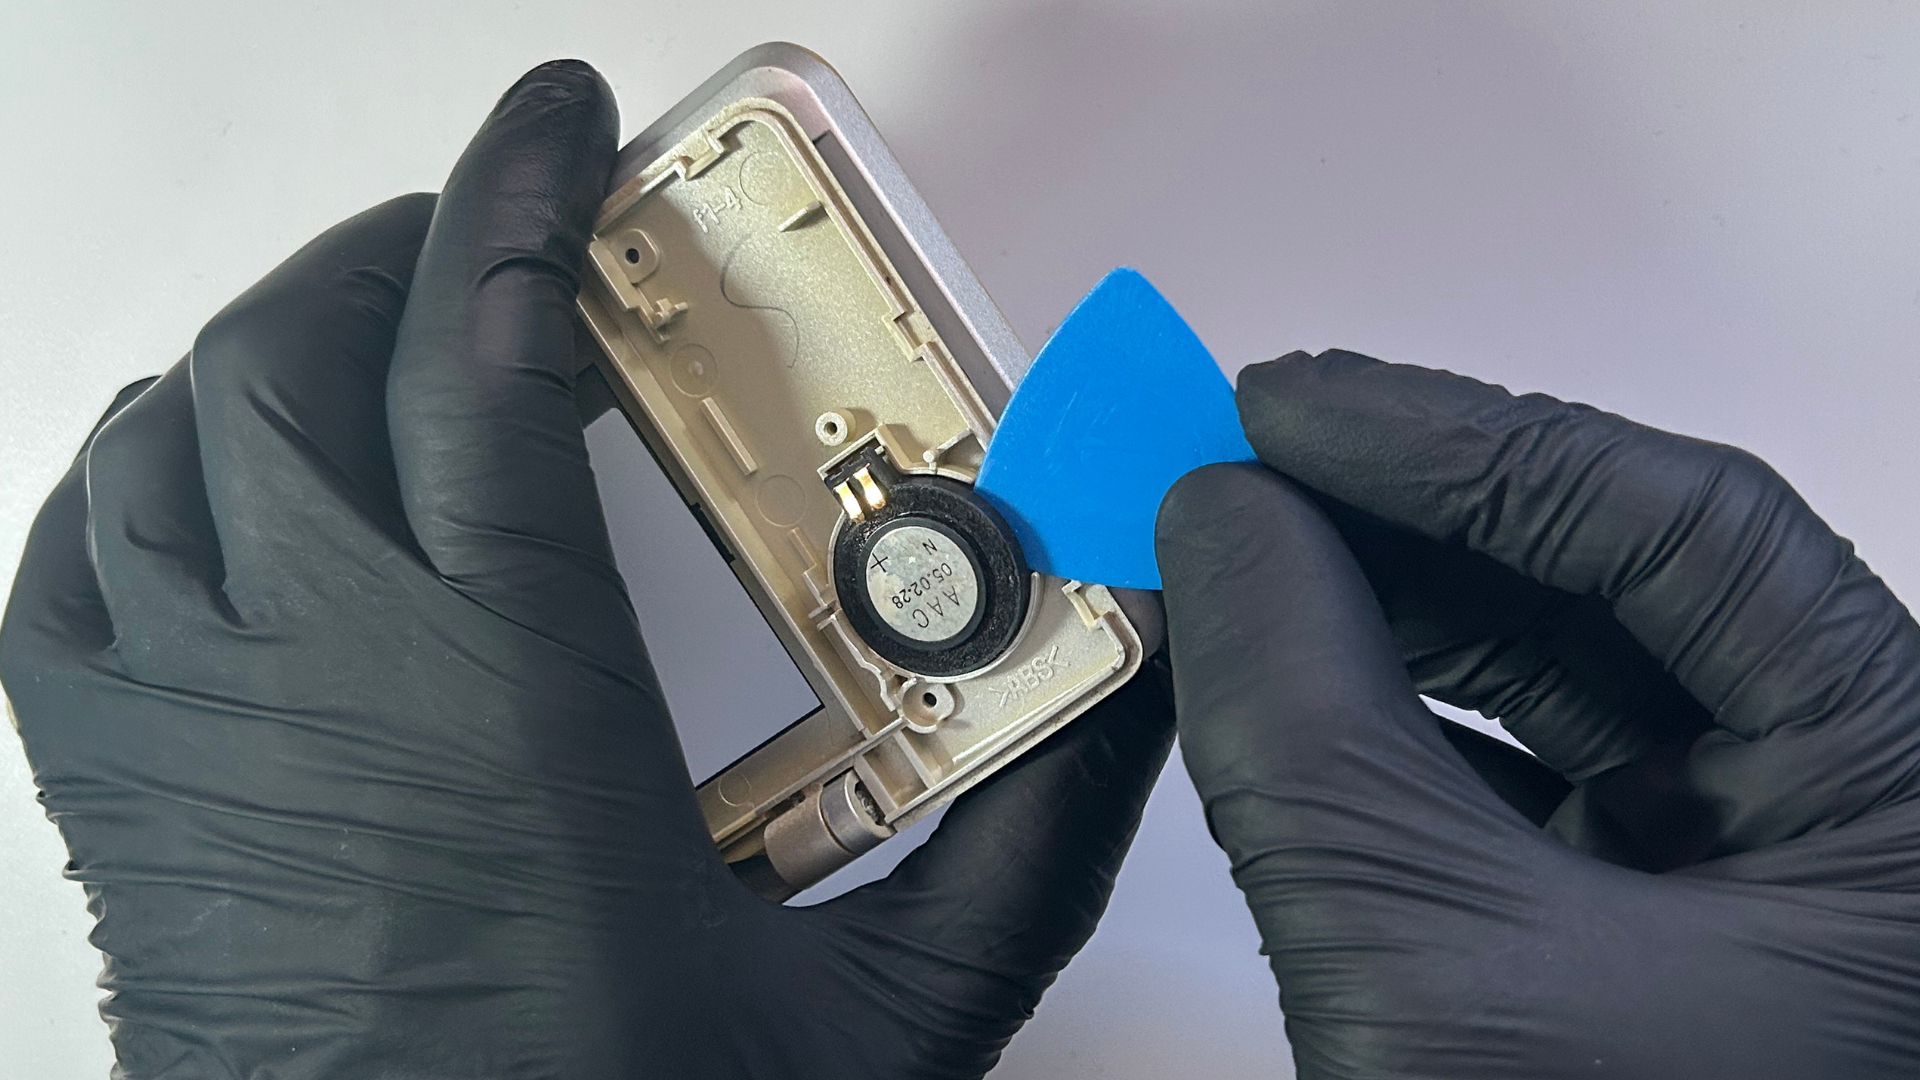
- Remove the left and right speaker modules from the shell using your pick or pry tool.
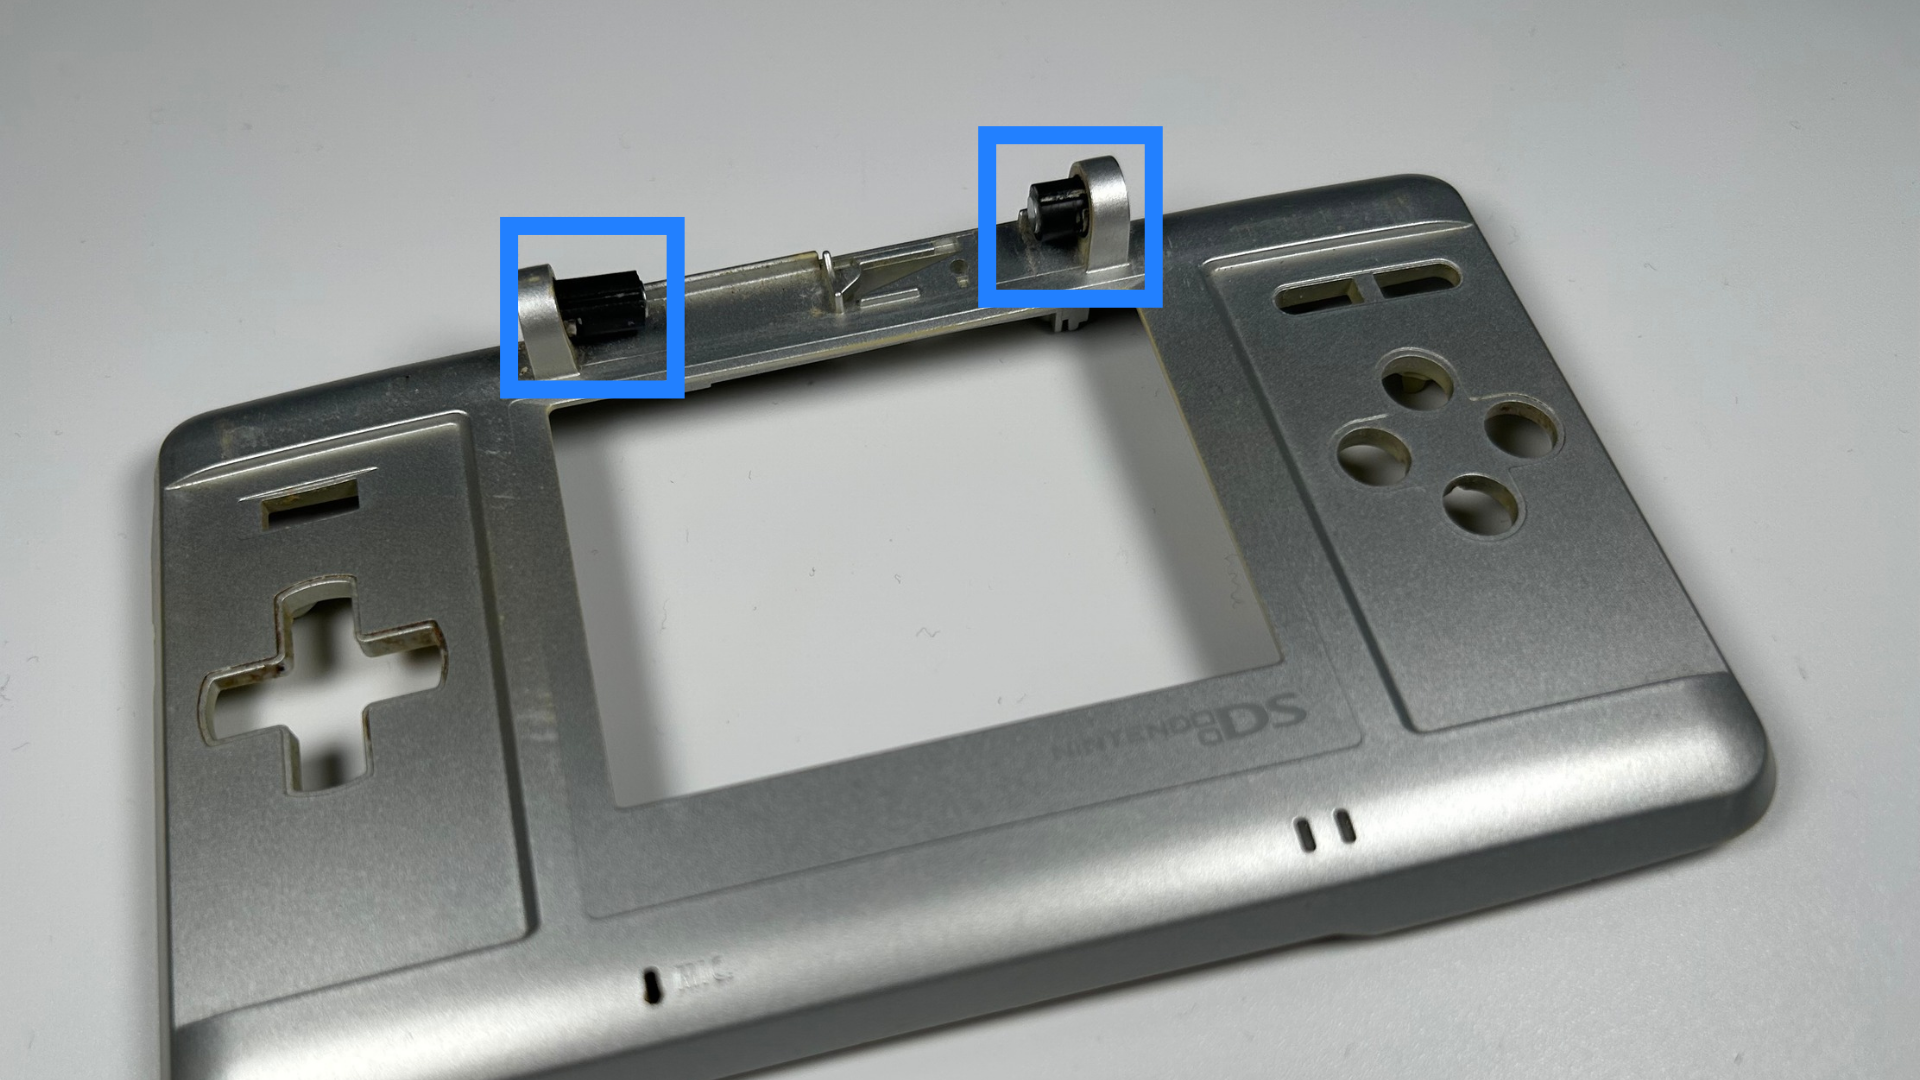
- Carefully separate the upper and lower shell sections and remove the two small black hinge pieces. These pieces are different lengths, so take note of their positions and orientation. Keep both pieces safe, as they will need to be transferred to the replacement shell.
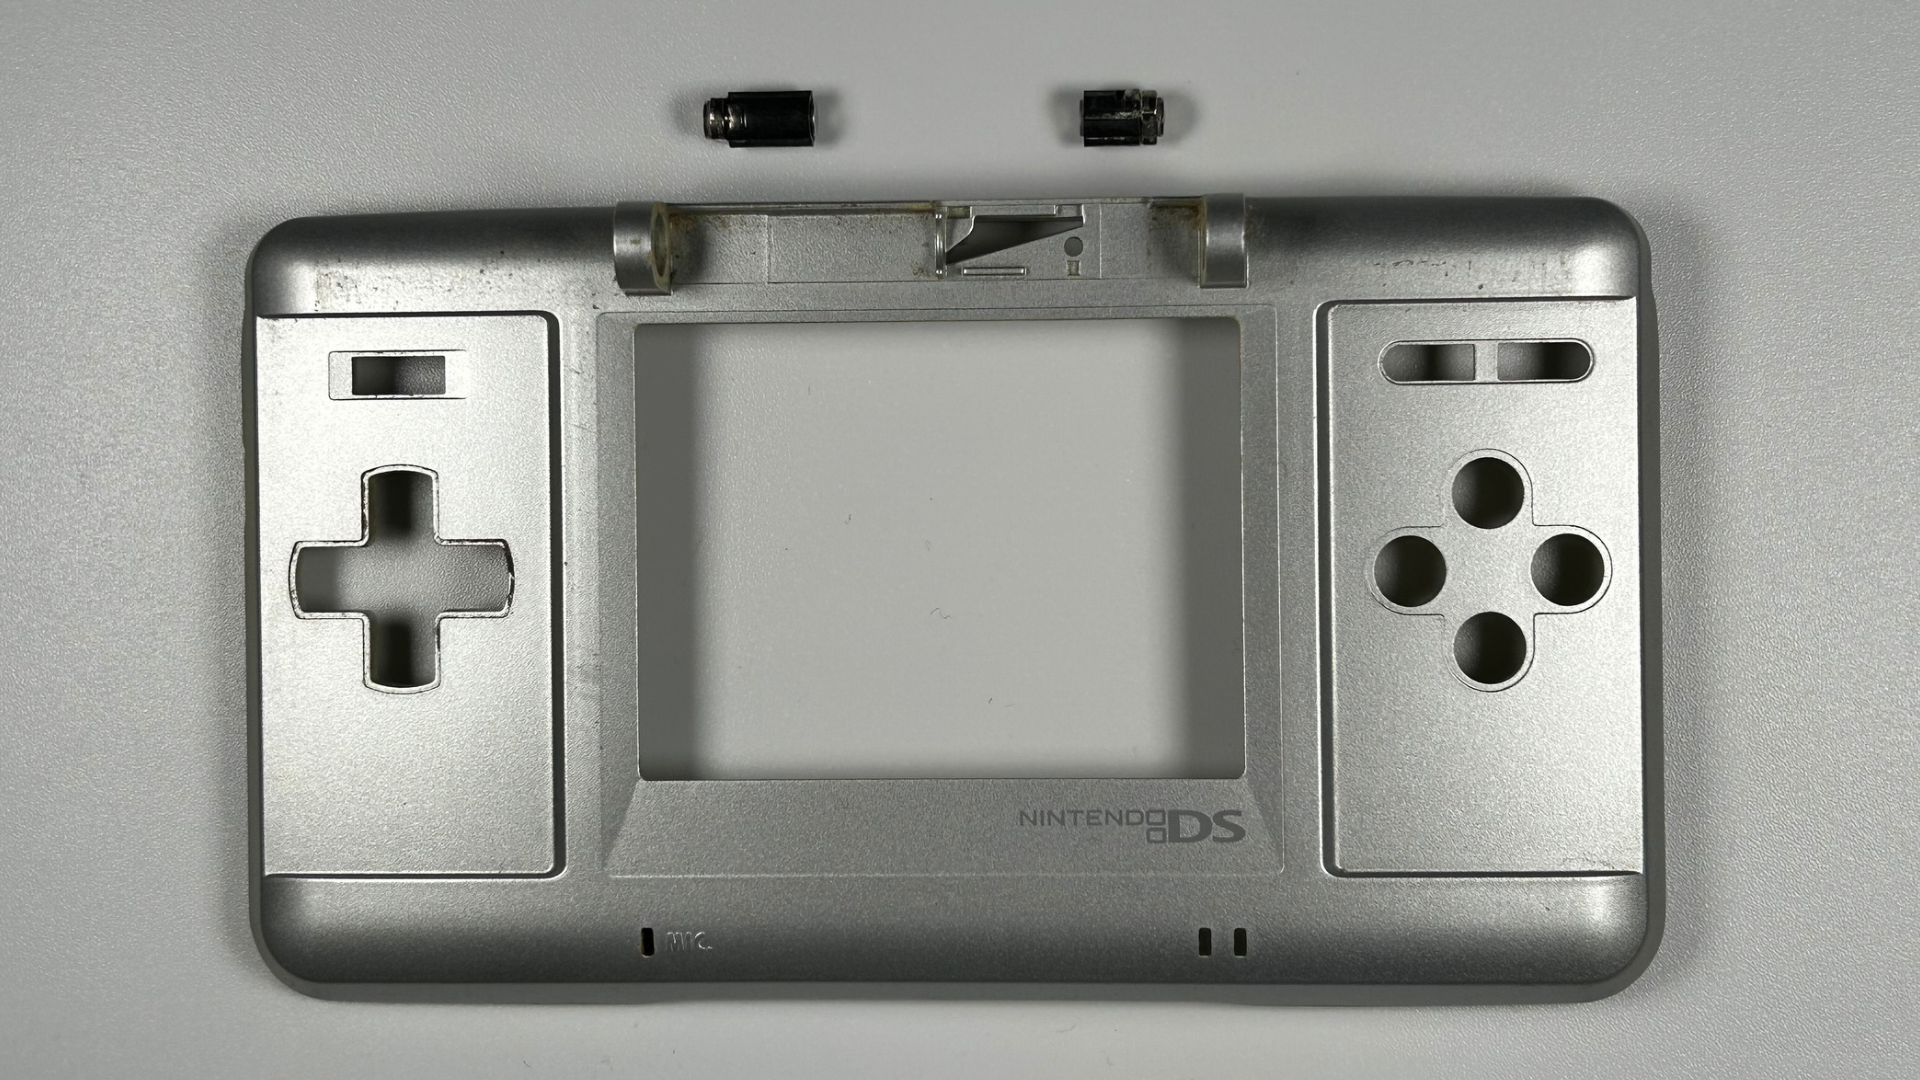
Step 8 – Prepare the replacement shell
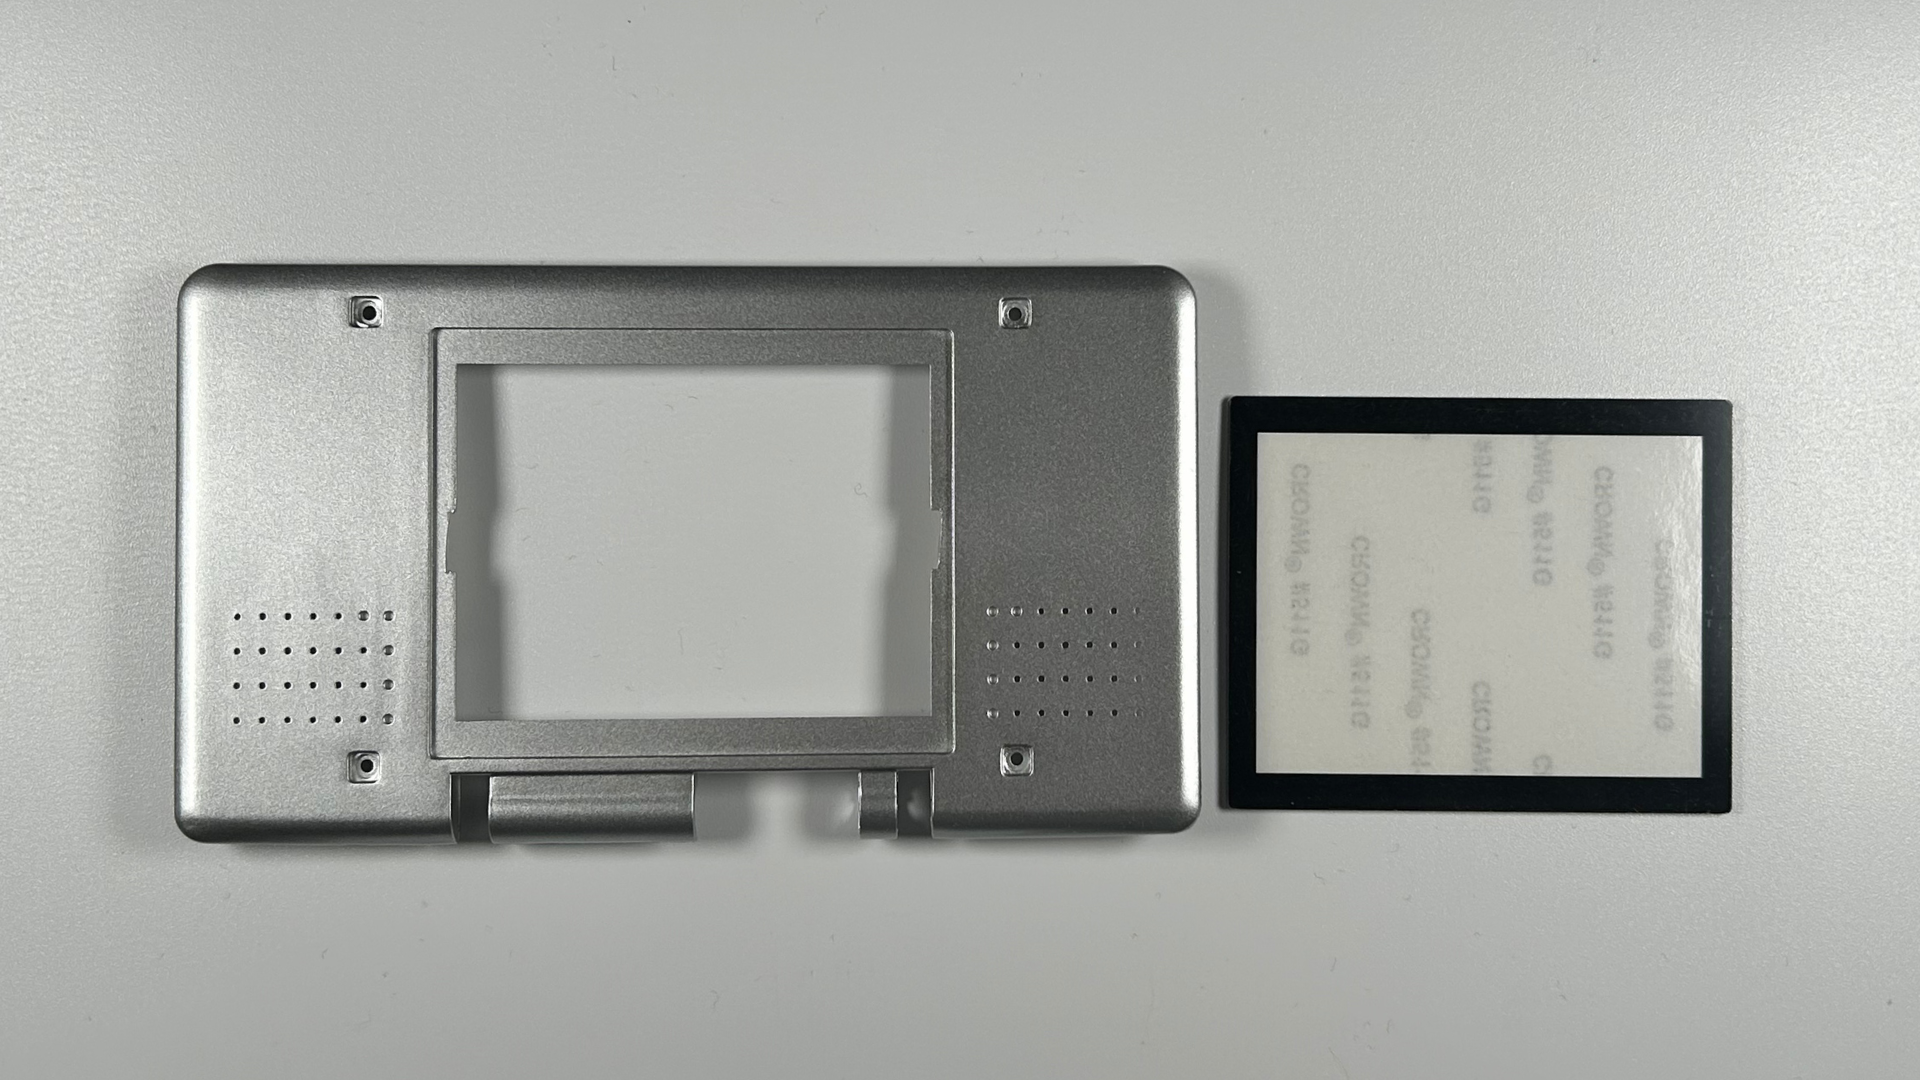
- Lay out the new shell pieces and compare them with the original housing to make sure all parts are present.
- Transfer or install any small trim pieces, rubber pads, stickers and cosmetic inserts that are not already fitted to the replacement shell.
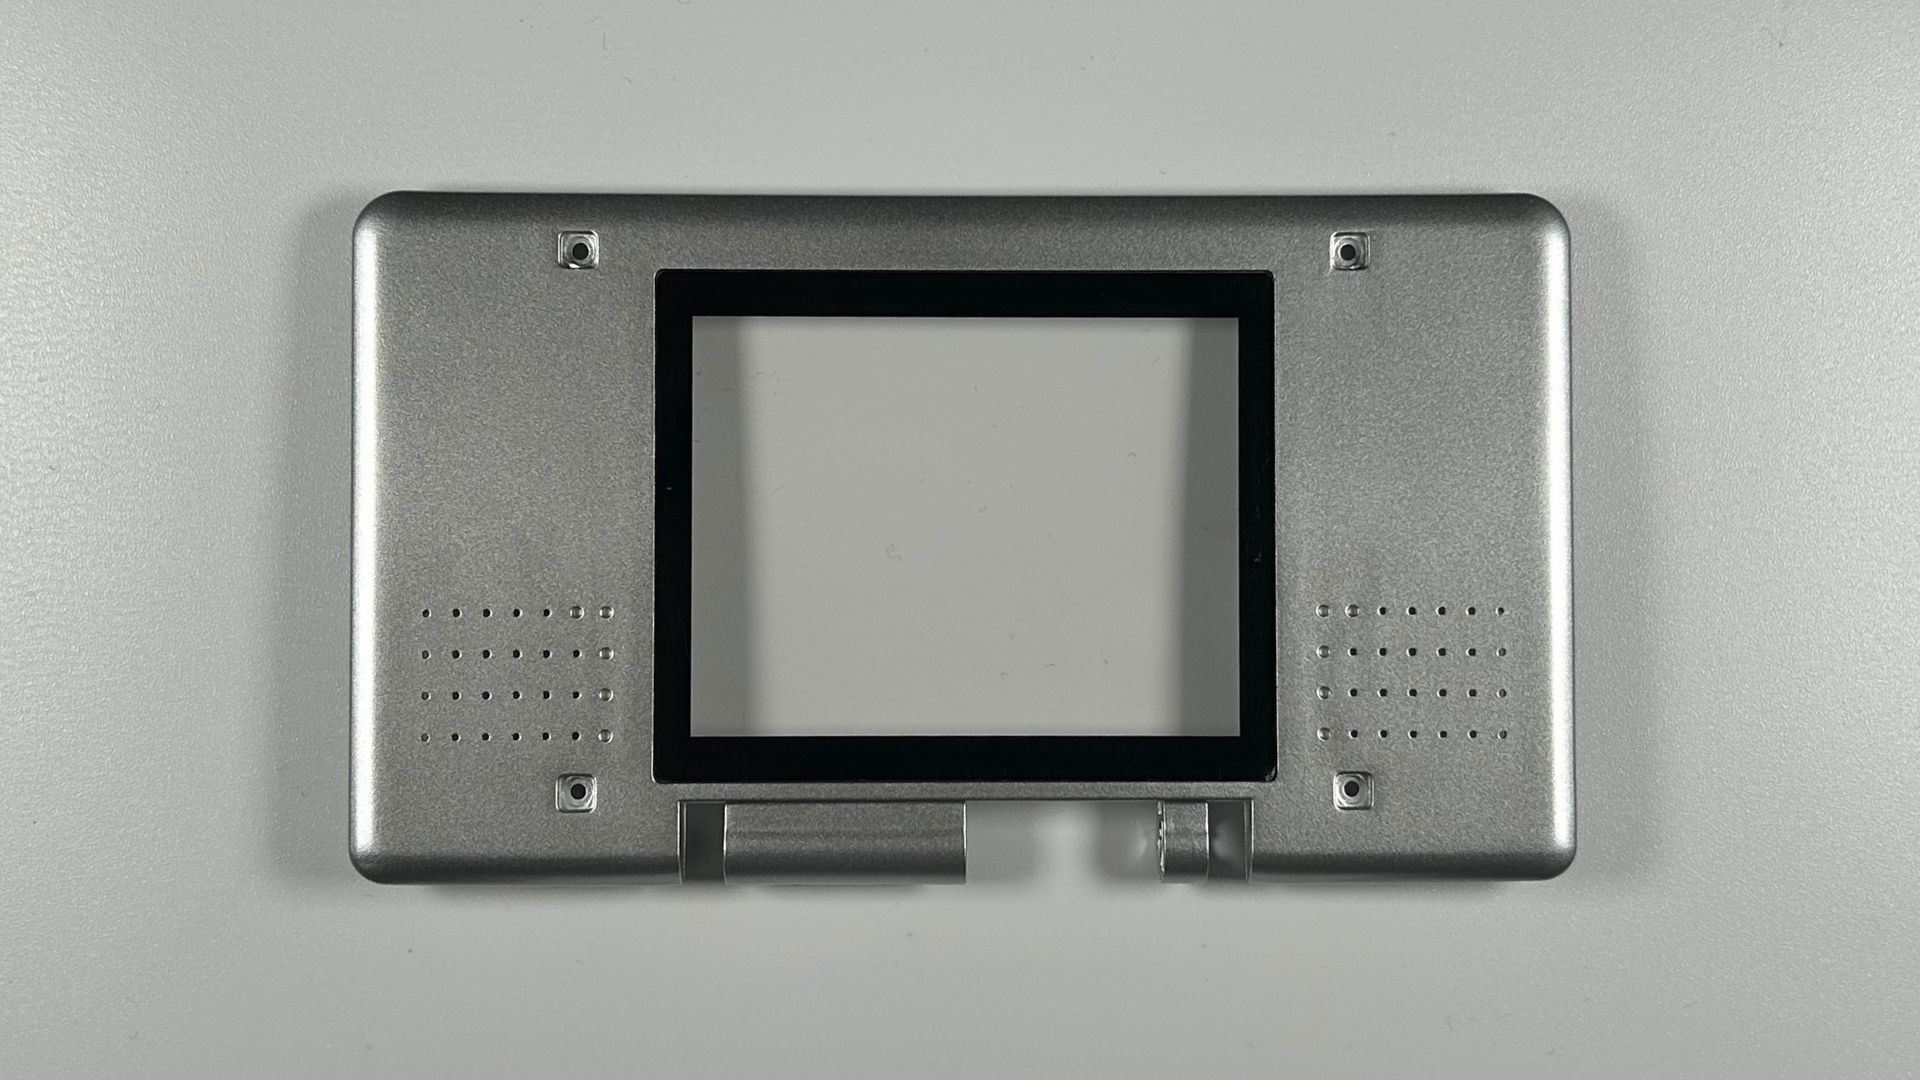
- Fit the top screen lens into the upper shell. If your replacement lens uses adhesive, make sure the surface is clean and free from dust before pressing it into place.
- Check that the button openings, hinge area and screw posts are clear before beginning reassembly.
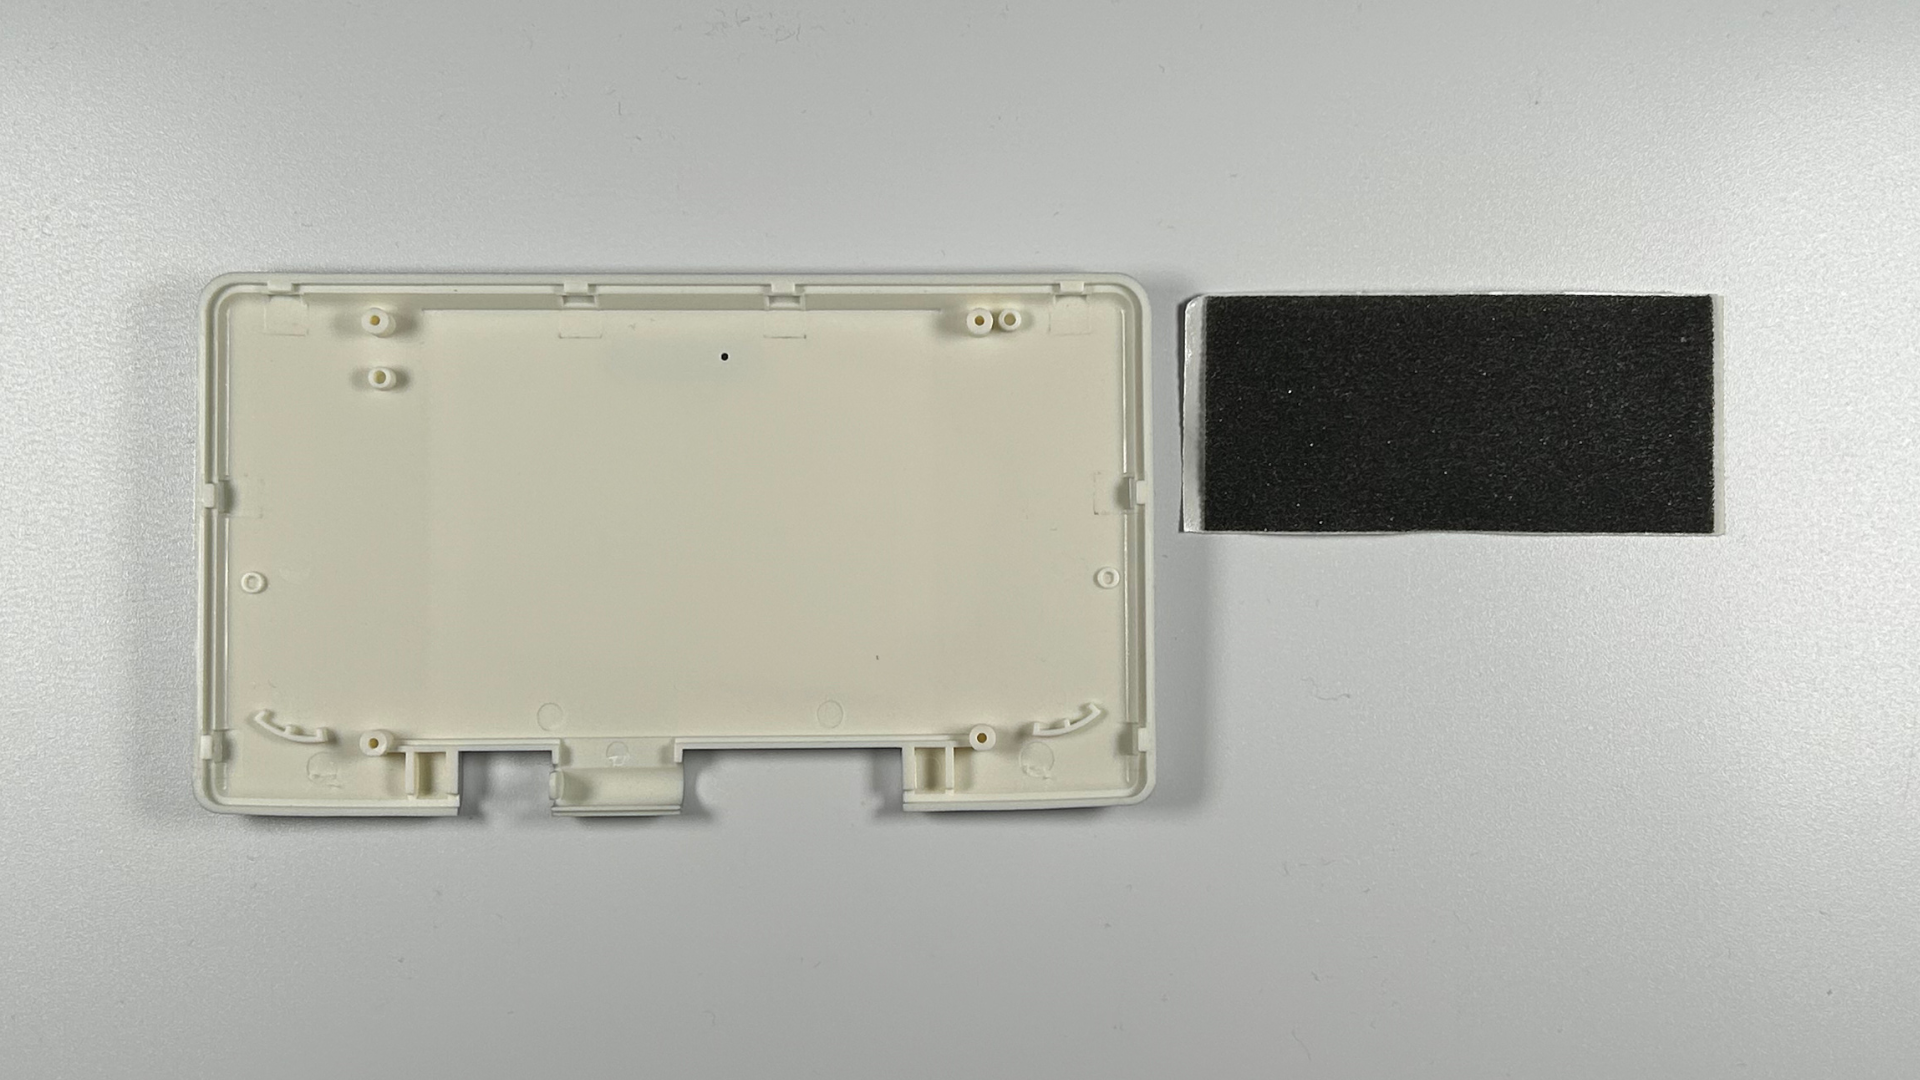
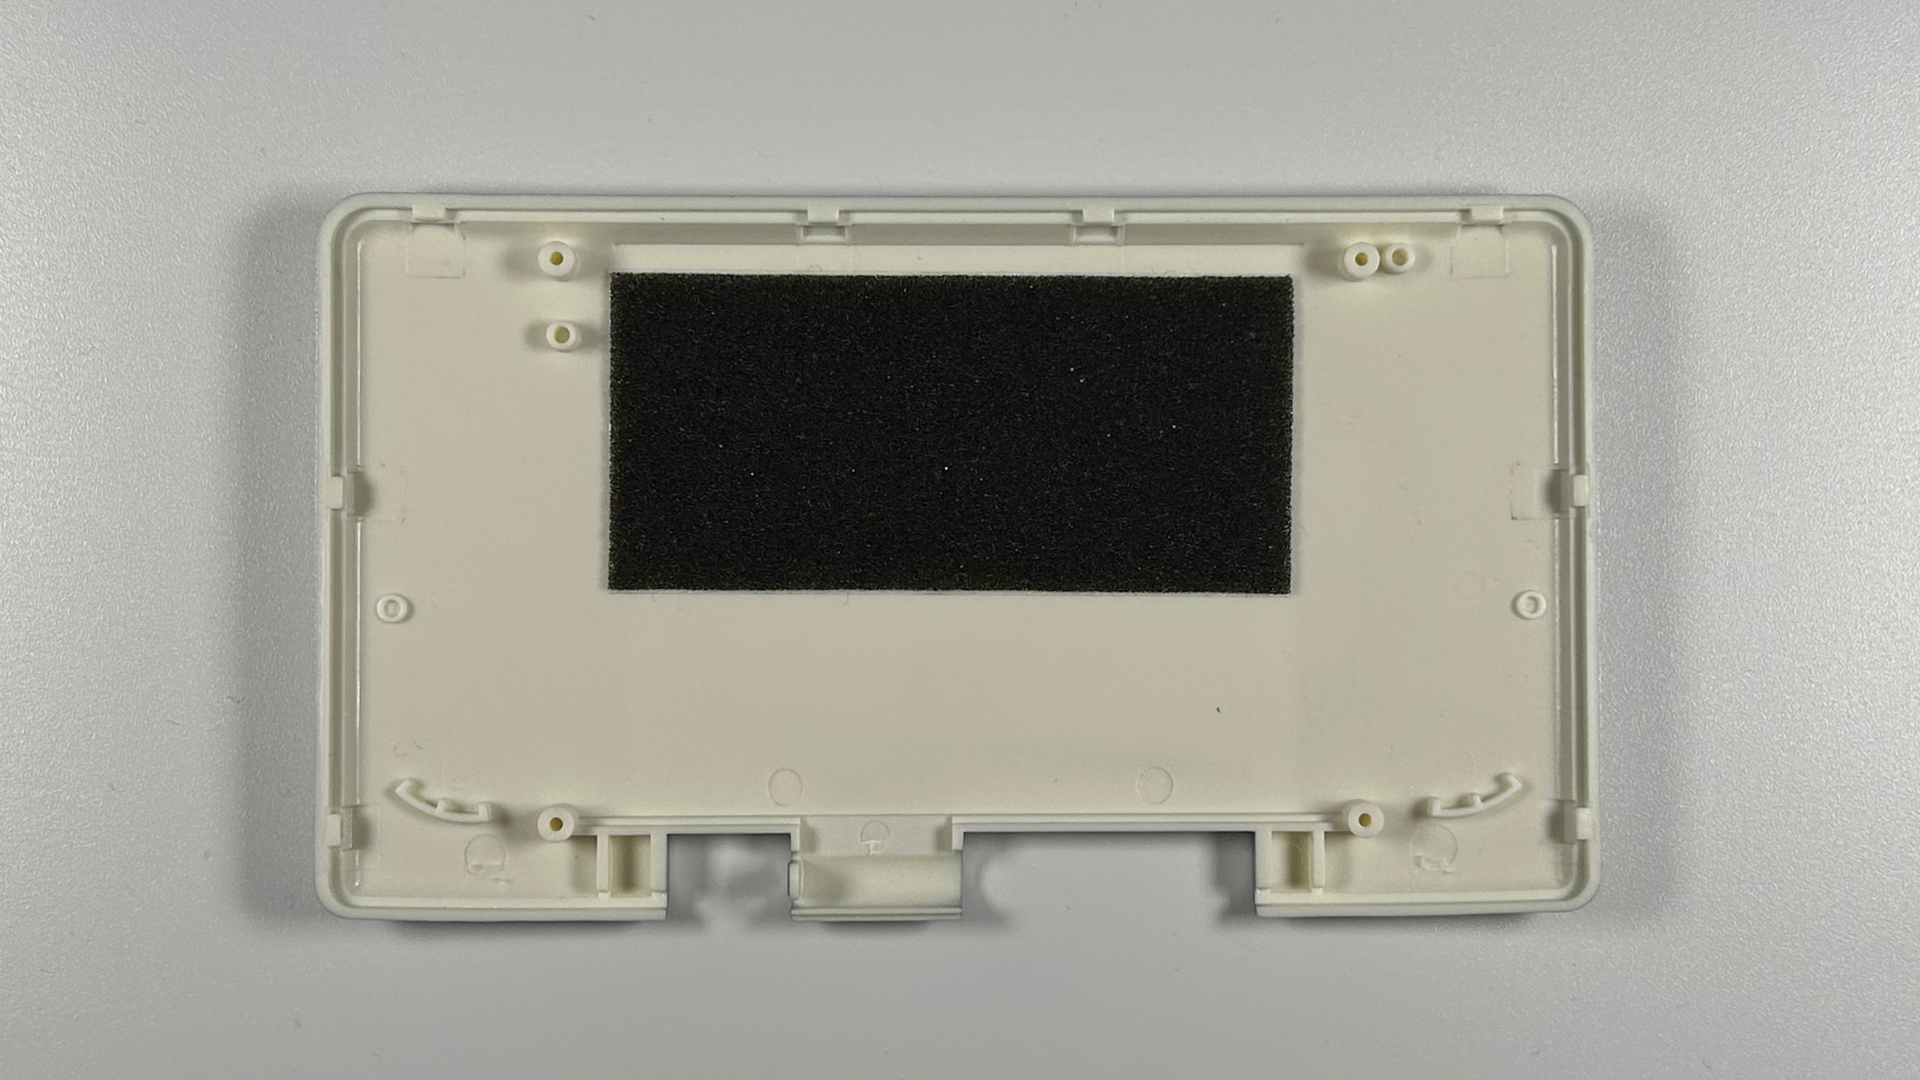
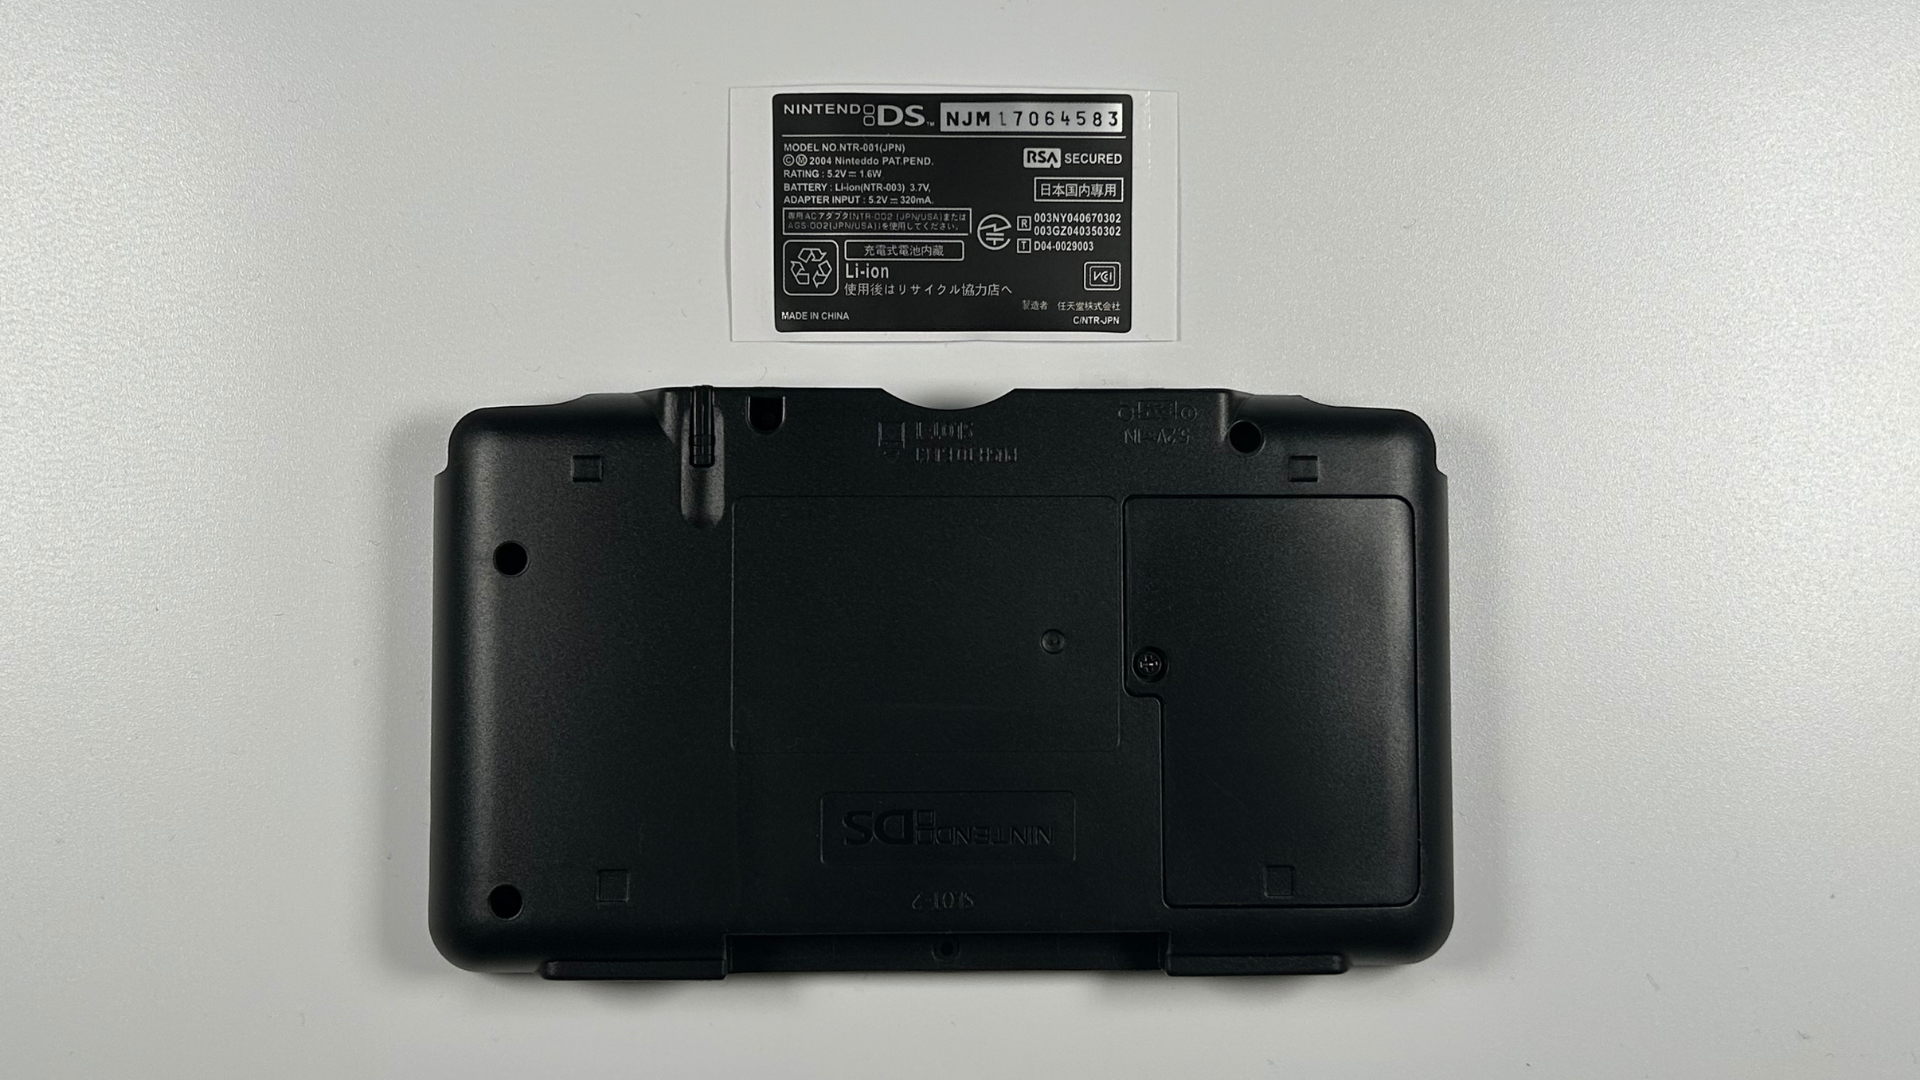
Step 9 – Join the upper and lower shell sections
- Take the new upper and lower shell faceplates and align their hinge sections.
- Fold the upper faceplate down into the closed position, just as you would when closing the Nintendo DS after use.
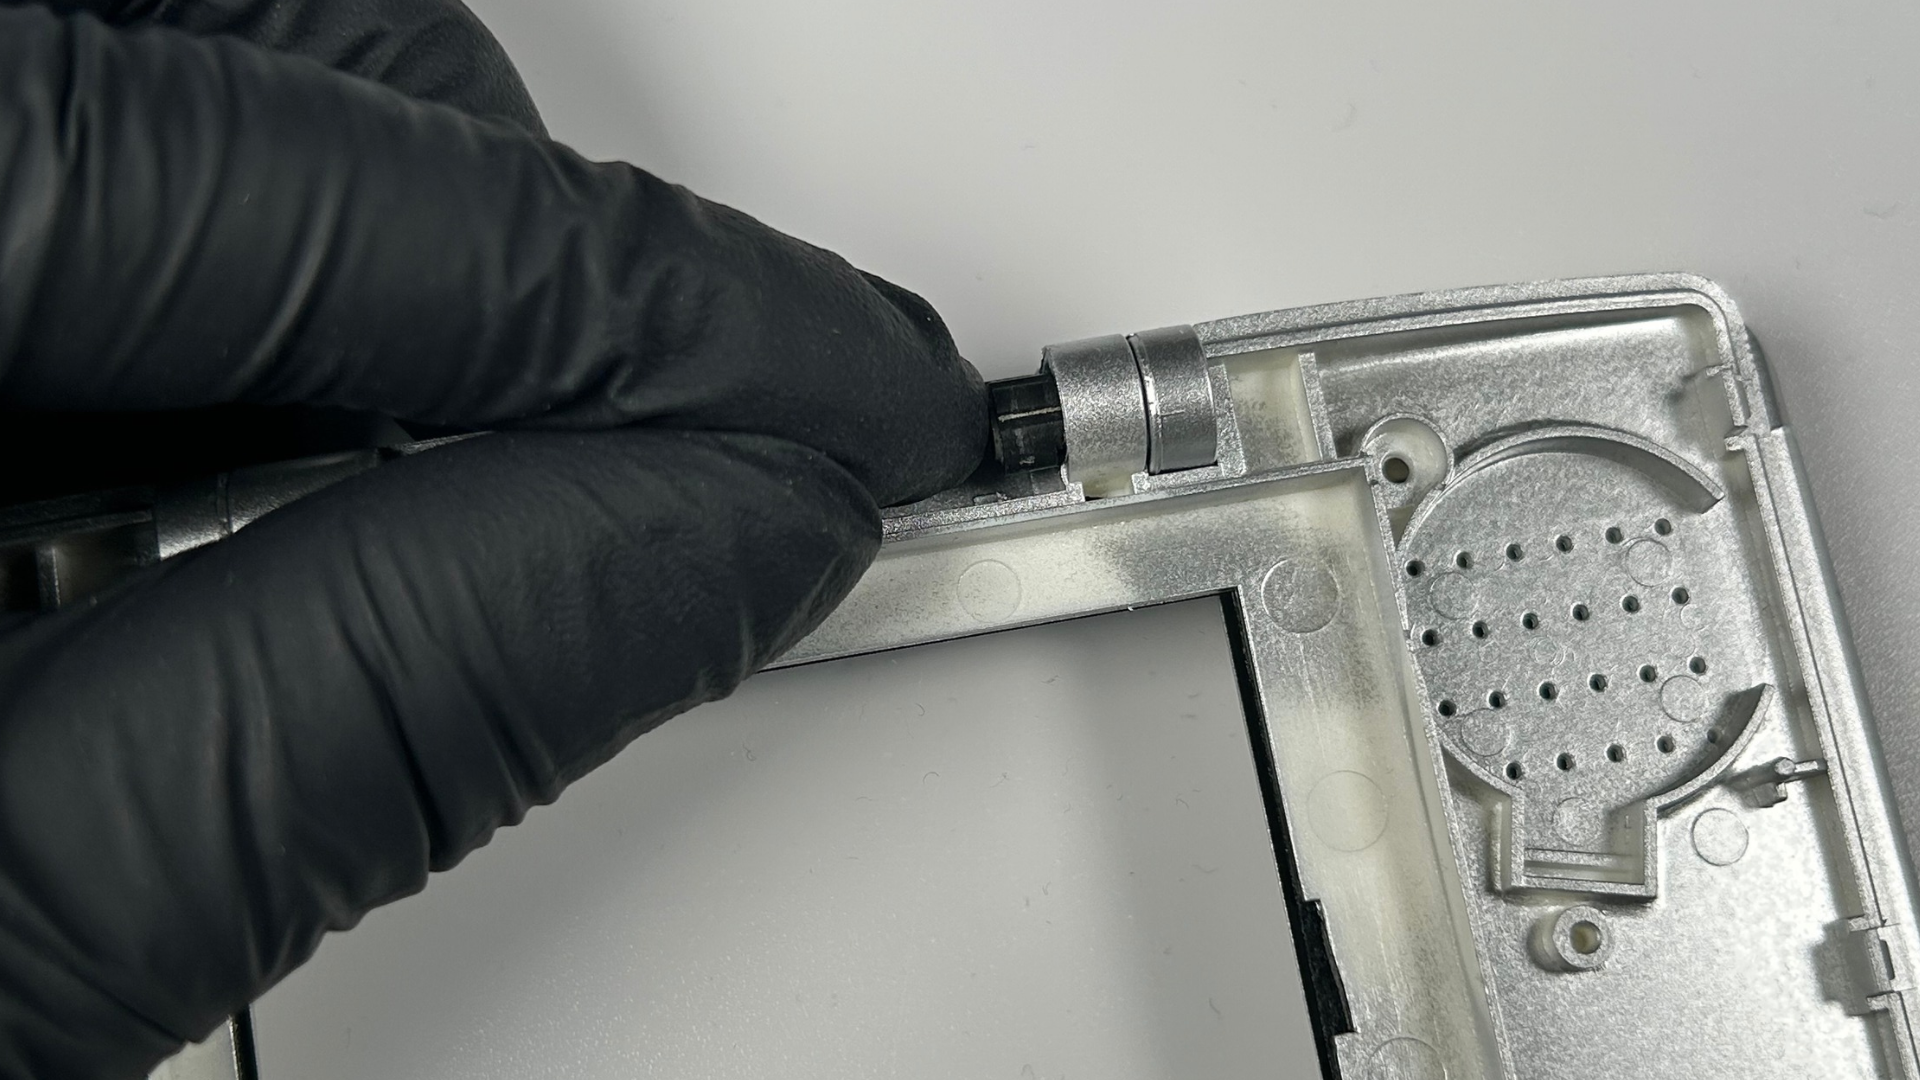
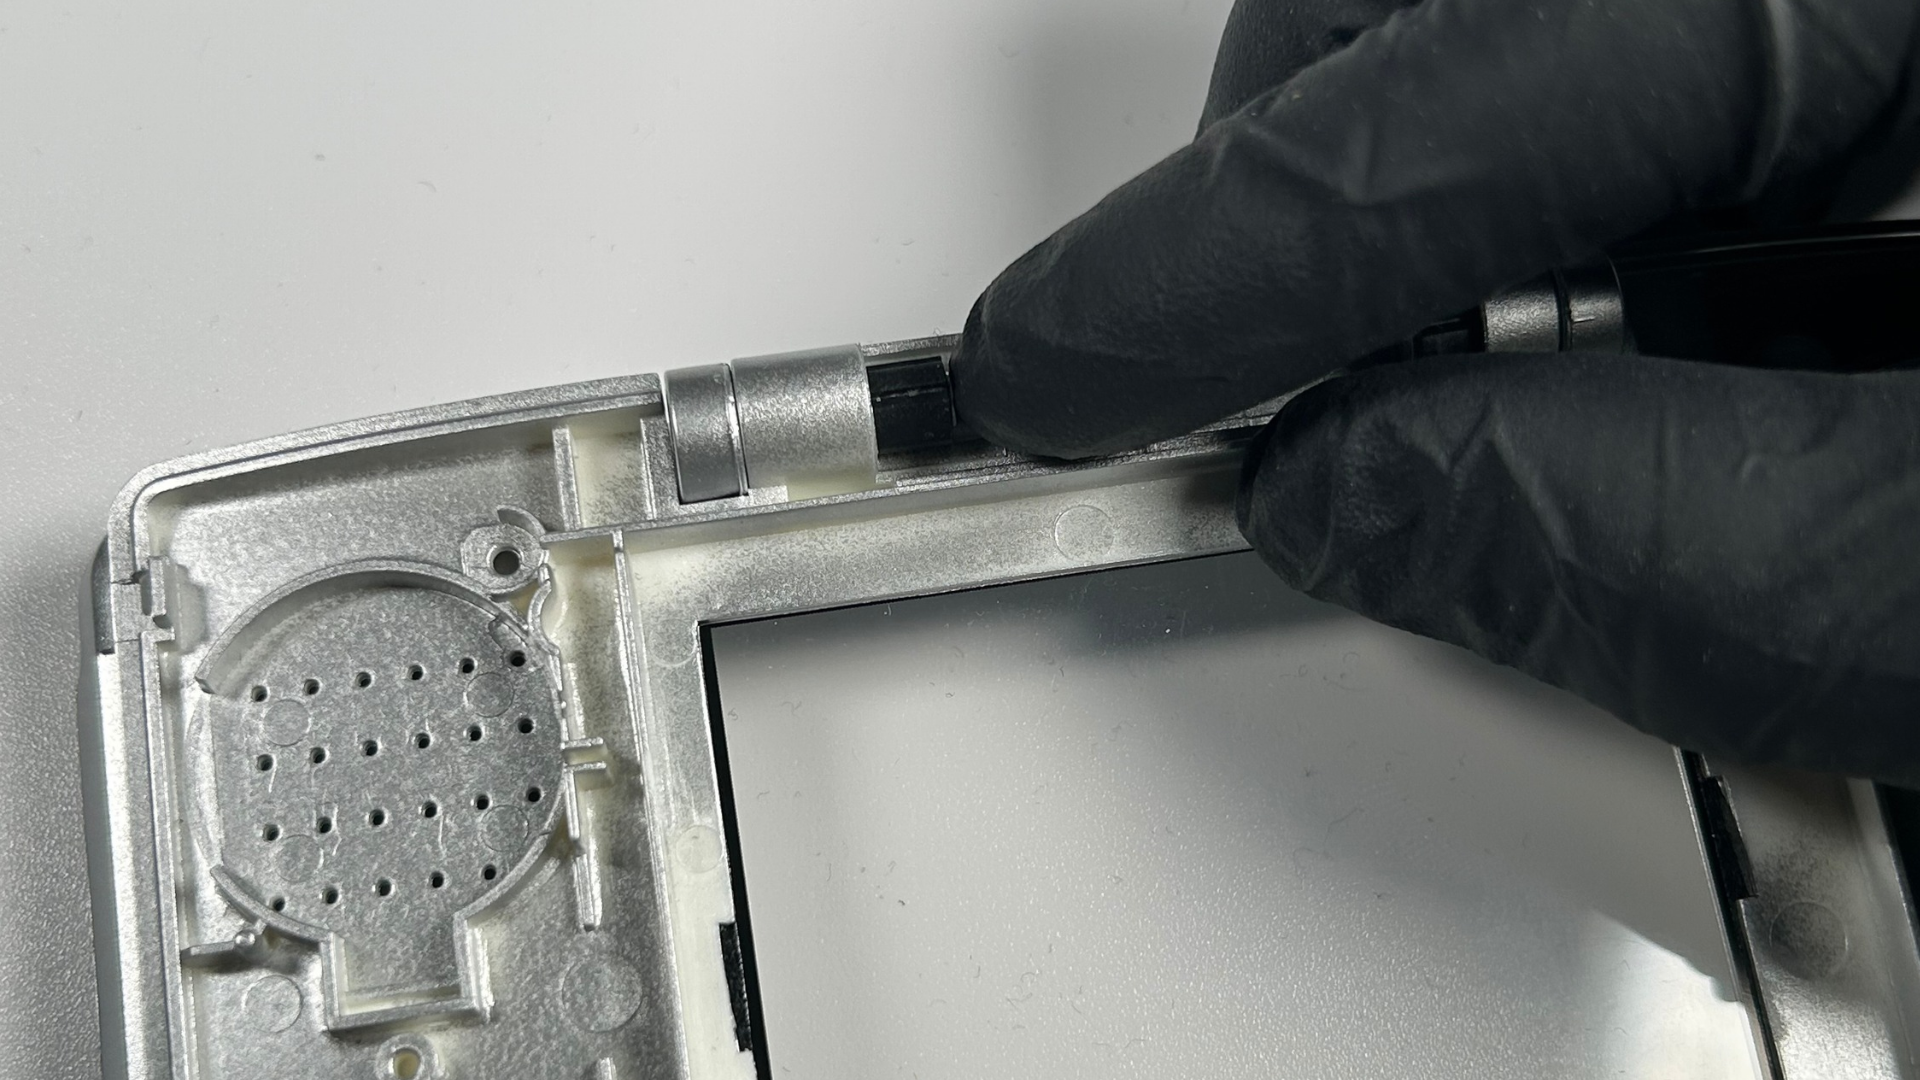
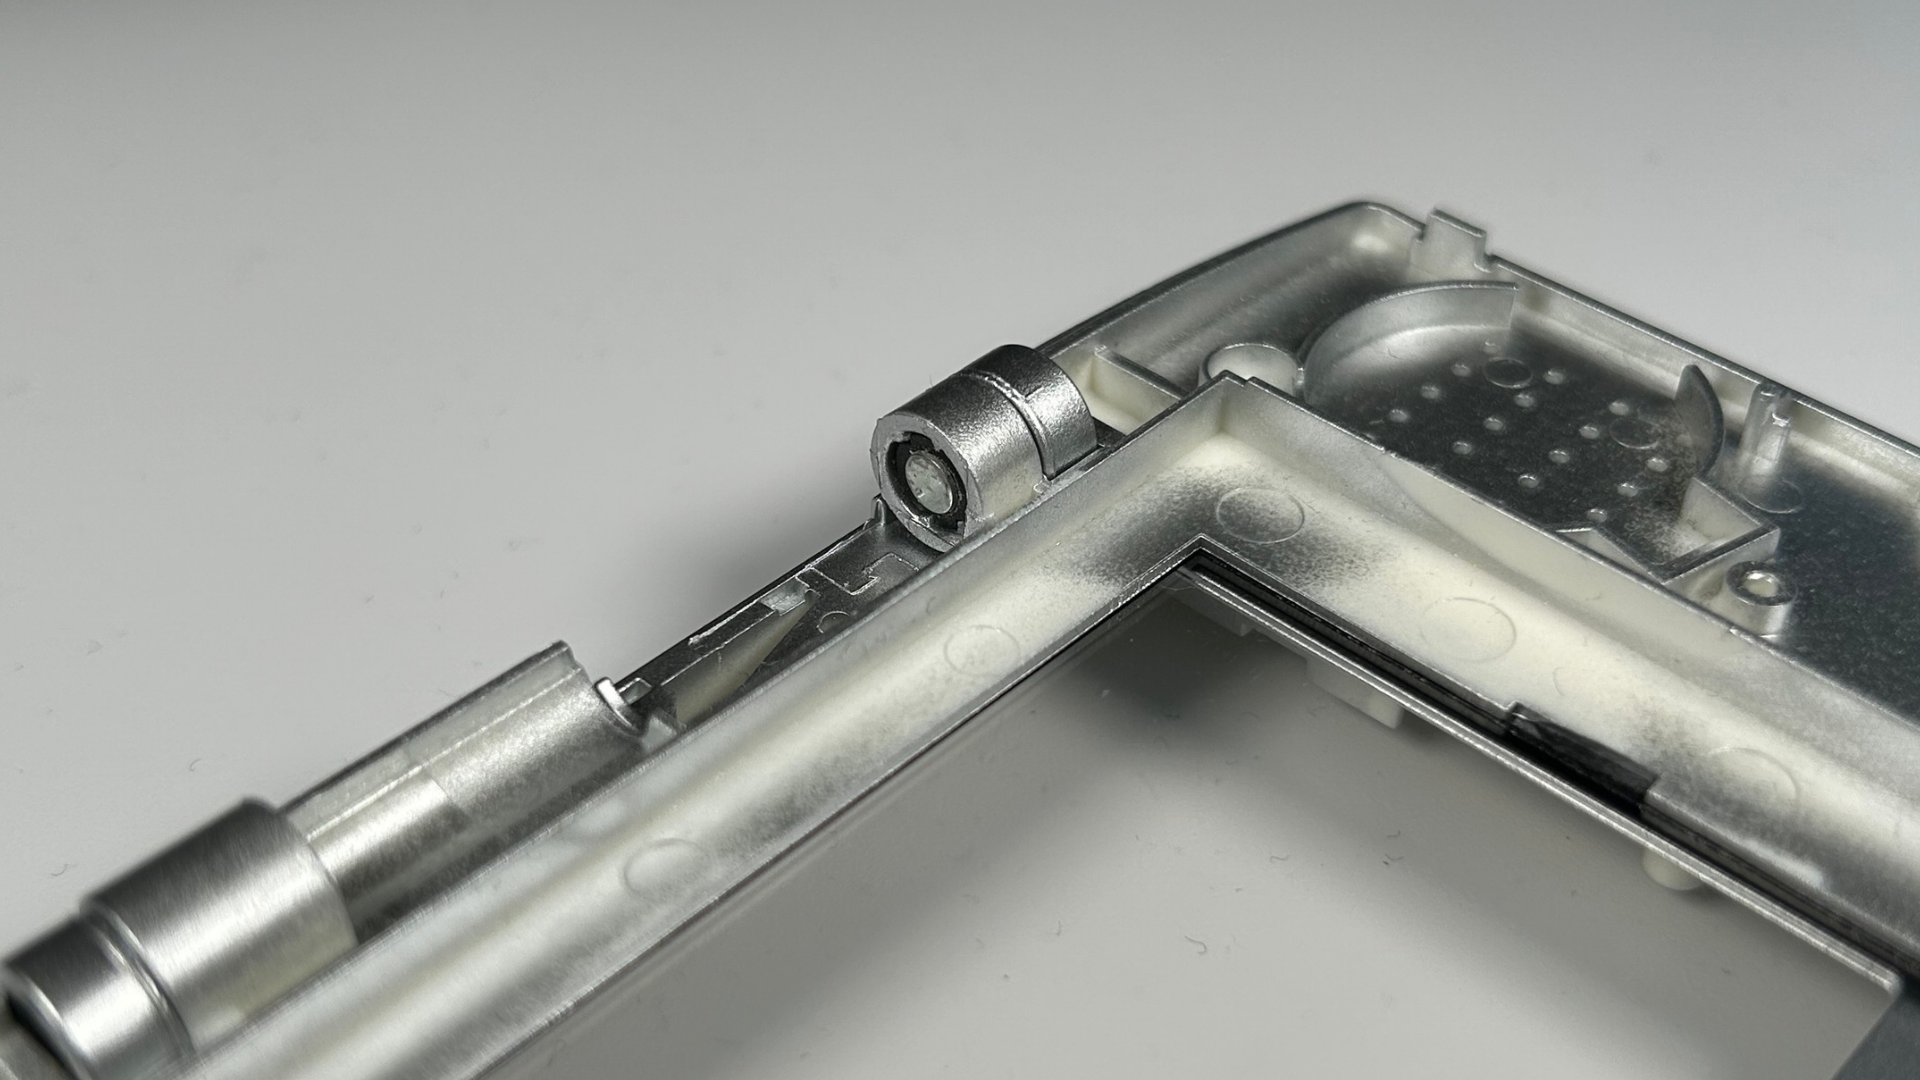
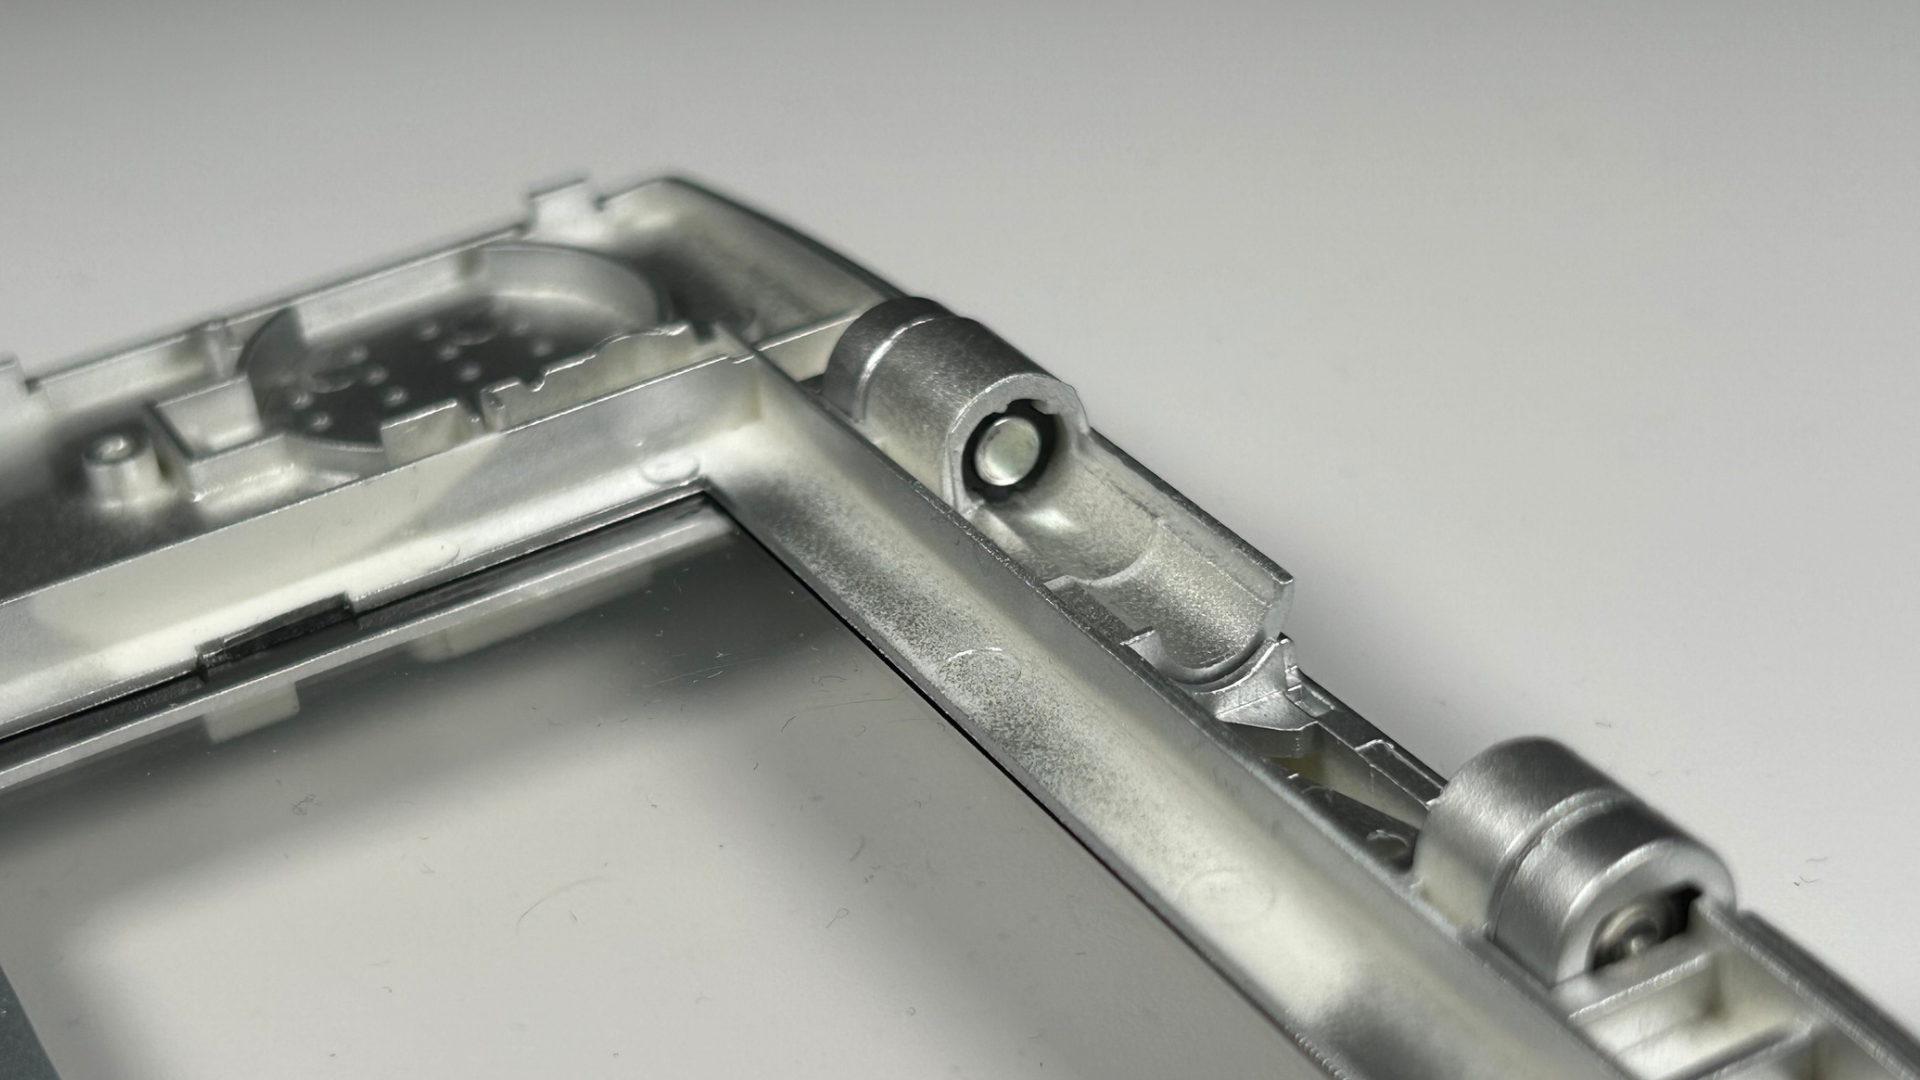
- Insert the two small black hinge pieces into their corresponding slots on the left and right sides. Make sure each piece is positioned correctly, referring to the photographs from Step 7 if needed.
- If either hinge piece does not push fully into place, slowly open the Nintendo DS until the grooves in the upper and lower shell sections align. Once aligned, gently push the hinge piece the rest of the way in. Do not force it.
- Check that both hinge pieces are seated correctly and that the two shell sections are connected.
Step 10 – Install the speakers and top LCD
- Place the left and right speakers back into their corresponding slots in the new upper shell faceplate. Make sure both speakers are seated correctly.
- Carefully position the top LCD into the upper shell faceplate, making sure it sits correctly within the frame.
- Check that the speakers and LCD are sitting flat and that no wires or ribbon cables are trapped underneath them.

Step 11 – Reinstall the speaker daughterboards
- Place the left speaker daughterboard into its corresponding position in the upper shell and secure it with the Phillips screw.
- Carefully reconnect the ribbon cables from the rear of the top LCD to the right daughterboard. Ensure each cable is fully inserted and its locking tab is secured.
- Position the right daughterboard in the upper shell and secure it with the second Phillips screw.
- Check that both daughterboards are seated correctly and that the ribbon cables are not twisted or trapped.
Step 12 – Reinstall the LCD spacer and hinge cover
- Carefully feed the top LCD ribbon cable through the slit in the hinge section, making sure it passes through without twisting or snagging.
- Reinstall the yellow plastic spacer along the top edge of the upper LCD, ensuring it sits correctly in its original position.
- Position the hinge cover back into place around the ribbon cable, making sure the cable is routed correctly through the opening.
- Turn the console over and reinstall the hidden Phillips screw underneath the top LCD ribbon cable to secure the hinge cover.
- Check that the ribbon cable moves freely through the hinge area and is not pinched or trapped between the shell sections.
Step 13 – Reassemble the upper screen housing
- Carefully position the rear shell plate over the upper screen housing, making sure it is correctly aligned with the surrounding edges.
- Gently press the rear plate into place, ensuring that no ribbon cables or speaker wires are trapped between the shell sections.
- Reinstall the four Phillips screws to secure the rear plate to the upper screen housing.
- Refit the four rubber screw covers over the screw holes on the front of the upper housing. Press each cover gently into place.
Step 14 – Reinstall the bottom LCD
- Carefully position the bottom LCD into its corresponding slot in the replacement lower shell, making sure it sits correctly within the frame.
- Gently peel back the top-left corner of the foam layer on the rear of the bottom LCD to expose the area where the top LCD ribbon cable attaches.
- Carefully align the top LCD ribbon cable with its original position on the rear of the bottom LCD and gently press it onto the adhesive.
- Fold the foam corner back down over the ribbon cable and gently press it into place.
- Check that the bottom LCD is seated correctly and that the ribbon cable is securely attached without being twisted or sharply folded.
Step 15 – Reinstall the motherboard and reconnect the ribbon cables
- Carefully position the motherboard back into the replacement lower shell, ensuring it sits correctly over the screw posts.
- Reconnect the two small ribbon cables beneath the larger ribbon cable on the right. Make sure they are fully inserted before gently closing their black locking tabs.
- Reconnect the two larger ribbon cables to their corresponding motherboard connectors and secure their locking tabs.
- Reattach the black antenna wire to its connector on the motherboard.
- Secure the motherboard using the four Phillips screws removed during disassembly.
- Check that all ribbon cables are securely connected and that no wires are trapped underneath the motherboard.
Step 16 – Reassemble the lower housing
- Carefully position the rear housing over the lower shell, making sure all edges are aligned and no wires or ribbon cables are trapped.
- Gently press the rear housing into place, ensuring it sits flush against the lower shell.
- Reinstall the screws securing the rear housing.
- Insert the battery into its compartment, making sure it is correctly positioned.
- Refit the battery cover and secure it using its Phillips screw.
Step 17 – Test the console
- Power on the Nintendo DS before considering the repair complete.
- Check that both displays power on correctly.
- Test the touchscreen and all buttons.
- Check both speakers and the volume control.
- Confirm that the hinge opens and closes smoothly without putting tension on the top screen ribbon cable.
- Connect the charger briefly to make sure the charging system still works correctly.
Conclusion
Replacing the shell on an original Nintendo DS requires almost a complete teardown, so take your time when working around the display ribbon cables, hinge and small connector locks.
Once the console is fully reassembled, test both displays, the touchscreen, speakers, buttons and charging function to make sure everything was reconnected correctly.