Intro
In this guide, I’ll show you how to replace the screen on a Apple iPhone XR.
What you'll need
- Precision Screwdriver Set (Pentalobe, Phillips & Tri-Point)
- Plastic Pick Opening Tool
- Suction Cup Opening Tool
- Replacement Waterproof Adhesive Seal
- Hand Squeeze Air Blower (optional, for removing dust and debris)
Important: Power off the phone completely before starting. Work on a clean, static-free surface.
Step 1 – Remove the bottom screws
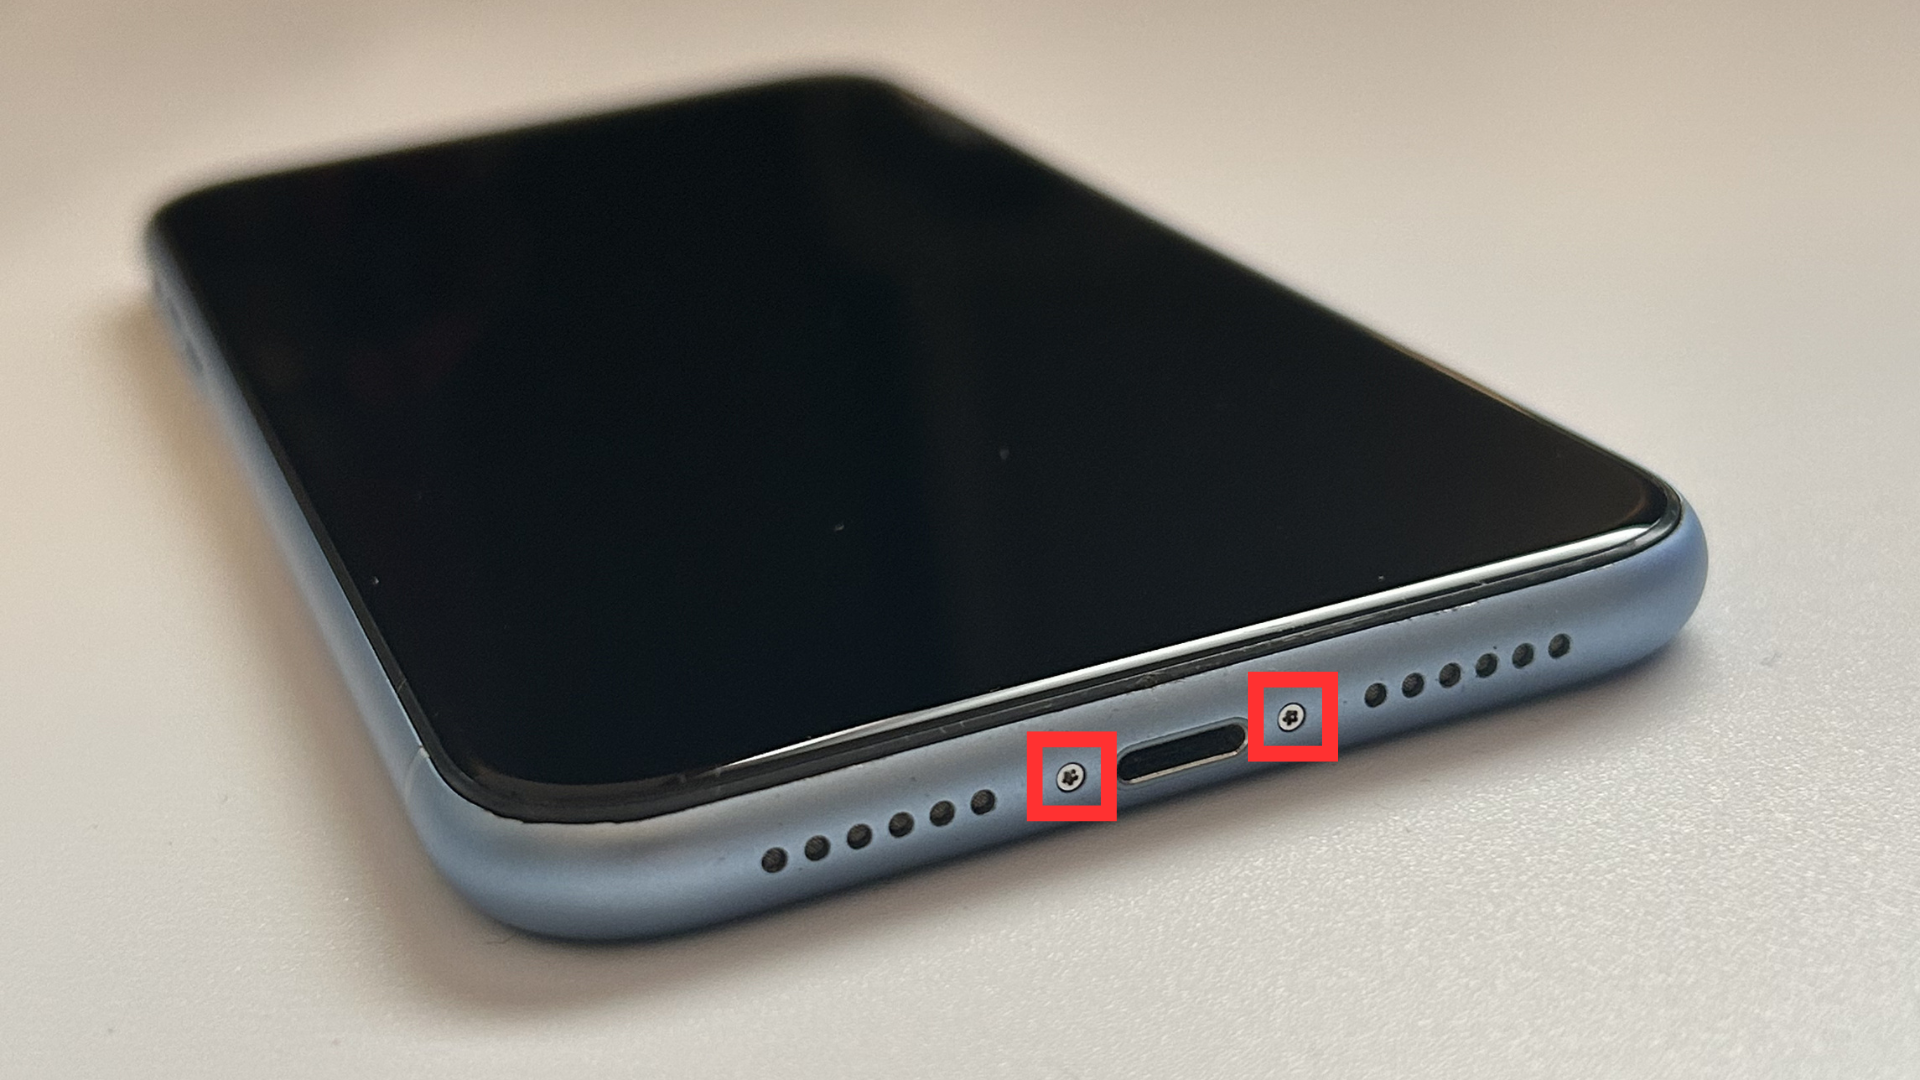
1. First, remove the two pentalobe screws from the bottom edge of the device.
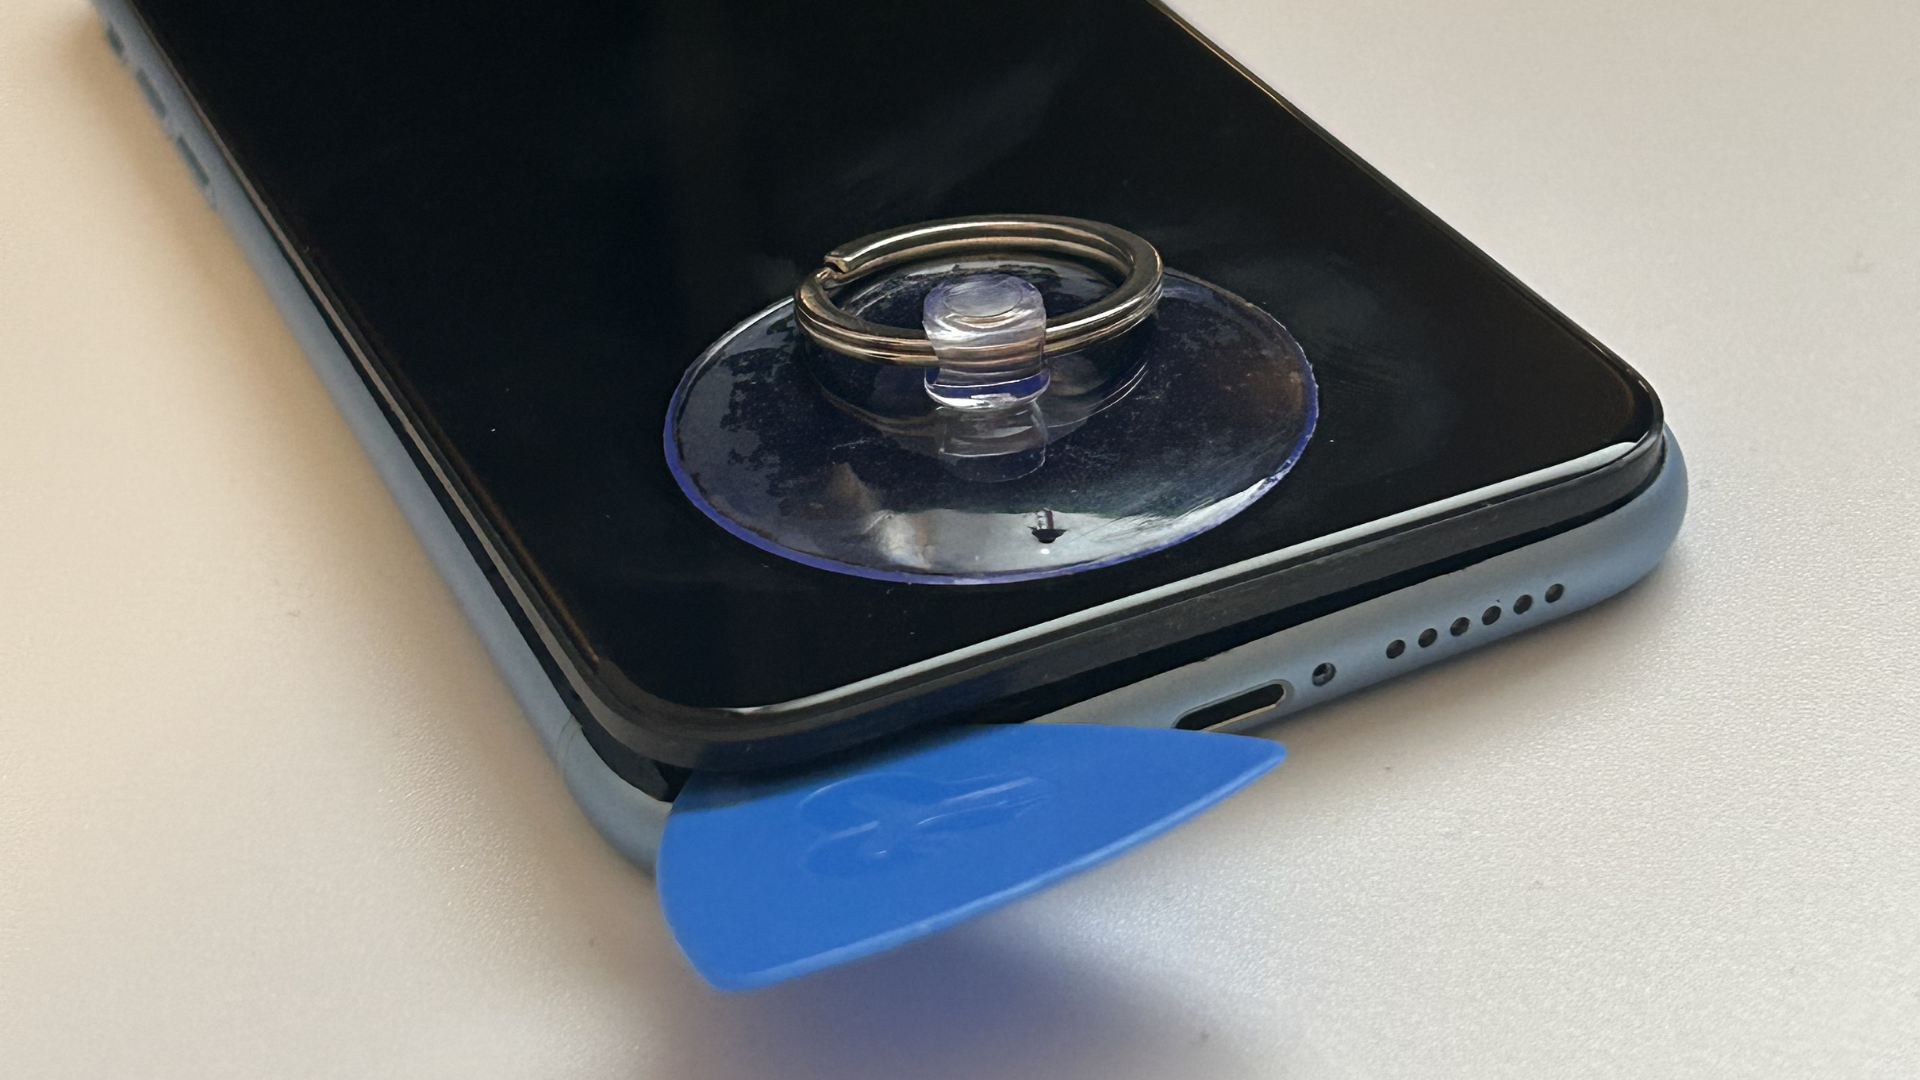
2. Use the suction cup to pry the bottom edge up just enough to slide the plastic pick in.
3. Use the inserted plastic pick to work around the bottom-left corner and left side of the device. Do not run the pick up the right side because that is where the fragile ribbon cables are located and the screen only lifts open from the left side anyway.
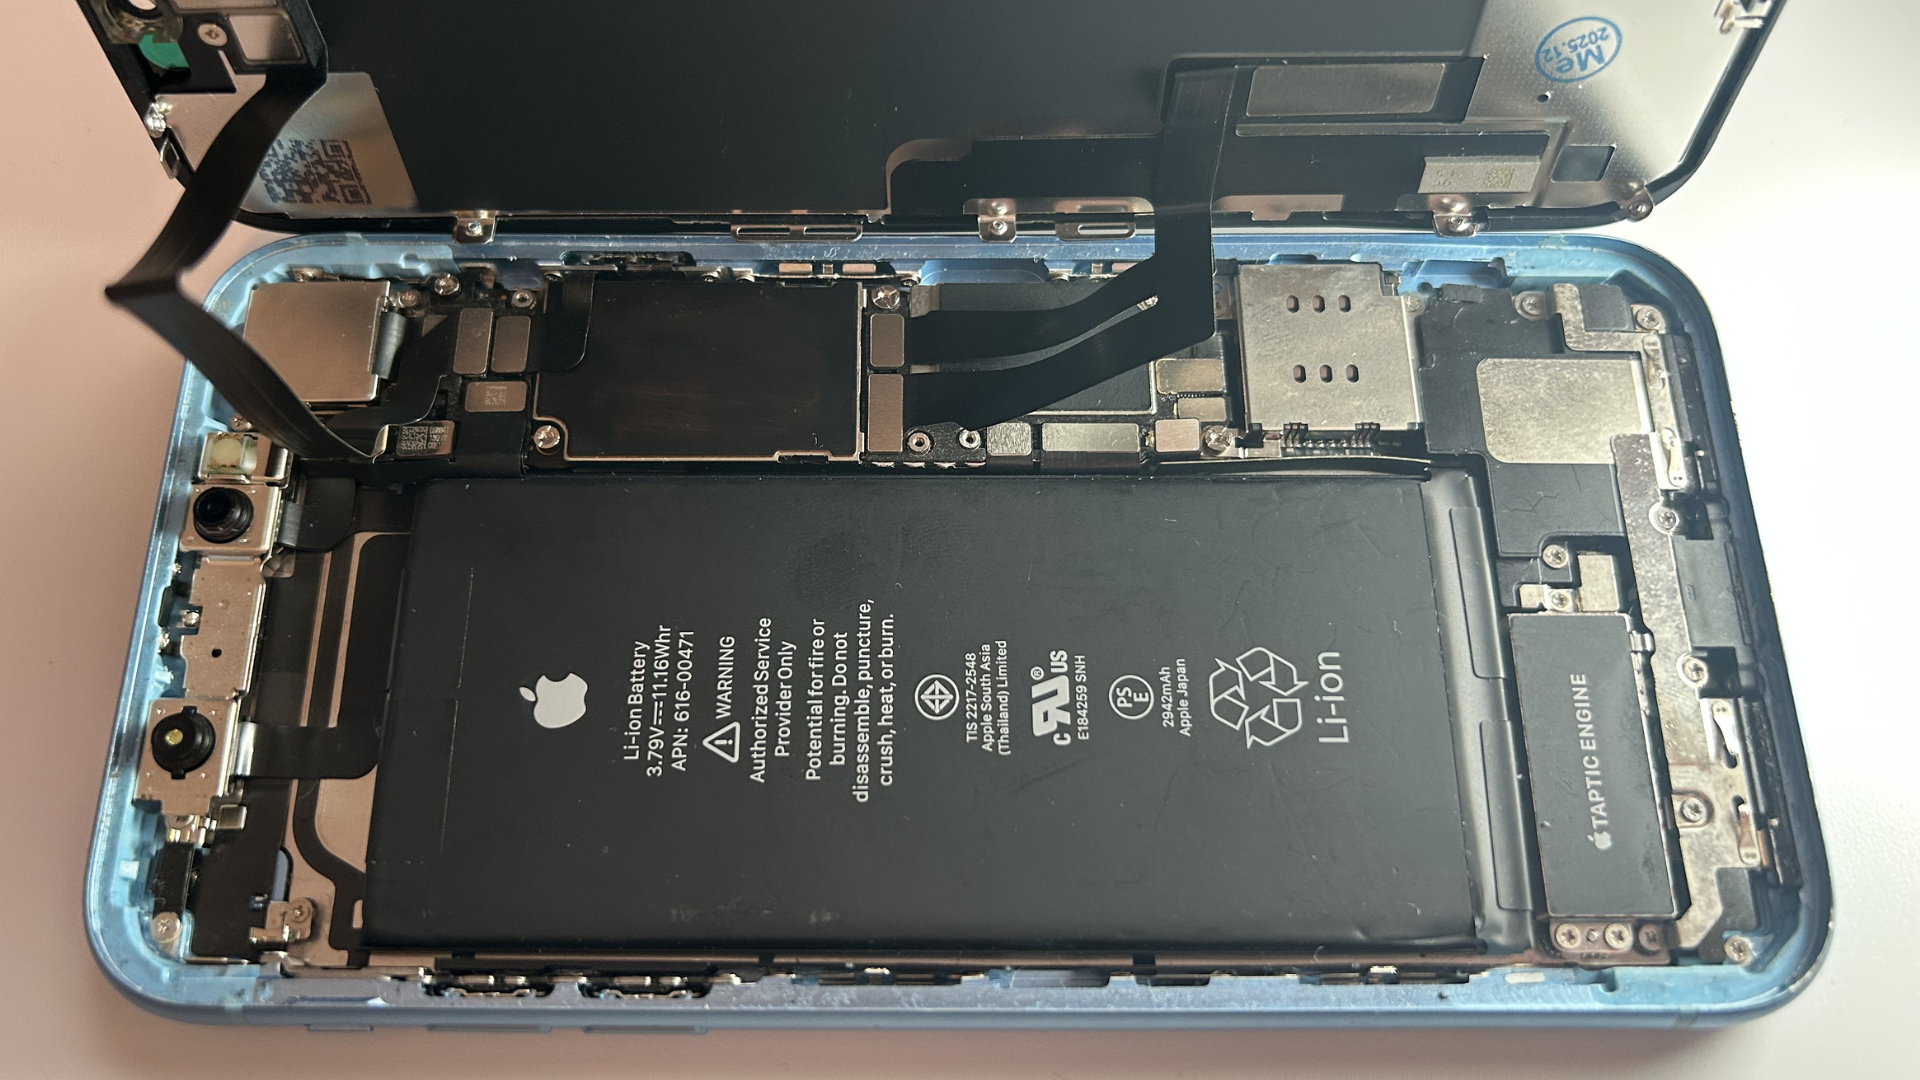
Step 2 – Remove the metal shields covering the flex connectors
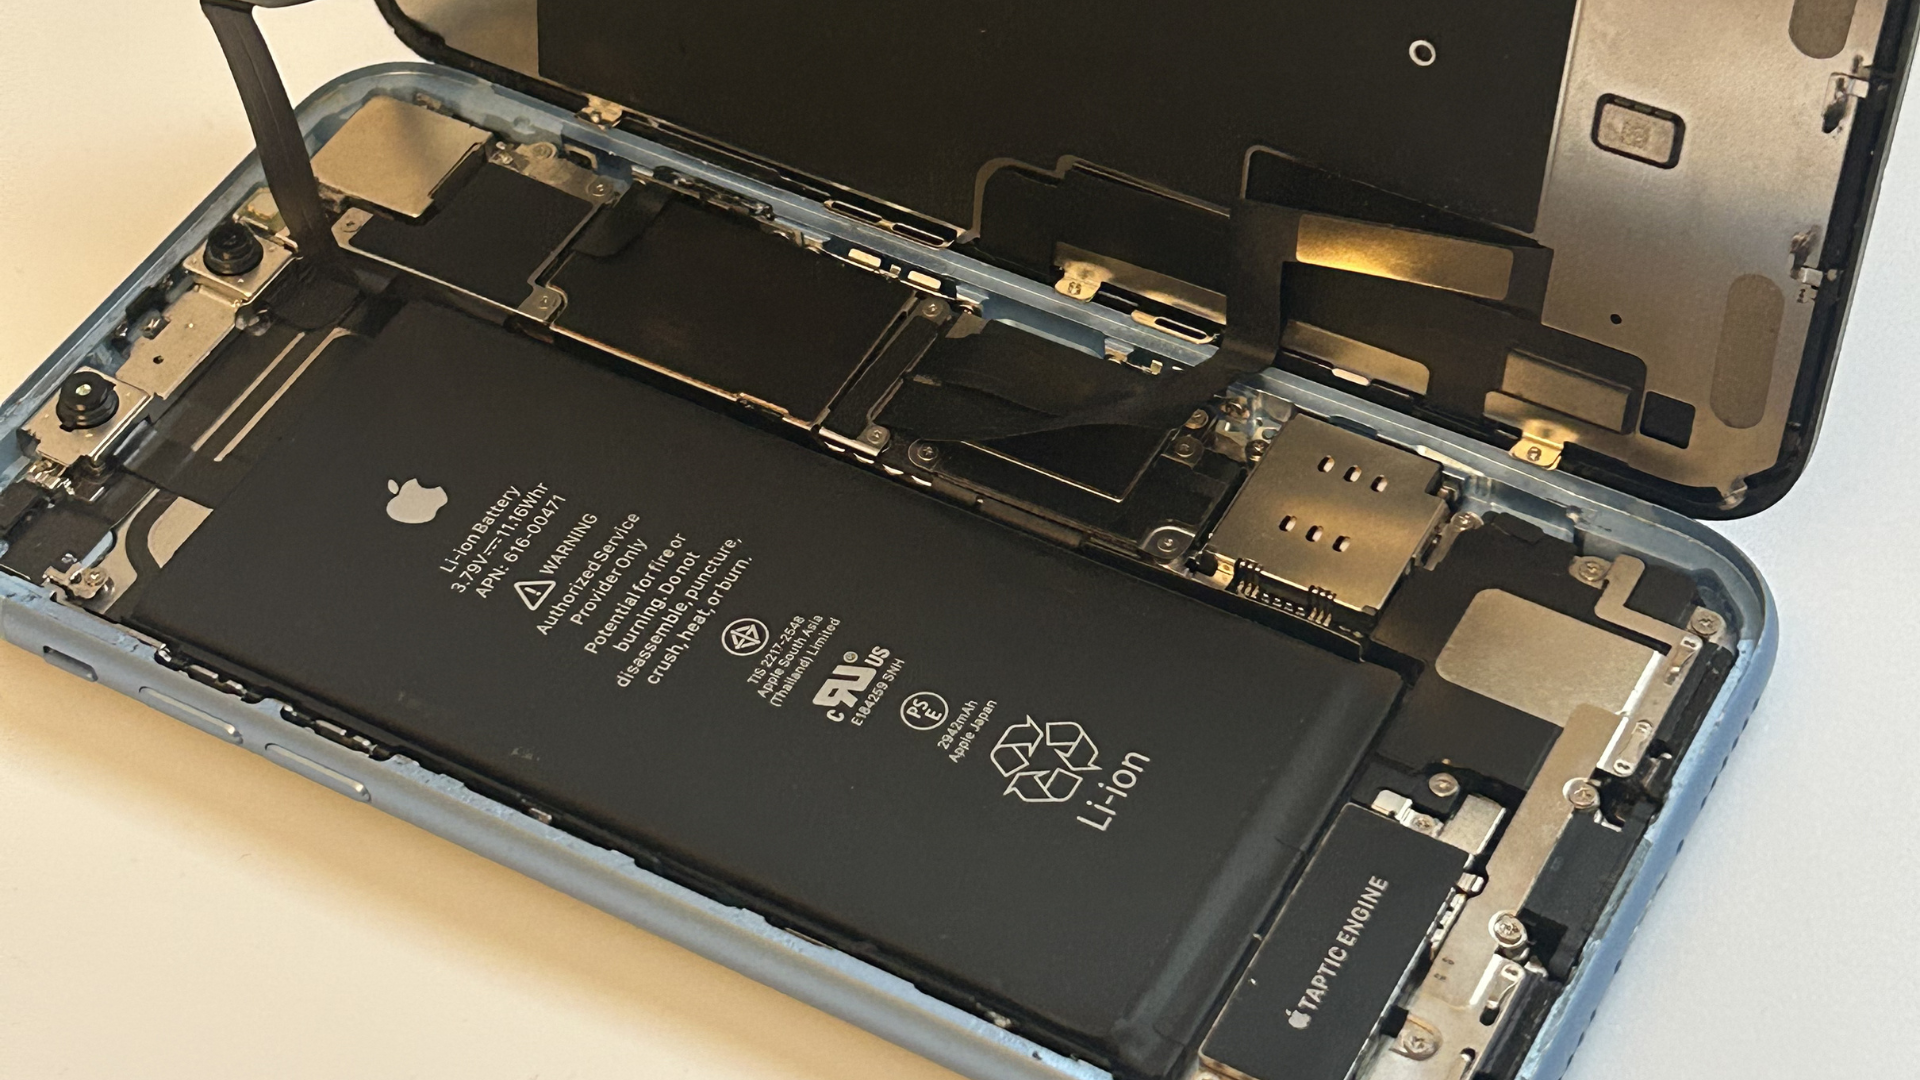
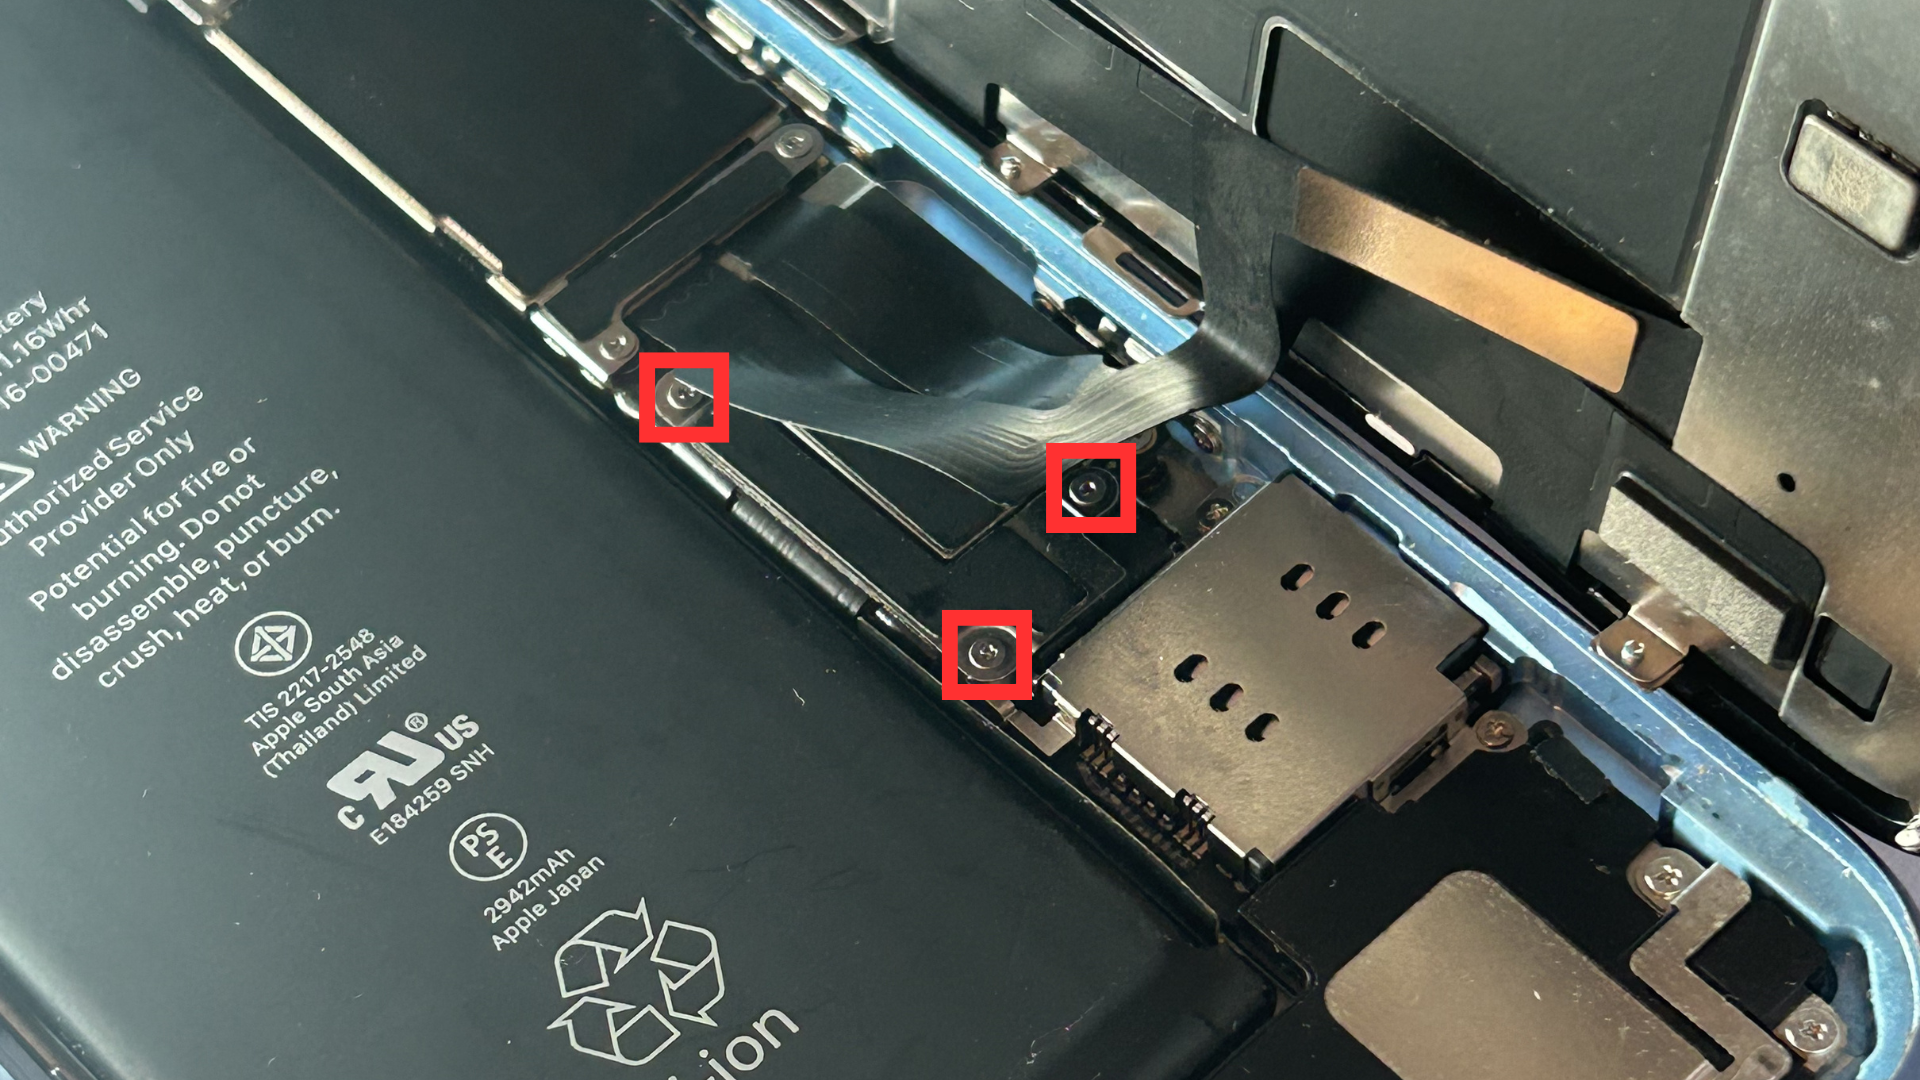
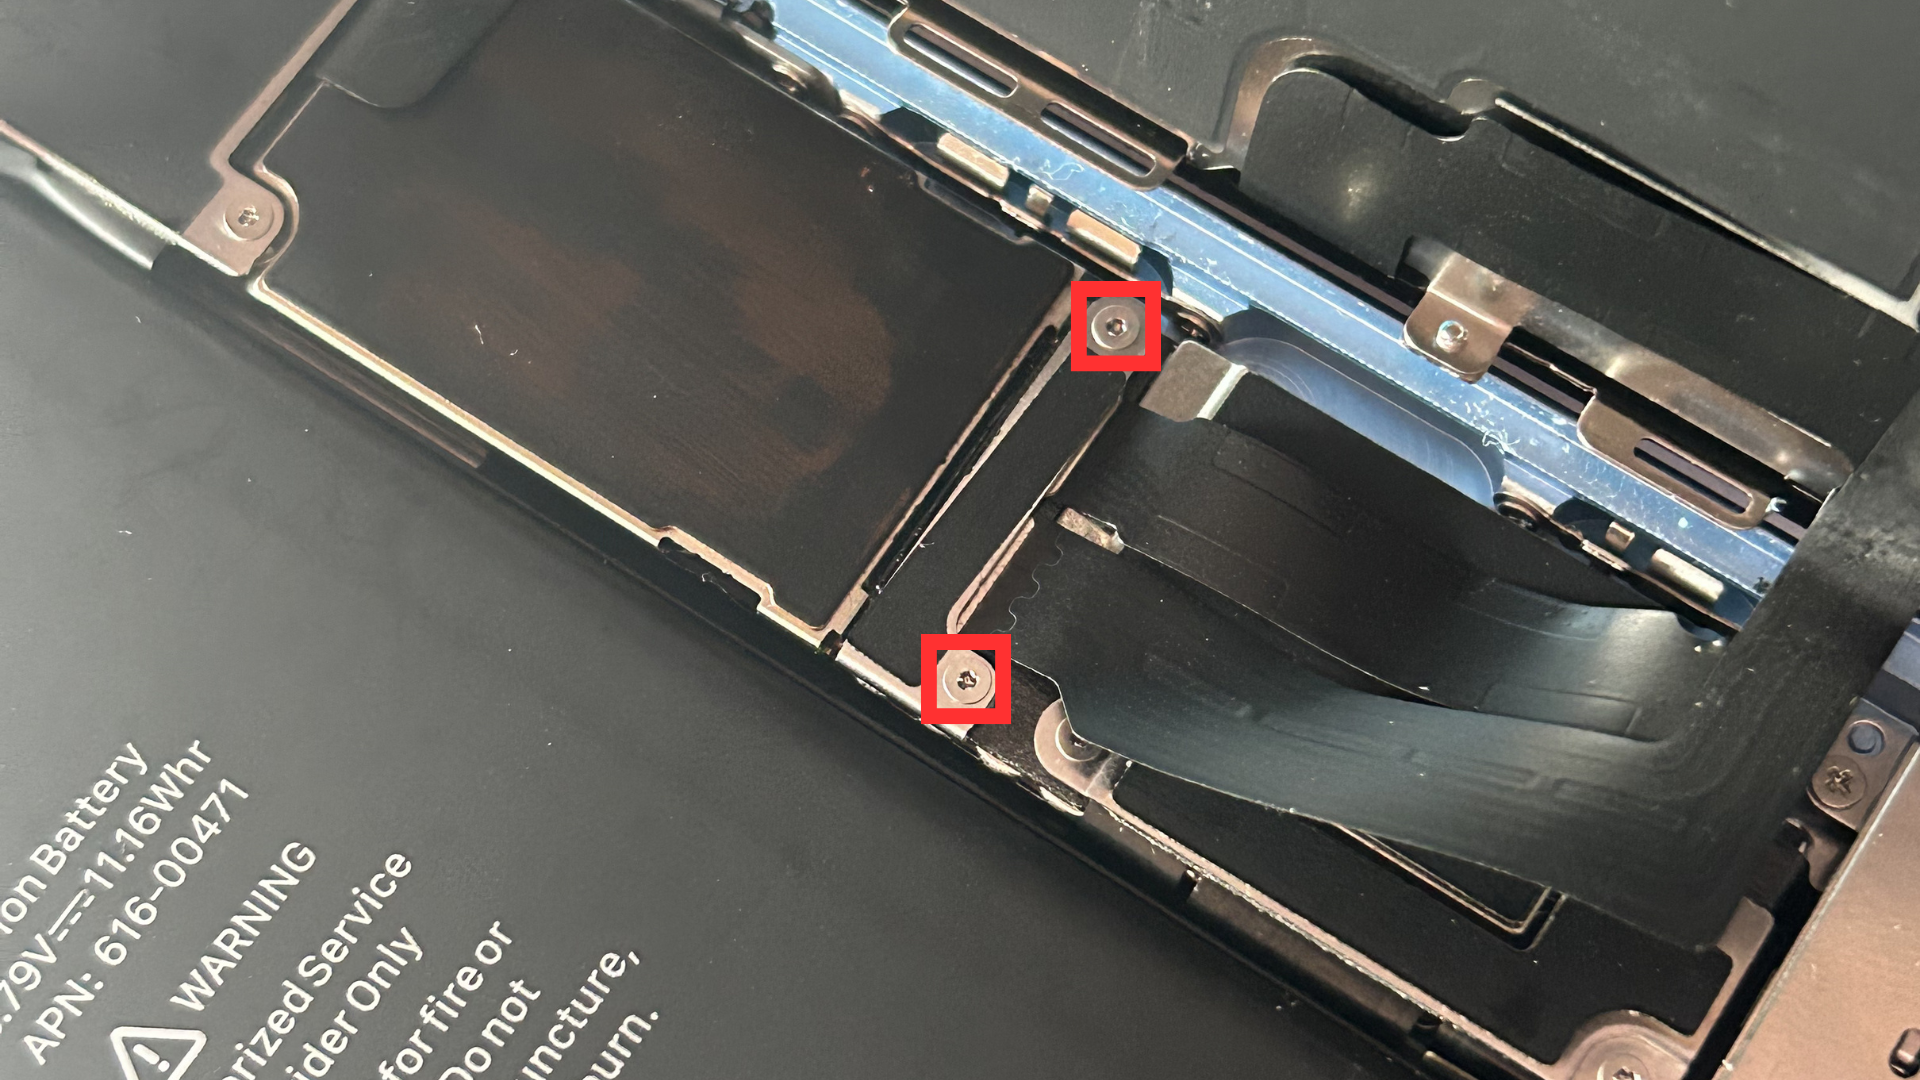
1. Unscrew the screws for the first/bottom metal shield.
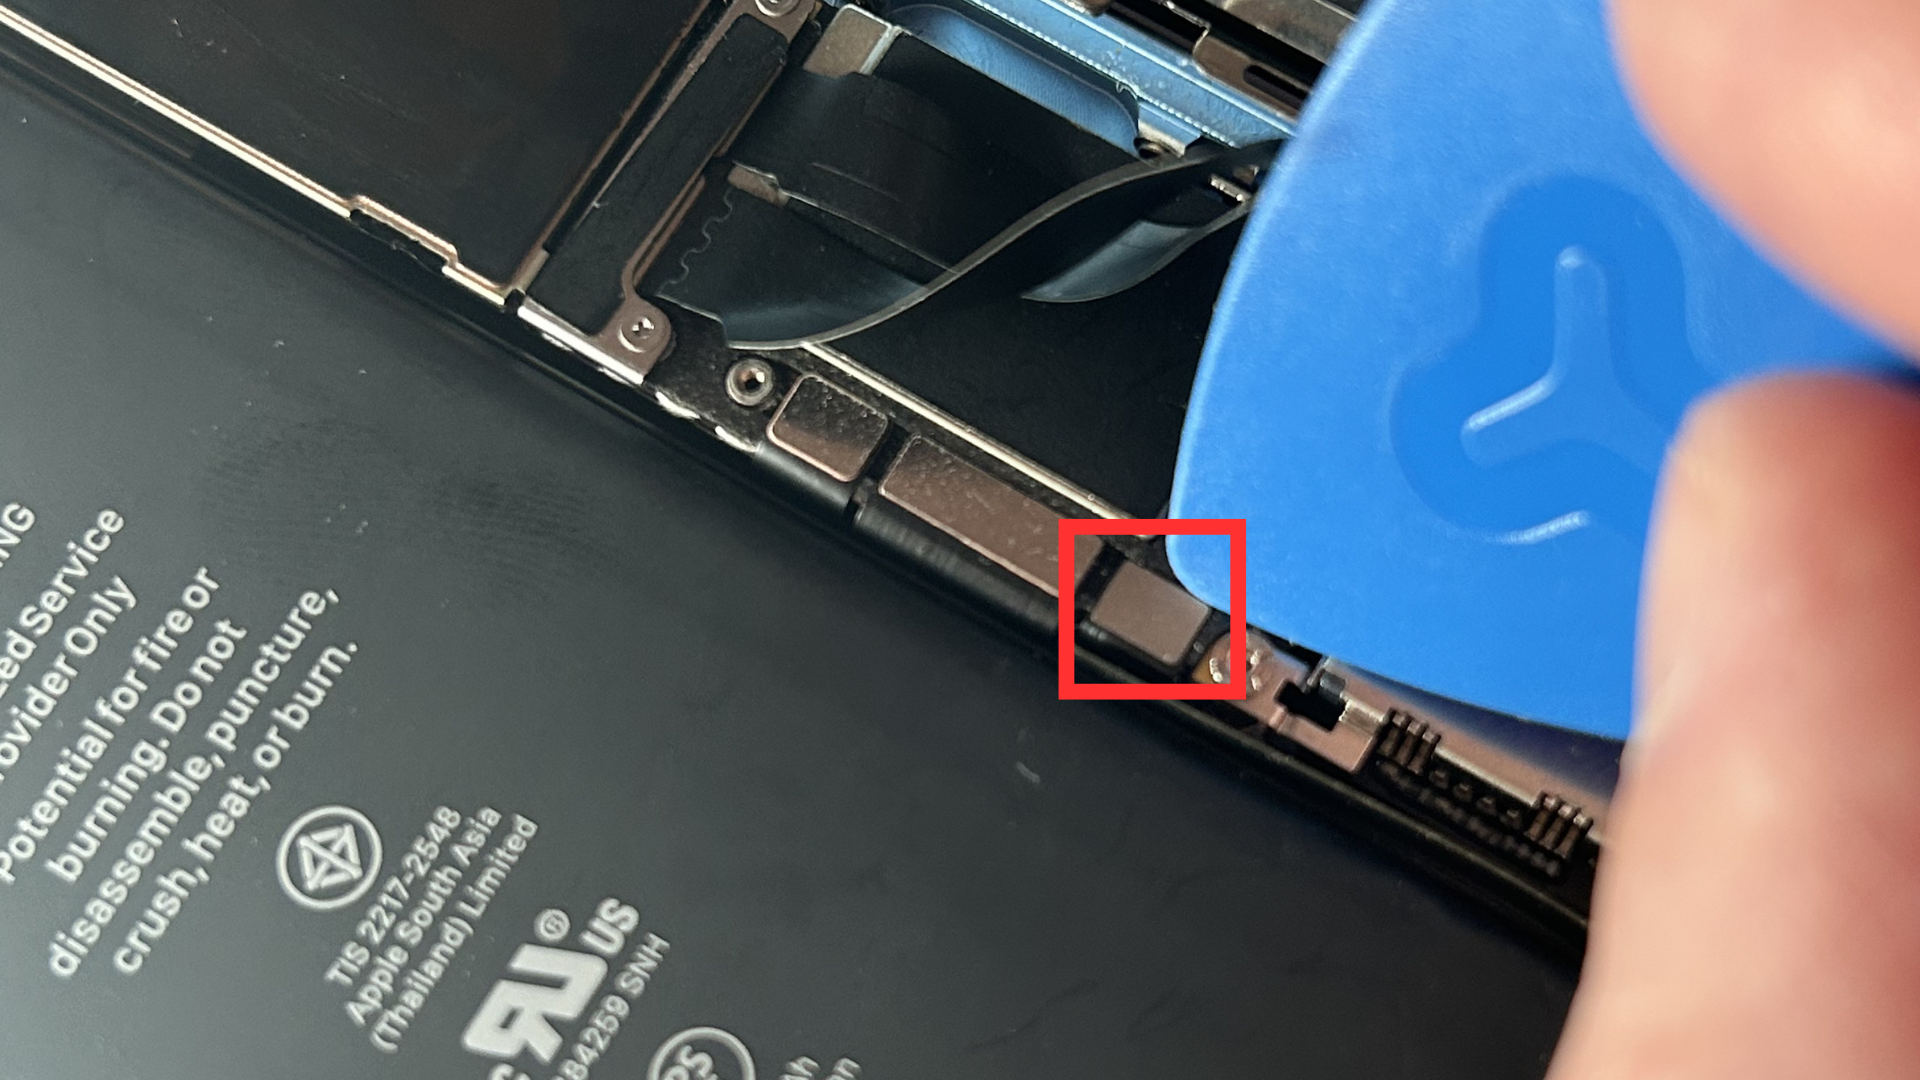
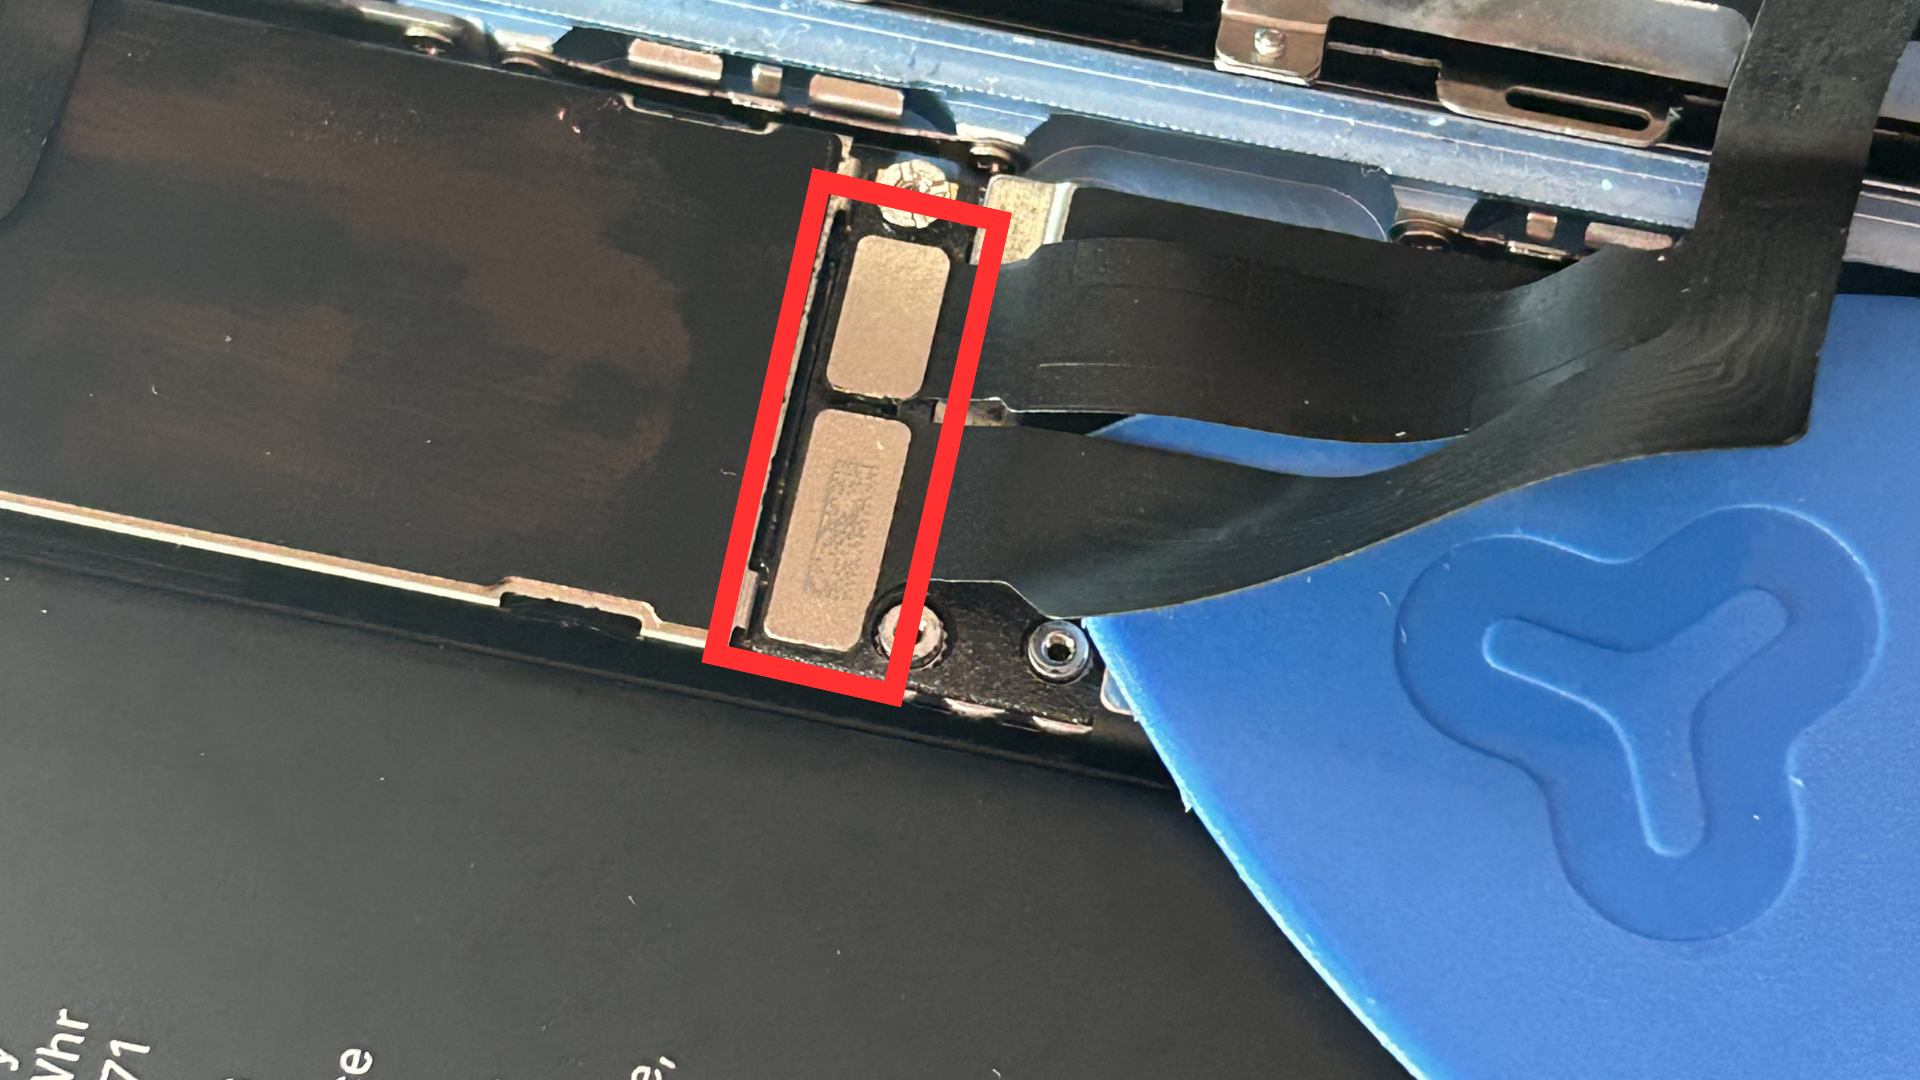
2. Use the plastic pick or pry tool to gently detach the battery ribbon cable from the connector. This step is very important before proceeding.
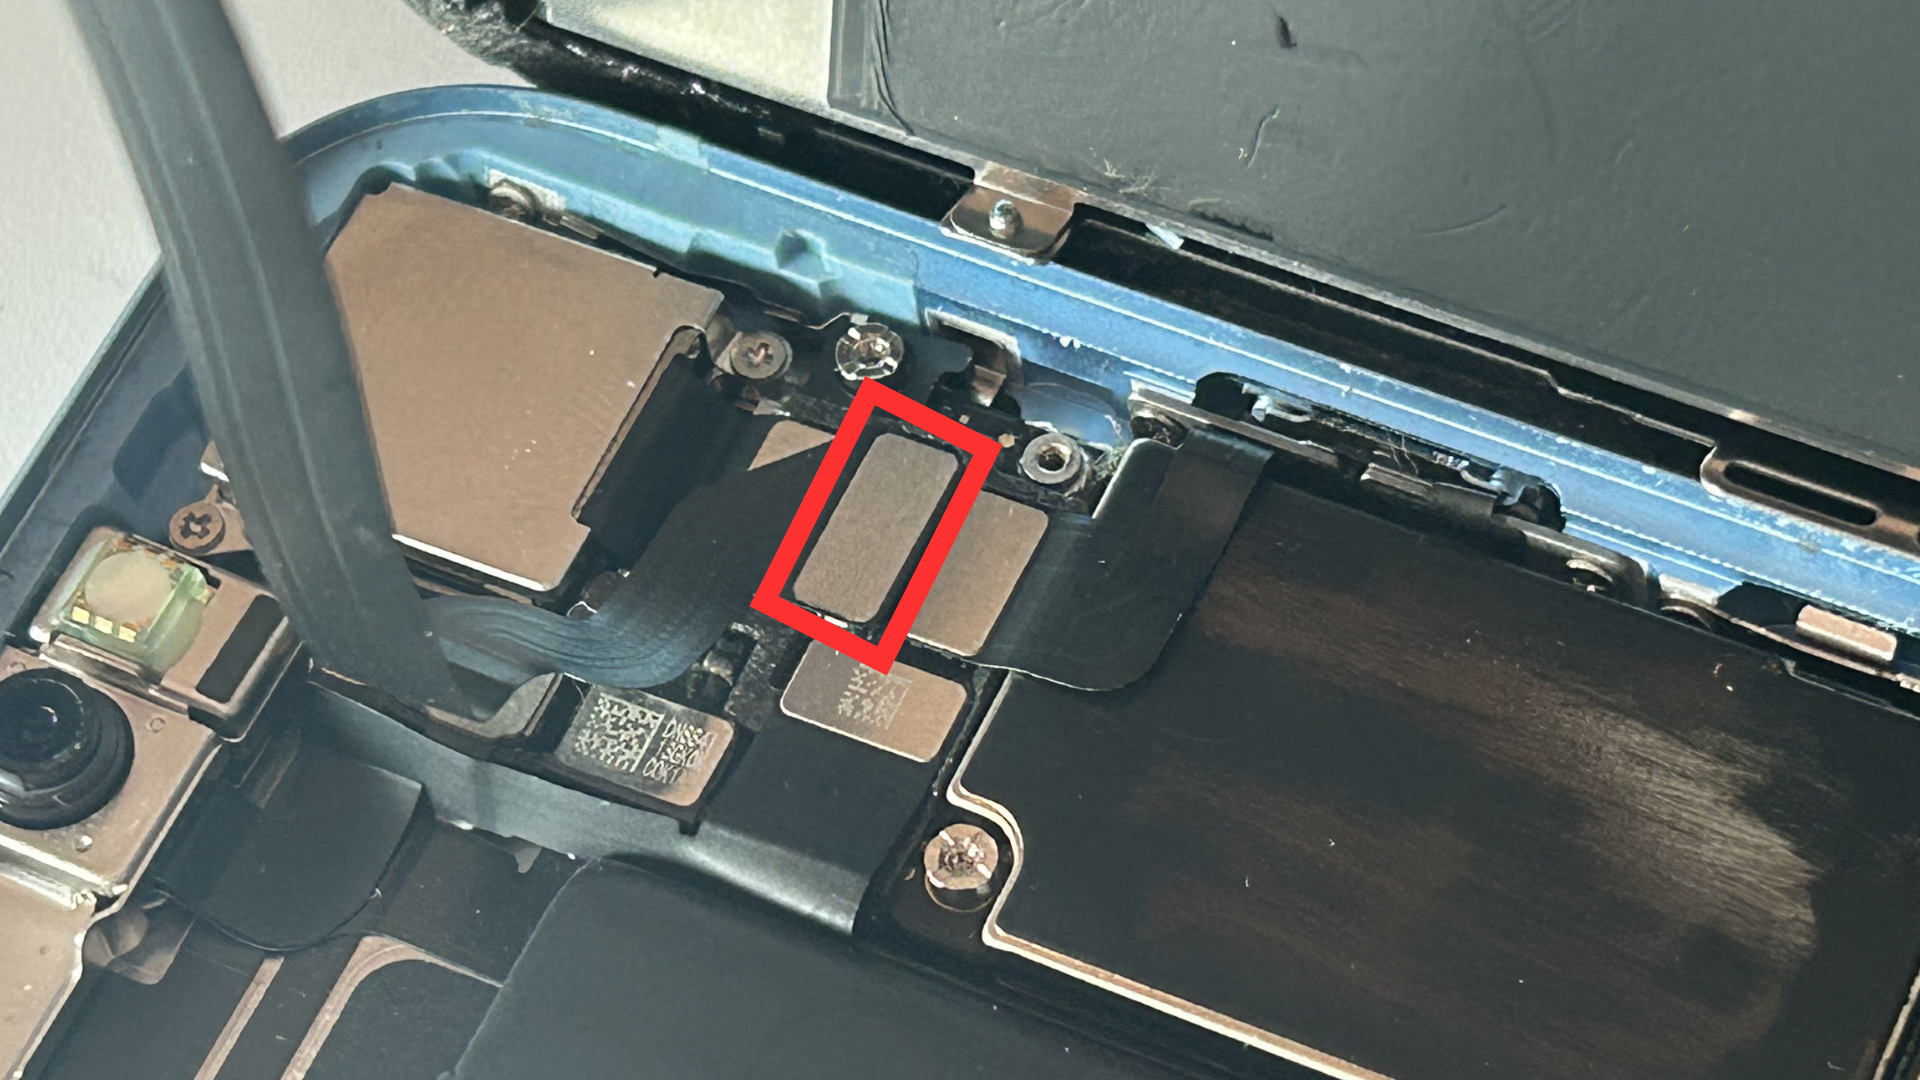
3. Remove the second shield to expose the display and touchscreen connectors, then carefully disconnect both ribbon cables.
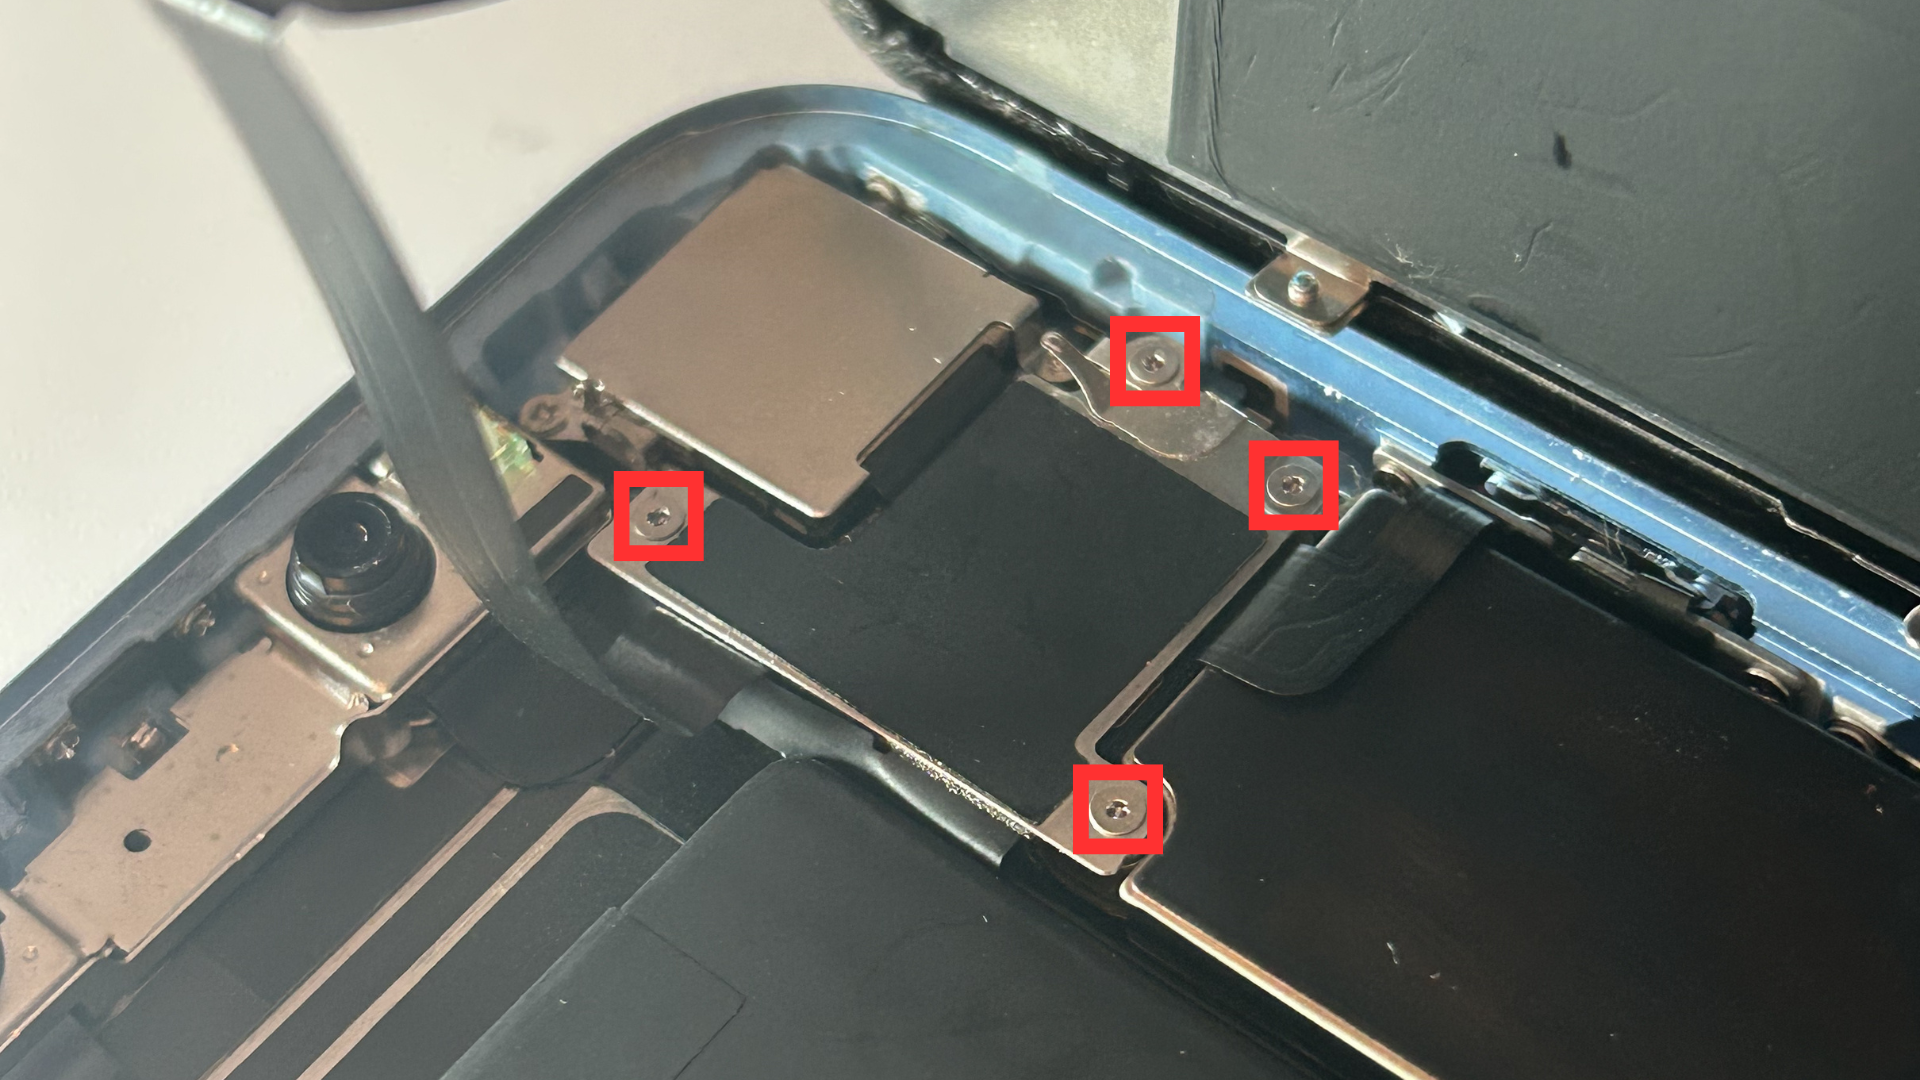
4. Remove the final shield at the top of the device to expose the ear speaker and sensor assembly connector, then disconnect it.
5. If you have a replacement waterproof adhesive seal, now is a good time to remove the remains of the old adhesive seal around the edges of the device where the screen sits.
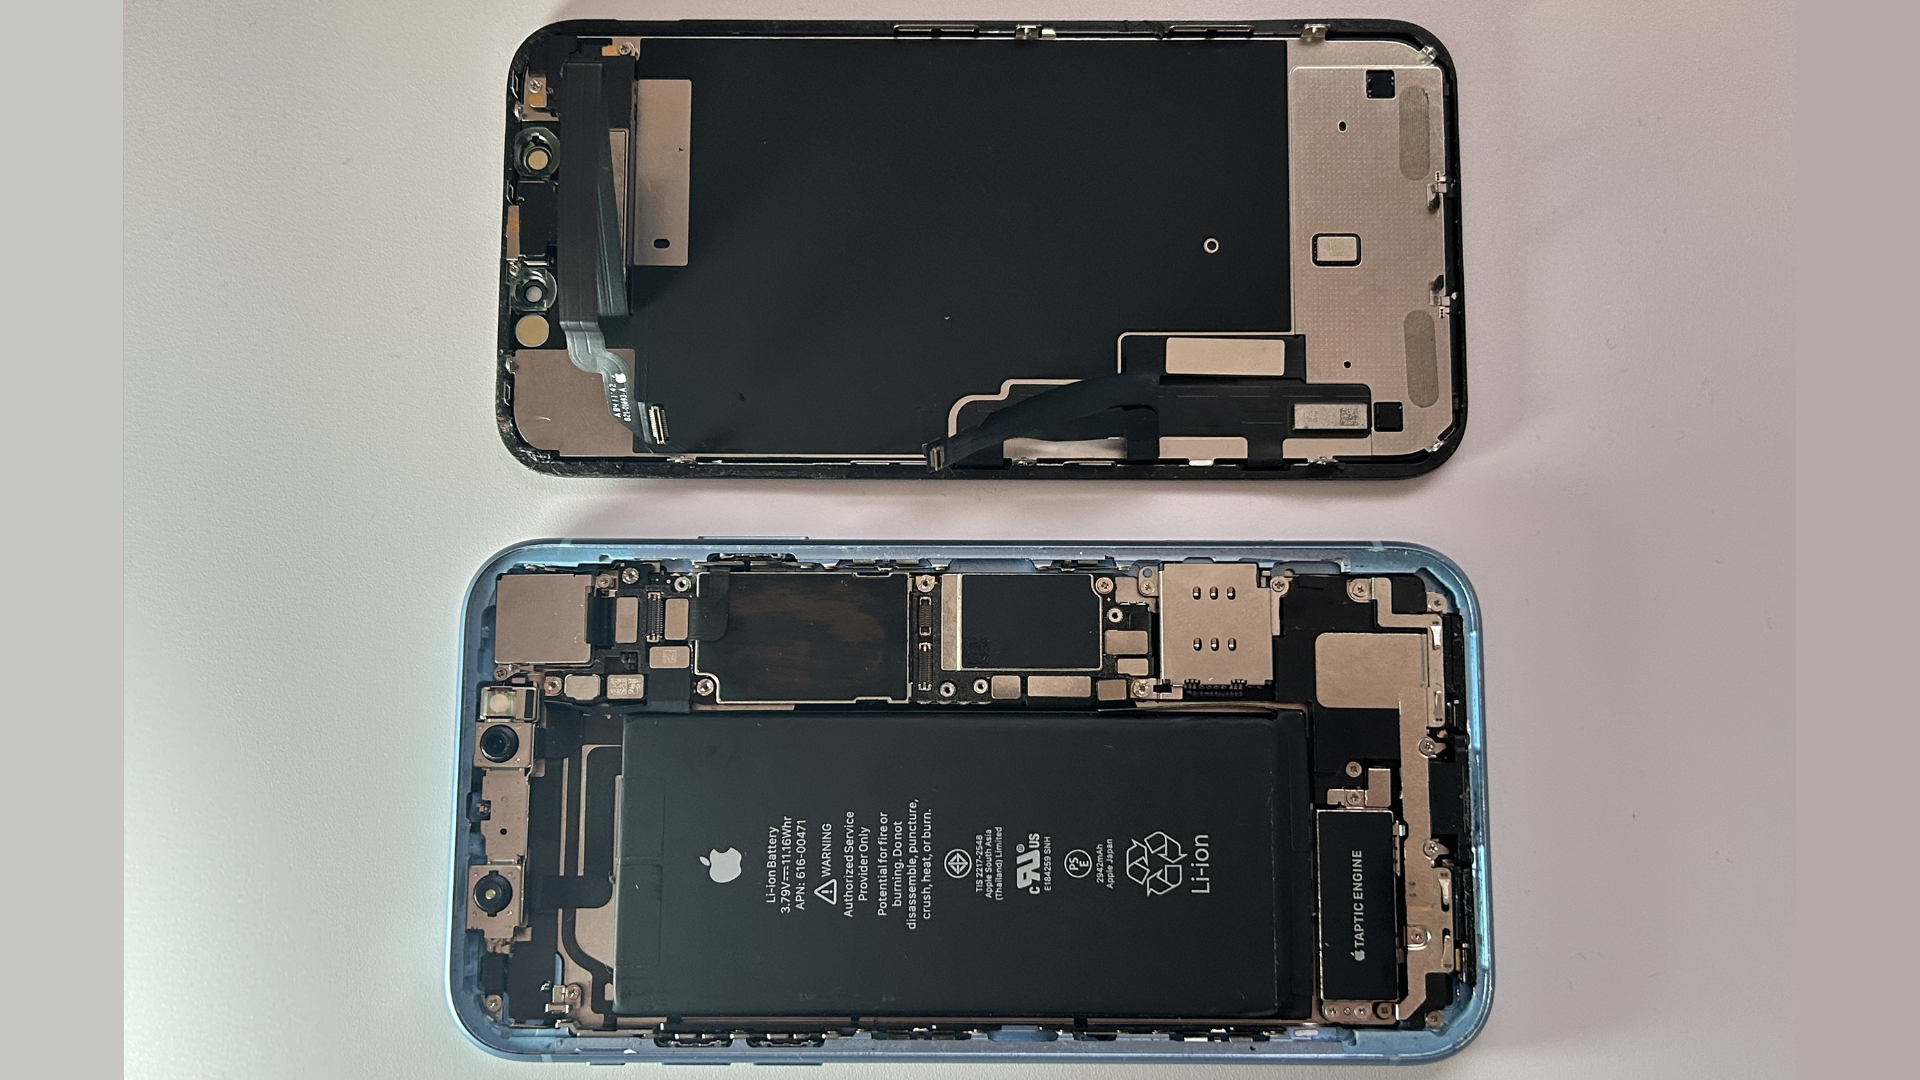
So for this step we just detach the following:
- Battery cable
- Display cable
- Touch cable
- Ear Speaker cable
- Old adhesive seal
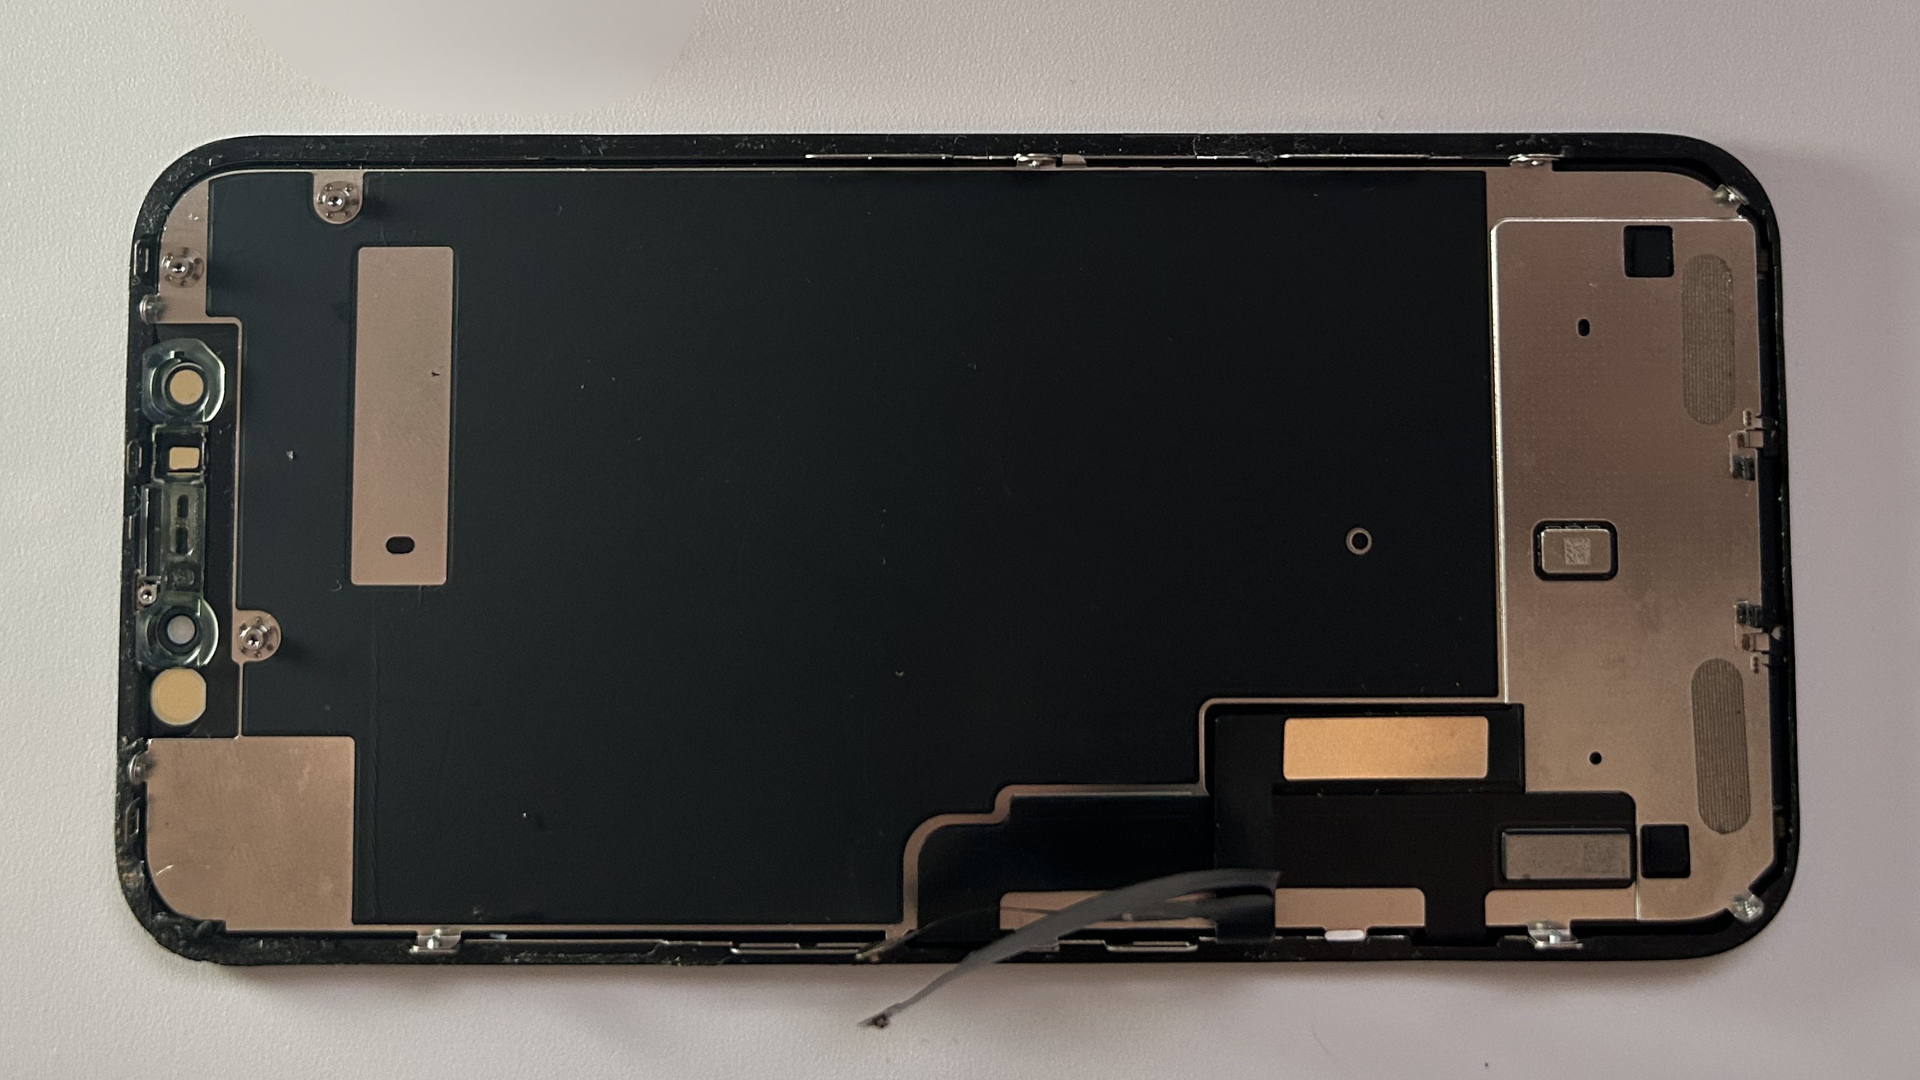
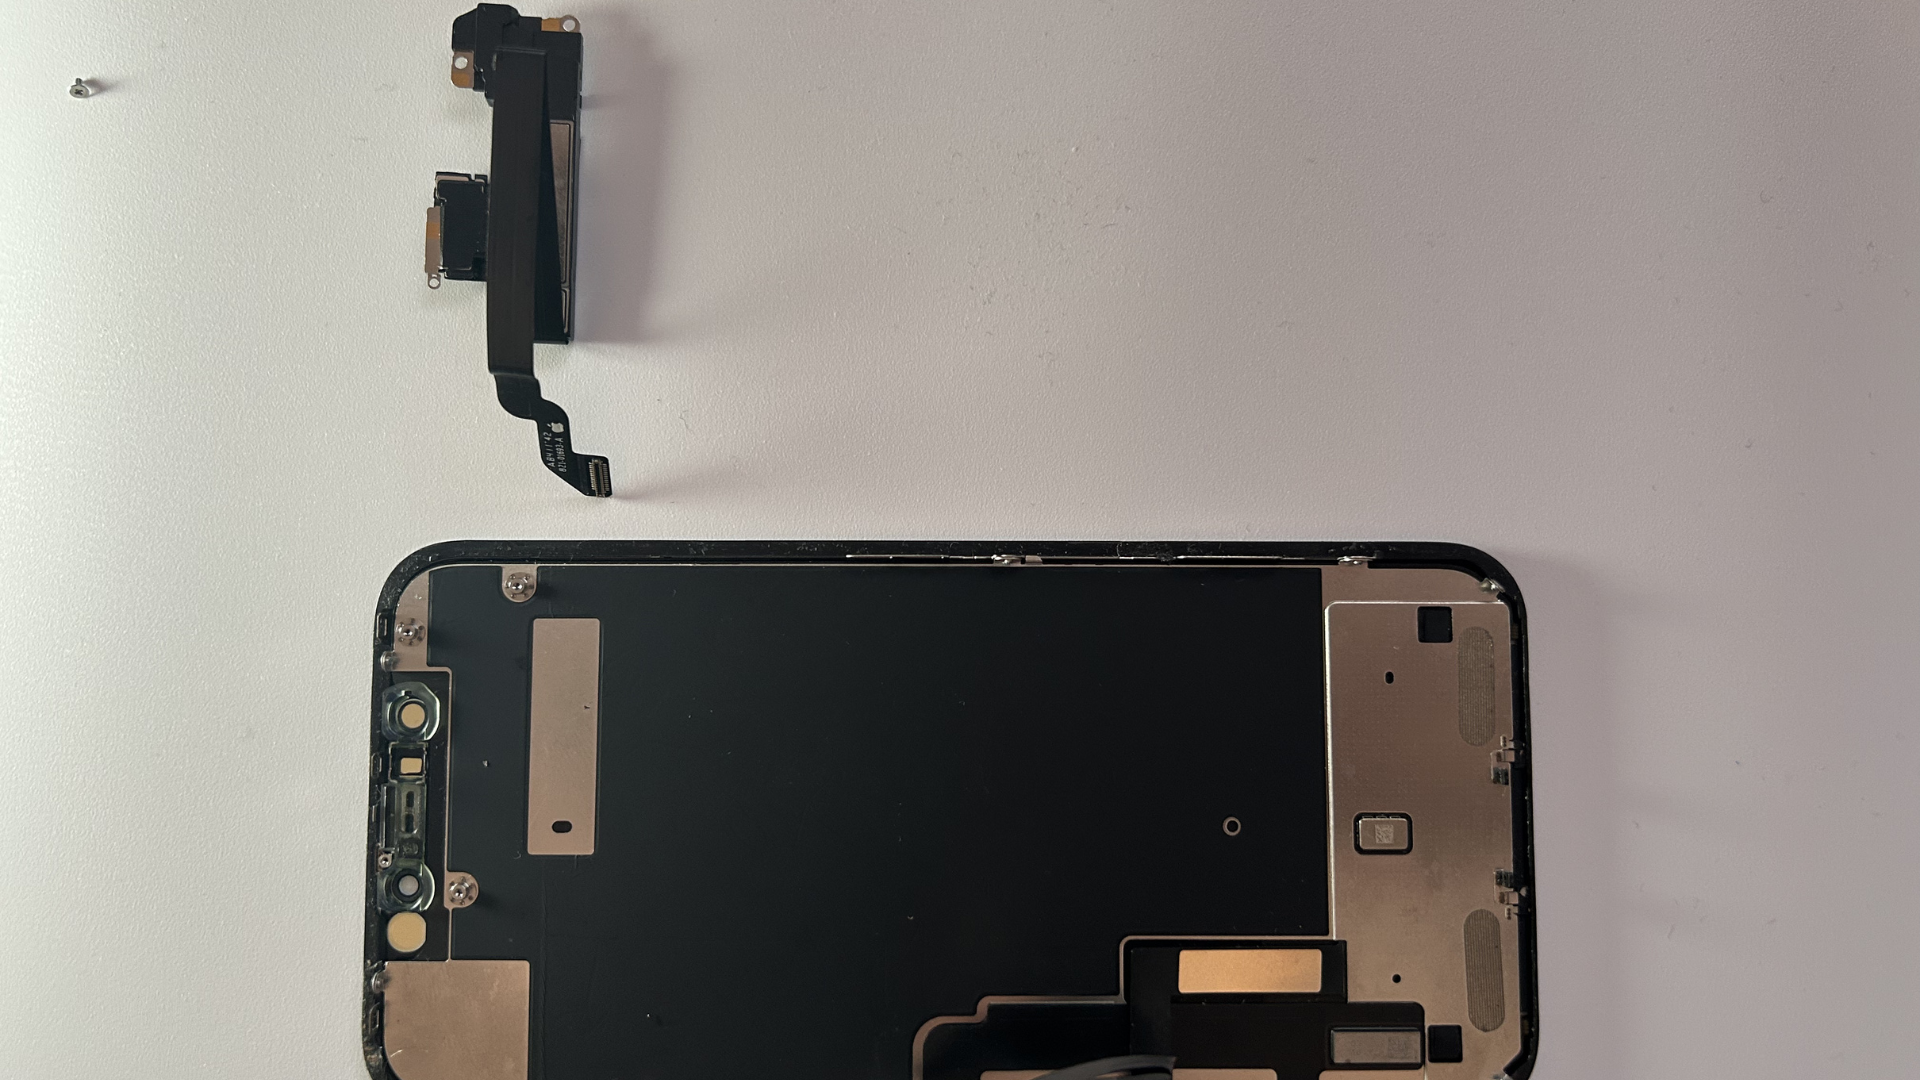
Step 3 – Transfer the Ear Speaker and Sensor Flex to the new screen
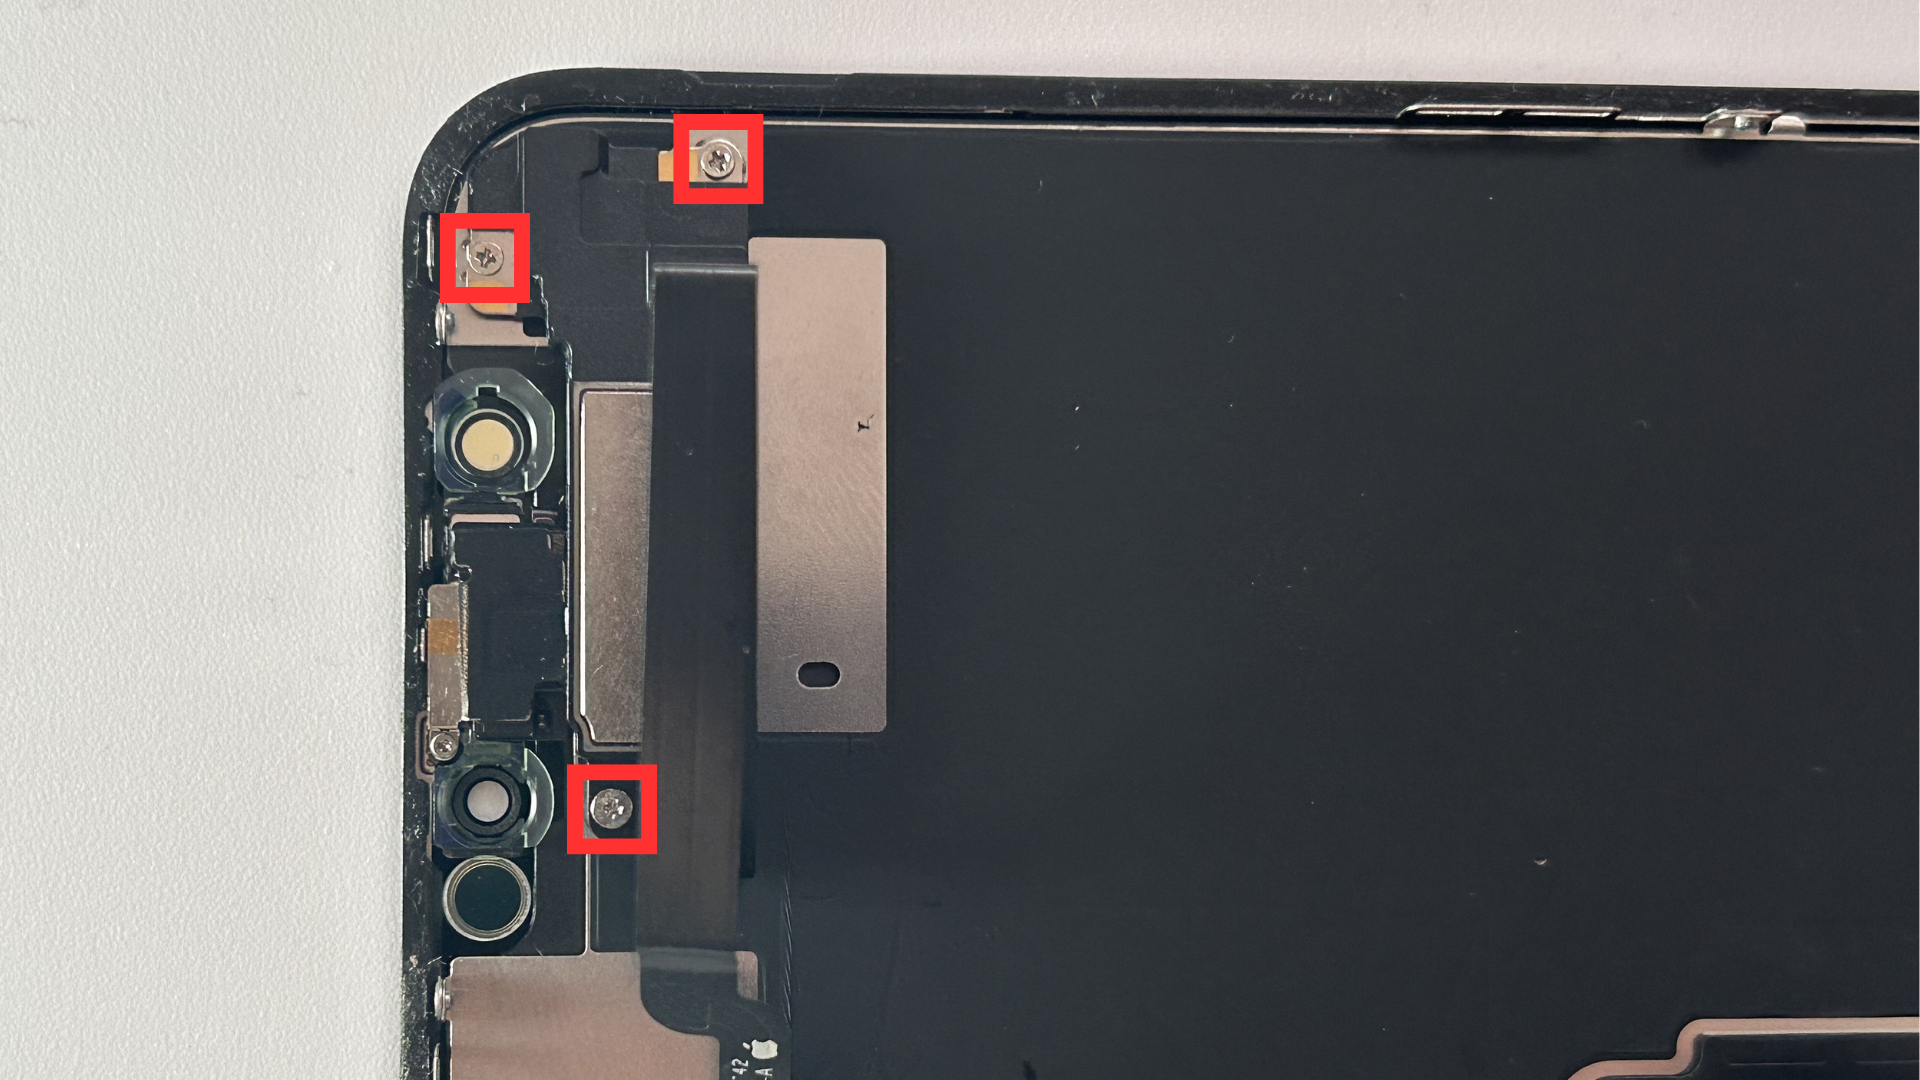
1. Unscrew the 3 screws holding the Ear Speaker module in place.
2. Carefully remove the Ear Speaker module, you may notice the speaker part is stuck onto the screen so take your time and very gently wiggle it out carefully. These parts are very sensitive and fragile. If the ear speaker and sensor assembly is damaged during removal, Face ID may stop working permanently. Take extra care when handling this component.
3. Once that is safely removed. You can go ahead and attach the ear speaker module to the new screen with the same three screws.
Once the new screen is in place and everything is reconnected, reassemble the iPhone in the reverse order:
- Replace the waterproof adhesive seal.
- Reattach all ribbon cables.
- Refit the metal shields.
- Put the screen back on (slide the top edge of the screen into the iPhone's frame first).
- Rescrew the two pentalobe screws on the bottom edge.
Power the iPhone XR back on and test the new screen and Face ID to confirm everything is working correctly.
Troubleshooting
If the new screen does not display an image, double-check that the display and touch flex cables are fully seated in their connectors.
If Face ID is unavailable after the repair, inspect the ear speaker and sensor assembly for damage and verify that all related connectors are properly attached.
If touch functionality is intermittent, disconnect the battery again and reseat the display connectors before re-testing.
Conclusion
Replacing an iPhone XR screen is a relatively straightforward repair for anyone comfortable working with small electronics. The most important parts of the repair are disconnecting the battery before working on the display connectors and carefully transferring the original ear speaker and sensor assembly to preserve Face ID functionality.
Once reassembled, test the display, touchscreen, front speaker, proximity sensor and Face ID before considering the repair complete.
If you're performing this repair for the first time, allow around 30–60 minutes to complete the repair.